Bitwarden is a highly used password manager that uses published open source code that is used to secure and managing sensitive online data such as passwords, passkeys, and credit cards.
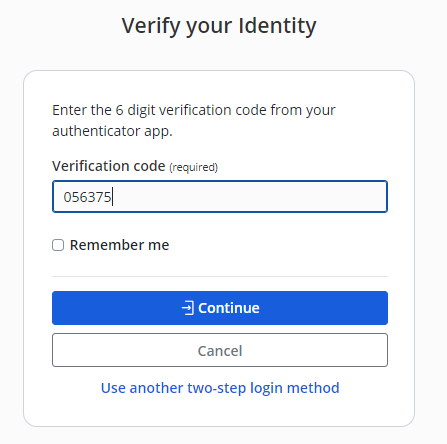
By default access to your Bitwarden vault is protected by you master password, but access to your account can be further protected by using your SafeID programmable hardware token (the token produces OTP codes that can be used as a second factor whilst logging in to your Bitwarden account), and once activated an additional authentication step is added after you supply your password (example below);
Using a SafeID Programmable Token as a second factor during Bitwarden Logon
Once programmed, your SafeID programmable token will produce OTP that can be used during authentication after you have supplied your username and master password (i.e. as a second factor during logon).
The following procedure guides you through the process of adding 2-step authentication using a programmable hardware token;
Two-step authentication using your Fido key is enabled by logging in to your Bitwarden vault account (with admin access), then use the password manager to navigate to "Settings | Security";
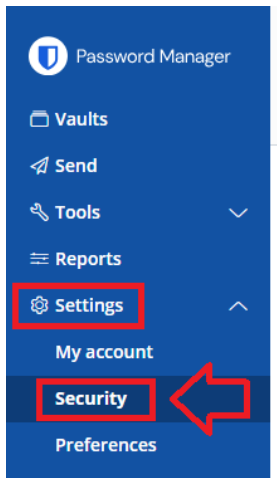
Select the tab "Two-step login", then next to the icon for "Authenticator App", click on the
 button;
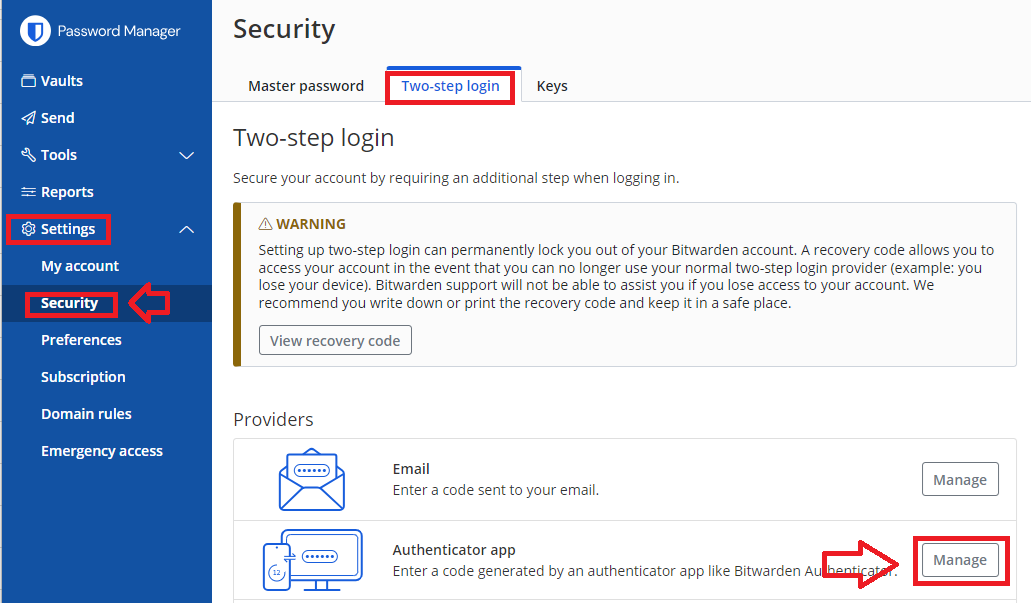
For security reasons you will now be asked to provide your Master Password.
Enter your password then click
 ;
;
A new windows titled "Two-step login Authenticator app" will now open (example below);
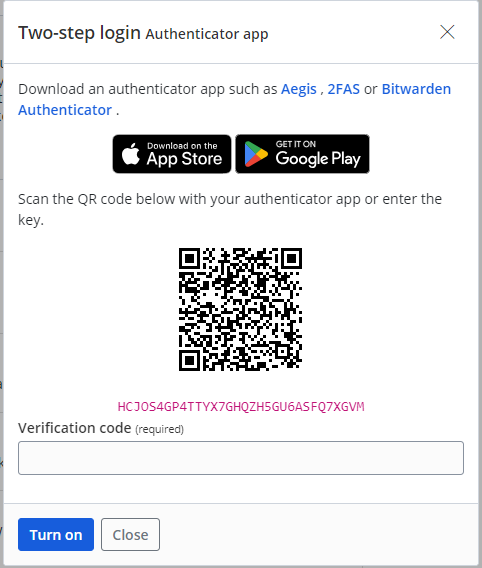
Although the generated QR code is intended to be added to an authentication app, the QR code is suitable for burning onto a programmable token.
The instructions for burning a programmable token using this type of QR code can be found in the following procedure;
- We have a range of programmable tokens that can act as direct replacements for an authentication apps.
Programming single seeded tokens using a QR code on a windows PC
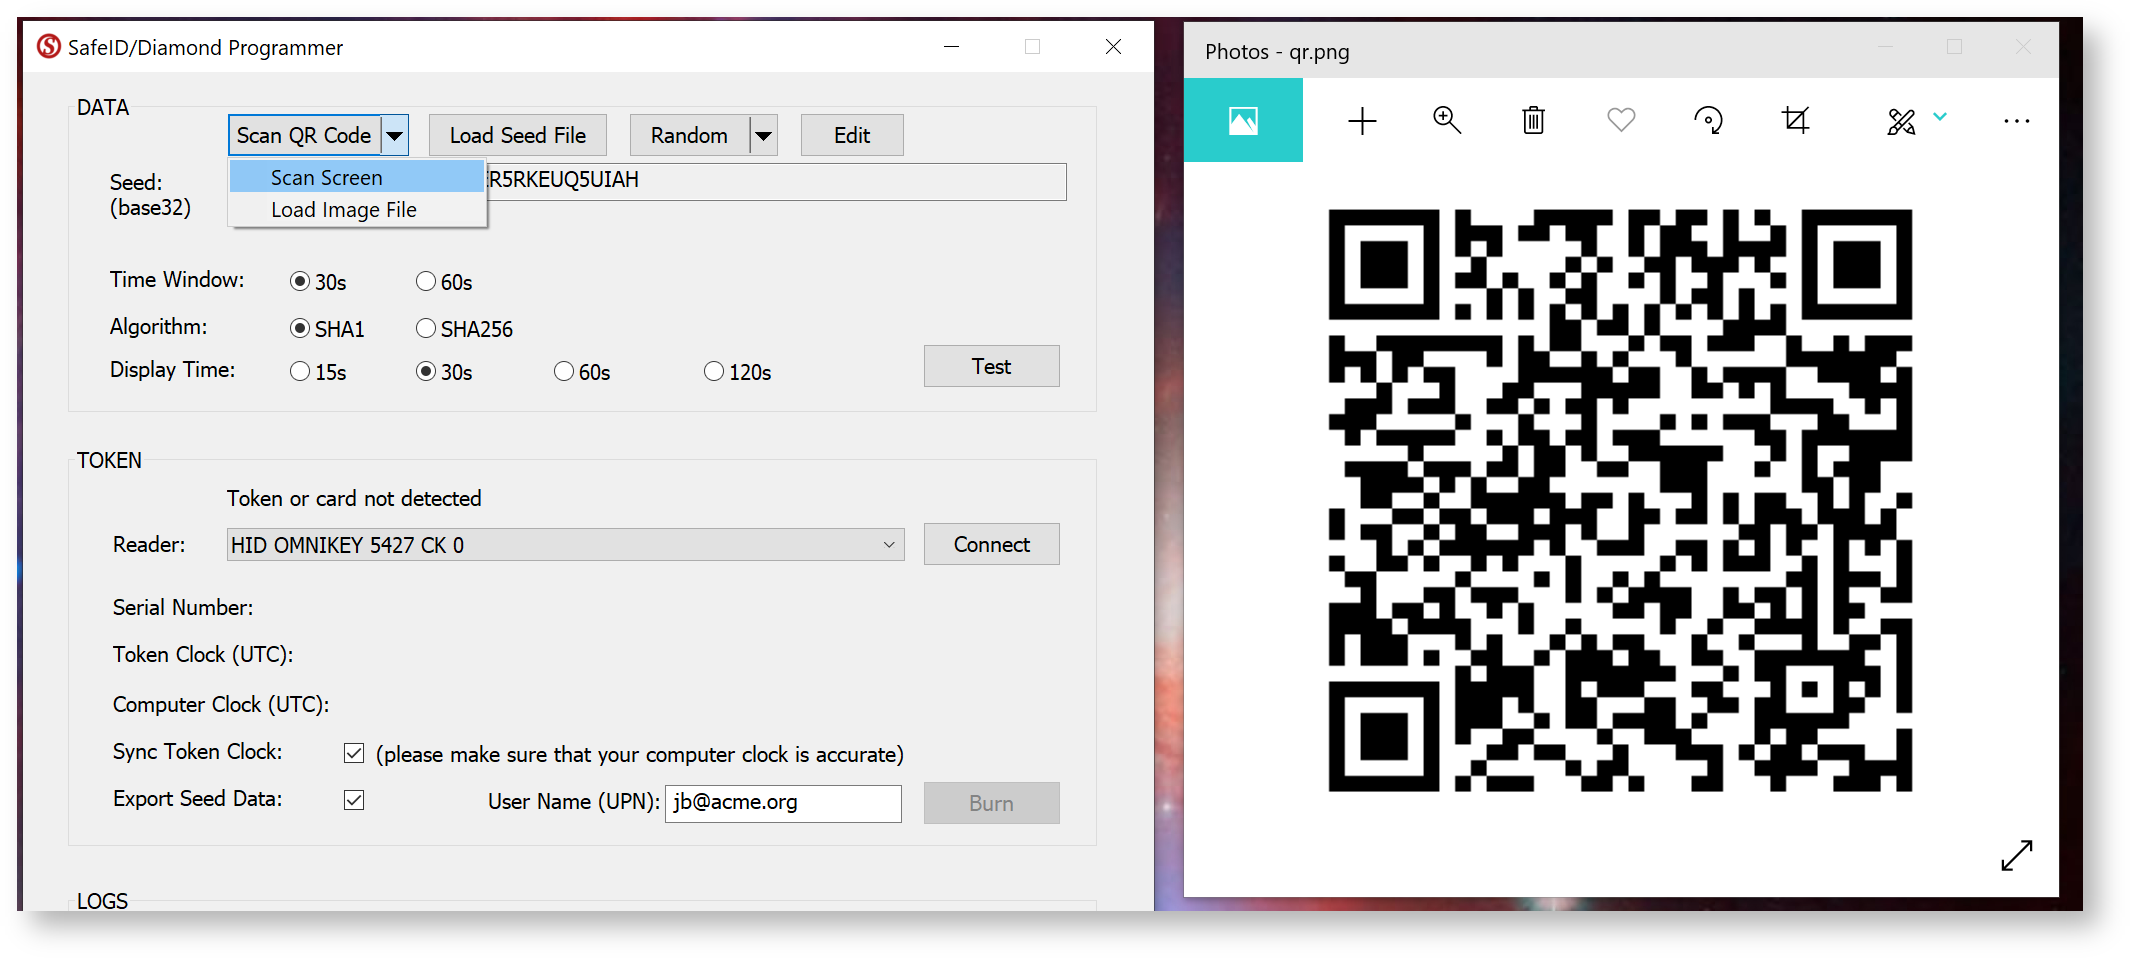
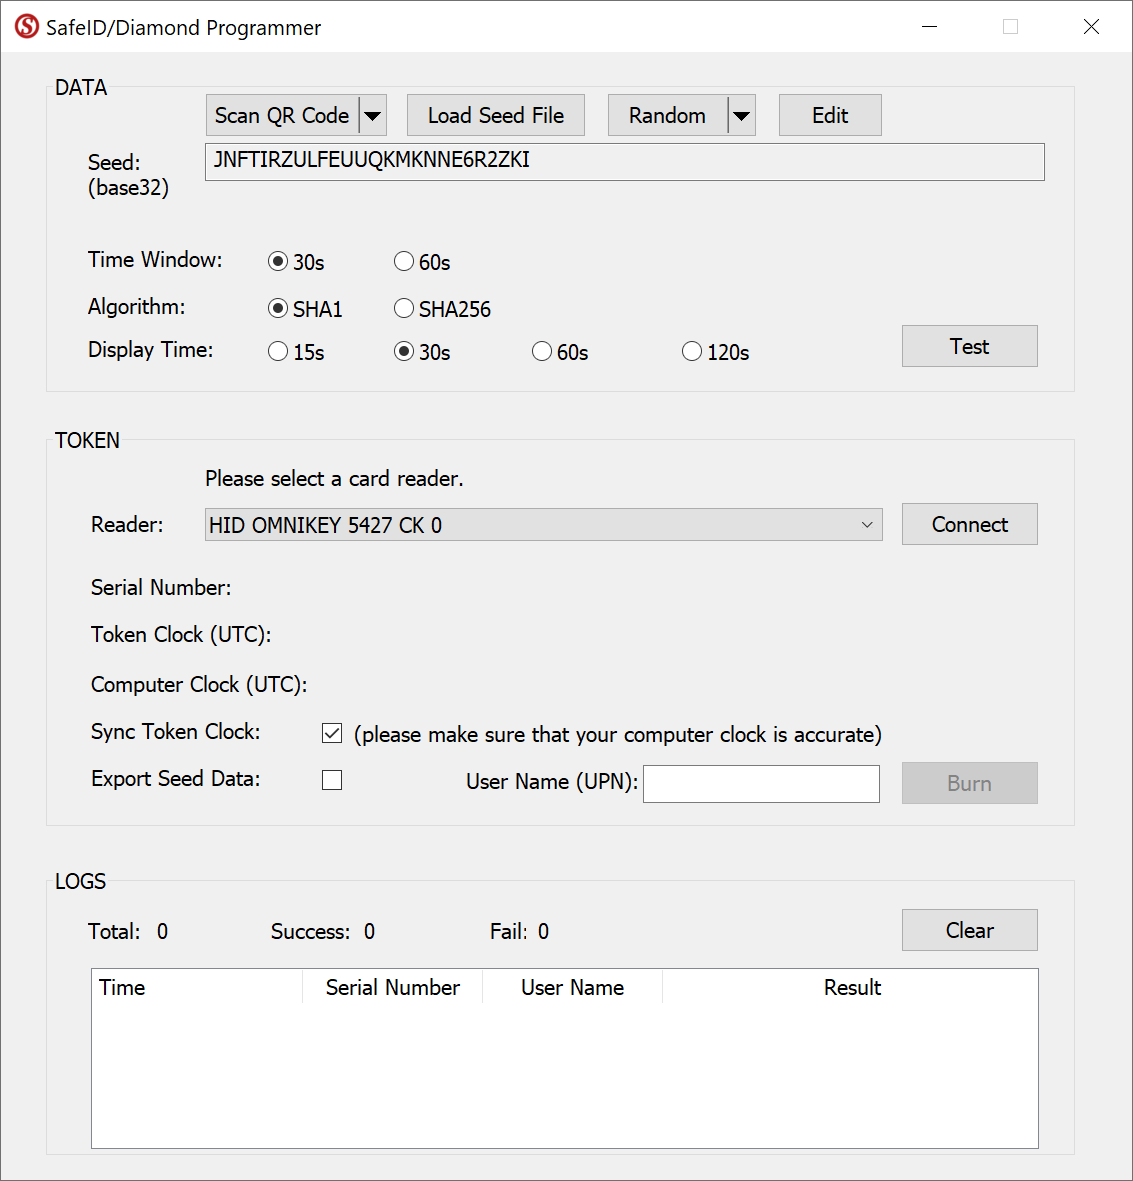
Download and launch the SafeID/Diamond programming tool.

Click the Scan QR Code button
Before you scan the QR code please ensure that the clock on your computer is displaying the correct date and time.
You can scan the screen for a QR code, or load from a file.
If you are scanning the barcode on the screen please ensure that the QR code is not obscured by other windows, and if you have more than one monitor please ensure that both the app and the QR code are displayed on the main display (display 1).
If you still have difficulty in scanning the QR code double check you only have the one instance of the app running, and that it is the latest version of the app. In most cases when there are issues with scanning of the QR code the most likely cause is the QR code contains the wrong data and may need to be regenerated. To test the QR code you could check that the code works correctly with the authenticator app it is intended for (e.g microsoft authenticator), and if this fails then you know that the QR code will need to be regenerated.
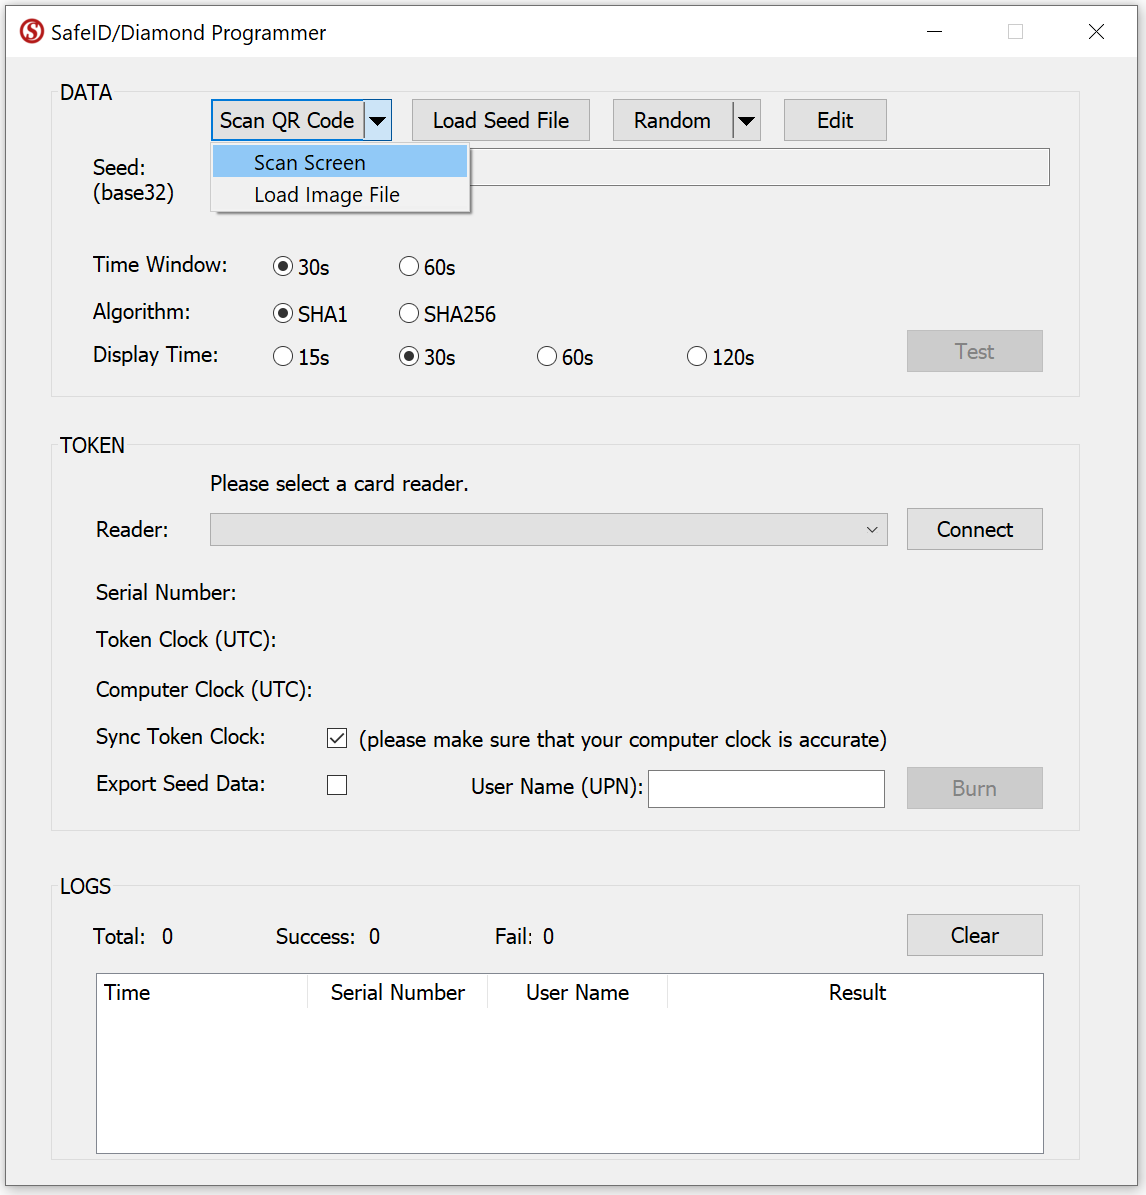
Select Scan Screen.
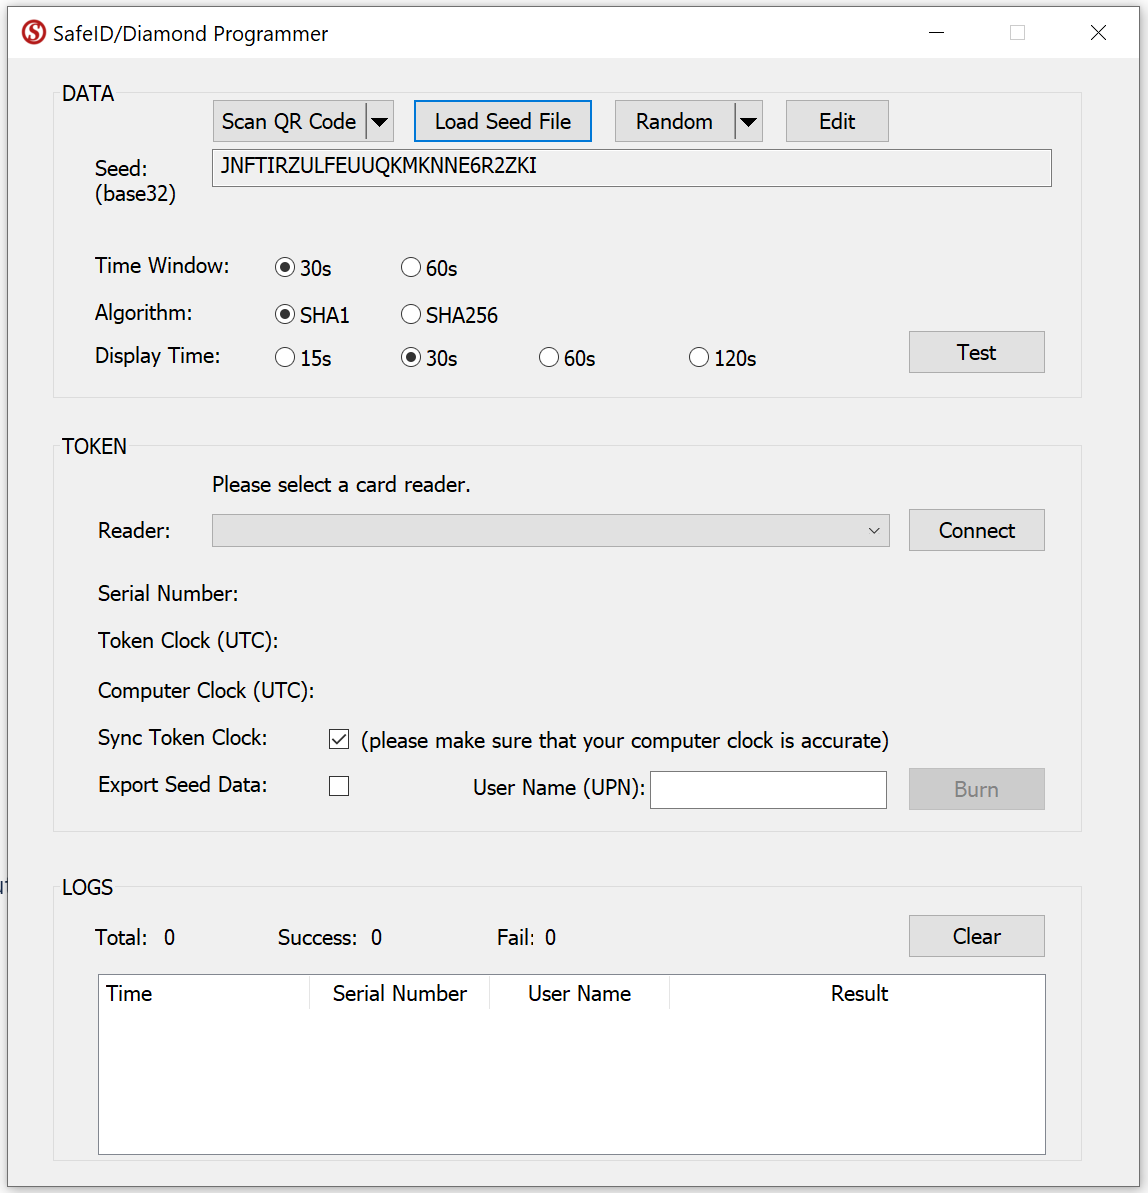
If succeeded, the Seed box should be filled with the token's seed data.
Now, select your smart card reader from the Reader drop-down list, e.g. "HID OMNIKEY 5427 CK"
Press the Connect button

Now, switch on a SafeID token and place it on the reader.
The tool will read out the token's serial number and time, and display them:
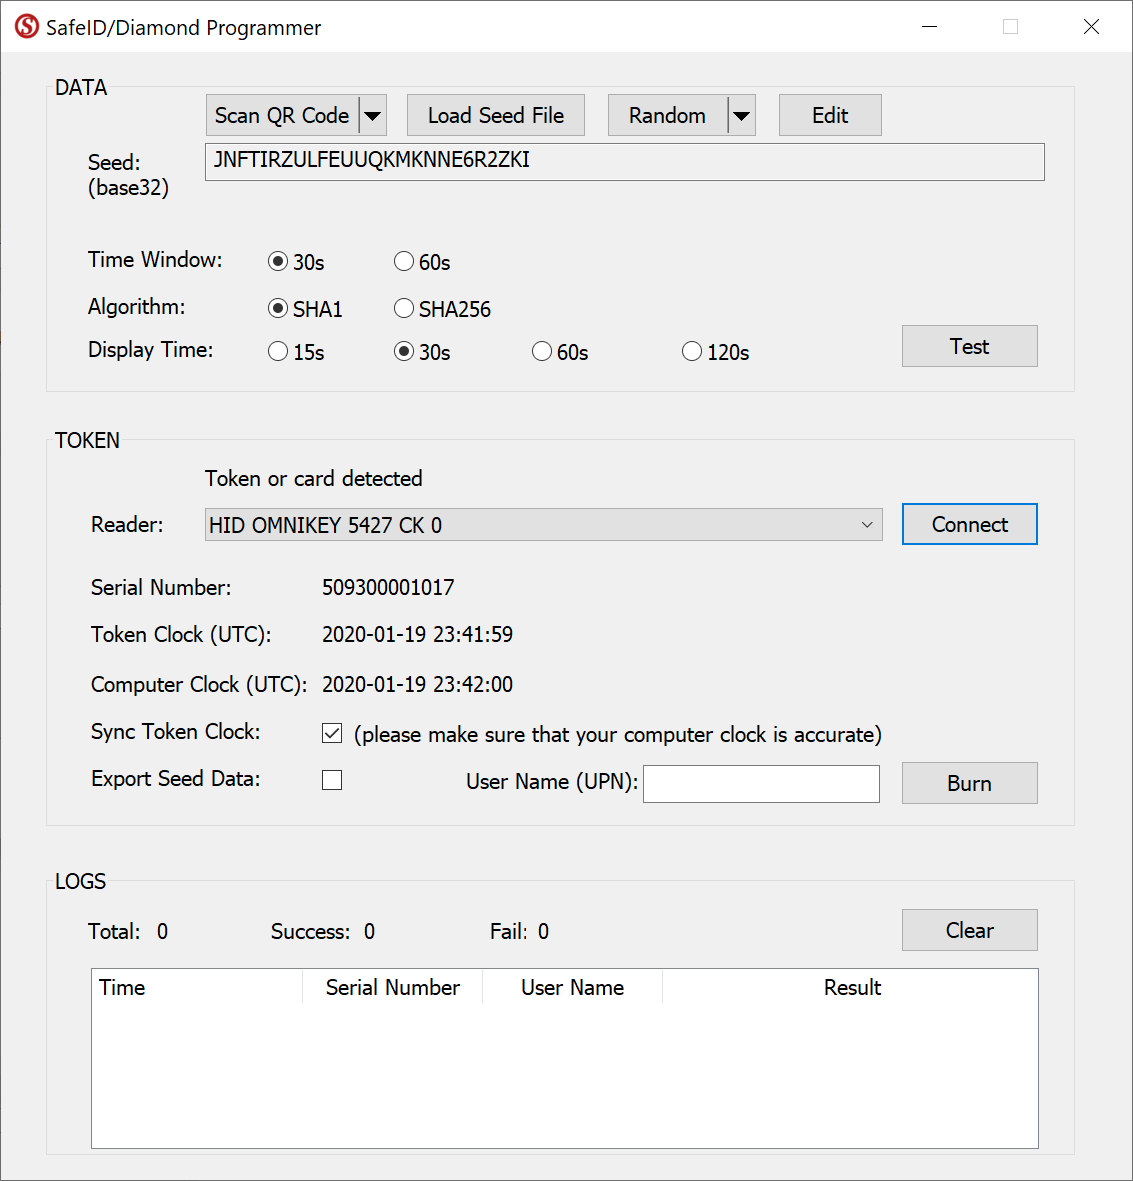
If you want to correct the clock on the token, then leave the "Sync Token Clock" checked, but first ensure the time on your pc is set correctly.
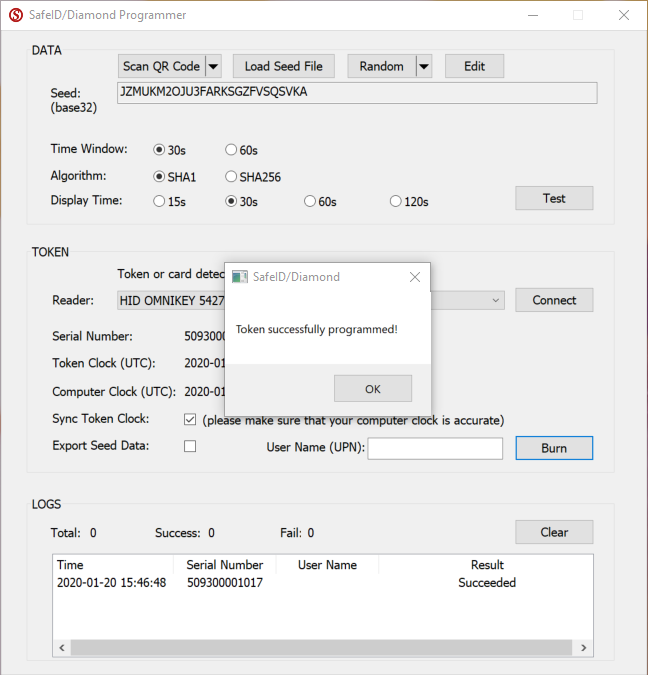
Switch off the token and switch it on again to generate a new code (the token may only use the new seed after being reset)
Programming single seeded tokens using a QR code on an Android mobile phone
Introduction
There are circumstance where you may want to replace a mobile phone based authentication app (such as google authenticator) with a programmable hardware token (such as the SafeID/Diamond or SafeID/Pro programmable tokens).
Preparation
Before you can use an NFC enabled phone to burn programmable tokens you will need to perform the following preparatory steps;
Make sure you’re running the latest version of Android (the majority of new Android smartphones have an NFC chip in the phone).
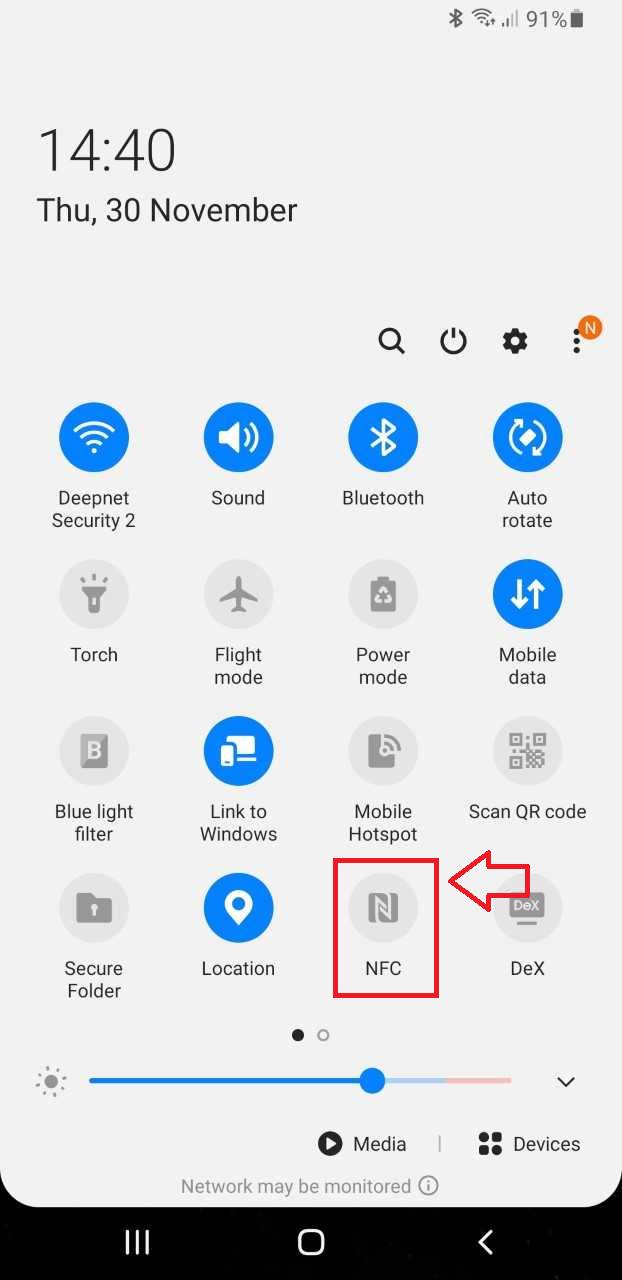
Turn on your device and slide from the top down to access the android settings.
Maximise the displayed icons then ensure the "NFC" icon is enabled;
If asked if you want to turn on "Android Beam", confirm that you want the feature enabled.
If your mobile device runs android you will need to visit the Google play store and search for the app "Deepnet SafeID Programmer"
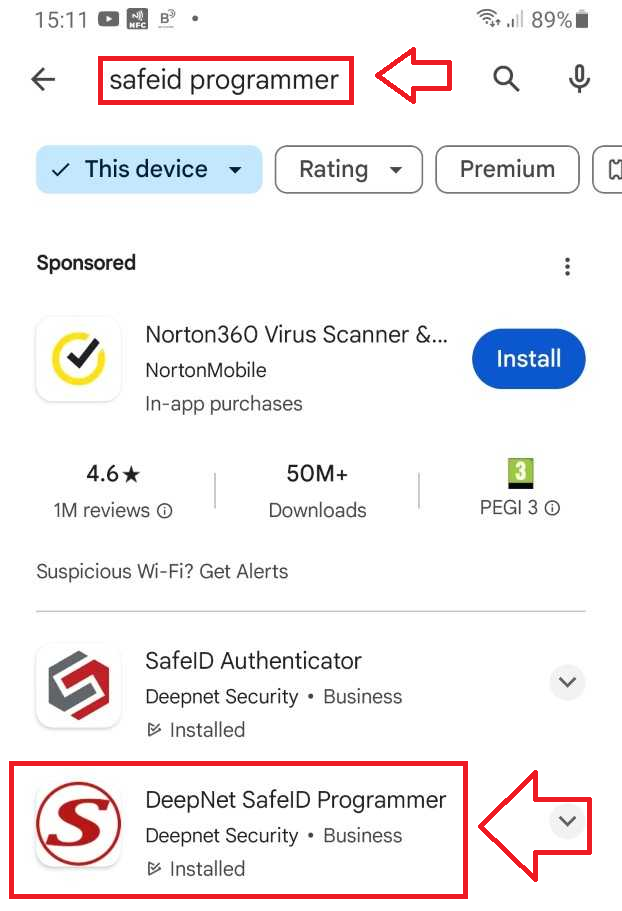
Download, Install and run this app.

Before you can produce OTP codes using a programmable token you will need to obtain the seed data (either in the form of a compatible QR code that can be scanned, or in hex or base32 encoded format).
Once the seed data for the token has been obtained it can be transferred to the app either by scanning the QR code, or manual entry of the Base32/Hex encoded seed:
When scanning a QR Code on an Android (or IOS) SafeID programming App you first need to make ensure that the QR code is ready for scanning using the camera on your smartphone.
Display the QR Code ready for scanning (the QR code below is just an example);

Next launch the app on your mobile device, point the camera at your QR code, then click on
 the button;
After clicking on the
the button point the camera the QR code and the code will be automatically scanned;
The token's seed/secret is extracted from the QR code, and you will progress onto the next step "Token Configuration";

You are now ready to burn the seed details onto the token.
Manual entry of the seed may be performed with either a Base32, or Hex encoded seed.
Copy and paste your seed into the input area then click
 ;
;
The software will then examine your seed and confirm if it is a valid Base32 or Hex seed (If the programming app cannot identify a valid seed then you may be requested to correct the entry).
When a valid seed has been entered you will still need to confirm the time and algorithm parameters.
Generally speaking, if the token is to be replacing an authentication app, then these parameters can be left at their default settings (but if you are aware that either a different time window size, or algorithm setting are needed, then you will need to manually adjust these settings from the default.
Once the token configuration settings match your requirements click on the
 button;
You are now ready to burn the seed details onto the token.
Burning Seed data onto the Programmable Tokens using an NFC enabled smartphone
Once the token parameters have been confirmed you will be asked to turn on the token.
Turn on the token then click
 ;
;
The app will update to show that the token is currently not connected to the app;

With NFC on the mobile enabled, ensure your token is turned on, then place the token near the NFC reader on your phone (typically this will be near the top at the back of your phone).
The app will update and show that the token is now connected, and will display details about the token that it has found;

Part of the information displayed is an assessment of any time drift that has been detected on your token.
Generally speaking, if more than 2 seconds drift has been detected we would advise you click on the "Synchronise Token Clock" option prior to burning your token.
If you are ready to burn the token click on the
 button, and the token details will be transferred to the token, and you will notified with the message "TOKEN PROGRAMMED SUCCESSFULLY";

Related Articles
Programming single seeded tokens using a QR code on and iOS mobile phone
Introduction
There are circumstance where you may want to replace a mobile phone based authentication app (such as google authenticator) with a programmable hardware token (such as the SafeID/Diamond or SafeID/Pro programmable tokens).
Before you can produce OTP codes using a programmable token you will need to obtain the seed data in the form of a compatible QR code.
Preparation
iPhones 7 and the more recent released models can read NFC tags and make NFC payments. However, no NFC support was added to iPhones 6 and 6S, yet it can be used to make NFC payments only.
Before you can use an NFC enabled phone to burn programmable tokens you will need to perform the following preparatory steps;

To obtain the programming app you will need to visit the apple play store and search for the app "SafeID Programmer"

Download, Install and run this app.
In order to burn programmable tokens you need to obtain seed data either by scanning a QR code, or via manual entry of seed data (provided in text form);

After tapping the scan button, point the camera at the QR code and the code will be automatically scanned;

The token's seed/secret is extracted from the QR code, and you then be asked to confirm the parameters that were scanned by tapping "CONFIRM";

You are now ready to burn the seed details onto the token.
Manual entry of the seed may be performed with either a Base32, or Hex encoded seed.
Copy and paste your seed into the input area then click
 ;
;
The software will then examine your seed and confirm if it is a valid Base32 or Hex seed (If the programming app cannot identify a valid seed then you may be requested to correct the entry).
When a valid seed has been entered you will still need to confirm the time and algorithm parameters.
Generally speaking, if the token is to be replacing an authentication app, then these parameters can be left at their default settings (but if you are aware that either a different time window size, or algorithm setting are needed, then you will need to manually adjust these settings from the default.
Once the token configuration settings match your requirements click on the
 button;
You are now ready to burn the seed details onto the token.
Burning Seed data onto the Programmable Tokens using an NFC enabled smartphone
Once the token parameters have been confirmed you will be asked to turn on the token.
Switch on the hardware token device, and place it on the phone, then click ""READ TOKEN"., and a new popup will appear "Ready to Scan";

Adjust the token position until a read is successful

When the details of the token are shown, tap "PROGRAM TOKEN", and once programmed you will be notified that token programming was successfully performed;


Verifying the burn was performed correctly
To confirm that the token was burned correctly first tap on the "Verify Token" button'

Turn the token off, then back on again (this ensures that the OTP code being displayed is from the newly burned seed).

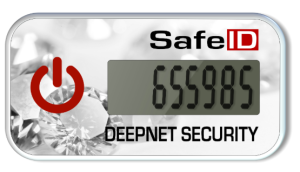
Check that the generated OTP code on the screen matches the on4e displayed on the token, if they match you have confirmed that the token was burned properly.

Related Articles
Programming multi-seeded tokens
If you have a multi seeded programmable token (such as the SafeID PinPad(pro) or SafeID QR(pro), then please see the instructions in the following guides;
Related Articles
After burning the token with the seed data we now produce an OTP code using the token, enter the code at the prompt "Verification code", then click
 ;
;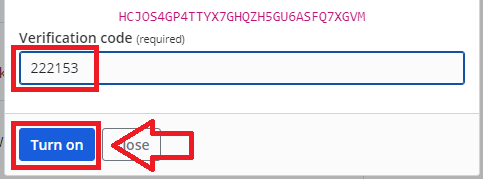
Two-step authentication using the programmable token can now be used when logging in to Bitwarden.
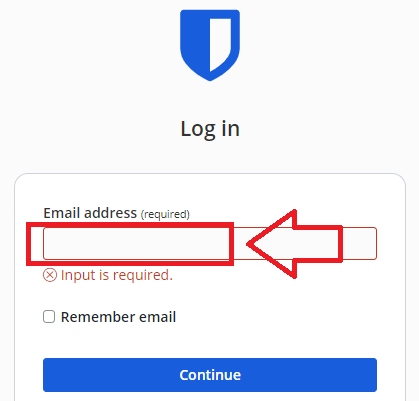
After navigating to "https://bitwarden.com/" and click on the "Log in" option, at the email address prompt enter your email address then click
 ;
;
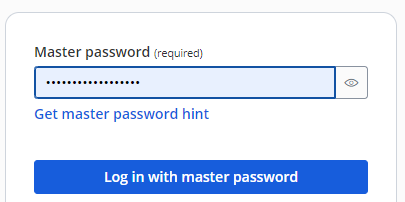
Enter your master password then click "Log in with master password";
You will now be asked to provide a Verification code;
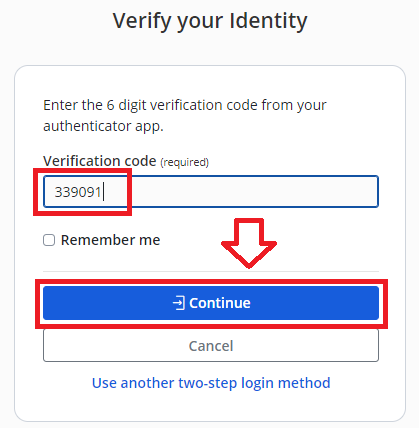
Enter an OTP code from your programmable hardware token then click
 , and you will be logged in to your Bitwarden account.
Related Articles