Set up Deployment Service
Set up Logon Procedure
Logon Procedure defines how users will be authenticated when they attempt to login to the portal. You can define a logon procedure of 1-step, 2-step and 3-step verification, for instance.
In the Admin Console, select "Logon Procedures"

There is a pre-defined logon procedure named "Deployment Service".
To change its logon steps, click its context menu, select "Logon Steps"

You can define the logon steps according to your own requirements

Set up Application
In the Admin Console, select "Applications"

There is a pre-defined application named "Deployment Service"
Normally, you do not have to make changes to the default setup.
Set up Realm
Realm is a group of user domains. It defines who is allowed to access the application that's associated with the realm.
In the Admin Console, select "Realm"

There is a pre-define realm named "Deployment Service"
You must change the domains that are to be included in this realm, e.g. deepnetid.com
Configure Policy Settings
If you allow your users to activate their own devices using the Deployment Service Console, then you need to configure the following policies:
DeviceID Policy
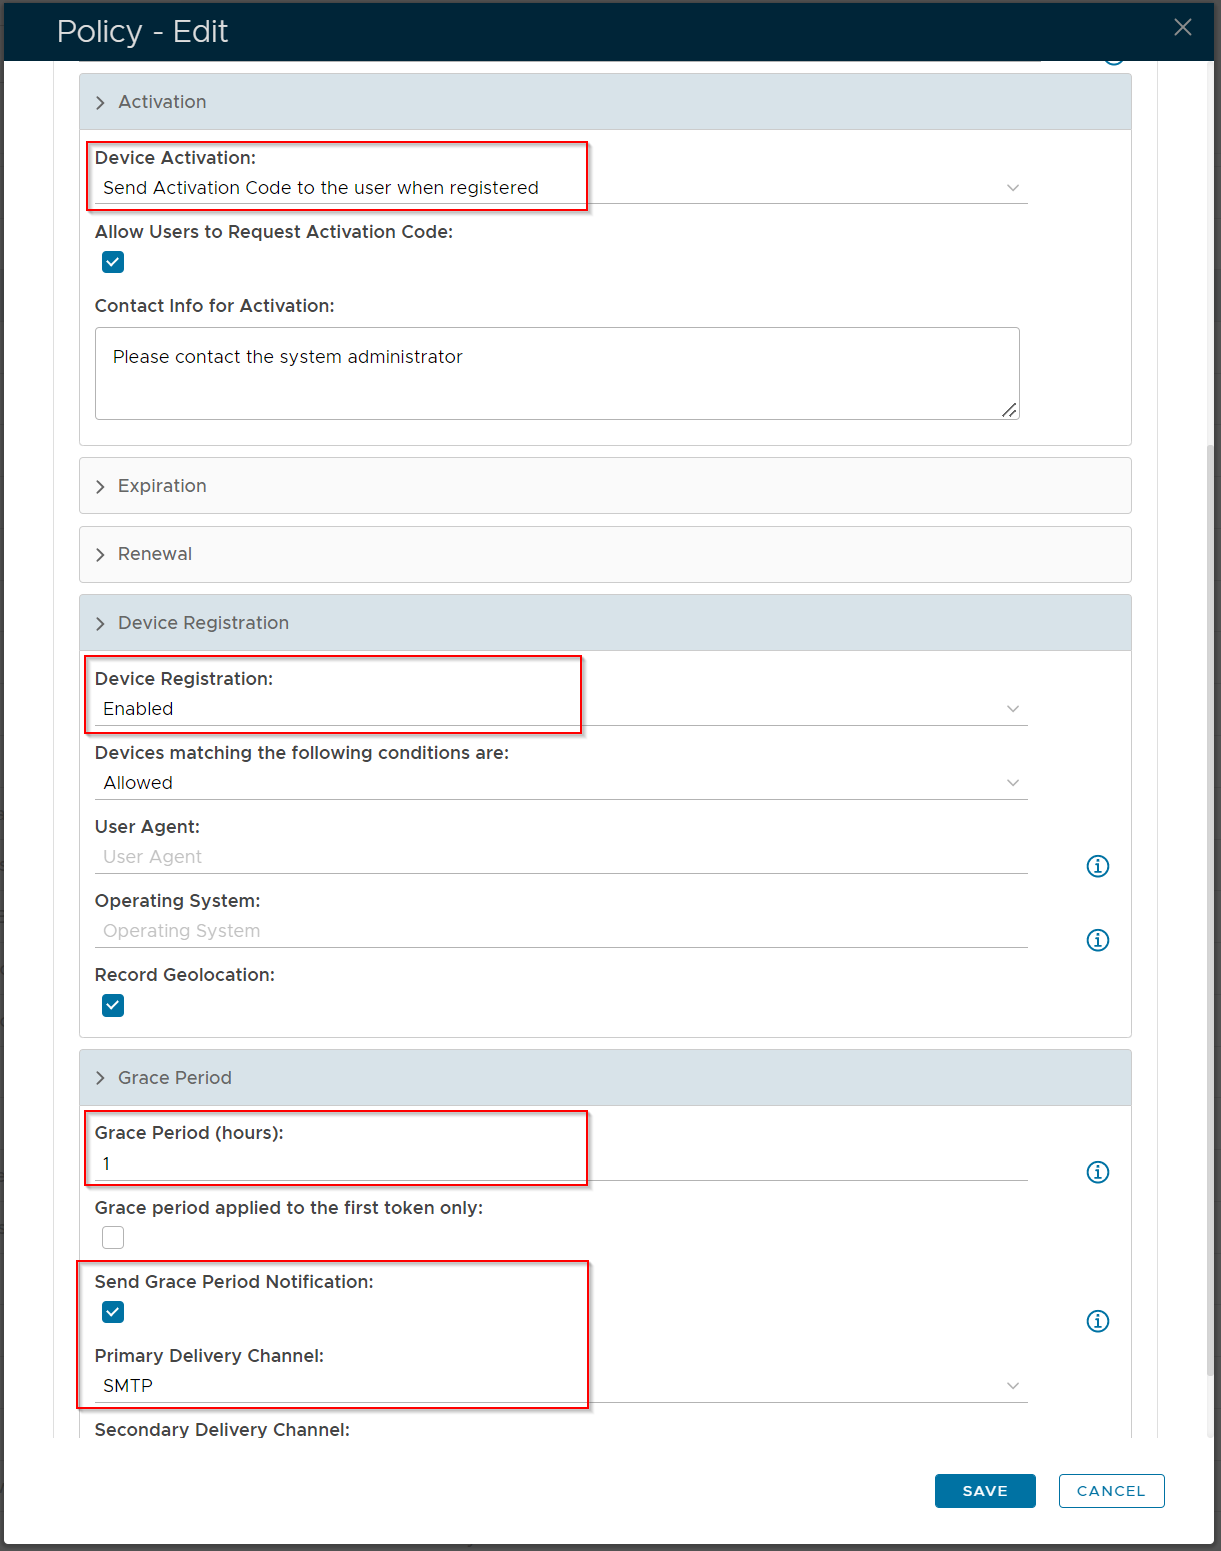
| Option | Value | Explanation |
|---|---|---|
| Device Activation | Send Activation Code to the user when registered | An activation link with a code will be sent to end users, enabling them to access the Self Service portal and activate their own DeviceID token |
| Device Registration | Enabled | This is a default option so that a DeviceID token will get created and dropped into quarantine until such time as it is activated. |
| Grace Period | Time period needs to be set above zero | Setting a grace period is a requirement, so that the end user will be able to recieve so the activation link. If Send Grace Period Notification is enabled, then the end user will receive a separate notification explaining how long they have to activate their token before their email is blocked. |
Activation Code Policy
The activation code has it's own policy where you can set the format and length of the code as well as an expiry
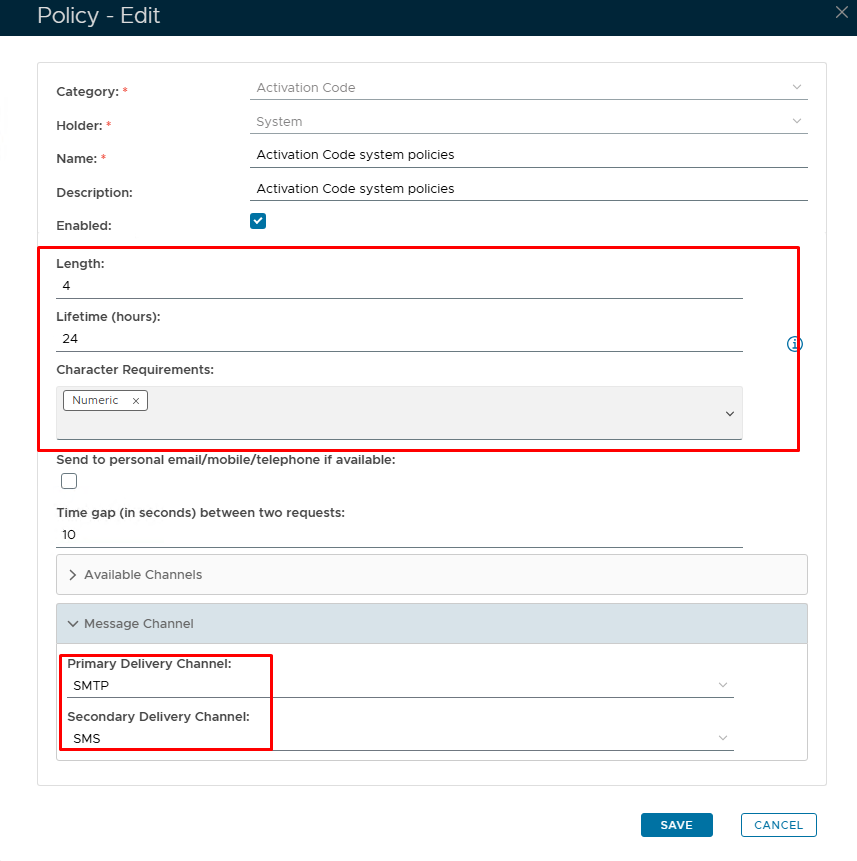
| Option | Value | Explanation |
|---|---|---|
| Length | Default = 4 characters | A length of 4 will be presented as 'xxxx'. You can increase or decrease the length however, 4 or 6 is the norm. |
| Lifetime | Set in hours | The number of hours before the Activation code expires. (0 = no expiry.) |
| Character Requirements | Numeric/Alphabetic/Both | Code format |
| Message delivery channels | SMTP/SMS | How would you like the end user to receive the Activation code? SMTP = email; SMS = text. |
Customize Message Template
To allow users to self-activate their devices, you need to customize the message template for device activation

Activate Device
If you have set up the alert for DeviceID registration and cc the message to the user, then the user will receive an email or text message when a device has been registered:

For the self-service to work, you would have enabled the grace period policy. The user will receive a grace period notification message:

For the self-service to work, you would have also enabled the activation message policy. The user will receive an activation message:

Clicking the activation link will take the user to the DualShield Deployment Service (DDS) portal:

After the user has been successfully authenticated, the user will be able to view the device that's waiting to be activated:

To activate the device, click the Activate button
If the policy is set in such that an activation code is required, then the user will be prompted to enter the activation code:

