During installation we package in our own root CA plus internal Agent and IDP certificates. Some of our long-term customers may see this warning when updating the DualShield Framework

This is because the RSA key used in the installation of their original older version of DualShield Authentication Server would have been 1024 bit, which was acceptable at the time.
It is now recommended to update this key to 2048 Bits. There are quite a few steps to this process. All the instructions in this guide should be followed precisely.
Upgrade DualShield
Upgrade to DualShield 7.3.0 or later version, 7.3.4 is recommended.
Setup OAuth Agent Authentication
As a fail-safe it is advisable to enable OAuth on Single Sign-On and Admin Console modules
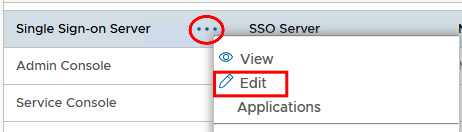
On the Admin Console go to Authentication>Agents
Edit Single Sign-on Server
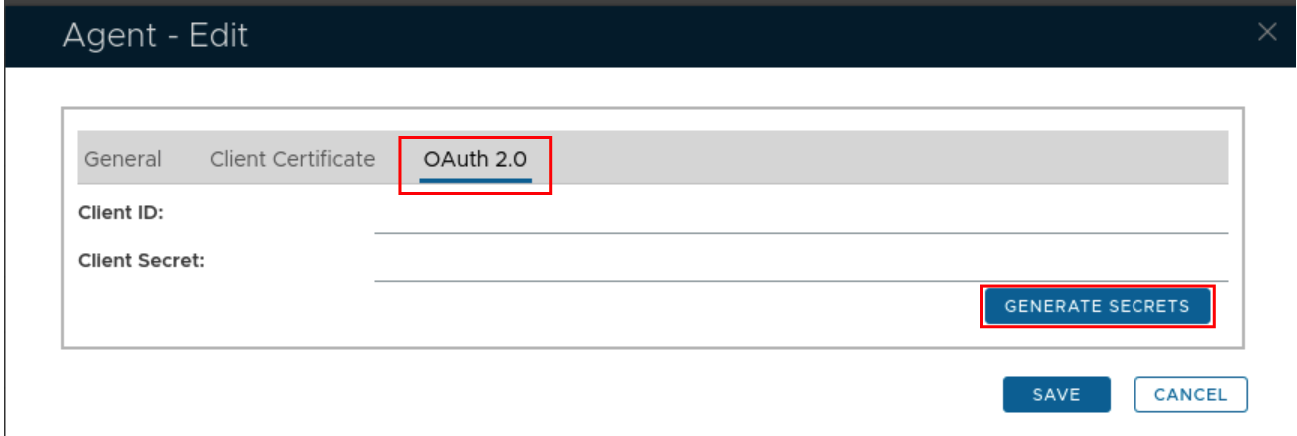
In the edit screen select the OAUTH2.0 tab and click Generate Secrets
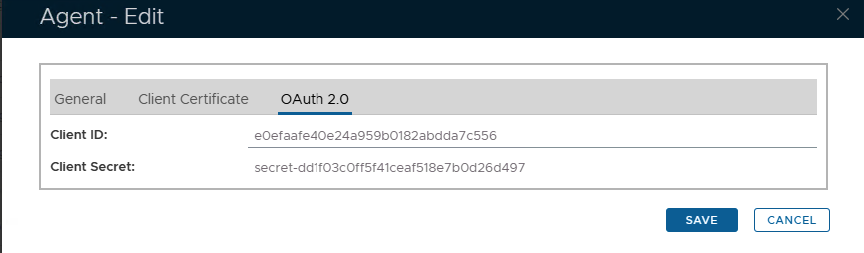
Keep this window open and edit the sso6.properties file which can be found in C:\Program Files\Deepnet DualShield\config.
For best results use notepad++ to edit the properties file.
For SSO6.Properties use the following template...
useOAuth=true
oauthClientId=#########################
oauthClientSecret=secret-##########################
oauthTokenUri=https://YourDualShieldFQDN:8071/das5/rest/oauth/token
Replace the hashes with the generated Client ID and Secret.
Replace the FQDN in the oauthTokenURI with your own backend server FQDN
This will be added into your SSO6.properties file as per the following example:

Repeat the process for Admin Console agent, however you will be editing the dac.properties file and you will also be using this template:
useOAuth=true
oauthClientId=#########################
oauthClientSecret=secret-##########################
oauthTokenUri=https://YourDualShieldFQDN:8070/das5/rest/oauth/token
This will be added into your dac.properties file as per the following example:
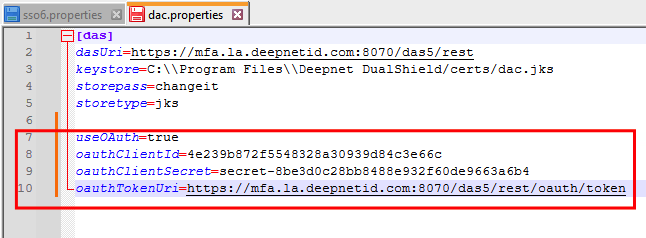
Notice also that only the Single Sign on module is using port 8071. This is specified in the sso6.Properties file.
oauthTokenUri=https://YourDualShieldFQDN:8071/das5/rest/oauth/token
The dac modules will use port 8070.
oauthTokenUri=https://YourDualShieldFQDN:8070/das5/rest/oauth/token
For further information on how OAuth 2.0 works and how to enable it refer to: OAuth 2.0
Regenerate the root CA
Step 2: Enter the command below:
"c:\Program Files\Deepnet DualShield\jre\bin\keytool" -list -v -keystore "c:\Program Files\Deepnet DualShield\jre\lib\security\cacerts" -alias dualultimateca
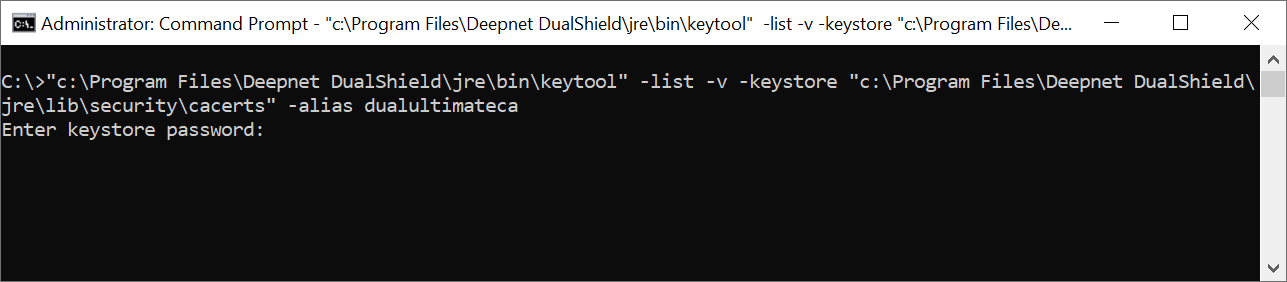
Step 3: At the prompt of “Enter keystore password:”, enter “changeit”
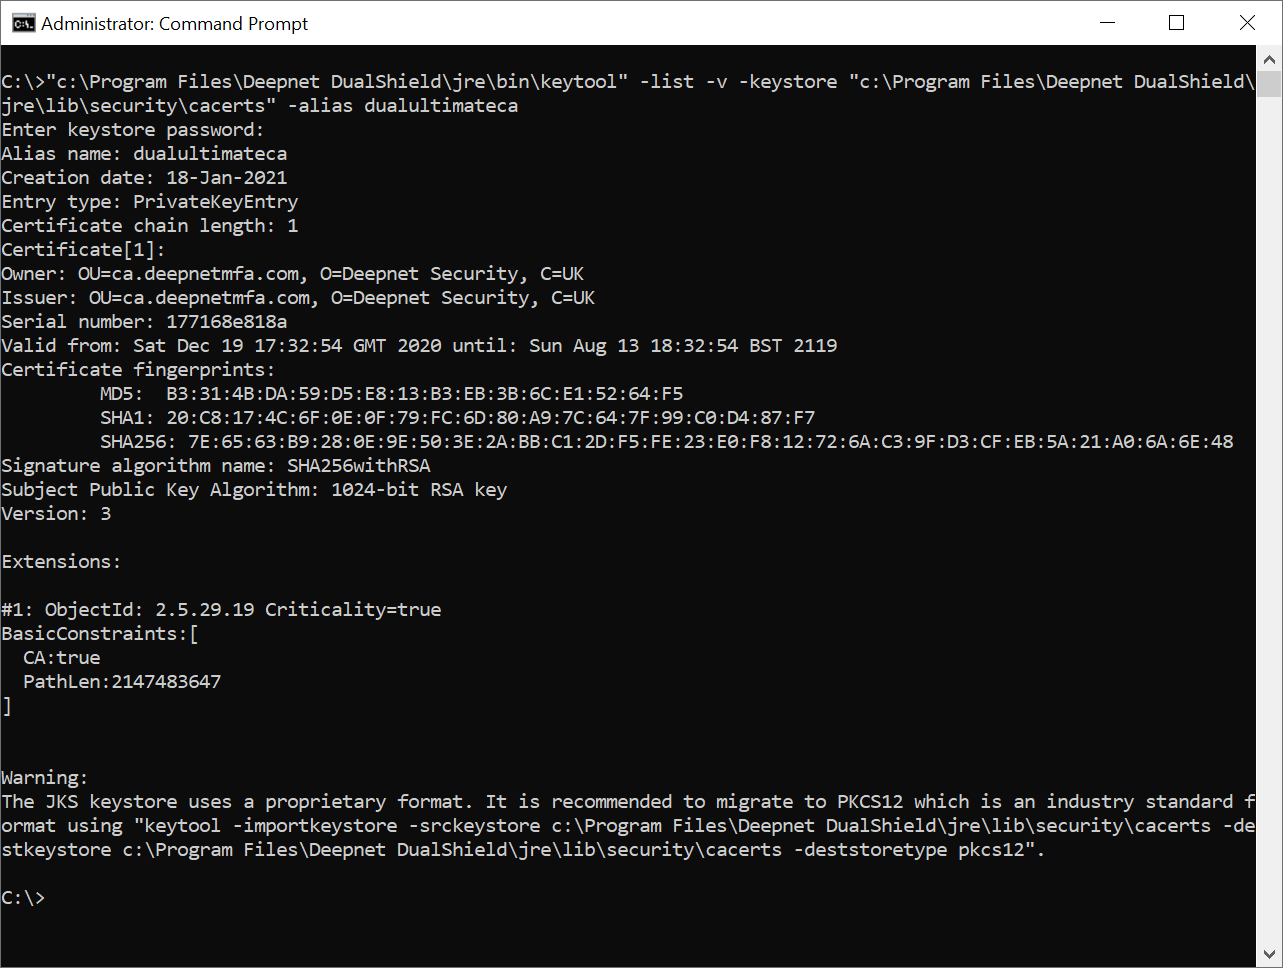
Step 4: Look out the line “Valid from … until …” in the result.
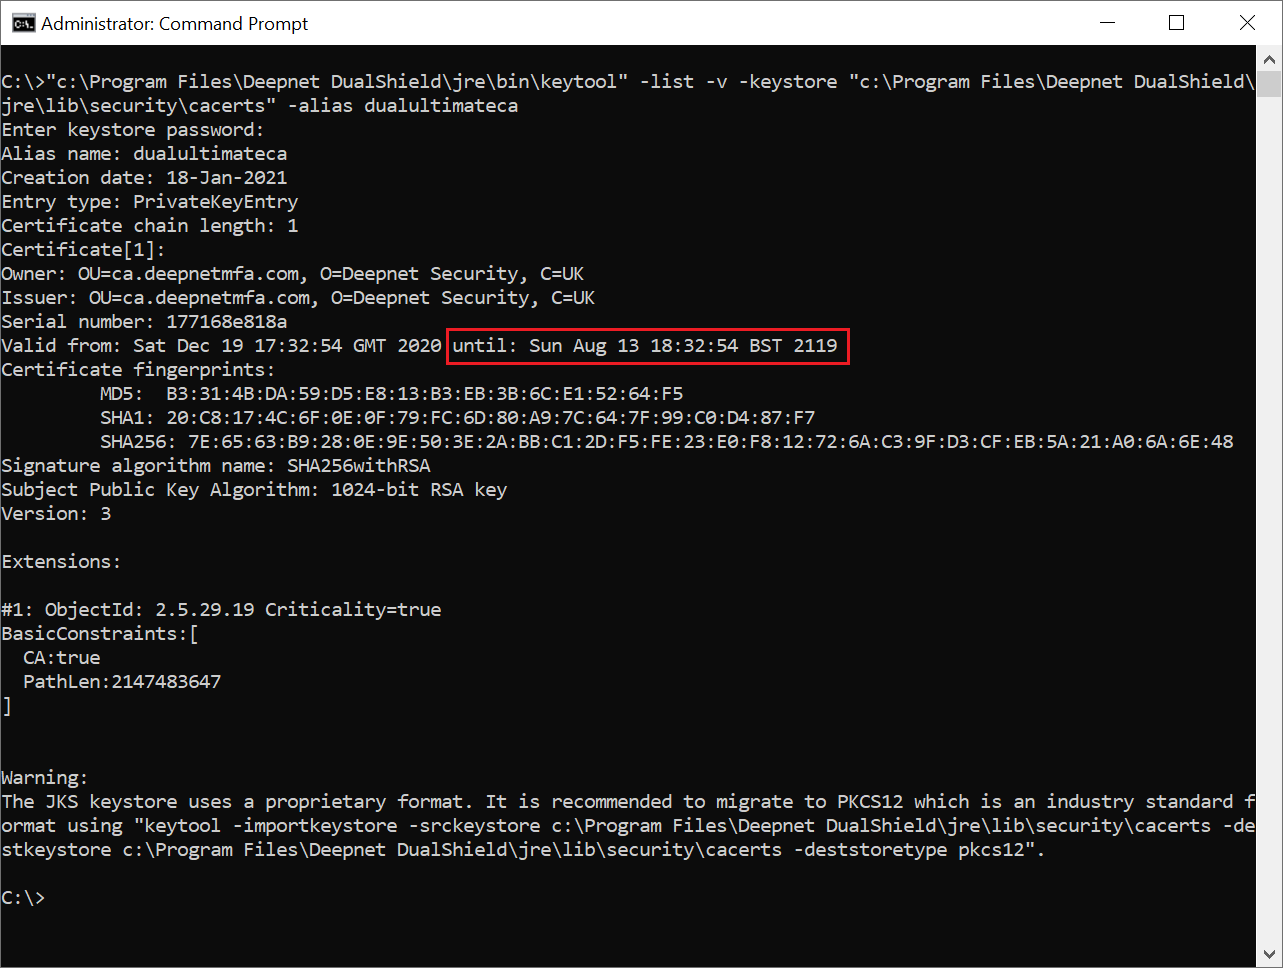
The date after "until:" is the expiration date of the DualShield CA certificate.
...However, instead of checking for the date, you will be checking for the owner...
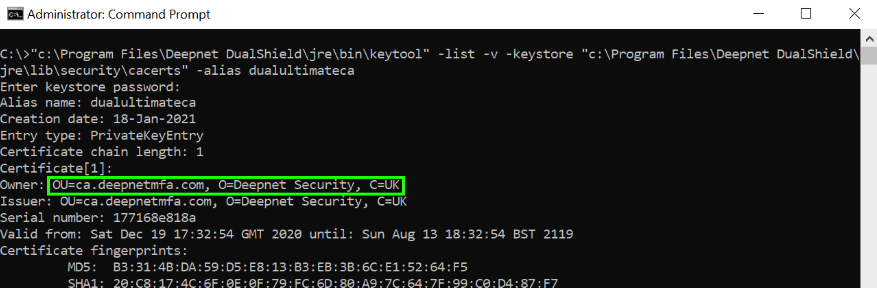
2) Note down the owner details. In this example, it is: OU=ca.deepnetmfa.com, O=Deepnet Security, C=UK
3) Backup the current cacerts file:
Run Command Prompt in admin mode and run the following commands:
cd C:\Program Files\Deepnet DualShield\jre
copy "lib\security\cacerts" "lib\security\cacerts.backup"
4) Delete the old root CA:
bin\keytool -delete -alias dualultimateca -keystore lib\security\cacerts -storepass changeit
5) Generate a new root CA with a keysize of 2048, using the owner information you acquired in step 2:
bin\keytool -genkeypair -alias dualultimateca -keyalg RSA -keysize 2048 -validity 36500 -dname "OU=ca.deepnetmfa.com, O=Deepnet Security, C=UK" -ext bc=ca:true -keystore lib\security\cacerts -storepass changeit -keypass changeit
Regenerate all agents and idp certificates
Method 1
Step 1: Download the following file
Renew DualShield CA Cert v4.zip
Step 2: Extract the zip file and then copy the file 'das-task-import-1.0-standalone.jar' to c:\temp
Step 3: Open the elevated Command Prompt and execute the following command
"C:\Program Files\Deepnet DualShield\jre\bin\java" -jar c:\temp\das-task-import-1.0-standalone.jar -f "C:\Program Files\Deepnet DualShield\tomcat\conf\server.xml"
This tool will create a task in DualShield called Renew all agent certificates.

Step 4: Restart the DualShield Server service once, and wait for DualShield to fully start (see How to check if a DualShield server is fully started )
Step 5: Restart the DualShield Server Service again.
Step 6: After restarted the dualshield service, log back in to the Admin console and go to Administration>Tasks. Check to see if the task has been executed succesfully.
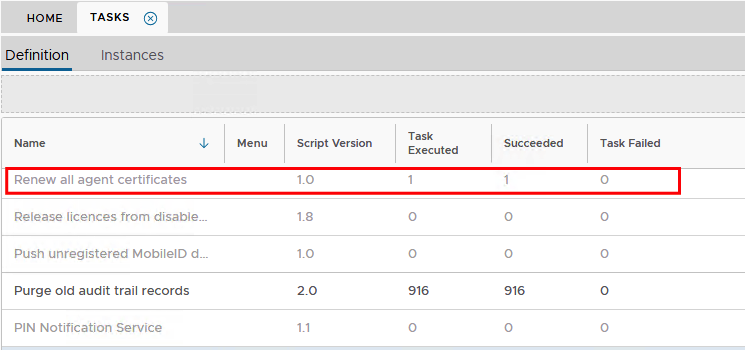
Step 7: Go to Authentication>Agents and view any internal agent, such as Single Sign-On, Admin Console or Service Console
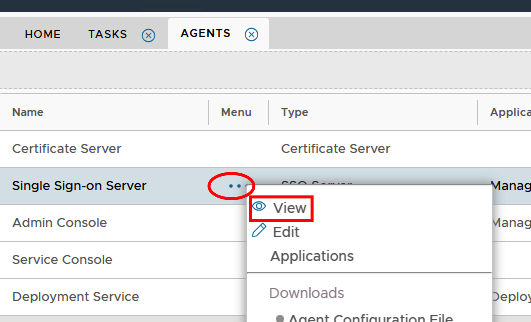
Step 8: Select Client Certificate and then click on Read More at the bottom of the window.
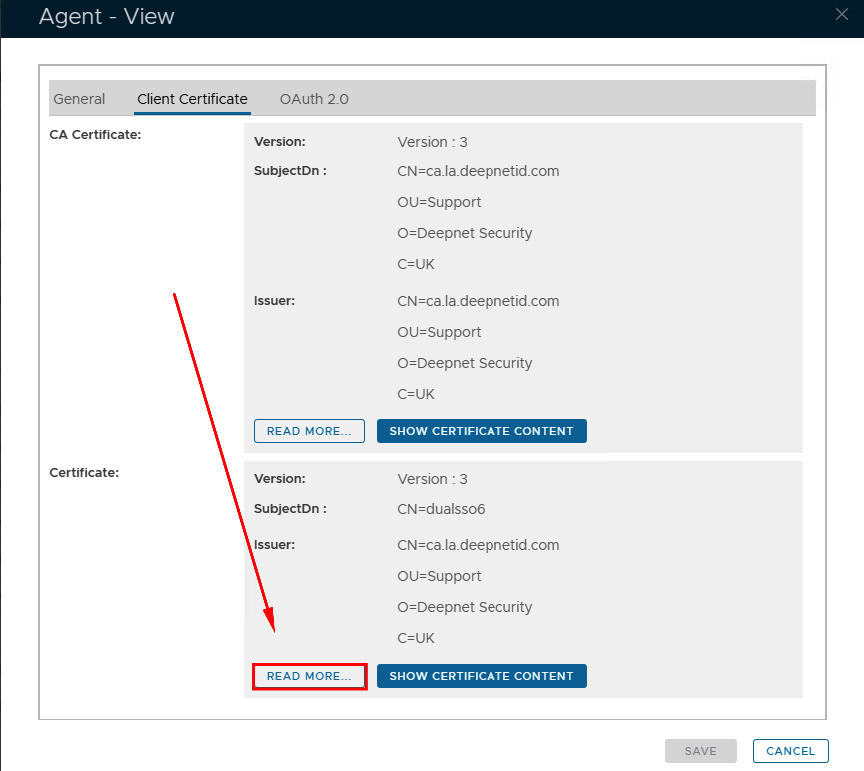
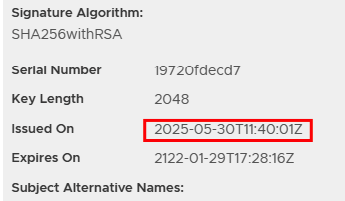
Step 9: Check the date of issue to ensure the certificate has updated succesfully.
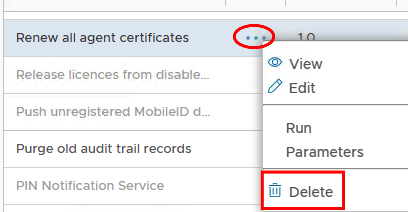
Step 10: Go back to Administration>Tasks and delete the Renew all agent certificate task.
Method 2
If you do not plan to use the client agent certificate any more (for example, you have enabled OAuth2.0 authentication), you can just run the Update SSO IDP Certificate task to only update the IDP certificates.

SAML Integrations
IMPORTANT IF YOU HAVE A SAML INTEGRATION!
After completion of the above steps, you MUST provide the third party Service Provider with the updated IDP Metadata/Certficate.
Go to SSO> SSO Servers, click on the corresponding ellipsis and select the files you need to download from the menu..
