To use the SafeID Help Desk application to generate TOTP codes, you must first import the tokens. SafeID Help Desk is compatible with the token secret CSV file format used by Entra ID.
The token secret file must include a header row with the following columns:
- serial number
- secret key
- time interval
- manufacturer
- model
- as the example below shows.
Below is an example
|
The "secret key" must be encoded by BASE32 or HEX
Optionally, but recommended, the secret file should include a column named "upn" which represents the username of the token.
|
References
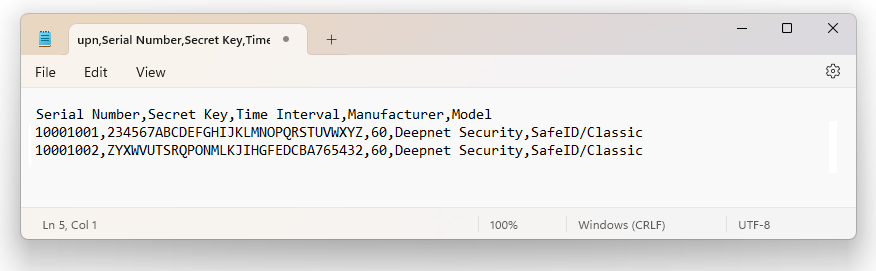
Deepnet SafeID or MobileID tokens are supplied with a token file in the CSV format. The token file includes serial number, secret key, time interval, manufacturer, and model as the example below shows.
Token Secret File
|
*Please note that the above token secret file is only an example. If you have not received the seed file of your tokens then click here to make a request, or contacting your reseller or Deepnet Security.
To assign tokens to users, you need to add User Principal Names (UPN) to the token file. Follow the steps below.
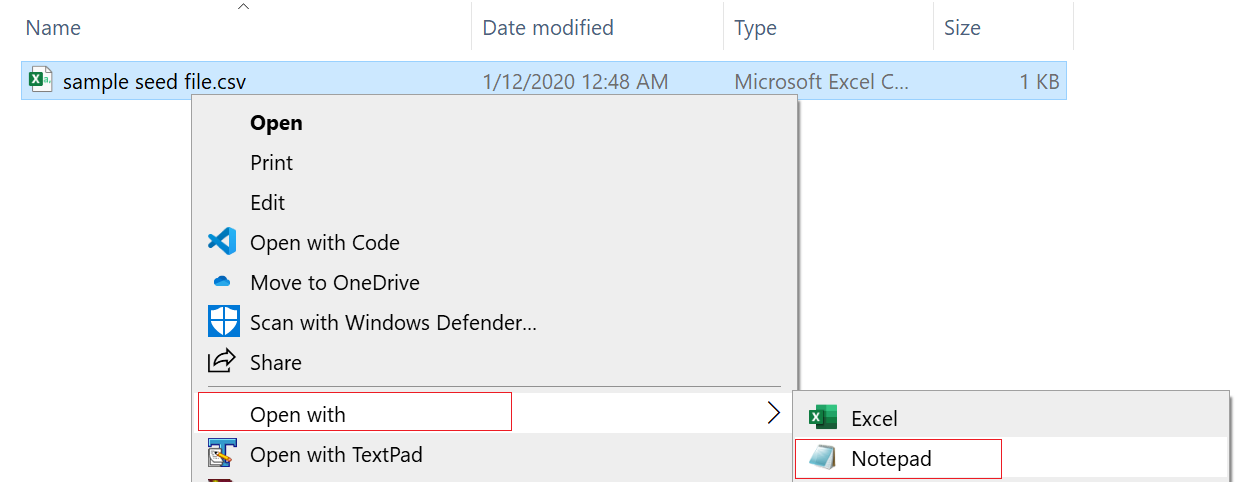
1 - Open the token file in a text editor, such as Notepad (Please do NOT edit the token CSV file using Excel).
Below is an example:.
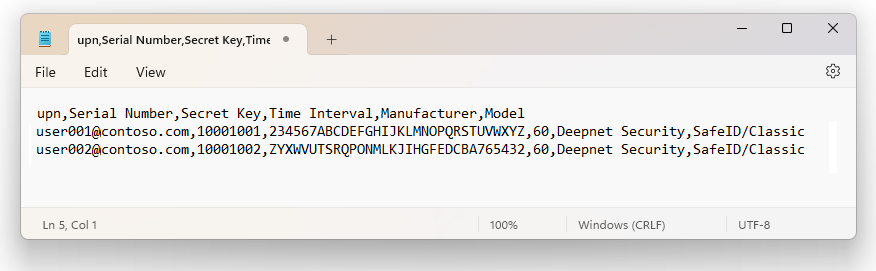
2 - Add 'upn' to the header row, so that the header reads:
upn,serial number,secret key,timeinterval,manufacturer,model
3 - Add a UPN in every row, e.g.
user001@contoso.com,1234567,234567ABCDEFGHIJKLMNOPQRSTUVWXYZ,60,Deepnet Security,SafeID/Classic

The revised content looks like below:
Save the file.
To use the tool, visit https://www.deepnetsecurity.com/tools/tokens-enrolment-for-entra/
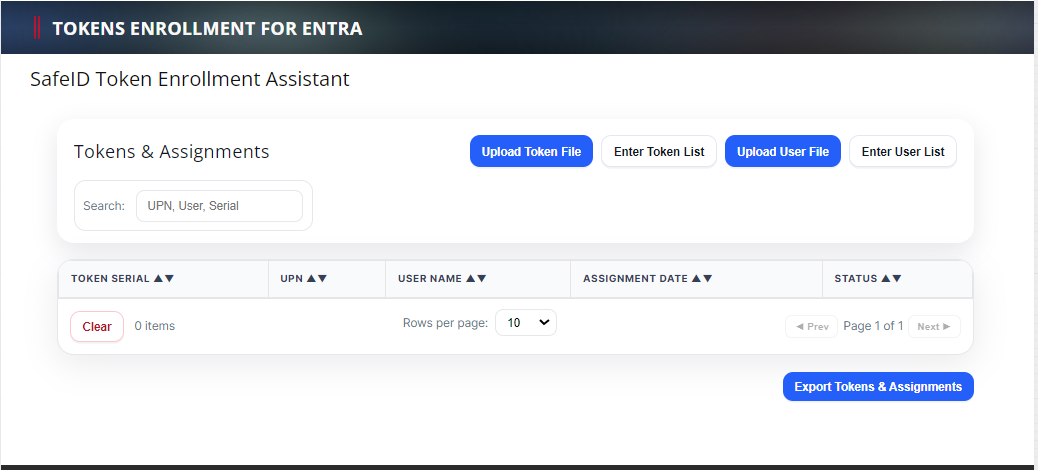
Follow the steps below:
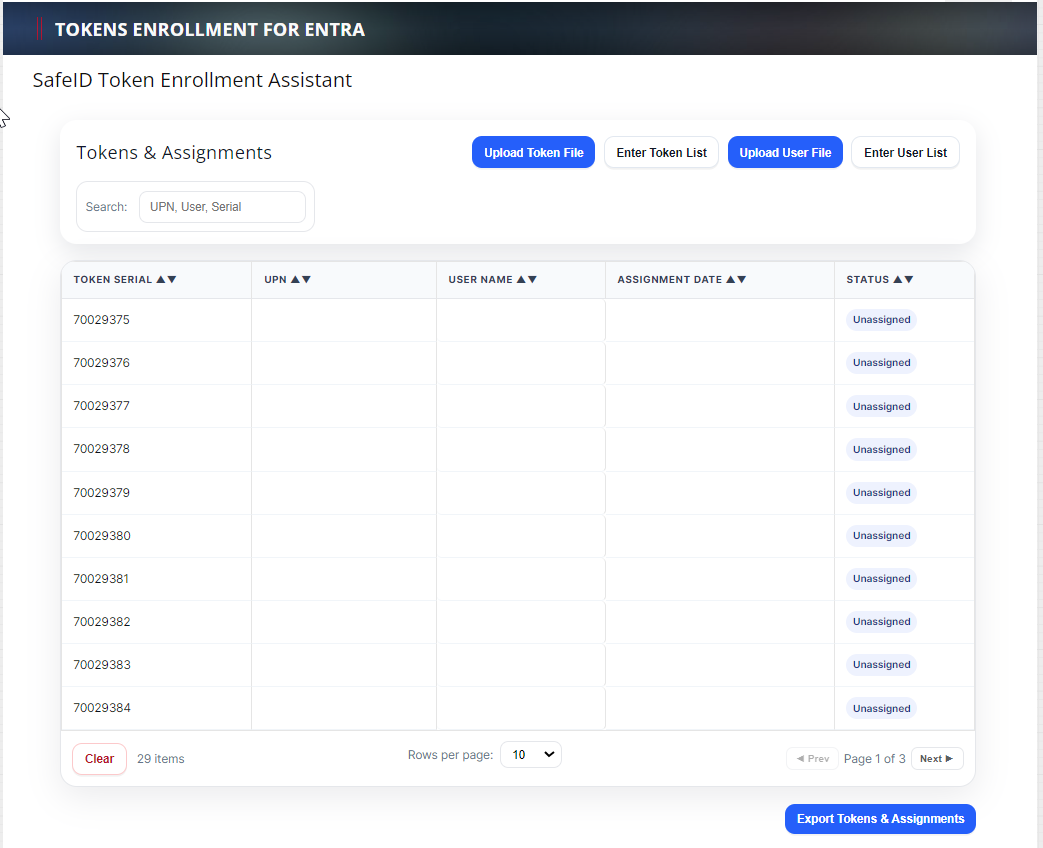
1 - Upload Token File
Click the "Upload Token File" to upload the token secret file that you have received. (If you have not received the seed file of your tokens then click here to make a request, or contacting your reseller or Deepnet Security).
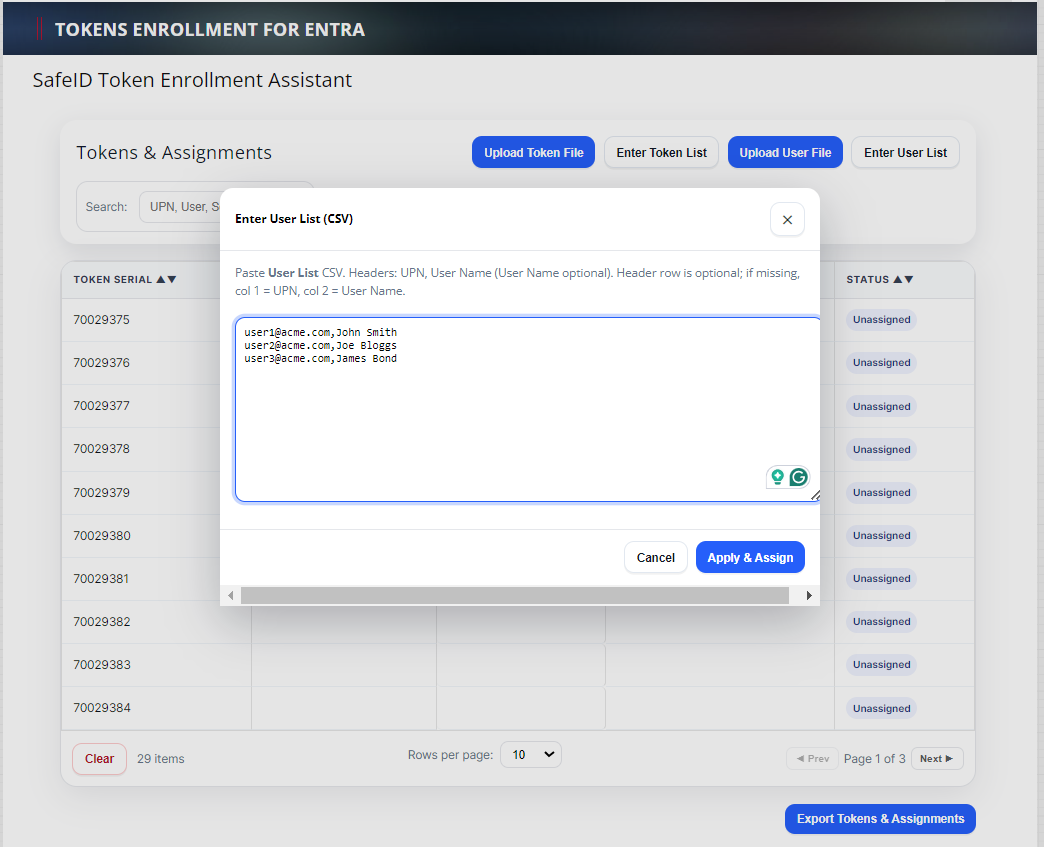
2 - Upload User File
A user file is a simple text file that includes a list of UPNs (one UPN per line). Below is an example:
user1@acme.com
user2@acme.com
user3@acme.com
Optionally, you can also include user names in the file
user1@acme.com,John Smith
user2@acme.com,Joe Bloggs
user3@acme.com,James Bond
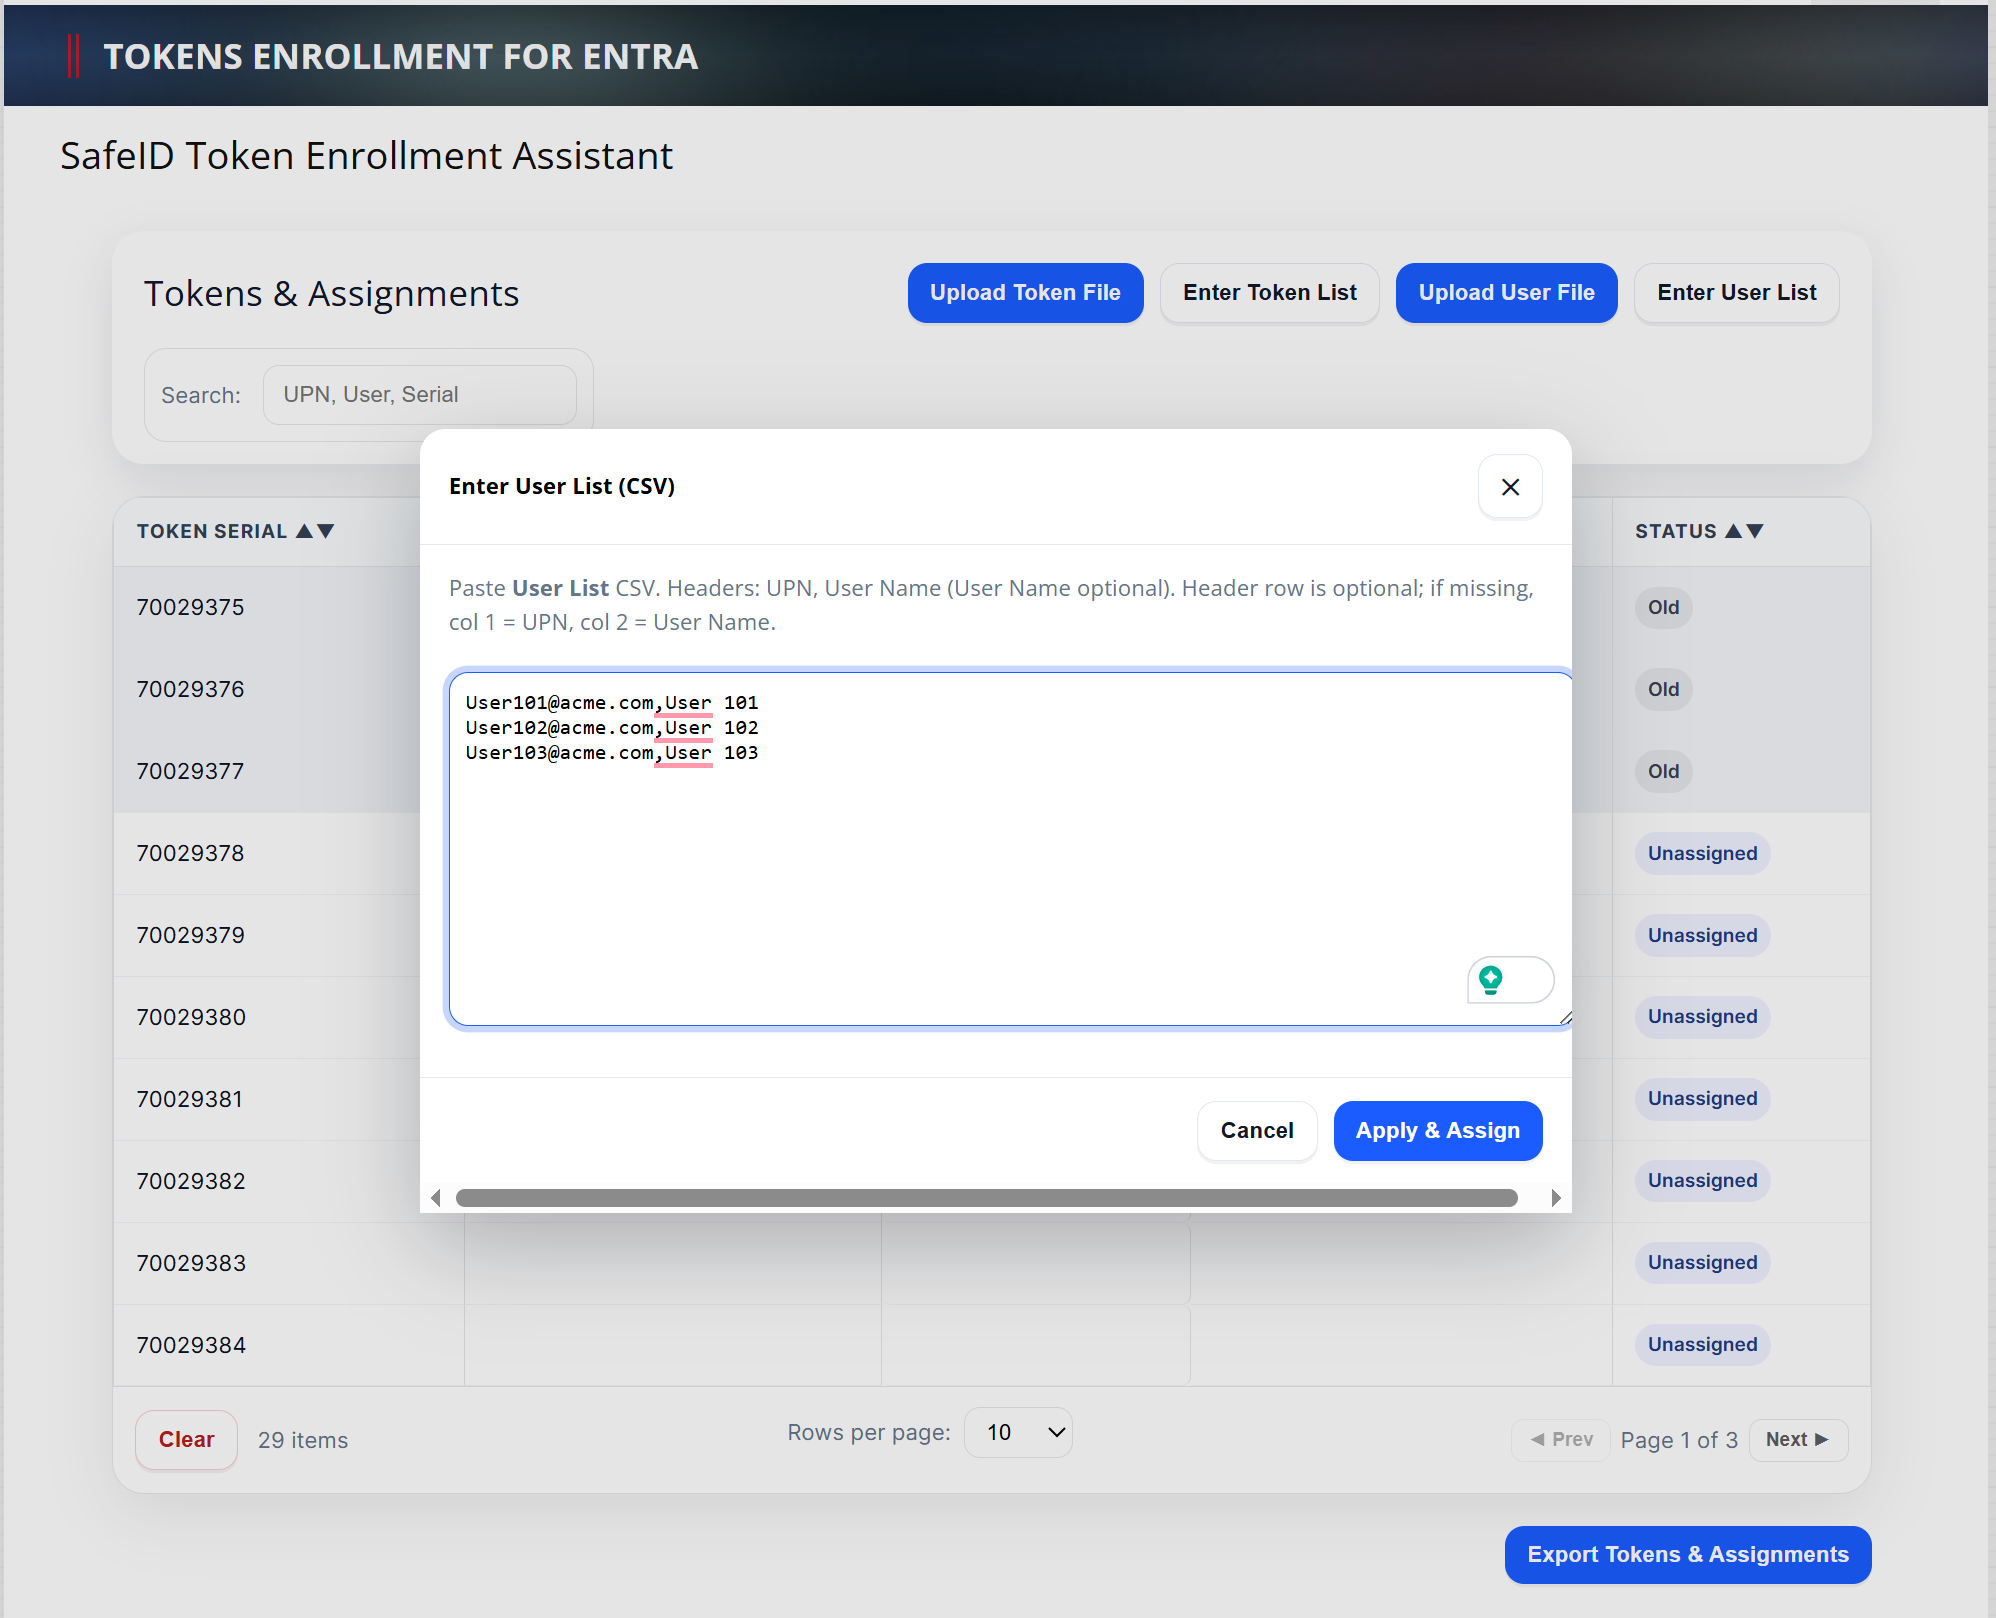
Click the "Upload User File" to upload your user file. Or, you can click "Enter User List" to enter the list of users
Click "Apply & Assign"
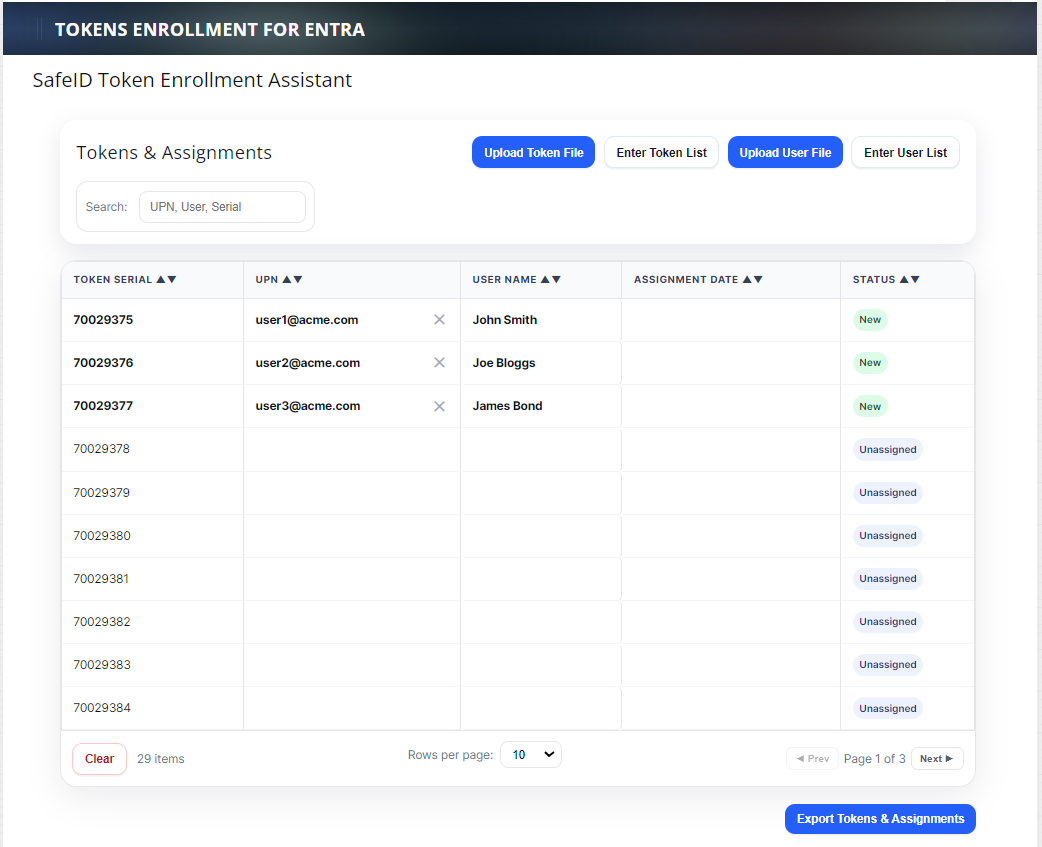
Tokens will then be automatically assigned to users.
You can re-assign a token to a different user by dragging the UPN and dropping it to a different UPN.
You can also delete a token assignment by clicking the delete icon (x) to the right of the UPN.
You can also edit the UPN and User Name if you need to change them.
3 - Export Token Assignment Files
Using this tool, you do not have to assign all tokens. In other words, you can leave some tokens unassigned.
Once you have completed token assignments, click "Export Tokens & Assignments" to export the token assignment file.
This tool will export only tokens that have been assigned. Two files will be exported and saved to your local PC.
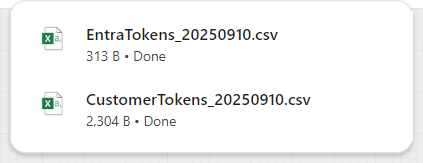
The "EntraTokens_YYYYMMDD.csv" is the token assignment file to be uploaded into Entra ID
The "CustomerTokens_YYYYMMDD.csv" is the token inventory file for you to keep and to use in the future if you need to add more assignments or make changes to the assignments.
4 - Add or Change Assignments
To add more assignments or change some existing assignments, upload your latest token inventory file (i.e, the "CustomerTokens_YYYYMMDD.csv" file)
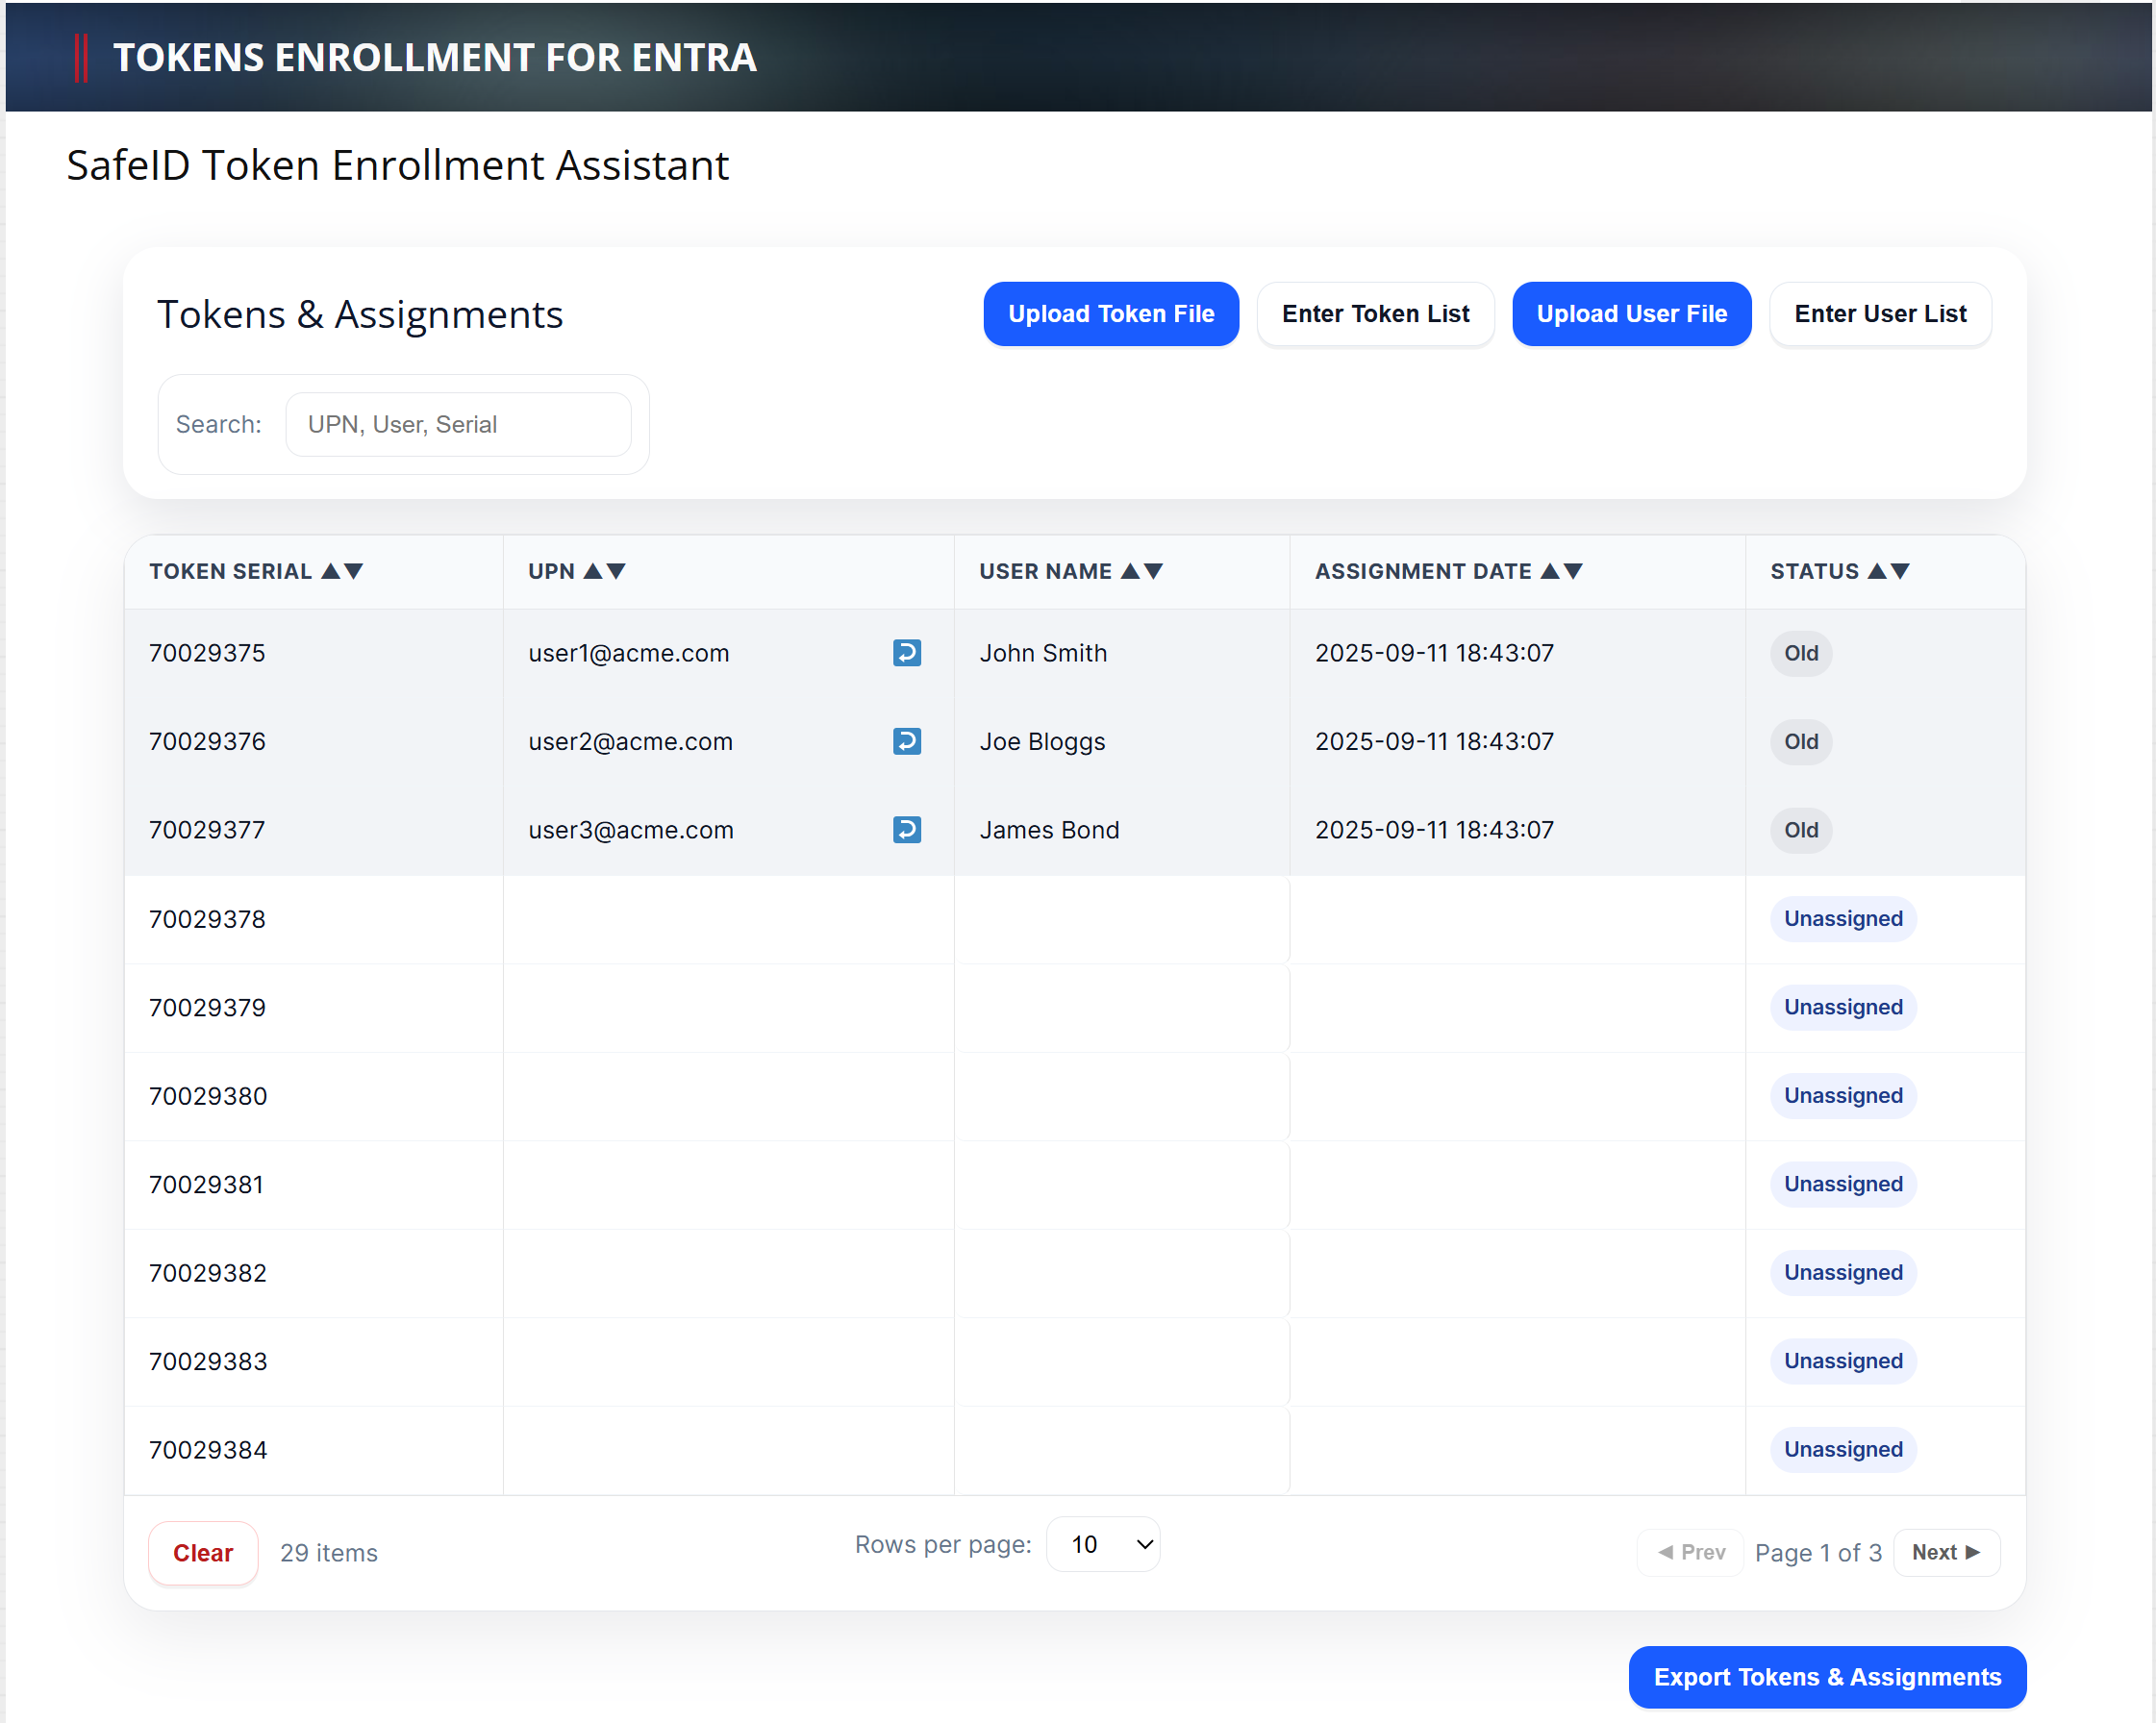
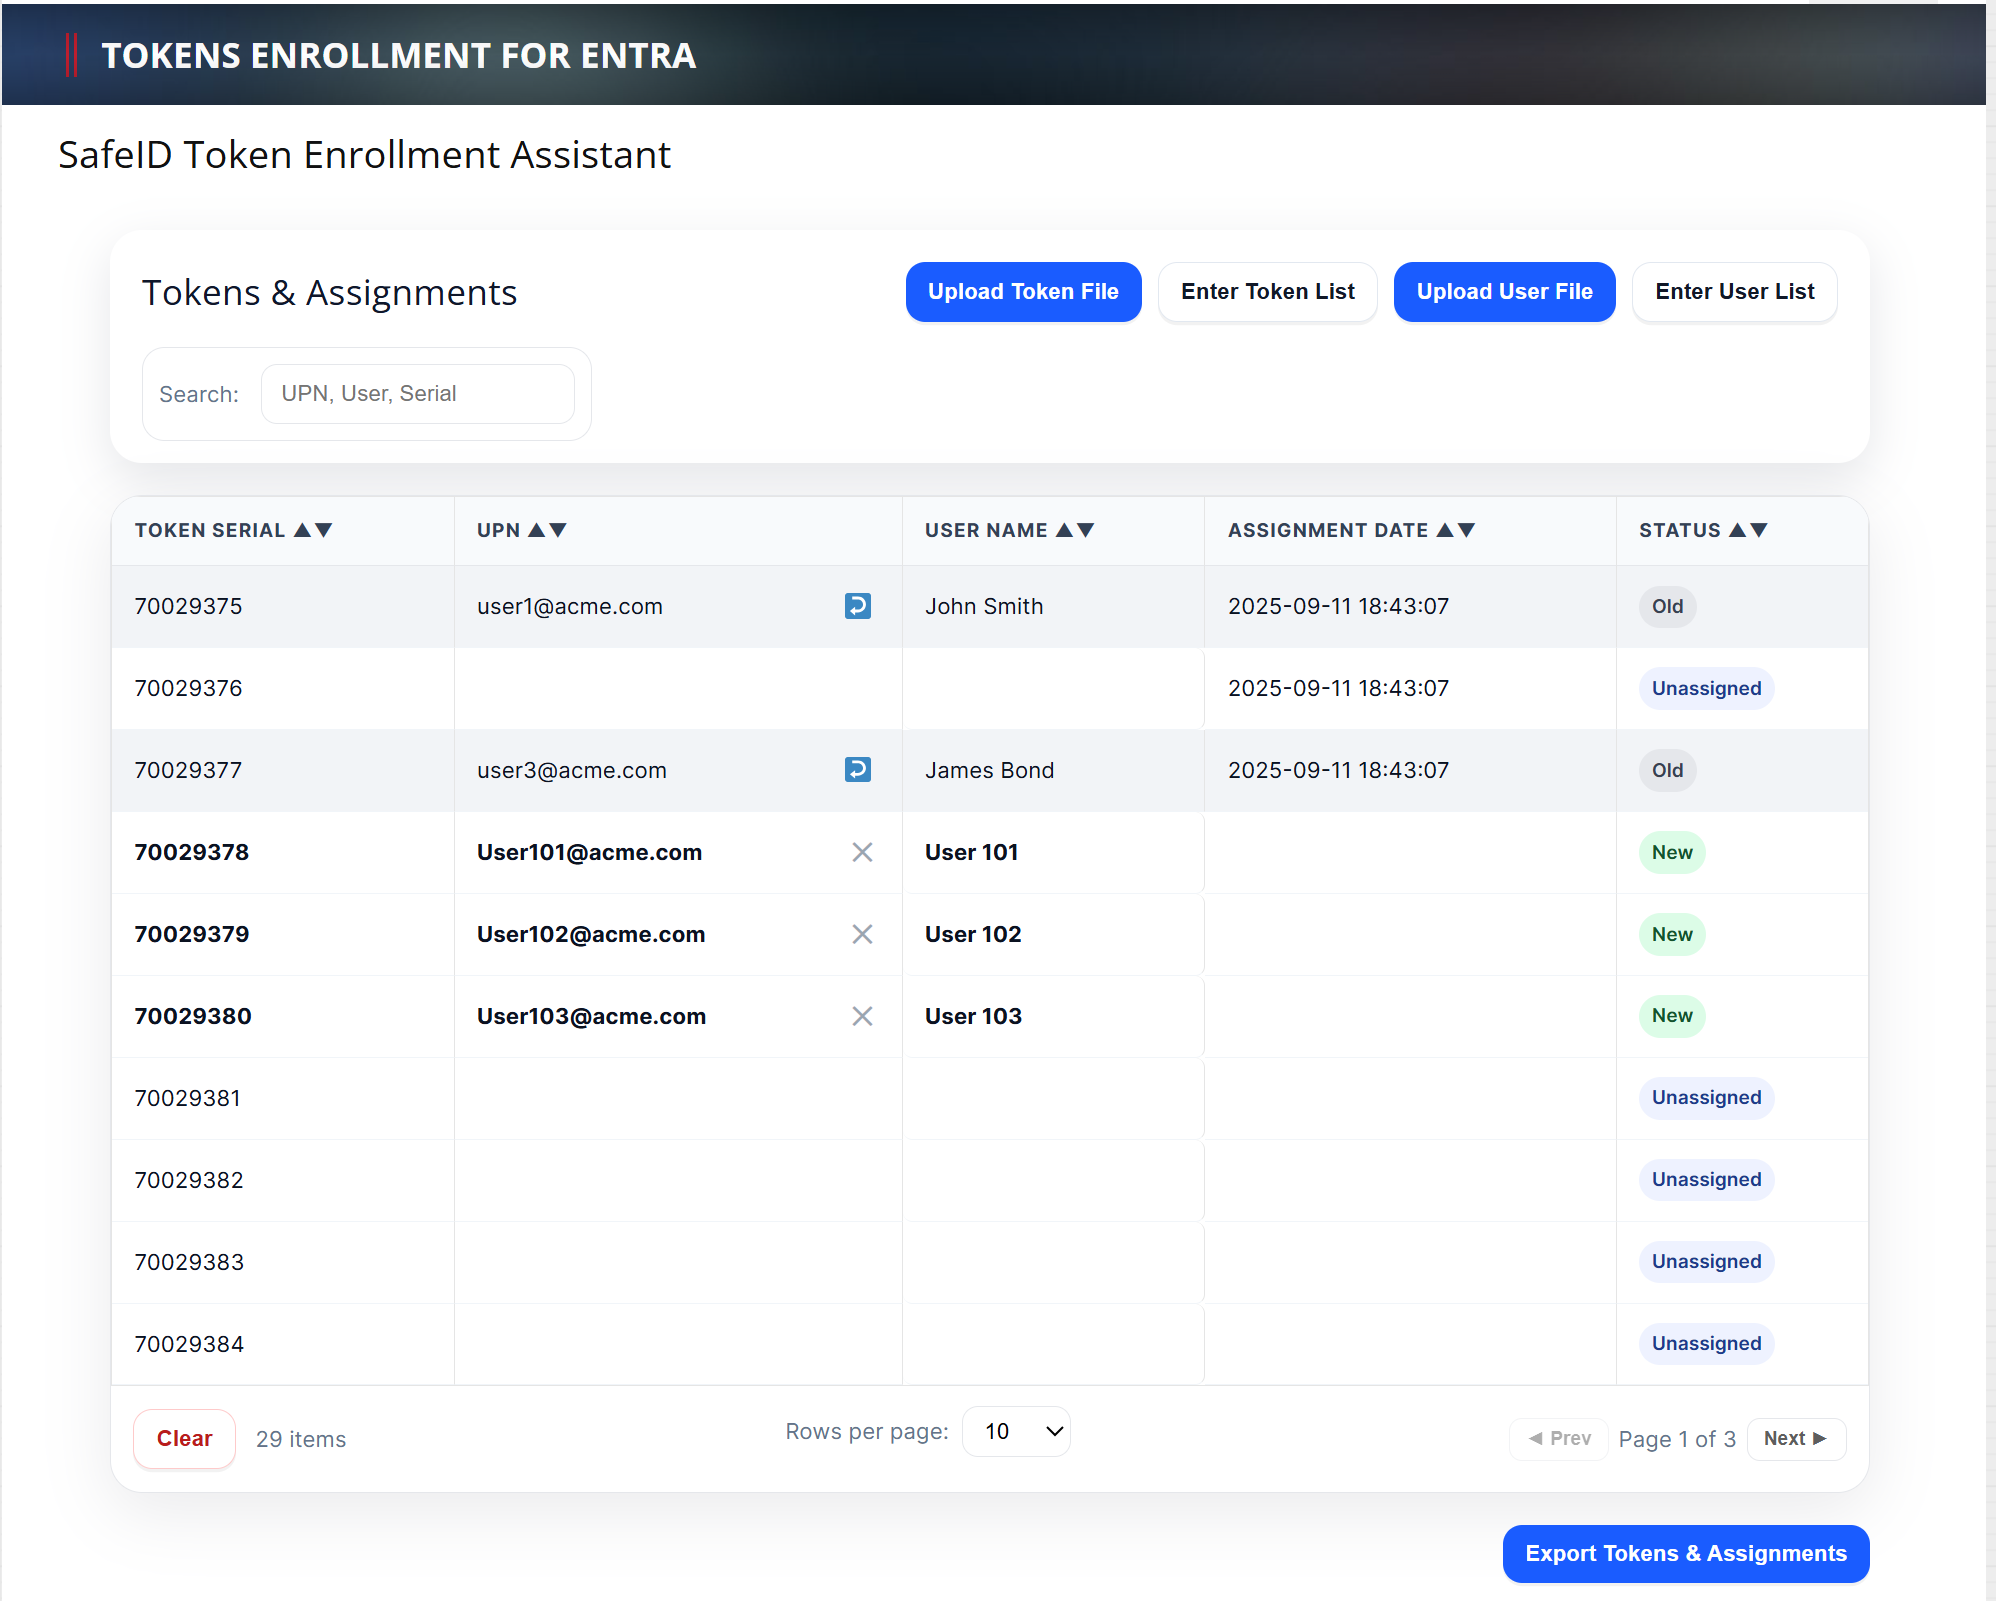
You will see the list of current token assignments marked as "Old" in the Status column.
To add new assignments, simply upload a new user file or enter a new user list
Click "Apply & Assign"
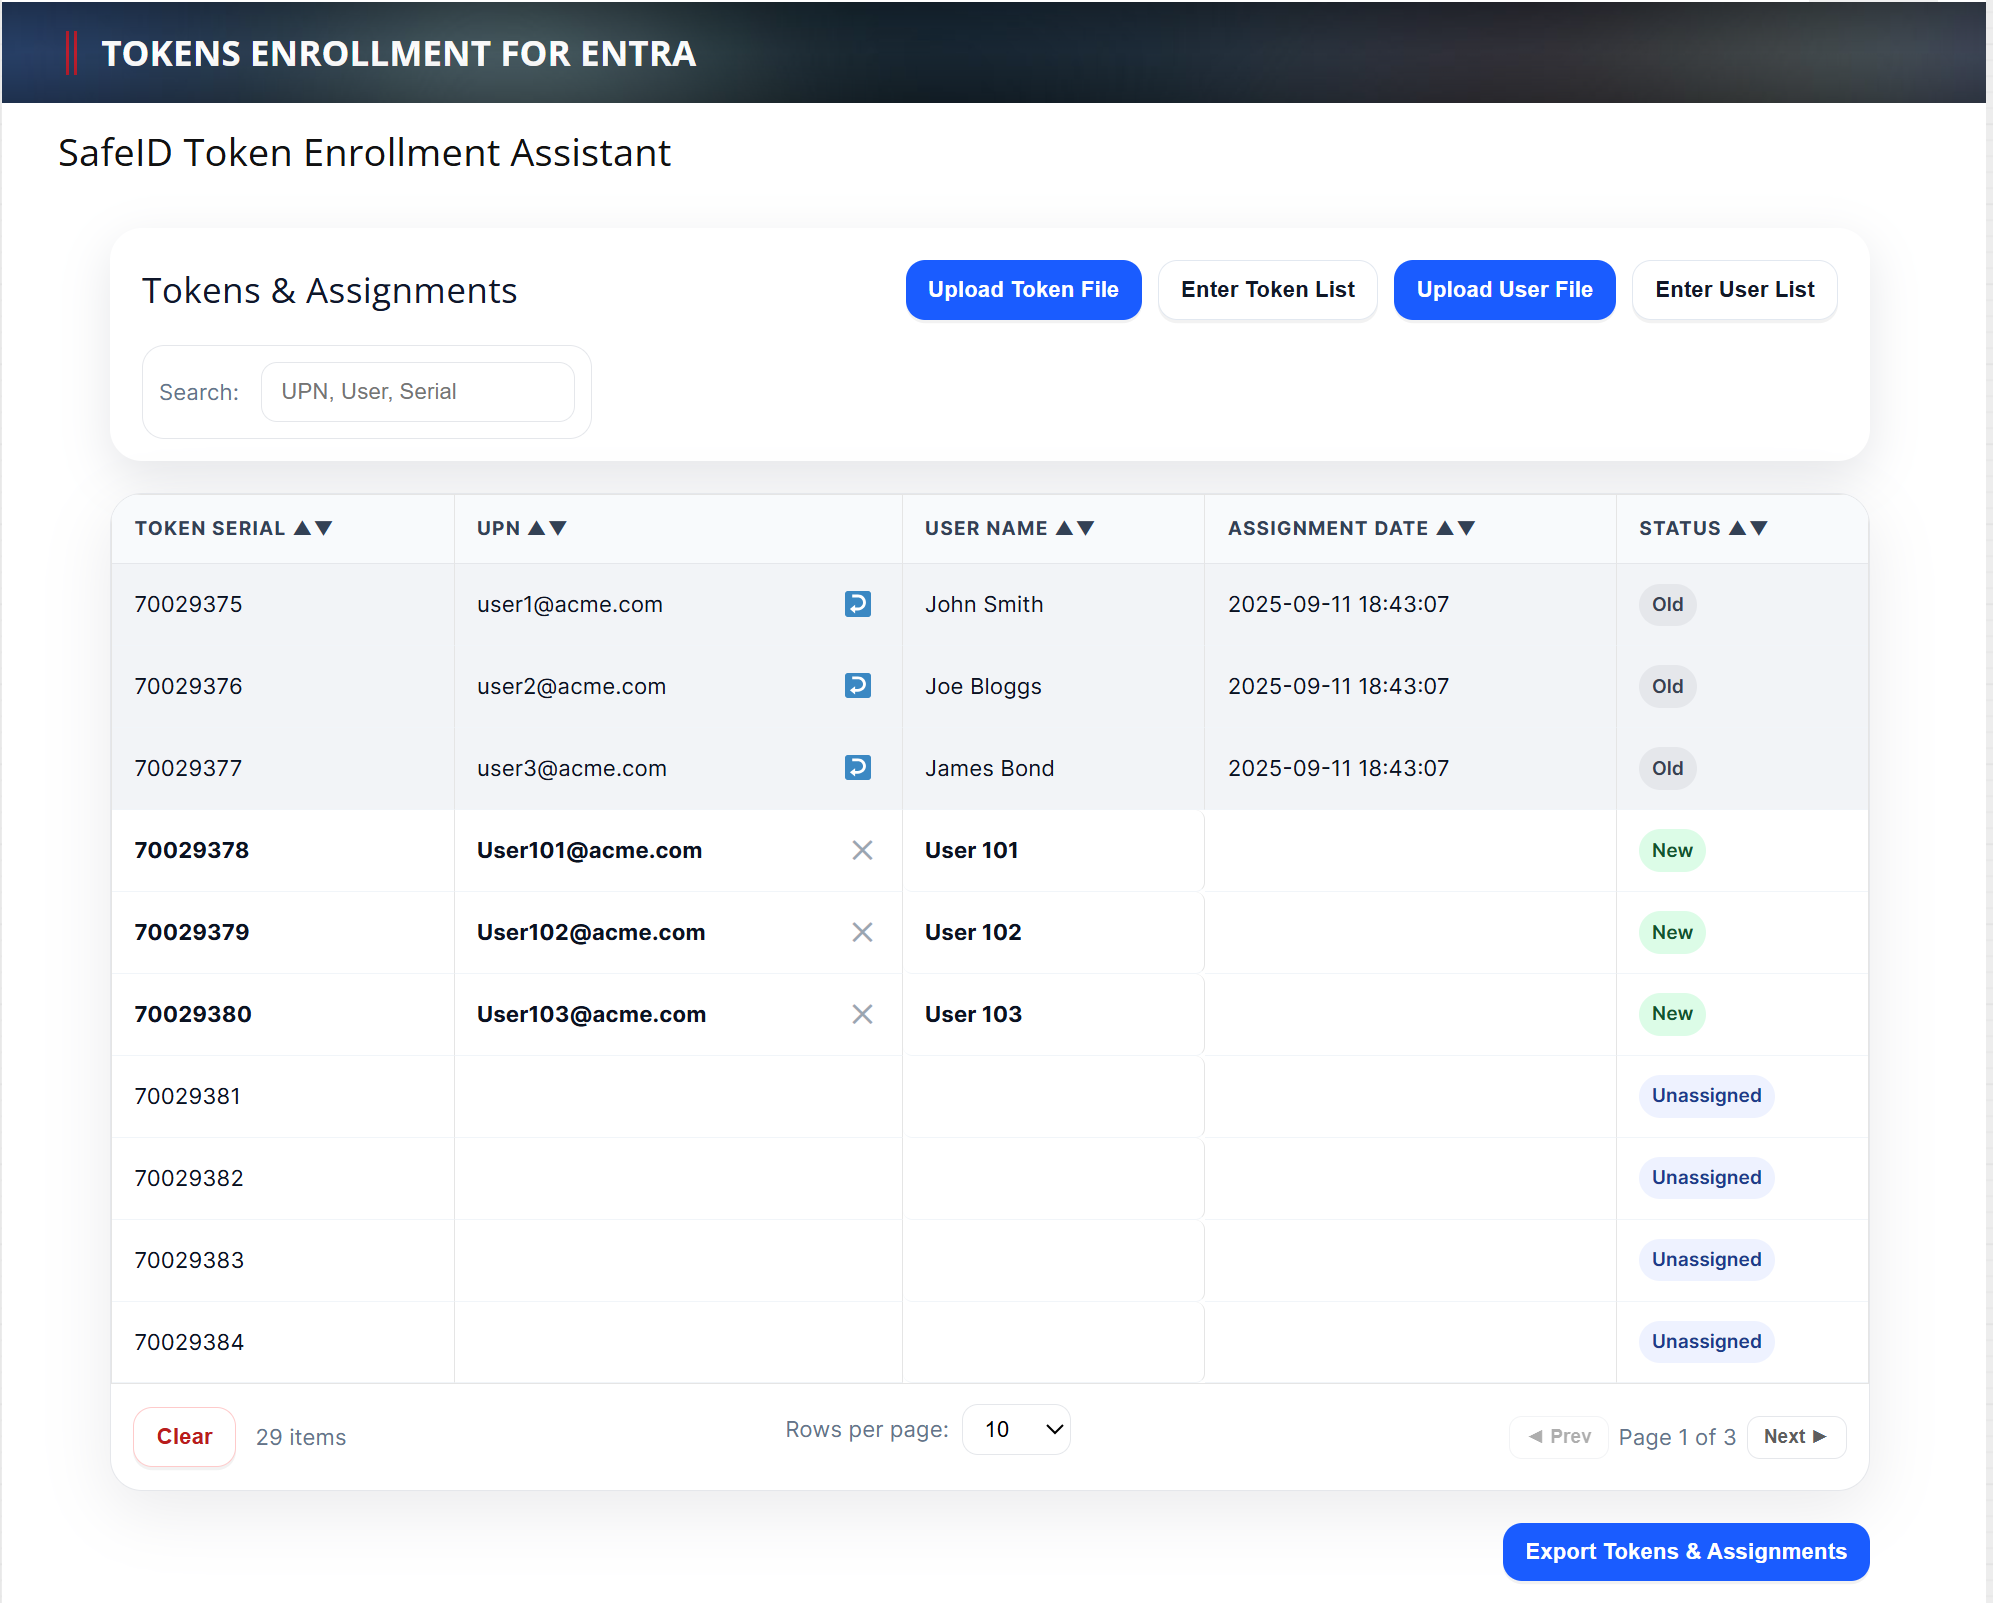
New token assignments are automatically carried out and marked as "New" in the Status column.
If you want to unassign an old token, then click the "Unassign" icon ![]() next to the UPN, e.g. user2@acme.com
next to the UPN, e.g. user2@acme.com