...
| Section |
|---|
|
| Column |
|---|
|
| Panel |
|---|
| borderColor | #9EBEE5 |
|---|
| bgColor | #f0f0f0 |
|---|
| borderWidth | 1px |
|---|
| 
|
|
|
Upload the Idp Certificate file
| Section |
|---|
|
| Column |
|---|
After adding the IDP metadata, the name must be entered. This name will appear on the IDP's button on the login page.
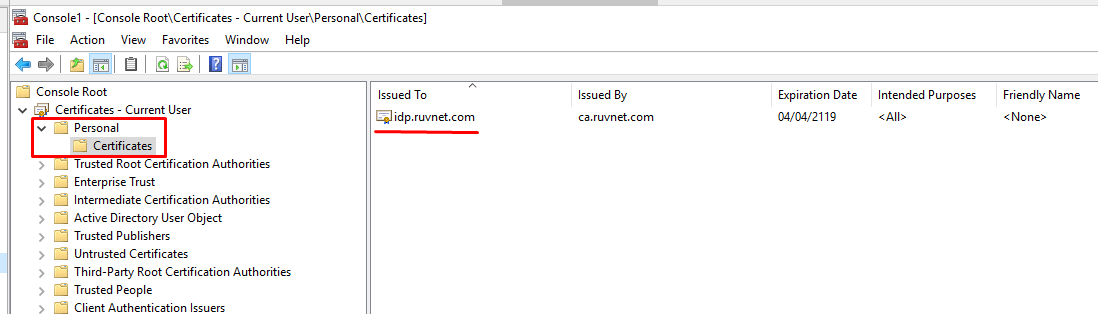
The User matching checkbox on the right is optional. In order to do this, you need to convert the 'crt' file that was downloaded in the previous section to a 'cer' file. To begin, Open the crt file and install the Certificate to your personal folder in Certificate manager |
|
| Section |
|---|
|
| Column |
|---|
Complete the site URL* and administrative contact details. *If you have had to use an alternative HTTP/HTTPS port, please specify the port number in the site URL.
Click the Save Service Provider (SP) metadata link below At the prompt make a note of the URL that will be used to download the SP Metadata, or simply click Yes to copy the link to the clipboard. Once installed the Certificate needs to be exported Export it as a Base-64 encoded X.509 (.CER) |
| Column |
|---|
|
| Panel |
|---|
| borderColor | #9EBEE5 |
|---|
| bgColor | #f0f0f0 |
|---|
| borderWidth | 1px |
|---|
| 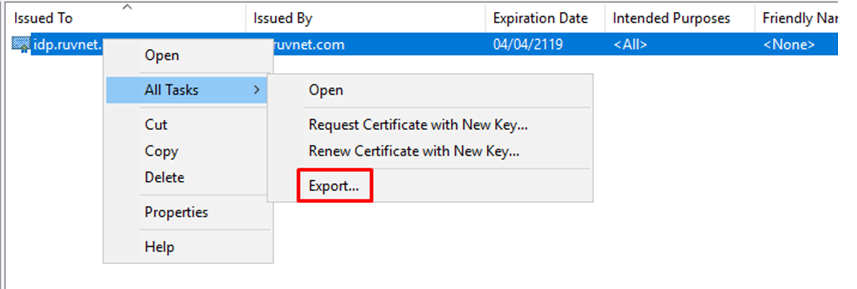 Image Removed Image Removed 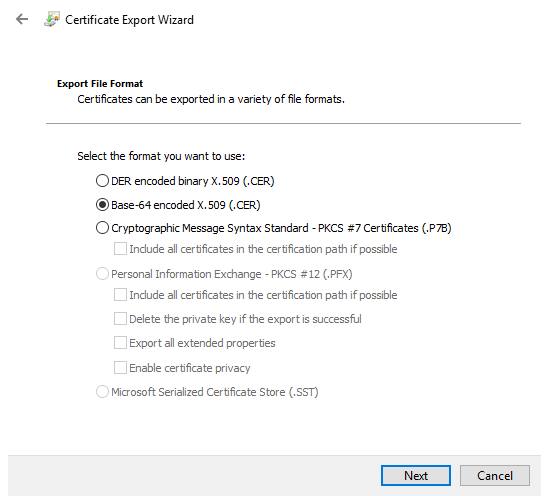 Image Removed Image Removed
|
|
|
...
 Image Added Image Added  Image Added Image Added
|
|
|
| Section |
|---|
|
| Column |
|---|
Upload the exported CER fileClick on Ok to exit out of the Single Sign-On / SAML configuration dialogue box, and click on the Apply Changes button on the top right of the main console. |
| Column |
|---|
|
| Panel |
|---|
| borderColor | #9EBEE5 |
|---|
| bgColor | #f0f0f0 |
|---|
| borderWidth | 1px |
|---|
|  Image Removed Image Removed |  Image Added Image Added
|
|
|
Launch a browser and paste in the SP metadata URL.
The metadata file will automatically download.