1. Create a SAML Service Provider

For Use the Metadata, use the template belowScreenshot above, which shows the configuration.
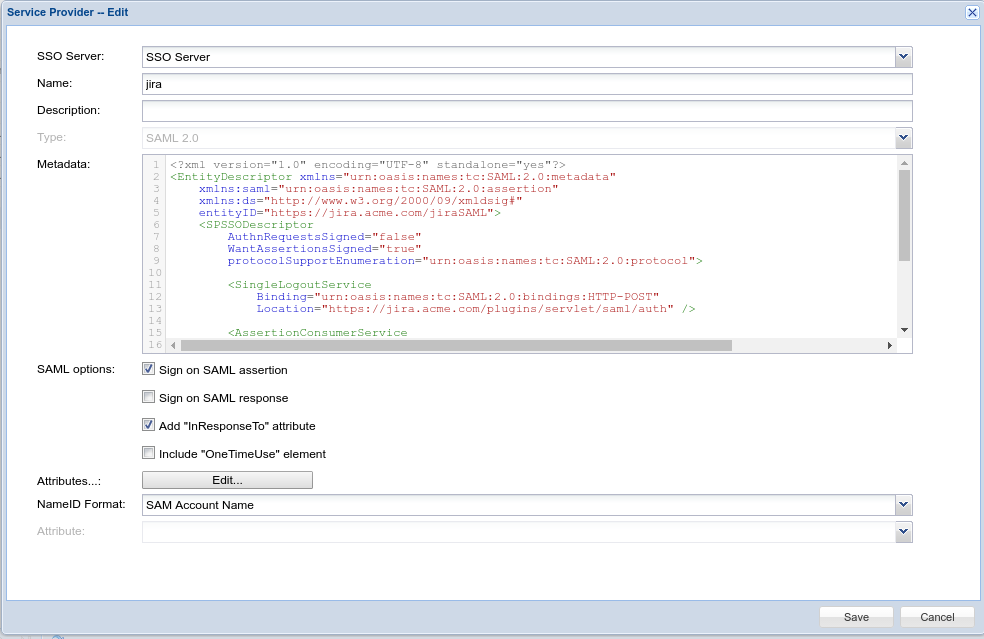
SSO Server: Select "Single Sign-on Server"
Application: Choose the Jira Application created previously.
Name: Enter an appropriate Name for this Service Provider.
Type: Choose "SAML 2.0"
Click the "CREATE METADATA" button. Then use the following Metadata template. Paste it in to the box. Then "SAVE":
| Code Block | ||
|---|---|---|
| ||
<?xml version="1.0" encoding="UTF-8" standalone="yes"?>
<EntityDescriptor xmlns="urn:oasis:names:tc:SAML:2.0:metadata"
    xmlns:saml="urn:oasis:names:tc:SAML:2.0:assertion"
    xmlns:ds="http://www.w3.org/2000/09/xmldsig#"
    entityID="https://jira.acme.com/jiraSAML">
    <SPSSODescriptor
        AuthnRequestsSigned="false"
        WantAssertionsSigned="true"
        protocolSupportEnumeration="urn:oasis:names:tc:SAML:2.0:protocol">

        <SingleLogoutService
            Binding="urn:oasis:names:tc:SAML:2.0:bindings:HTTP-POST"
            Location="https://jira.acme.com/plugins/servlet/saml/auth" />

        <AssertionConsumerService
            Binding="urn:oasis:names:tc:SAML:2.0:bindings:HTTP-POST"
            Location="https://jira.acme.com/plugins/servlet/saml/auth" />
        <AttributeConsumingService index="0" isDefault="true">
            <RequestedAttribute Name="loginName" NameFormat="urn:string" FriendlyName="Login Name" isRequired="true" />
            <RequestedAttribute Name="fullName" NameFormat="urn:string" FriendlyName="Full Name" isRequired="false" />
        </AttributeConsumingService>

    </SPSSODescriptor>
</EntityDescriptor>
|
...
The "Location" of "AssertionConsumerService" should be the same as the SAML Endpoint in the configuration of SAML add-on.

2. Create a logon procedure

...
In DualShield Administration Console, navigate to "Authentication | Logon Procedures"
Click the "+ CREATE" button, to setup a new Logon Procedure
Enter an appropriate "Name", plus set the 'Type' as "Web SSO":
 as the Type
3. Create
...
Logon Steps
Click the context "..." menu of the "JIRA" logon procedure and on the new Logon Procedure, then select "Logon Steps" from the menu

Add the necessary logon steps
4. Create an application

.
On the right, click the "+ ADD" button to add a new authentication method. Repeat for each Step.
For example, for this Web SSO Application, this could be "Static Password" (AD Password) and "One-Time Password":

4. Create the Application
Navigate to "Authentication | Applications"
Click the "+ CREATE" button
Enter an appropriate "Name" for this new Application
Select the internal "Realm"
Select the Logon Procedure created previously.
 Select the login procedure created in the previous step
5. Publish the application to SSO Server
Click the context "..." menu of the "JIRA" new Jira application, and then select "Agents" from the menu

Select "SSO Server" from the list of agents.
From the Agents List, select "Single Sign-on Server". Then "SAVE" button:

Finally, select the context "..." menu, then "Self Test", to confirm the Application is fully provisioned:
