If you want to upgrade a DualShield RADIUS server from version 6.5 or earlier to version 6.9 or later, then you need to follow this instruction.
From version 6.9 or later, you cannot directly upgrade an old version (version 6.5 or earlier) to the latest version (version 6.9 or later). You will have to uninstall the existing RADIUS server first, then install a new RADIUS server. This process will not require you to make any changes to the configurations and settings in your DualShield system, as long as the name of the new RADIUS server is the same as the old RADIUS server.
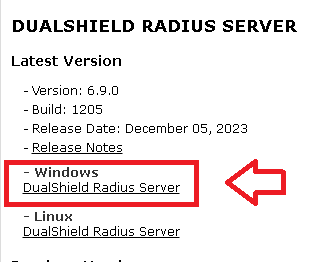
Download the Radius Server Installer
Upgrades and new installations are now performed using the radius installation pack (named as "setup-dual-radius-xxx-signed") which is downloaded from the Deepnet Support portal;
Record the name of the existing Radius server
Log into the DualShield Admin Console, and navigate to "Radius | Radius Server"
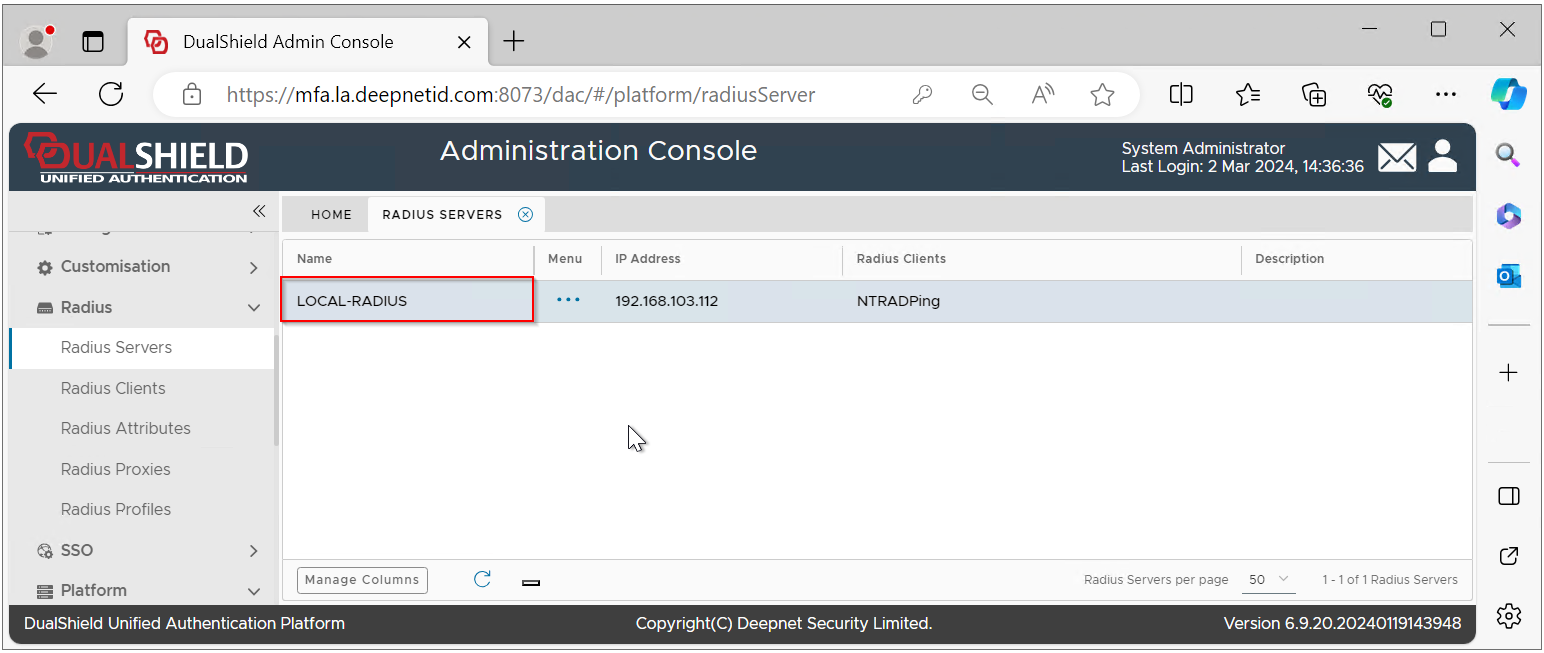
Take note of the name of the RADIUS server to be upgraded., e.g. "LOCAL-RADIUS"
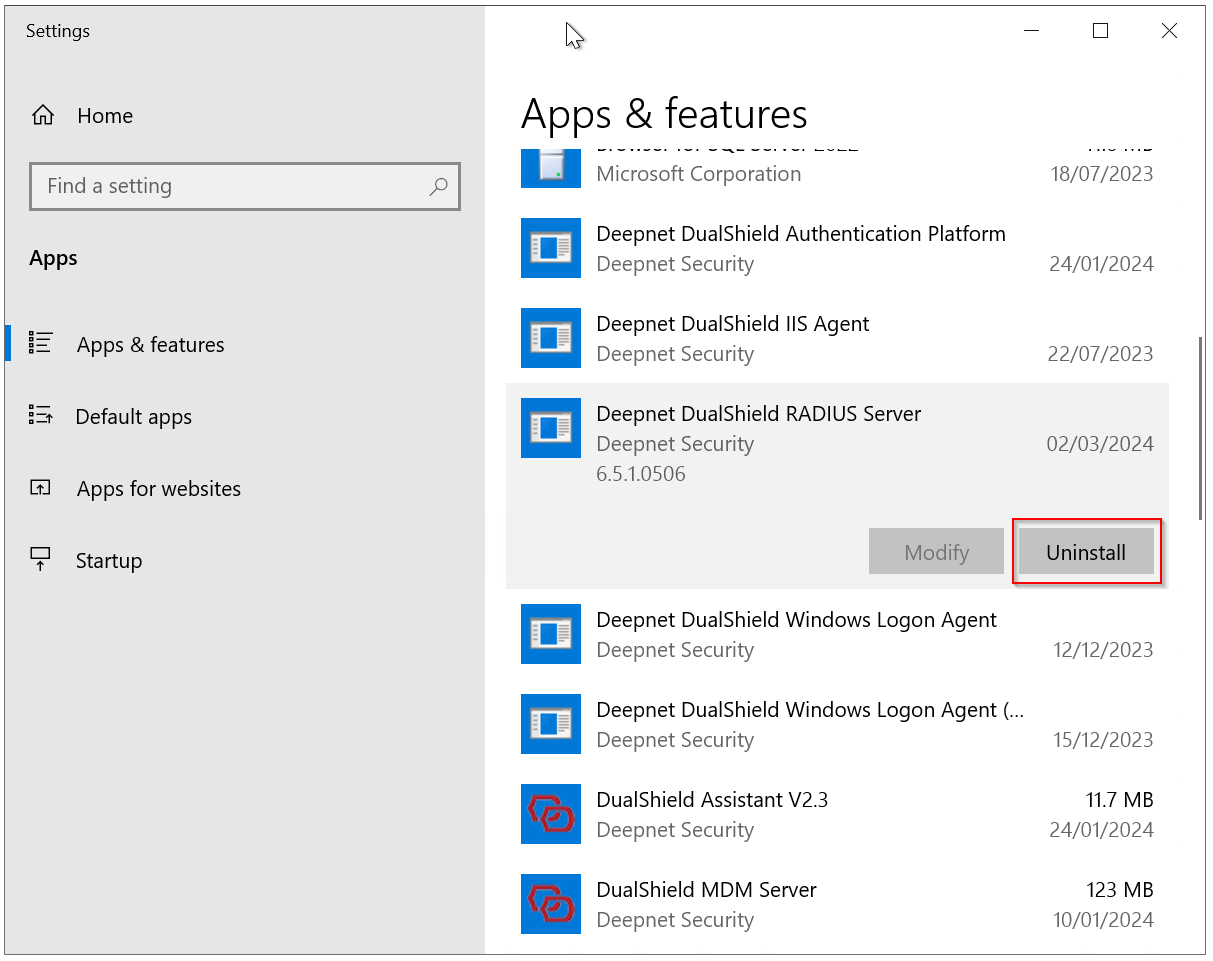
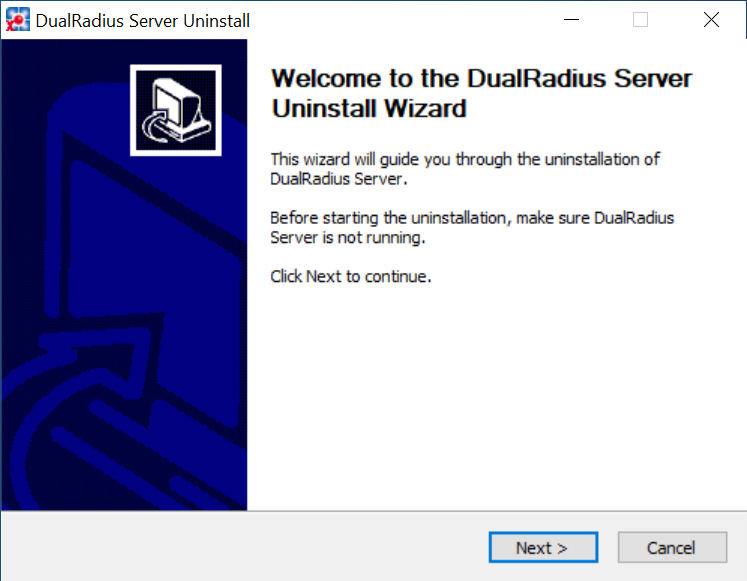
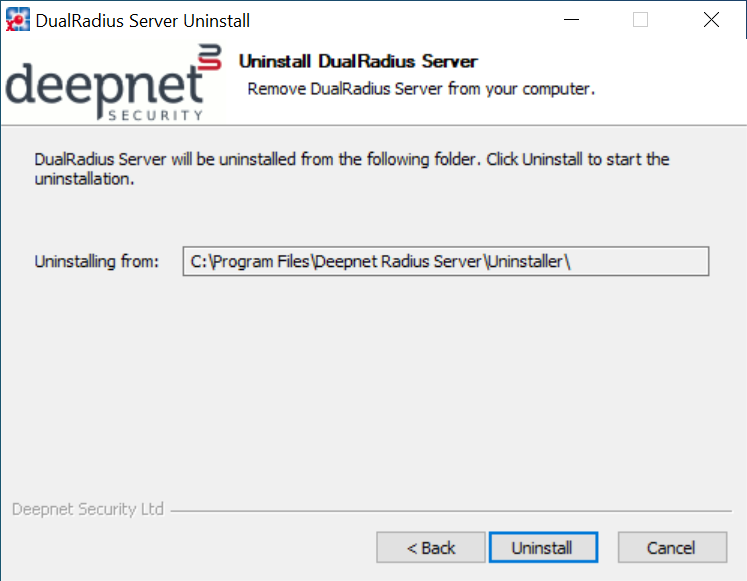
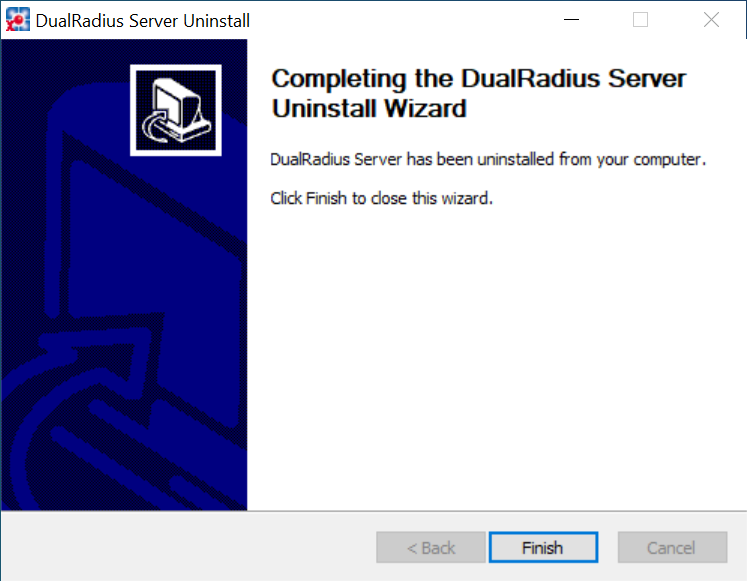
Uninstall the existing instance
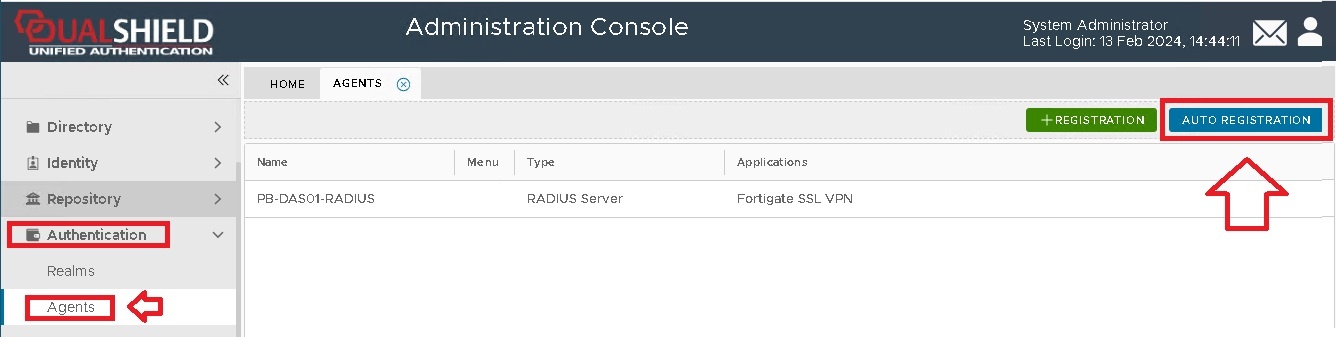
Enable Auto Registration
Both for Radius server upgrades, and fresh installations, you will now need to log in to the admin console and enable auto-registration.
For security purposes, the agent registration function is disabled by default. You need to enable the Agent Auto Registration function in your DualShield authentication server.
From the management console, navigate to "Authentication | Agents", then click 
A new window will now open titled "Auto Registration", ensure the "Enabled" option is selected, then click ;
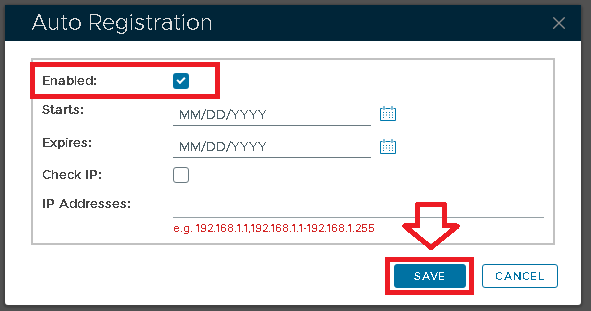
Tick the "Enabled" option first, then fill in the Starts and Expires date.
You may want to enable the "Check IP" option for extra security. If this option is enabled, then in the "IP Addresses" field you must enter the IP address of the machine where the authentication agent is being installed.
Click on the  button, and Auto-Registration will now take place during the installation of the RADIUS server.
Install Radius Server
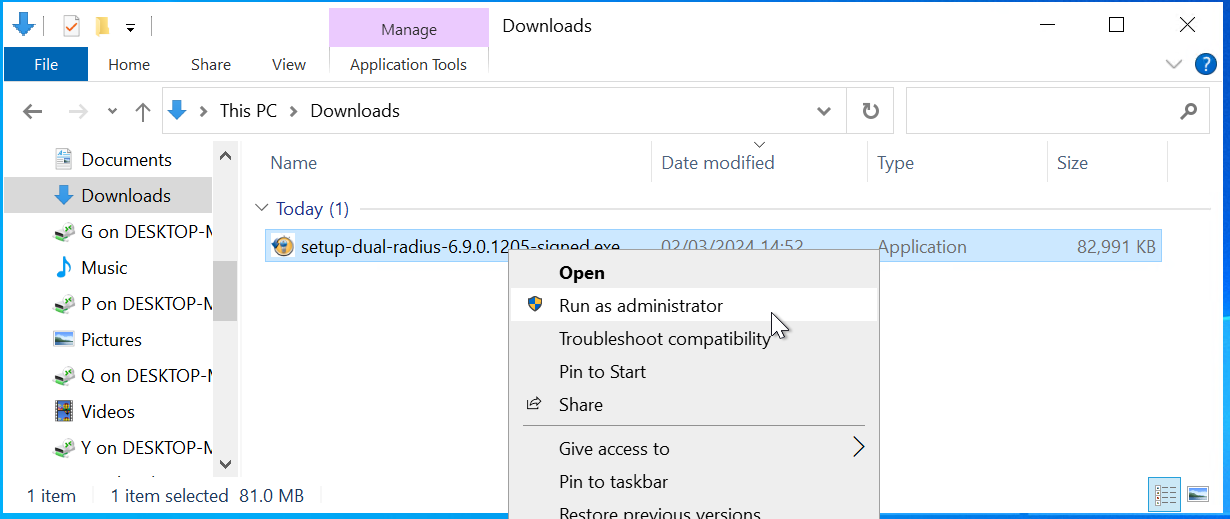
To install the new Radius server run the installer as administrator;
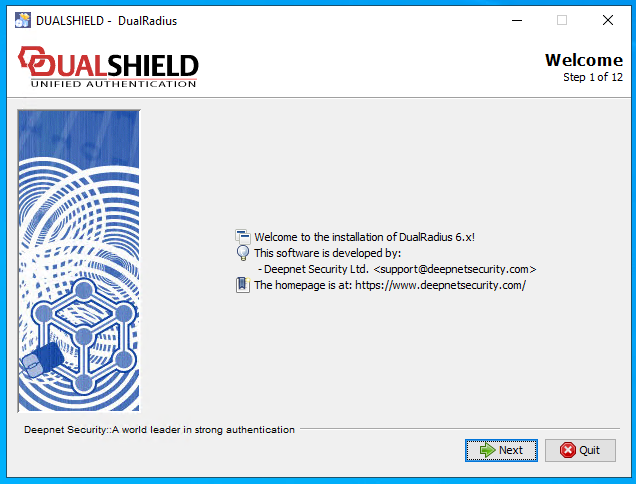
A new window titled "DUALSHIELD - DualRadius" will open welcoming you to the installation of the Radius Server;
Step 1: Welcome
Click on  to take you to the license agreement;
Step 2: Licensing Agreements
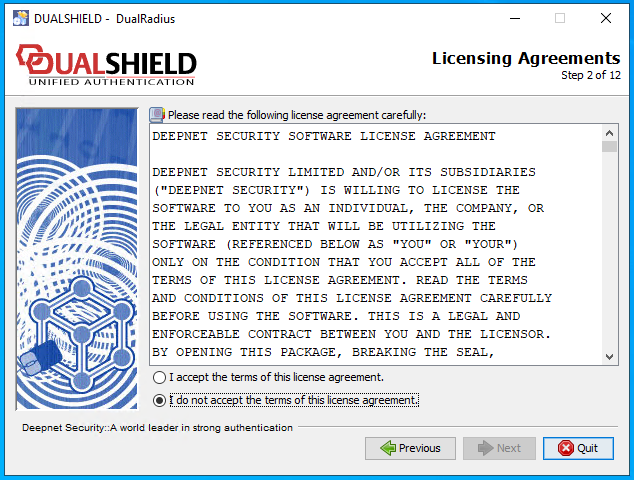
After reading the license terms select "I accept the terms of this license agreement", then click
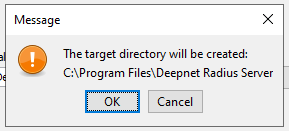
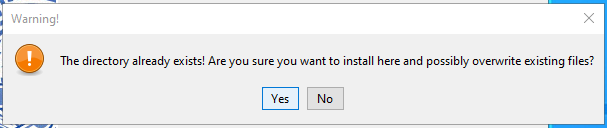
Step 3: Target Path
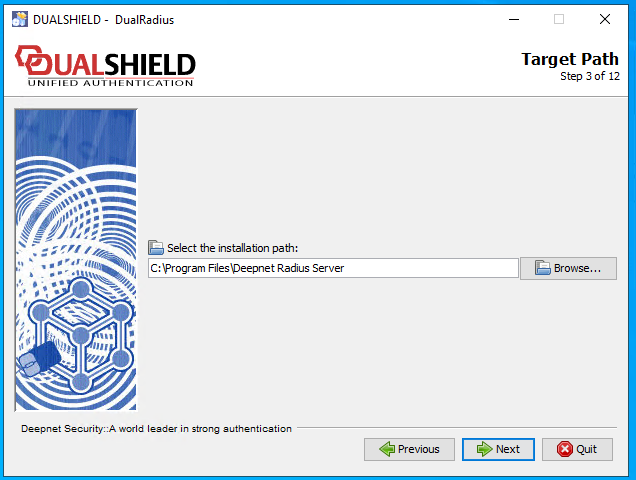
Click to continue installation.
If the directory does not yet exist you will be asked if you want to create it;
otherwise you will be asked if you want to overwrite the existing files in the existing directory;
Step 4: Server Selection
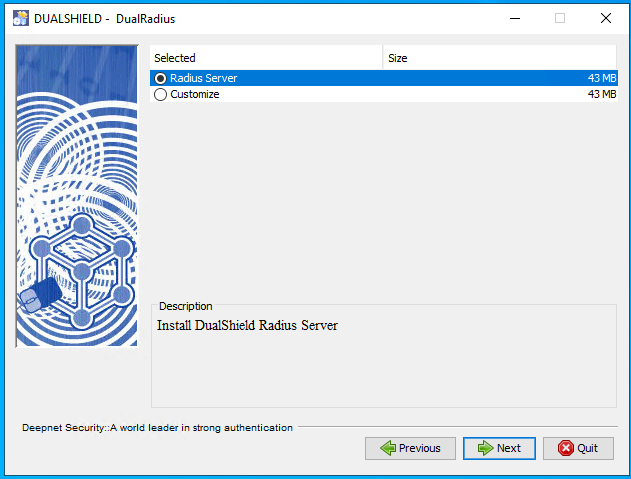
Click to continue installation;
Step 6: Select Installation Packages
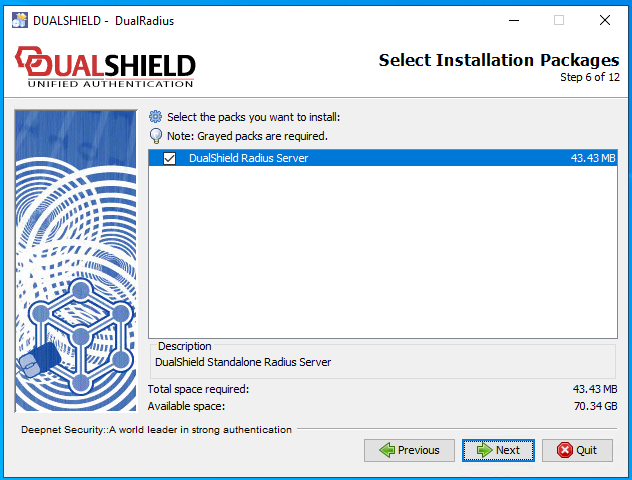
This page allows selection of which package options are to be installed.
Click to continue installation;
Step 7: User Data
You will now be shown a page that allows you to change port numbers used by the RADIUS server:
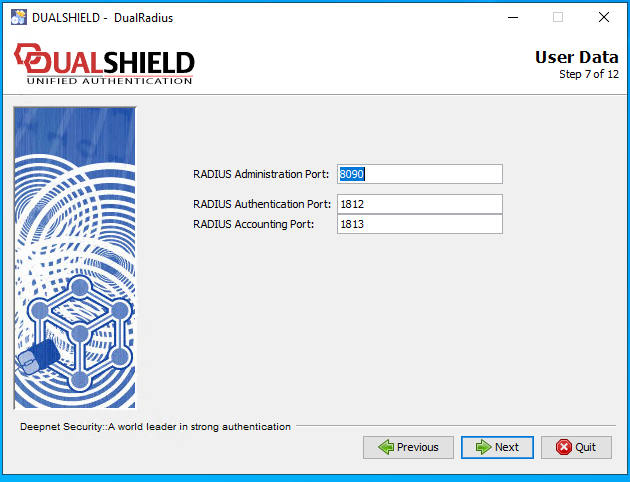
Administration Port:
The Administration port is the port accessed by the DualShield Authentication Server to manage the DualShield Radius Server.
Authentication Port:
The Authentication Port is the standard Radius authentication port.
Accounting Port:
The Accounting Port is the standard Radius accounting port.
You will not normally need to adjust these default radius port settings so click for agent registration;
Step 8: RADIUS Agent Registration
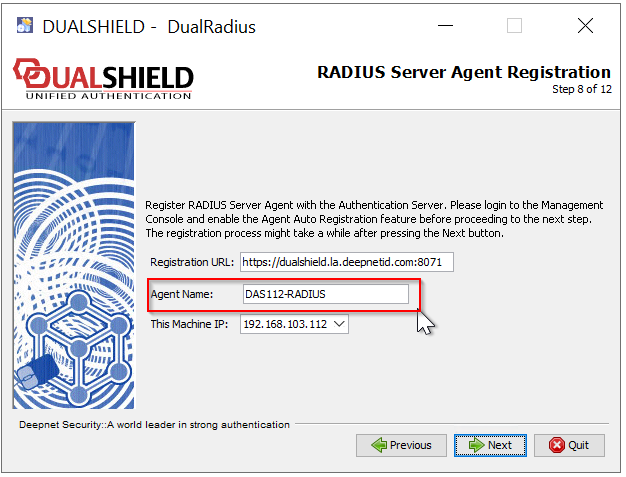
Change the Registration URL to the URL of your DualShield server. (Please note that the protocol of the connection to the DualShield server must be set to HTTPS. The default port of DualShield server is 8071)
IMPORTANT! If the Agent Name is not the same as the old name, then change it to the old name. In this example, the old name is "LOCAL_RADIUS"

Click to continue
If you are upgrading from a previous version of the Radiius server, then a popup such as the one below will be shown;
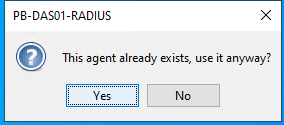
Click  to use the DualShield agent that was used with the previous version of the Radius server.
Step 9: Summary Configuration Data
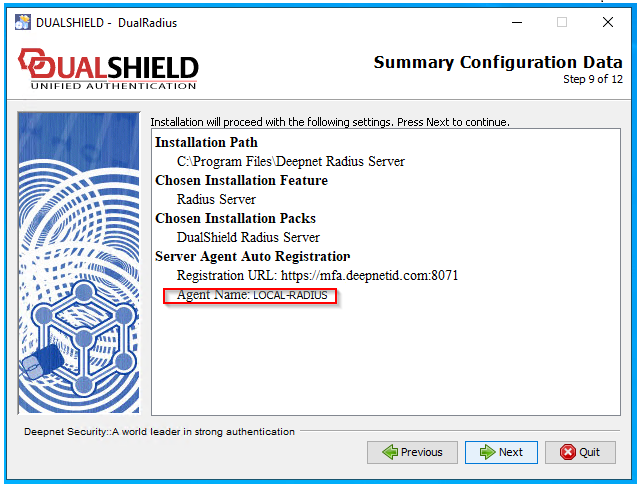
Click to continue installation;
Step 10: Installation
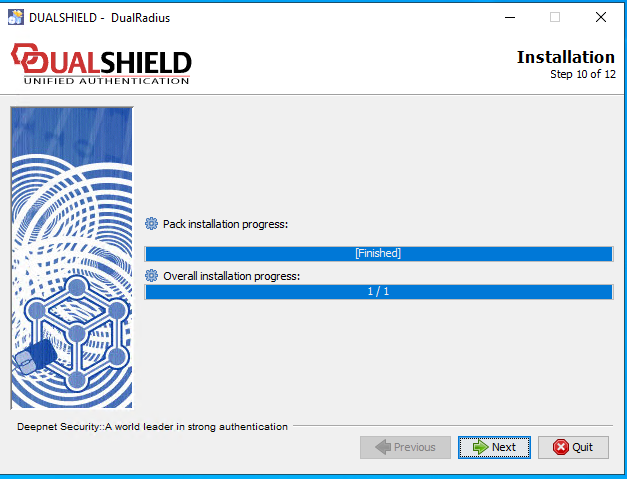
Click to continue installation;
Step 11: Perform External Processes
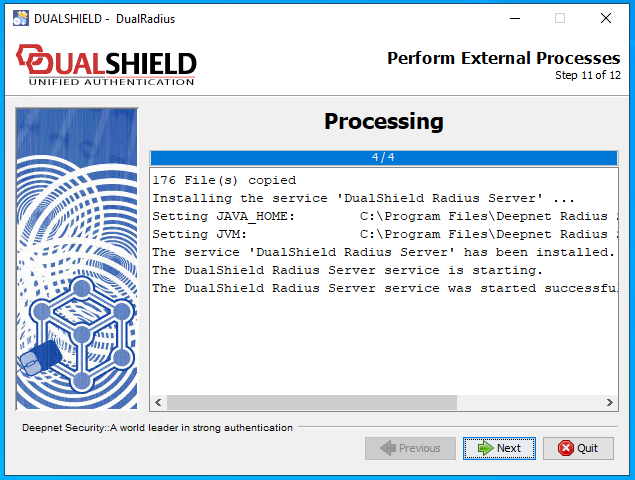
Click to continue installation;
Step 12: Installation Finished
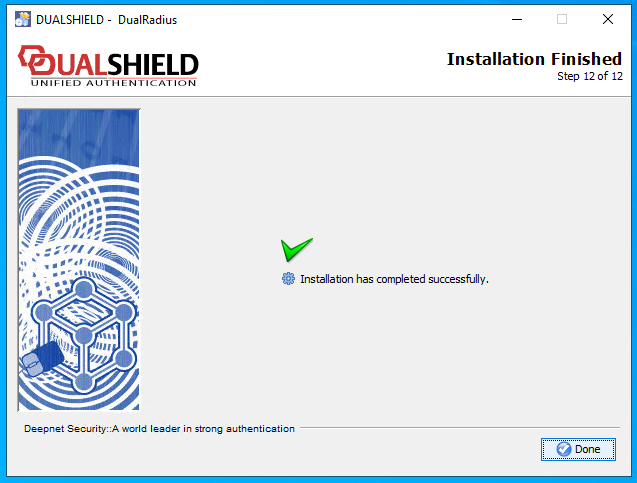
Click  , and installation will be complete.
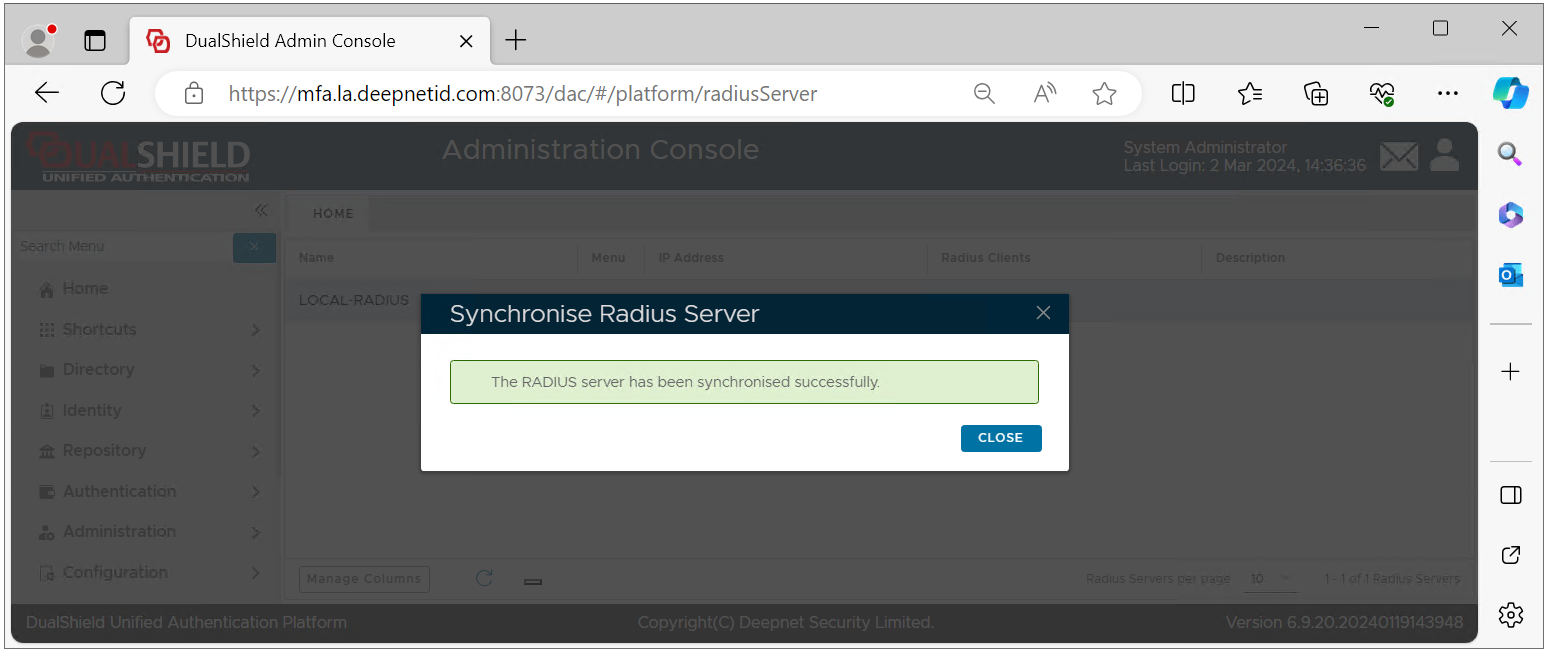
Synchronise Radius Server
After waiting a couple of minutes for the DualRadius service to start, Log in to the admin console, then navigate to "Radius | Radius Servers".
Left click on the context menu of your newly installed radius server, the select the option "Synchronise";
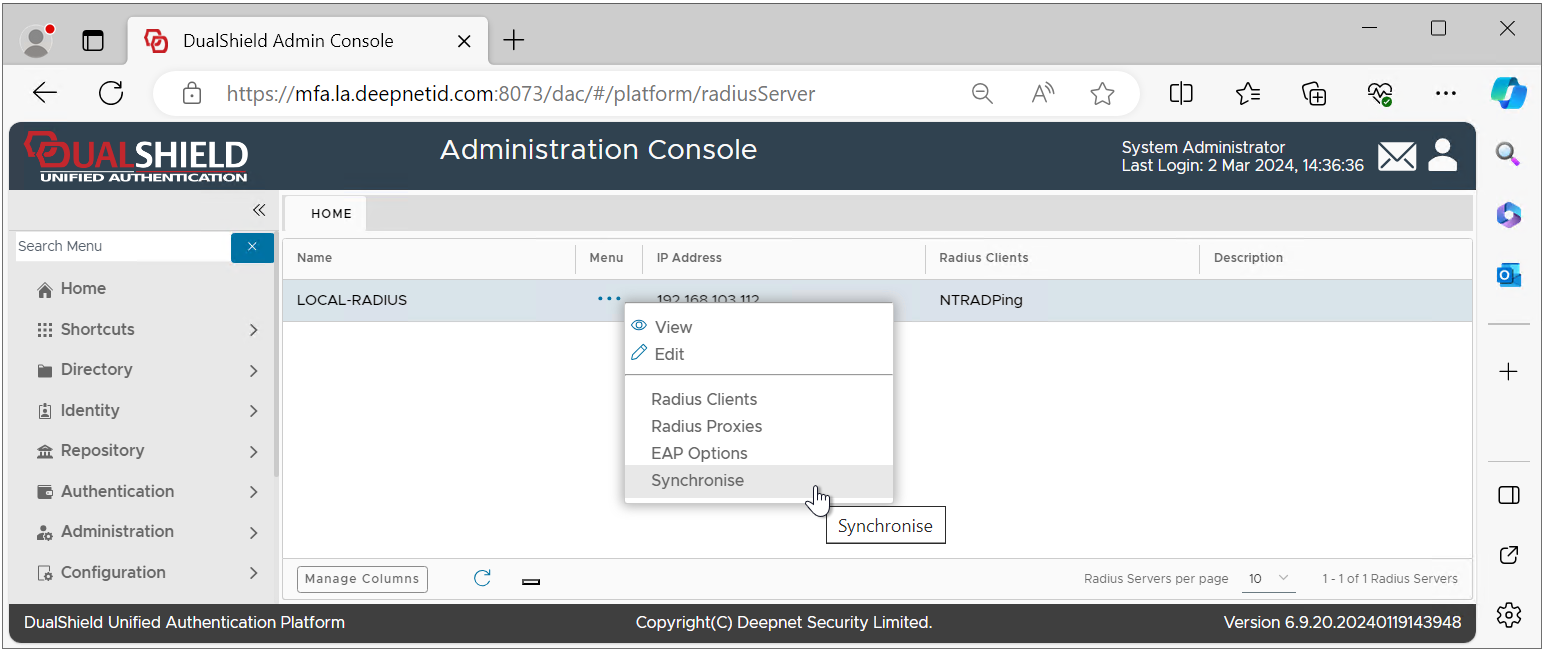
You should now see a confirmation that the Radius server has been synchronised;
Your DualShield RADIUS server has been upgraded successfully.