When a web application is secured by the DualShield IIS Agent with MFA, the agent adds an extra layer of authentication over the web application's form-based authentication. Without Single-Sign-On enabled, users will be first authenticated by the DualShield SSO, then by the web application's original login process that's usually the user's AD credential verification.
You have 2 options:
- Configure DualShield SSO to verify the 2nd factor only, e.g. one-time-password etc, and keep the application's original login process which will verify the user's AD password. In this option. you do not need to enable Single Sign-On.
- Configure DualShield SSO to verify both the 2nd factor and the user's AD password. In this option. you will need to enable Single Sign-On.
From the security point of view, both options have no difference. However, from the user experience point of view, option 2 will deliver a more coherent user experience.
Furthermore, DualShield IIS Agent provides 2 options for implementing Single Sign-On
- Single Sign-On by Auto-Filling
- Single Sign-On by Auto-Post
Between Auto-Filling and Auto-Post options, Auto-Post is preferred as it is easier to set up and quicker in performance. However, some IIS web servers have such restrictions that it is not possible to enable Single Sign-On by Auto-Post
Single Sign-On by Auto-Post
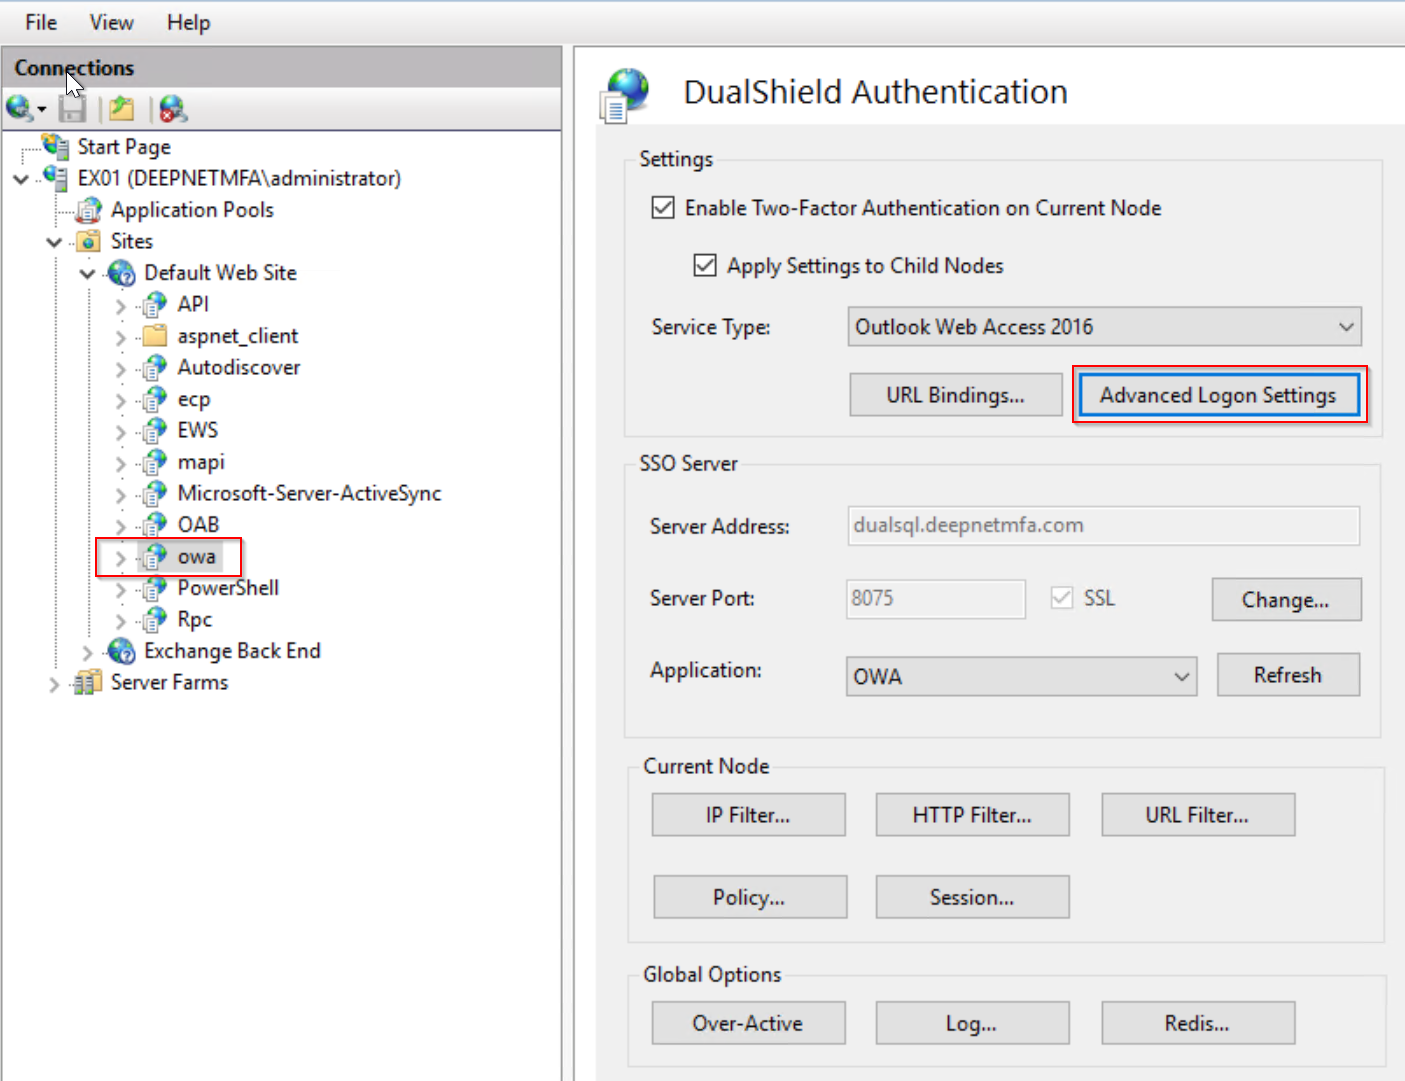
Click the "Advanced Logon Settings" button.

To enable Single Sign-On by Auto-Post, tick the option "Auto Post"
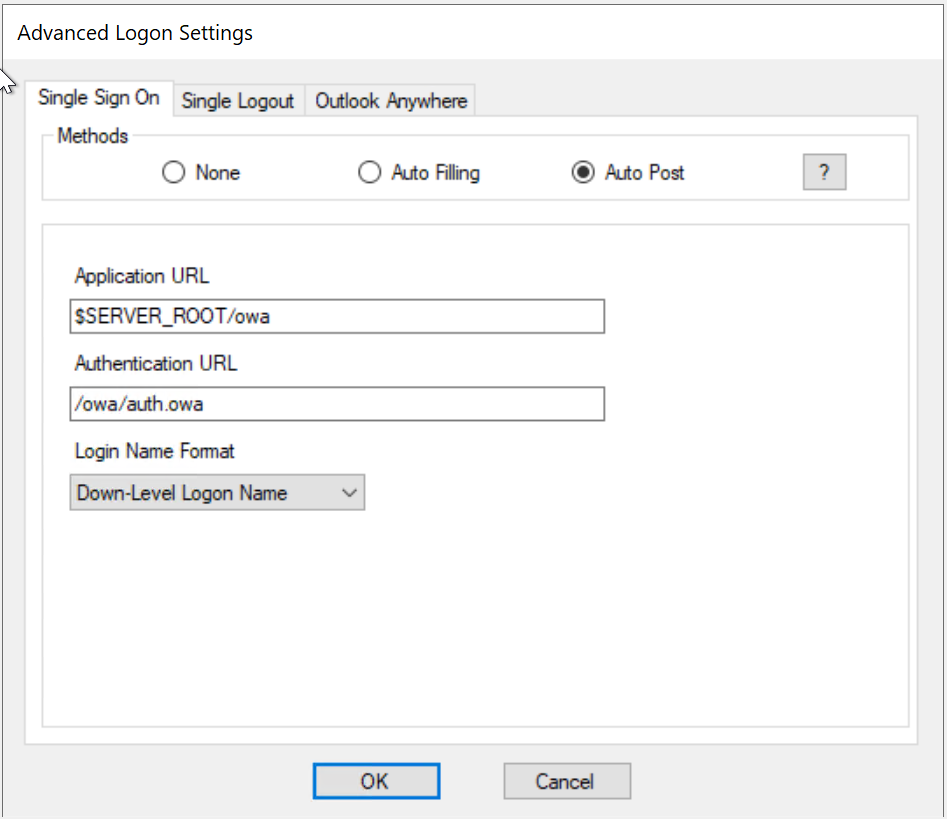
Set the following options accordingly

| Option | Remarks |
|---|---|
Enable Desktop SSO | If the web application is to be accessed by users from domain joined desktops or laptops, you can enable SSO from the desktop logon to web logon |
Application URL | When OWA is enabled with MFA, the ECP web UI is automatically enabled with MFA too, as ECP uses OWA as its logon process. If you use ECP web UI, then you must change the Application URL to: $RelayState.url |
Logon Name Format | Select the appropriate login name format that your application server accepts.
|

Click "OK" to save the settings
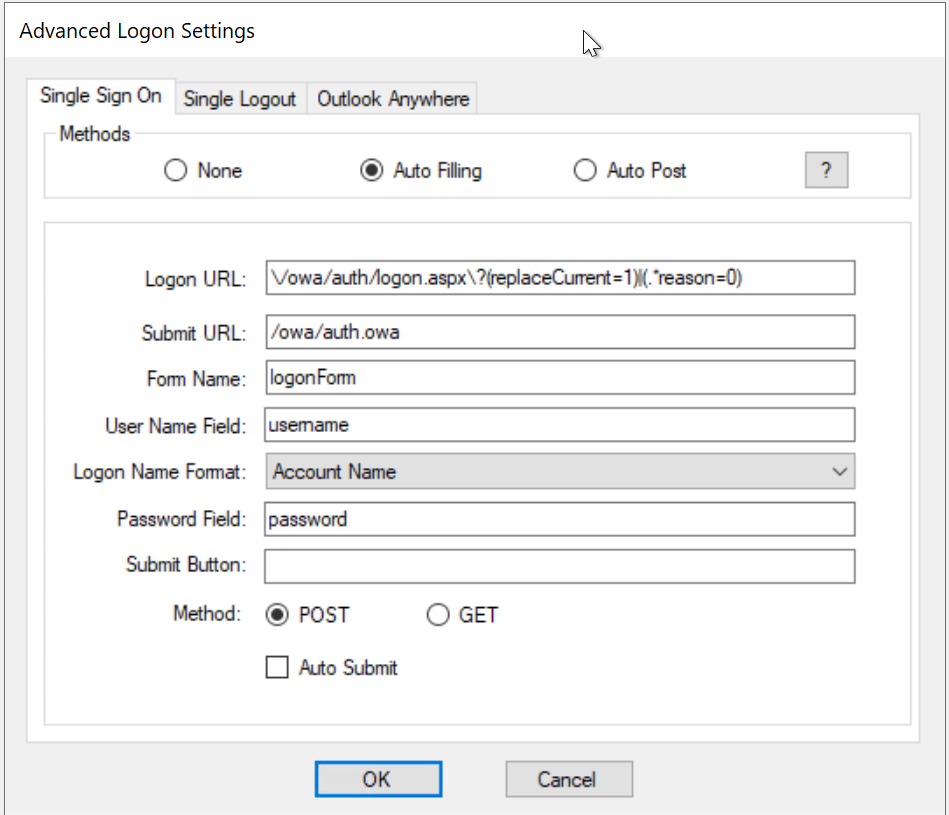
Single Sign-On by Auto-Filling

Click the "Advanced Logon Settings" button.

To enable Single Sign-On by Auto-Post, tick the option "Auto Filling"
If the web application is one of the pre-configured server types such as OWA, then usually there is no need for any further configuration in this tab apart from ticking the "Auto Submit" option
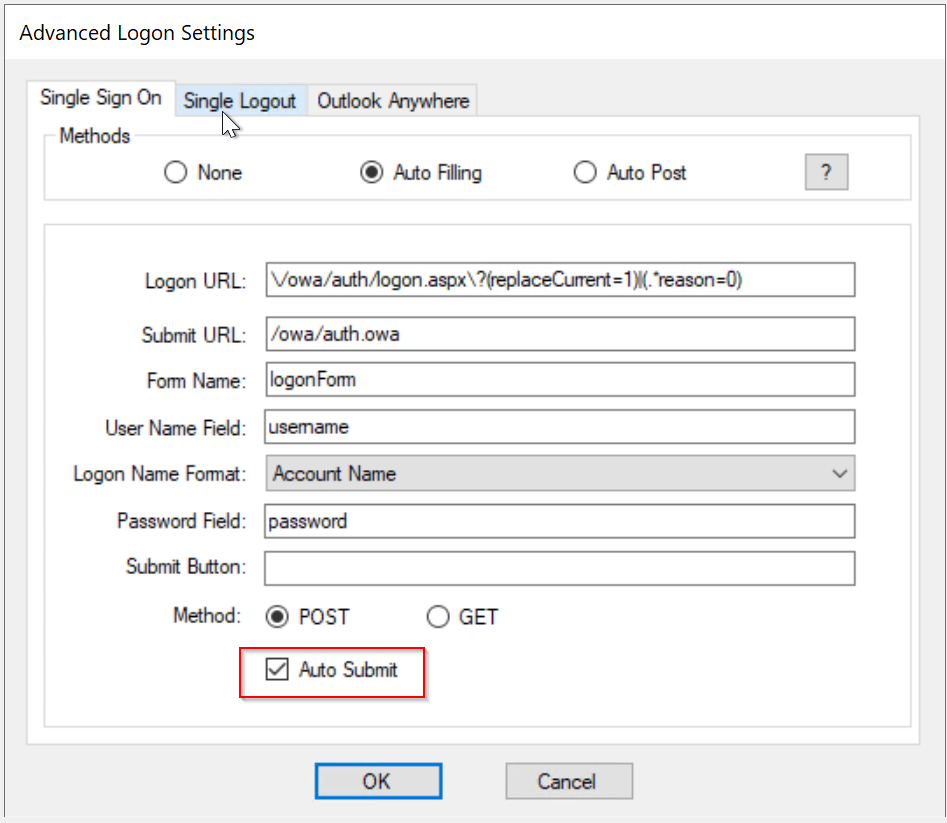
Click "OK" to save settings