Sign into Azure AD portal at https://portal.azure.com/
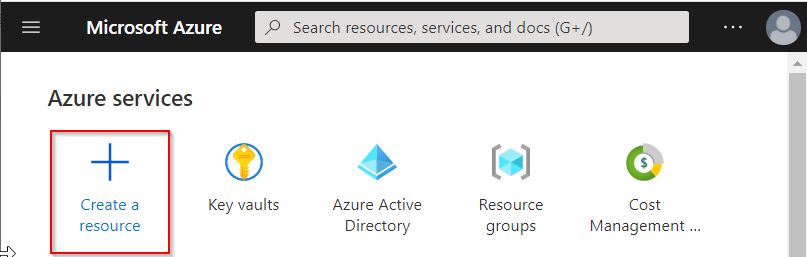
Click "Create a resource"
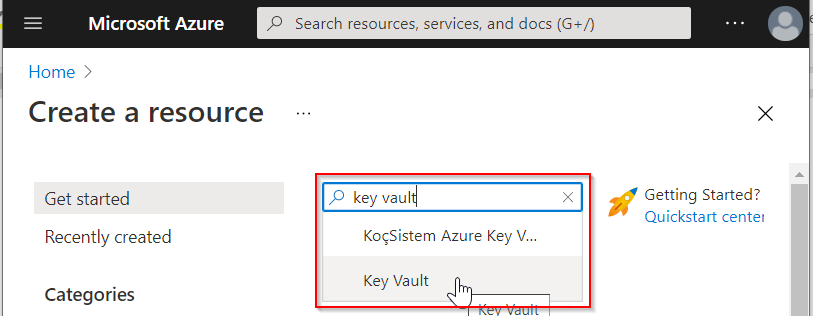
In the search box, enter "key vault" and then select "Key Vault" from the drop-down list
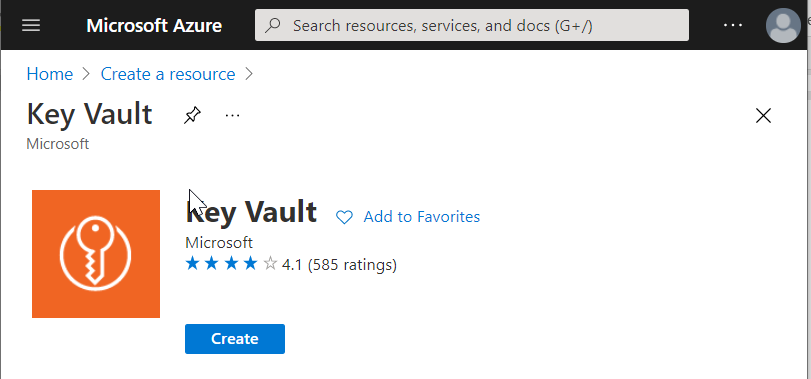
Click the "Create" button
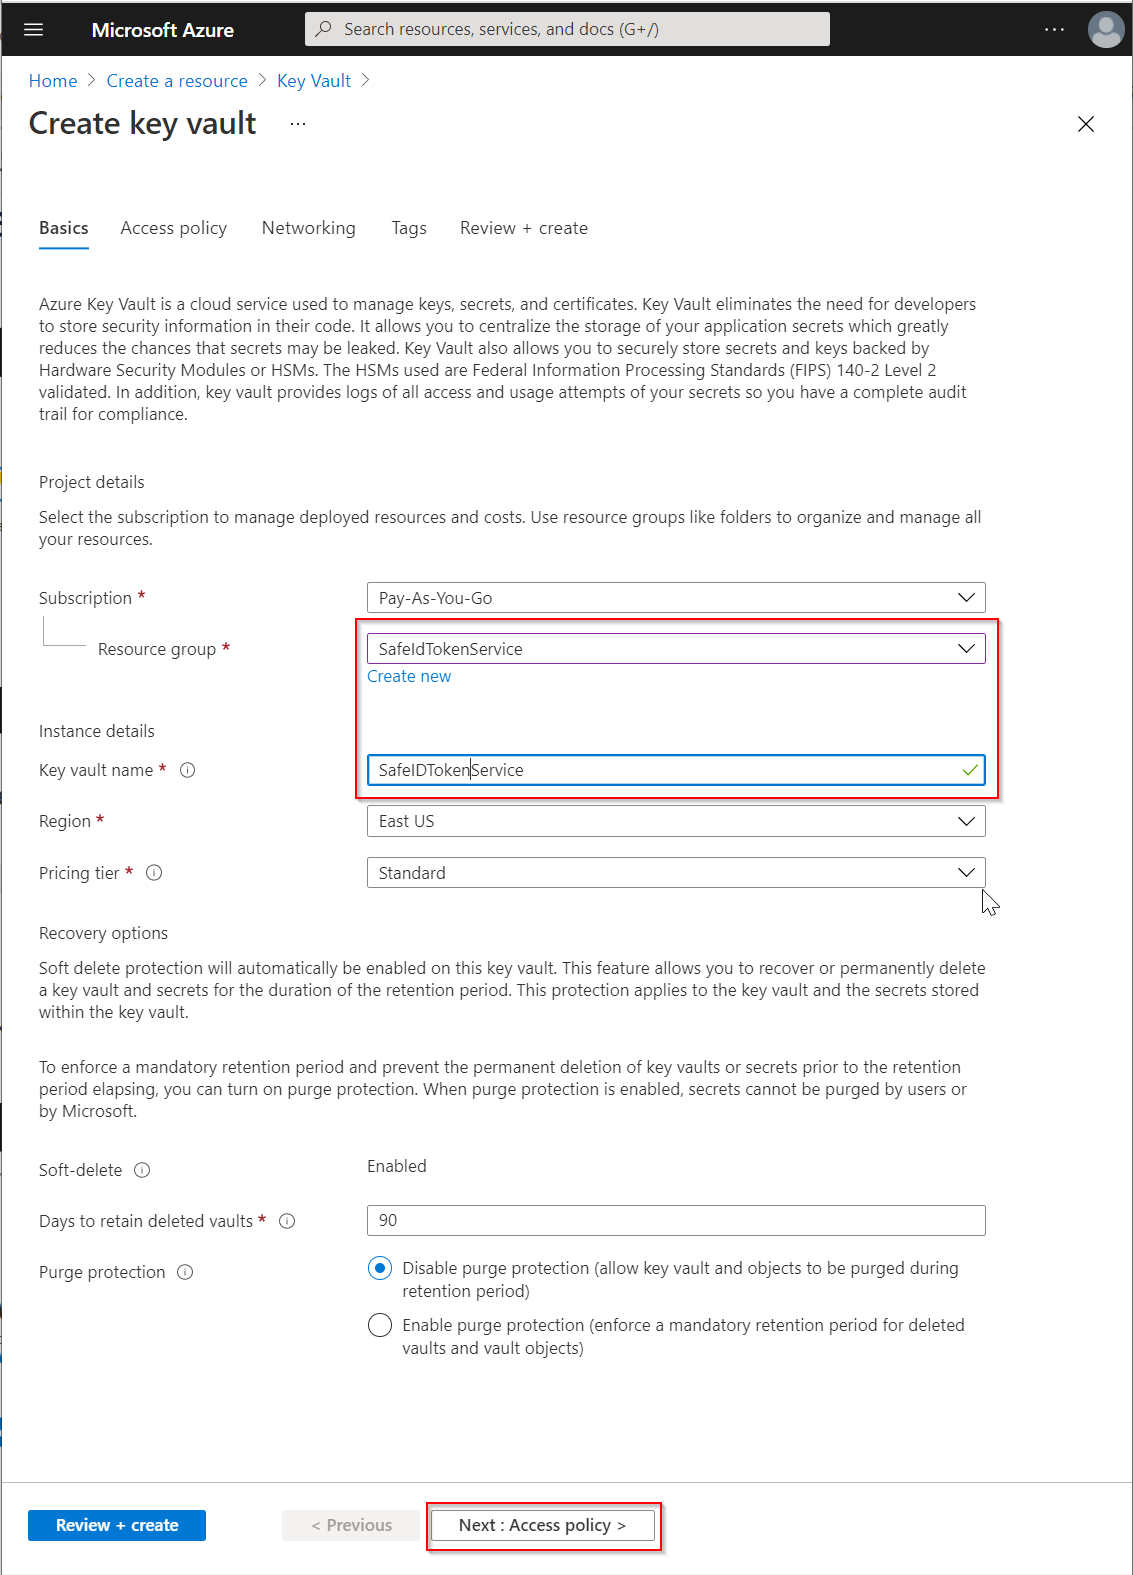
Select the Resource group that you have already created for SafeID Token Service, e.g. "SafeIdTokenService"
Enter the "Key vault name", e.g. "SafeIdTokenService"
Change other options if neccessary
Click the "Access policy" button
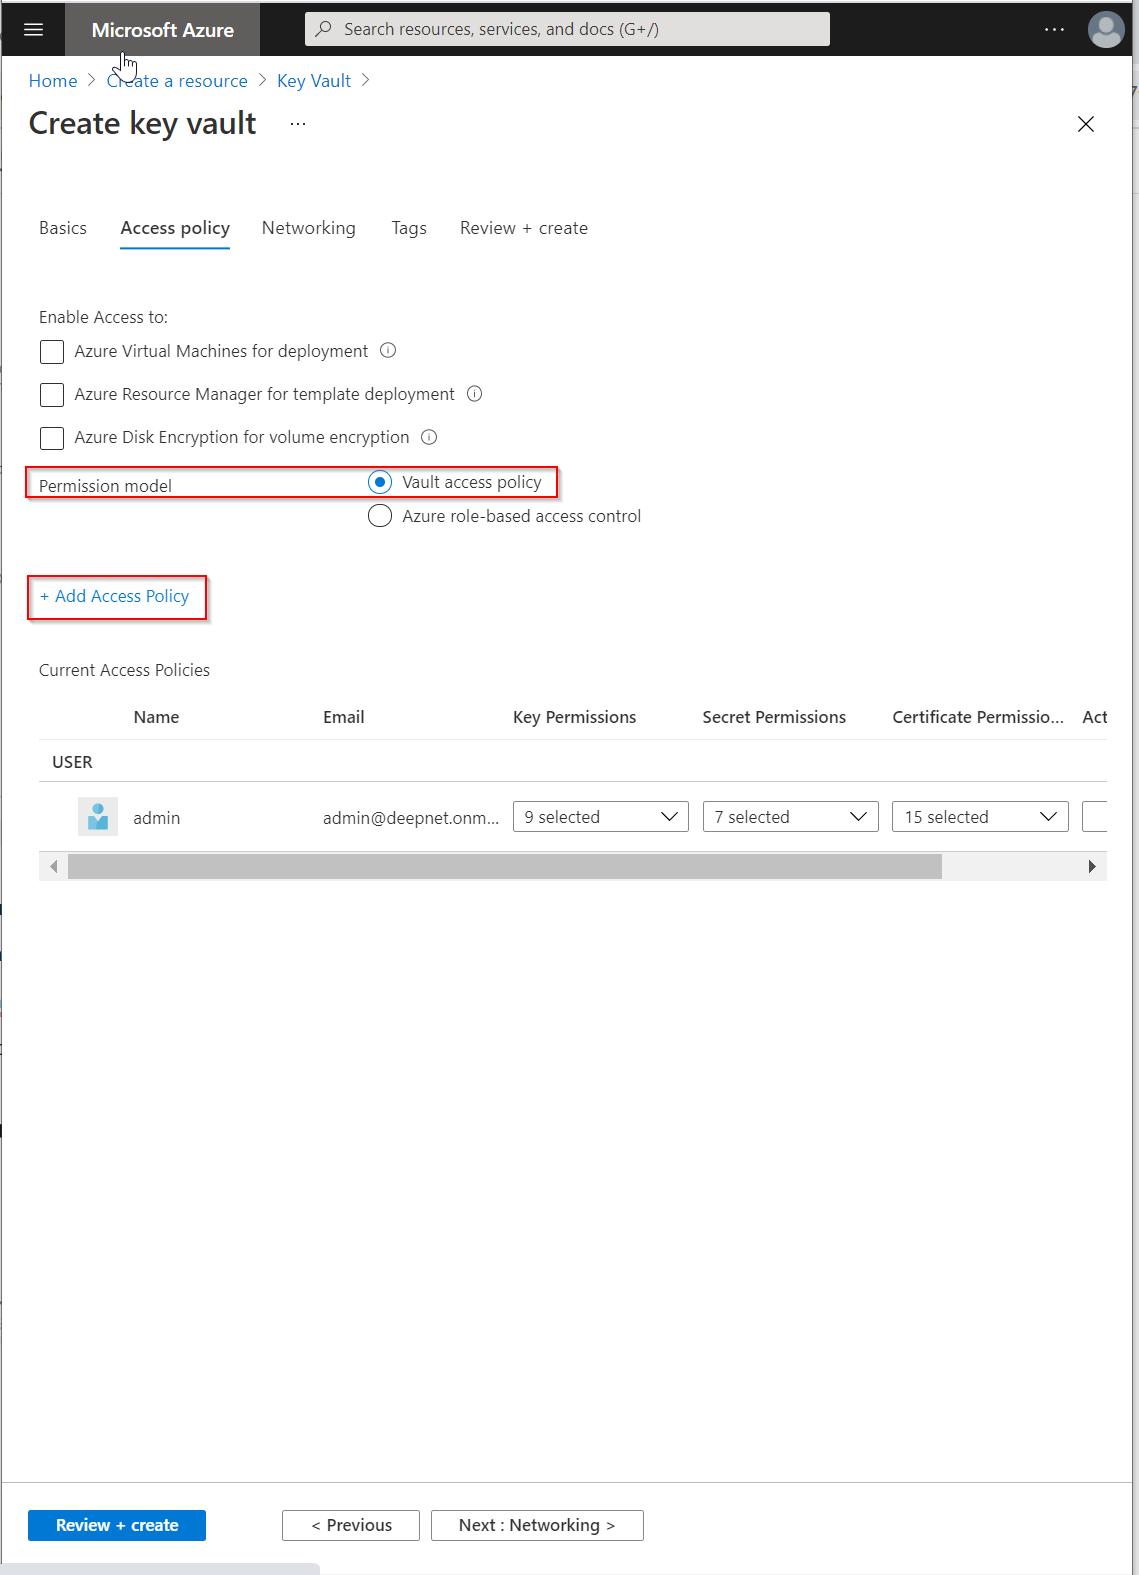
Make sure the "Permission model" is set to "Vault access policy"
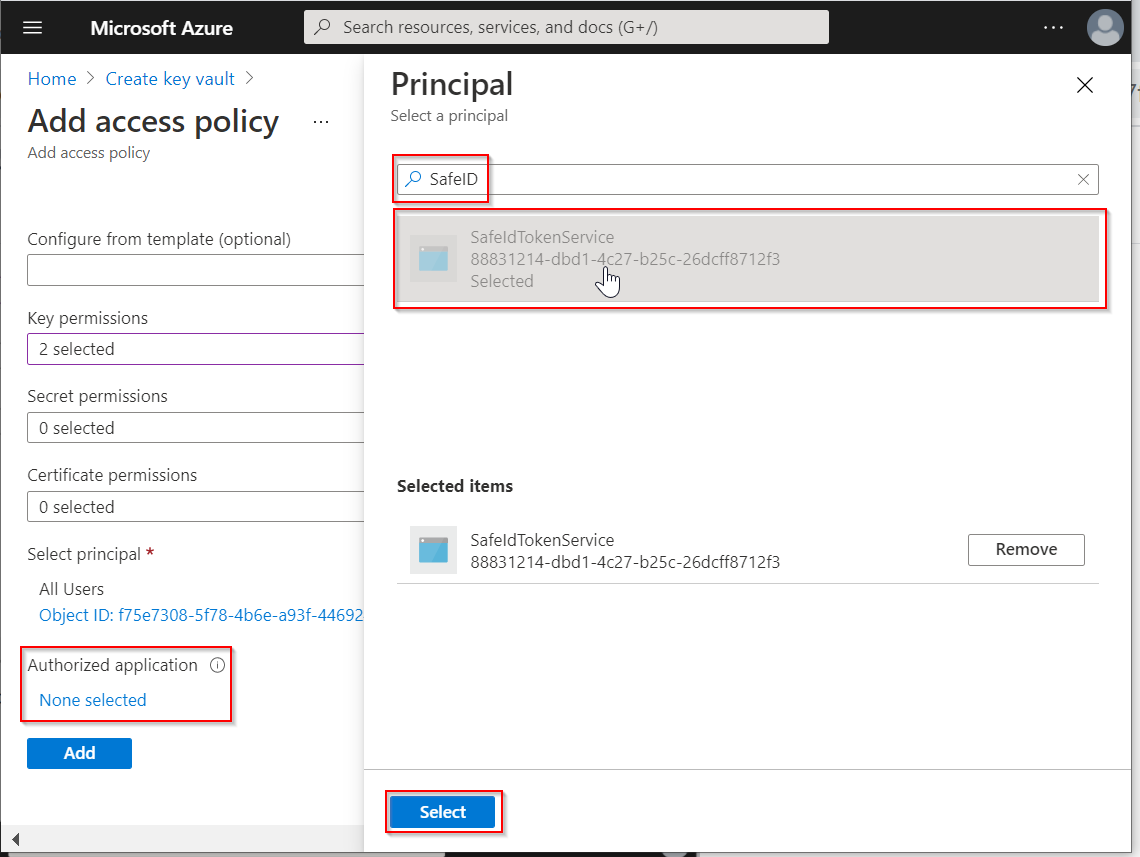
Click "+Add Access Policy"
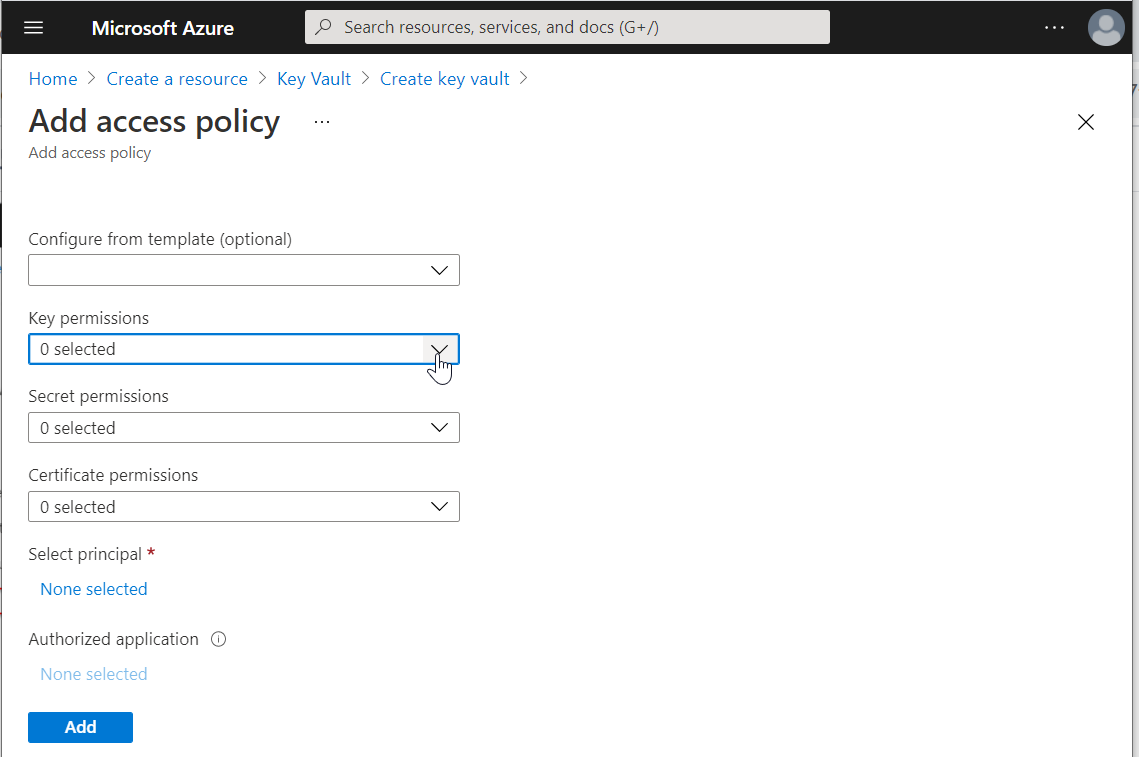
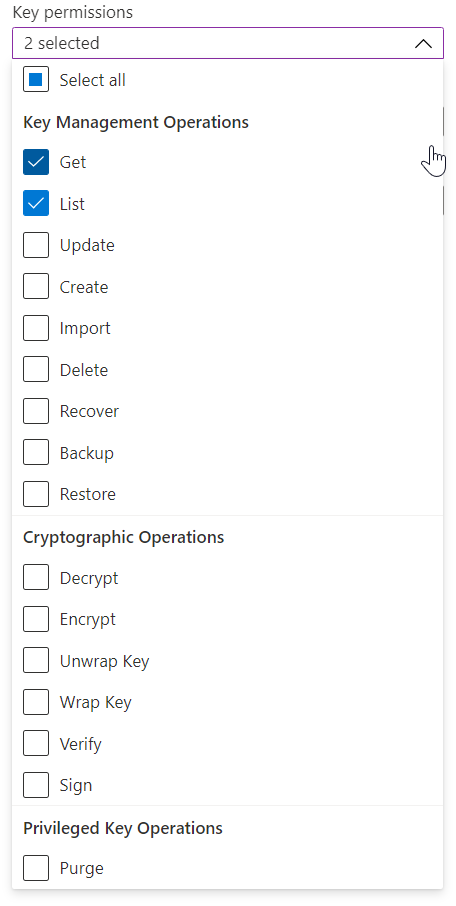
Click the down-down arrow on the right of Key permissions, and then select "Get" and "List"
|
|
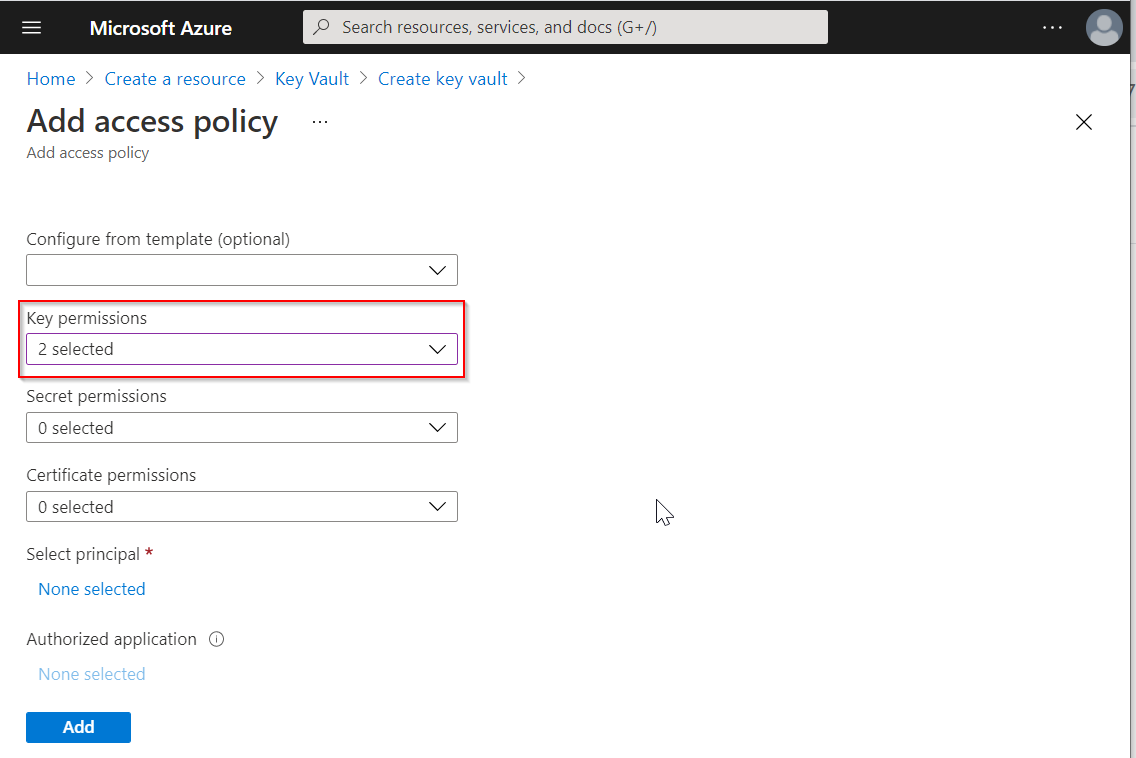
Click "None selected" under "Select principal"
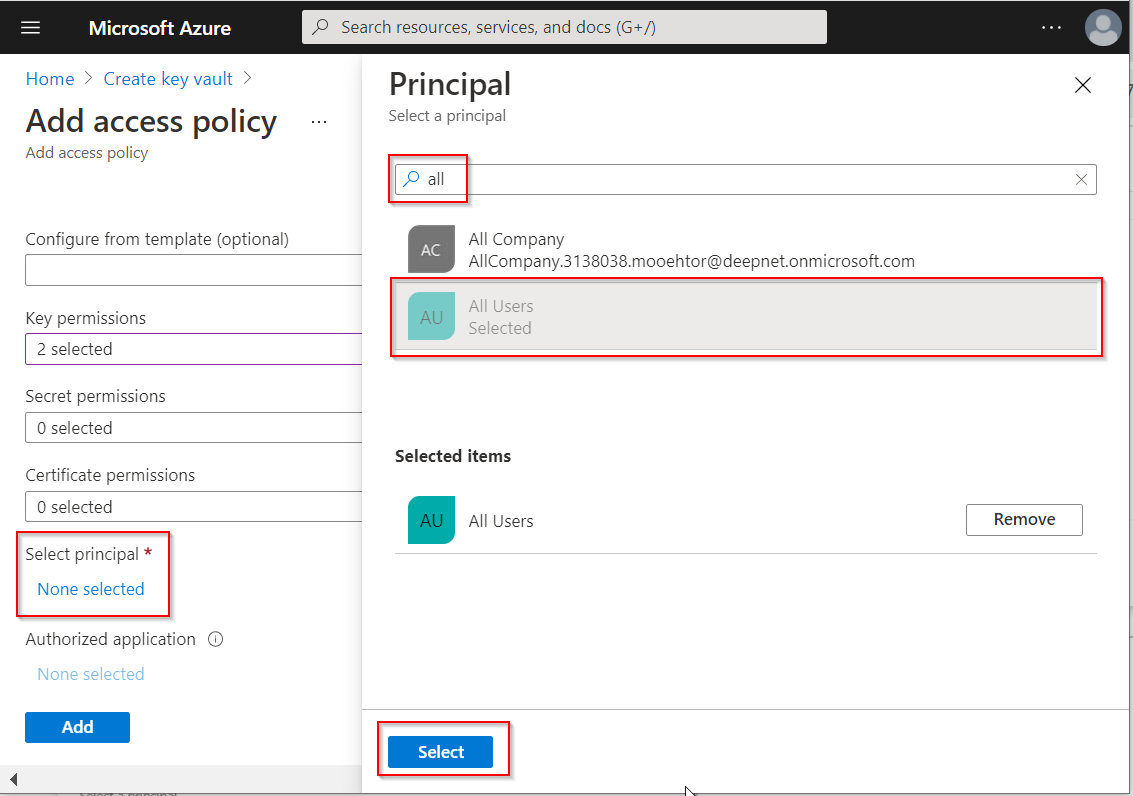
Enter "all" in the search box, and then select "All Users"
Click the "Select" button
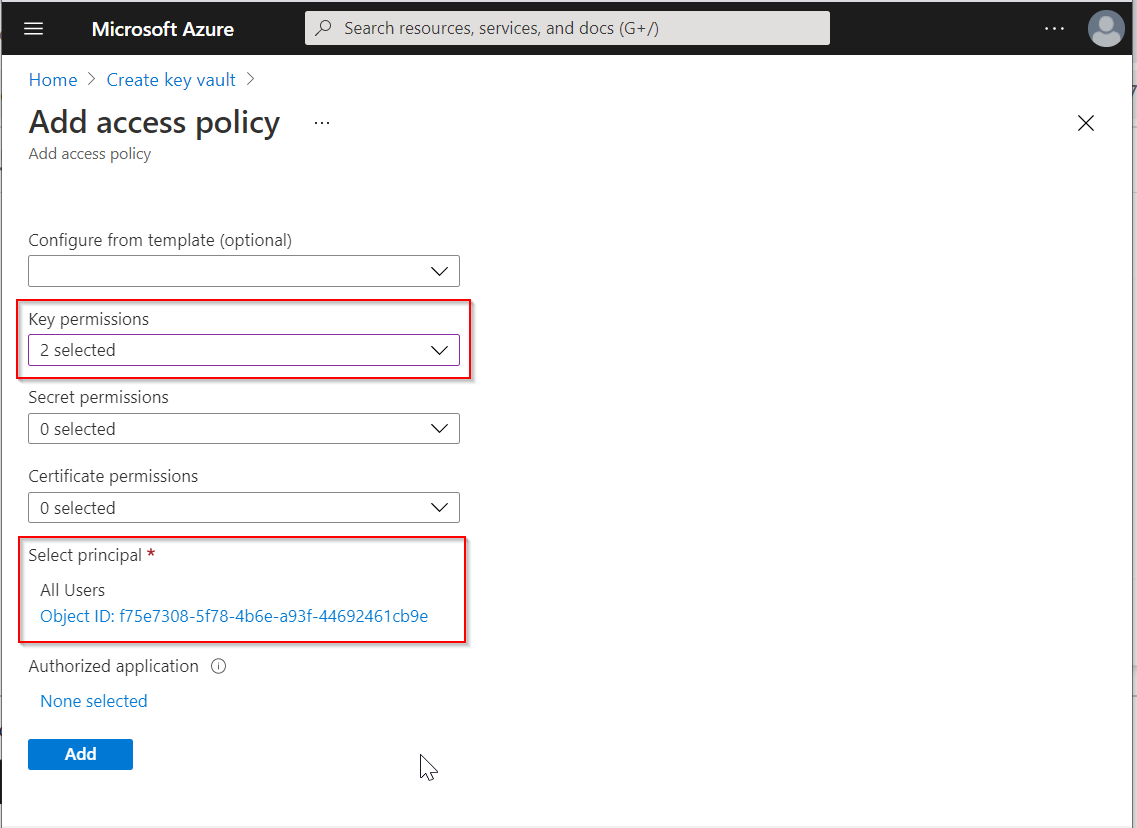
Click "None selected" under "Authorized application"