Setup Domain
- Log into the SalesForce Console, i.e. “https://login.salesforce.com”
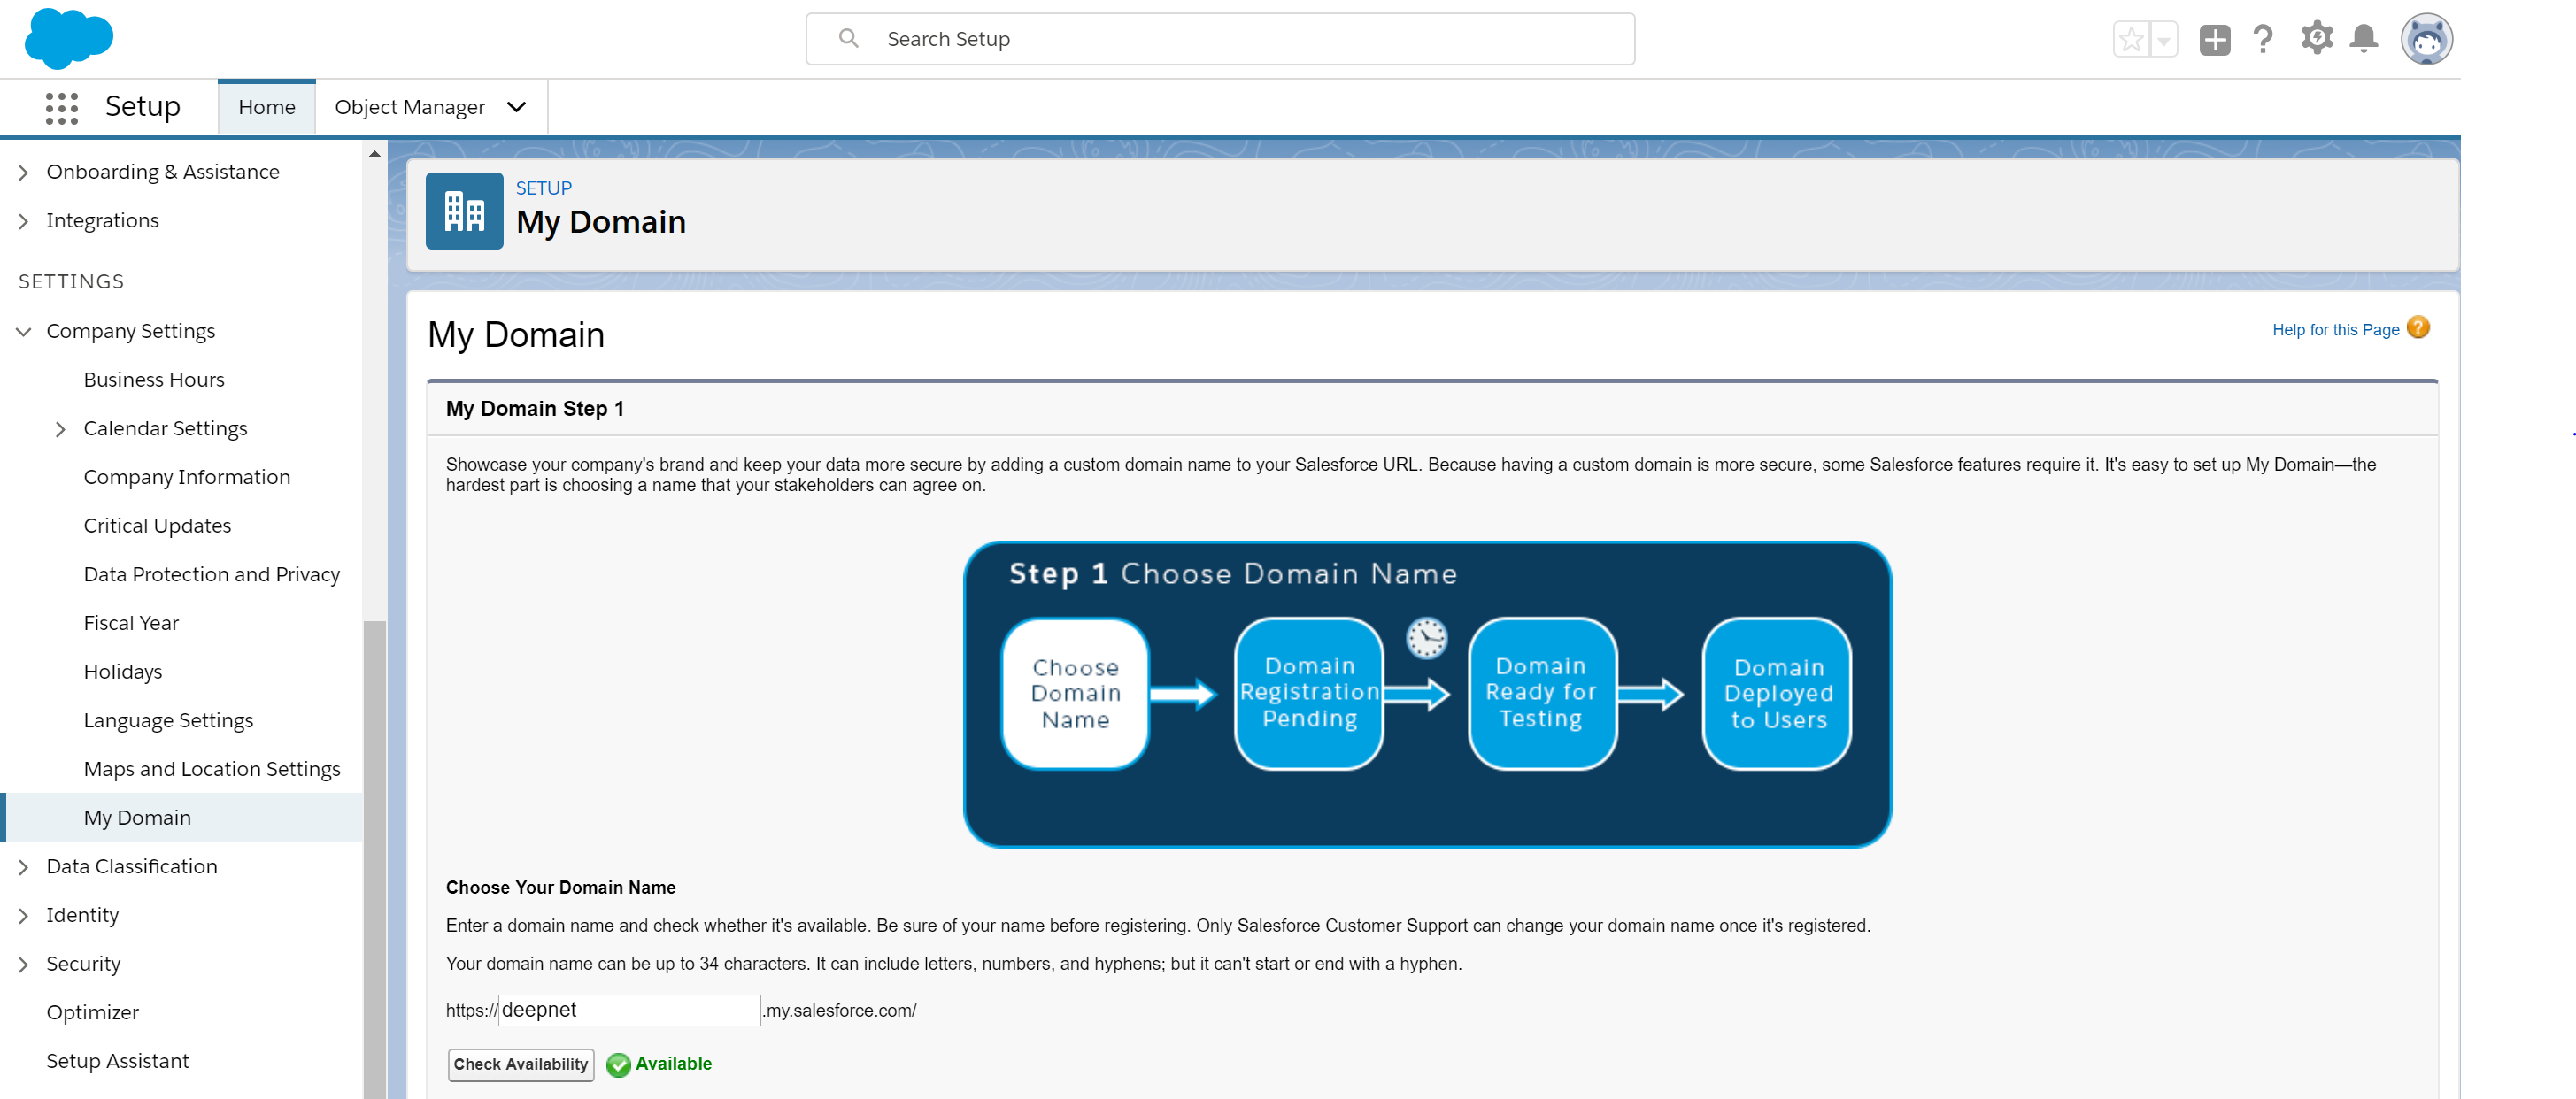
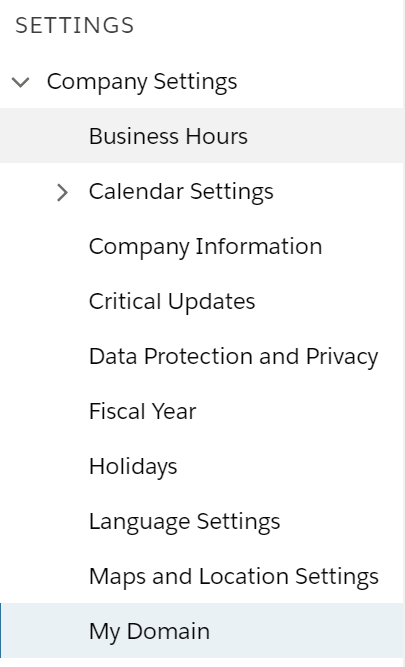
- Click the “Setup” icon, Expand “Settings\Company Settings” and click “My Domain”
- Follow the steps and deploy the new domain to your organization
Configure Single Sign-On Service
- Click “Setup” icon, Expand “Identity” and click “Single Sign-On Settings”
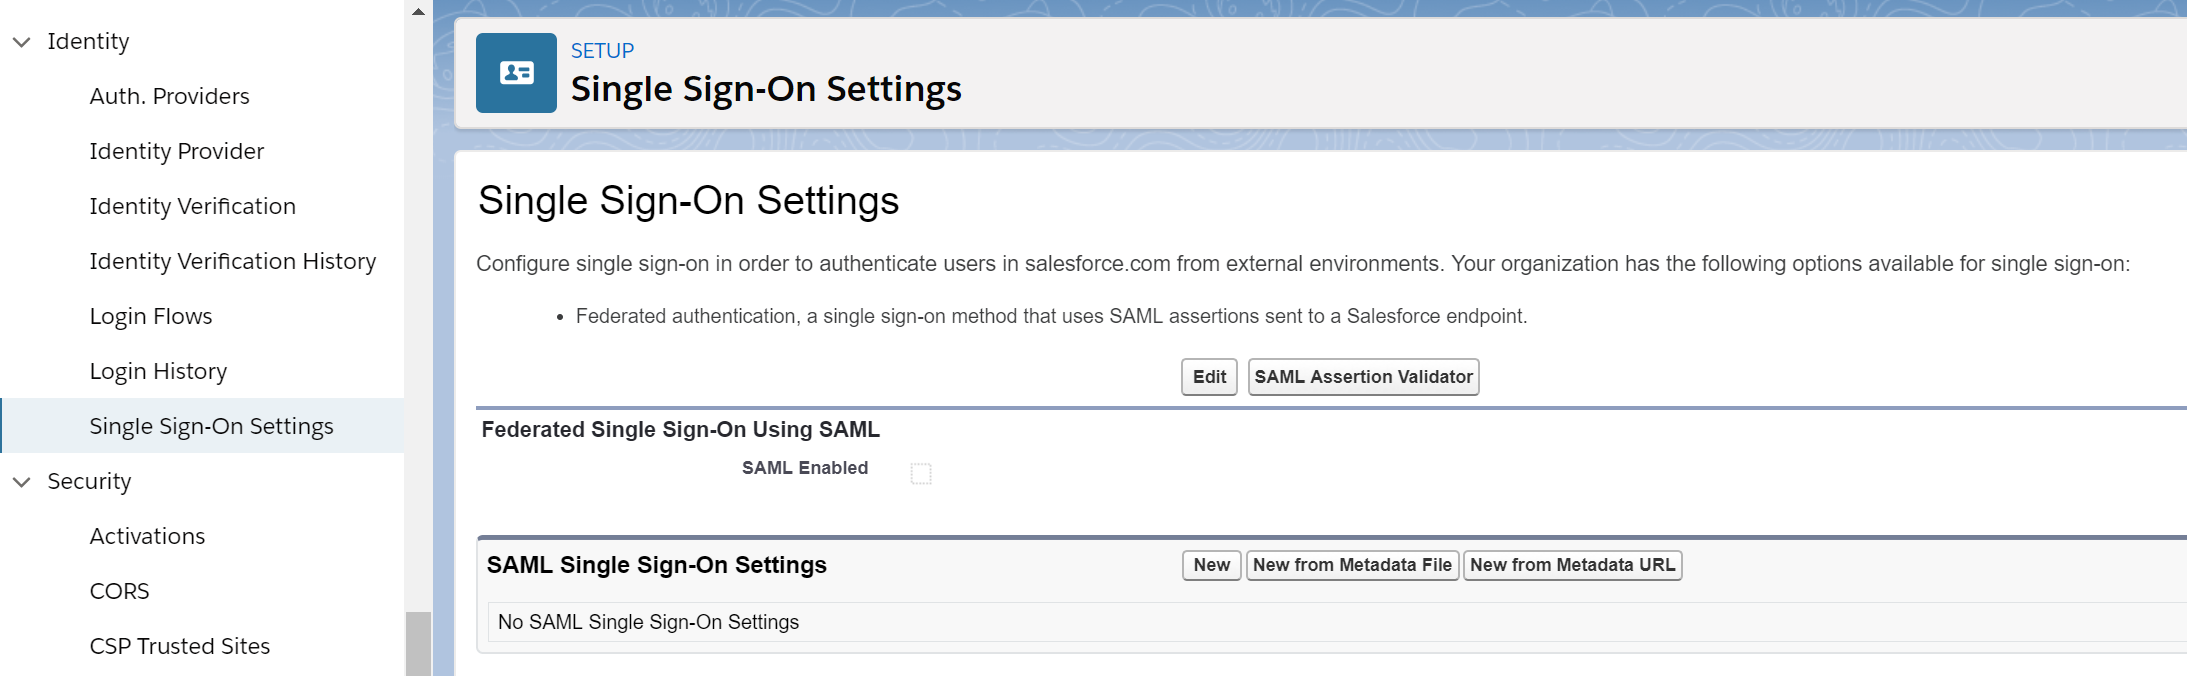
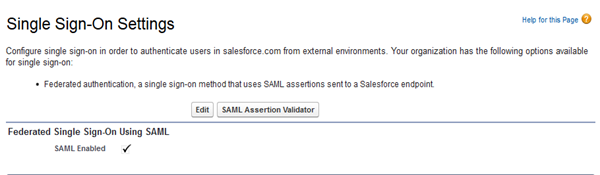
- Turn on the “SAML Enabled” option
- Click “New”
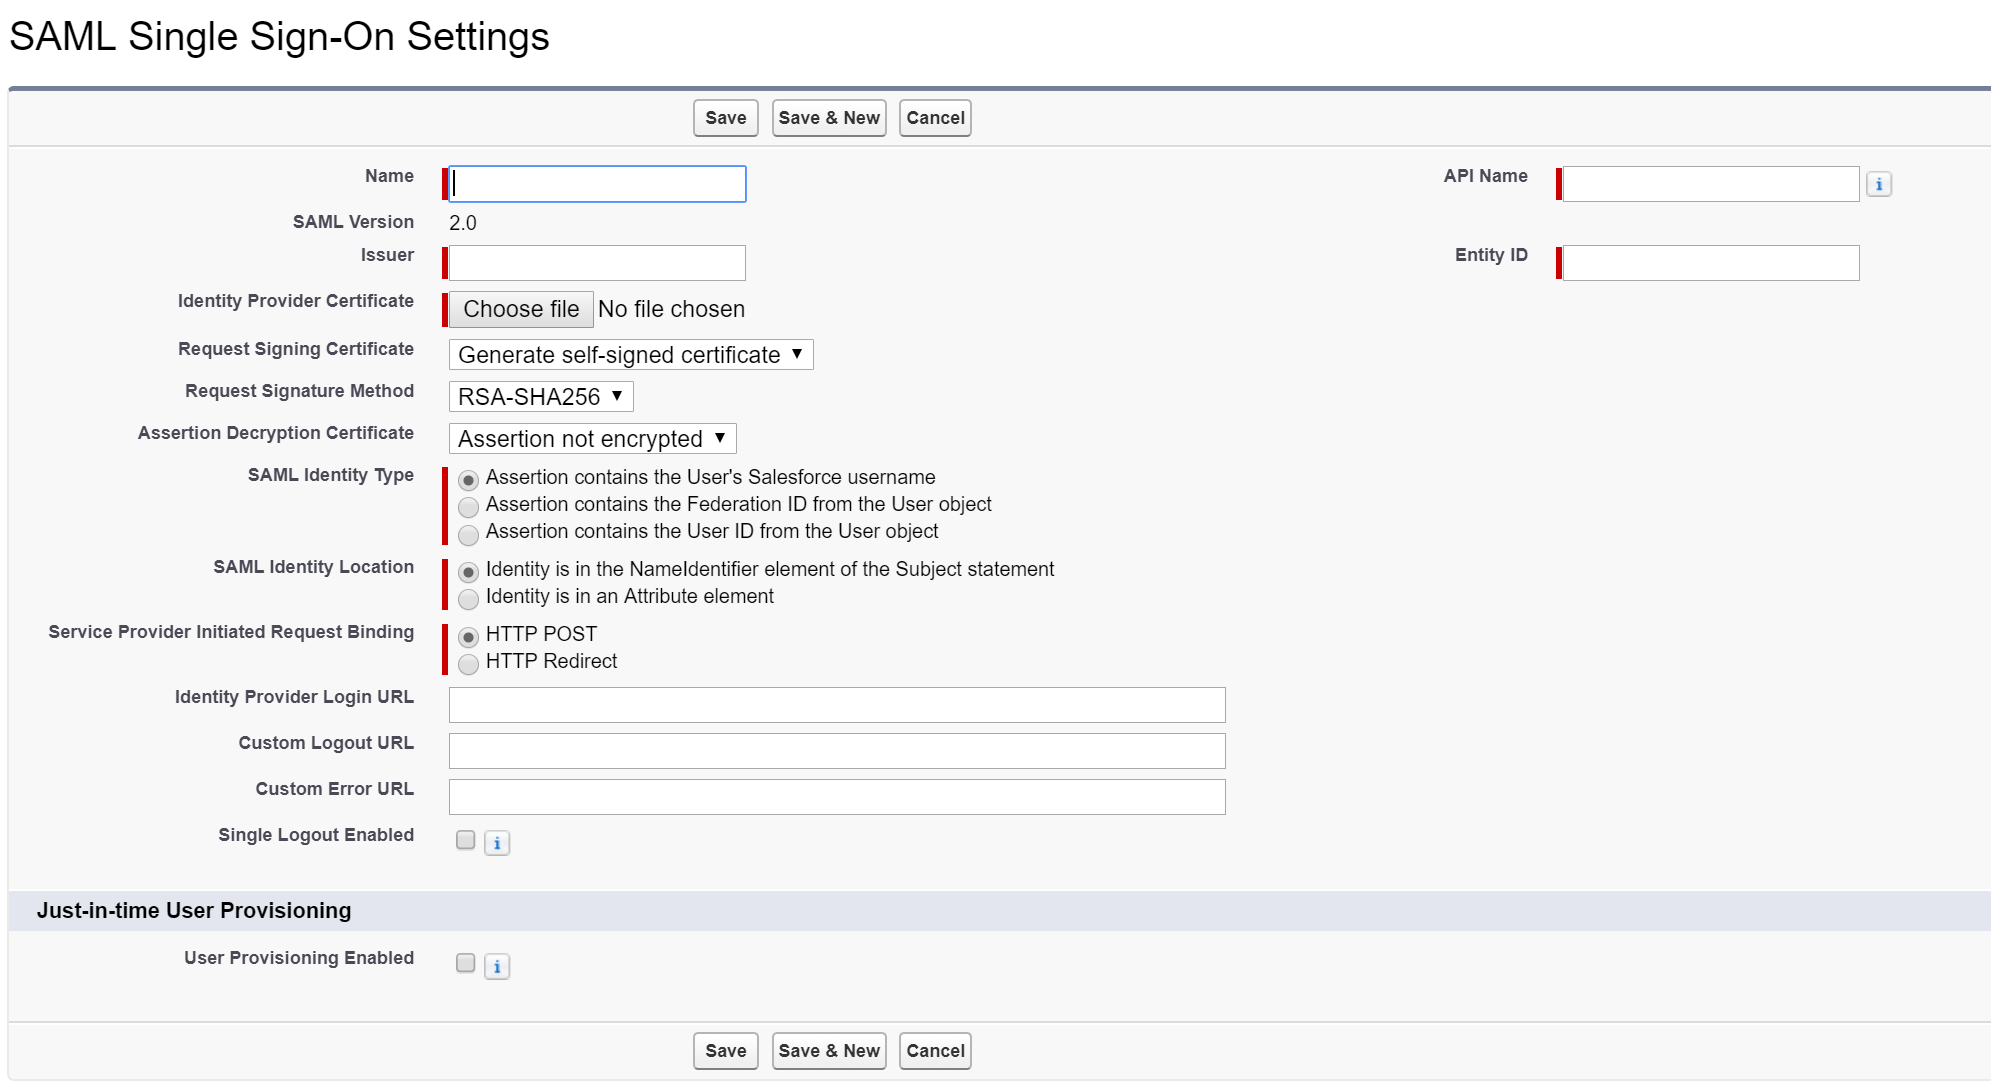
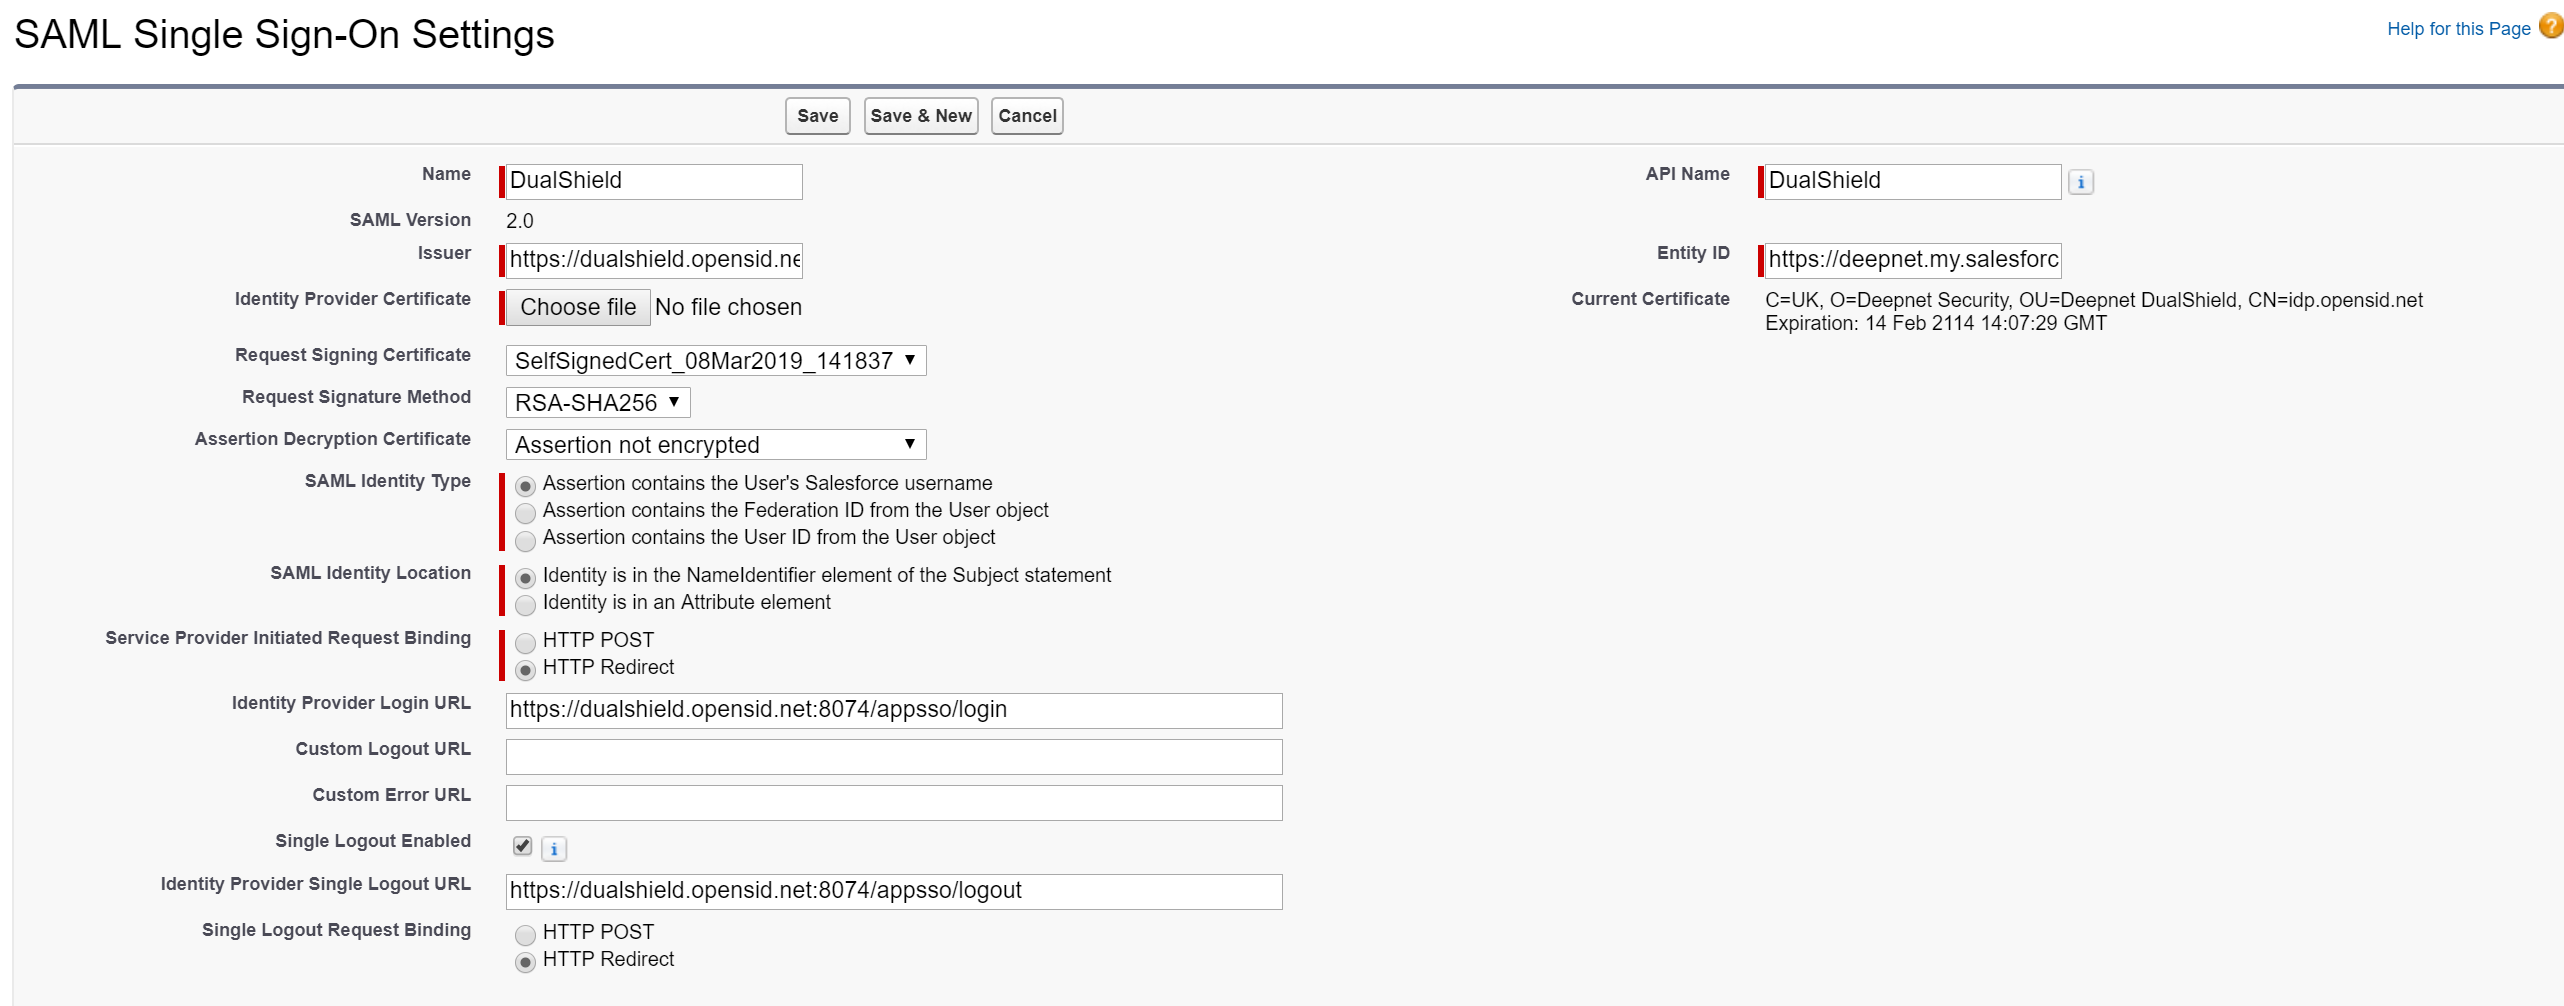
- In “Name” and "API Name", enter the name of your DualShield SSO server, e.g. "DualShield"
- In "Issuer", enter the EntityID for your DualShield IdP. By default, this is the FQDN of your DualShield, e.g. “https://dualshield.opensid.net”
- In "Entity ID", enter your SalesForce's FQDN, e.g. "https://deepnet.my.salesforce.com". This will be used as the SP's EntityID of your SaleForce.
- In "Identity Provider Certificate", click “Choose file” to upload your DualShield IdP certificate that you downloaded in the previous step.
- In SAML Identity Type, select “Assertion contains the User’s Salesforce username”
- SAML Identity Location, select “Identity is in the Name Identifier element of the Subject statement”
In "Identity Provider Login URL", enter the Login URL of your DualShield SSO, e.g. “https://dualshield.opensid.net:8074/appsso/login”
If your DualShield's version is 5.9.4 or earlier, then you need to append the application name to the end of the Login URL, e.g.
https://dualshield.opensid.net:8074/appsso/login?DASApplicationName=SalesForceSAML
The value of the DASApplicationName is the name of the web application that created on DualShield Management Console for SalesForce SAML
In "Identity Provider Logout URL" enter the Logout URL of your DualShield SSO, e.g. “https://dualshield.deepnetid.com:8074/appsso/logout”
In "Service Provider Initiated Request Binding", select "HTTP Redirect"
Click "Save"
Download the Metadata
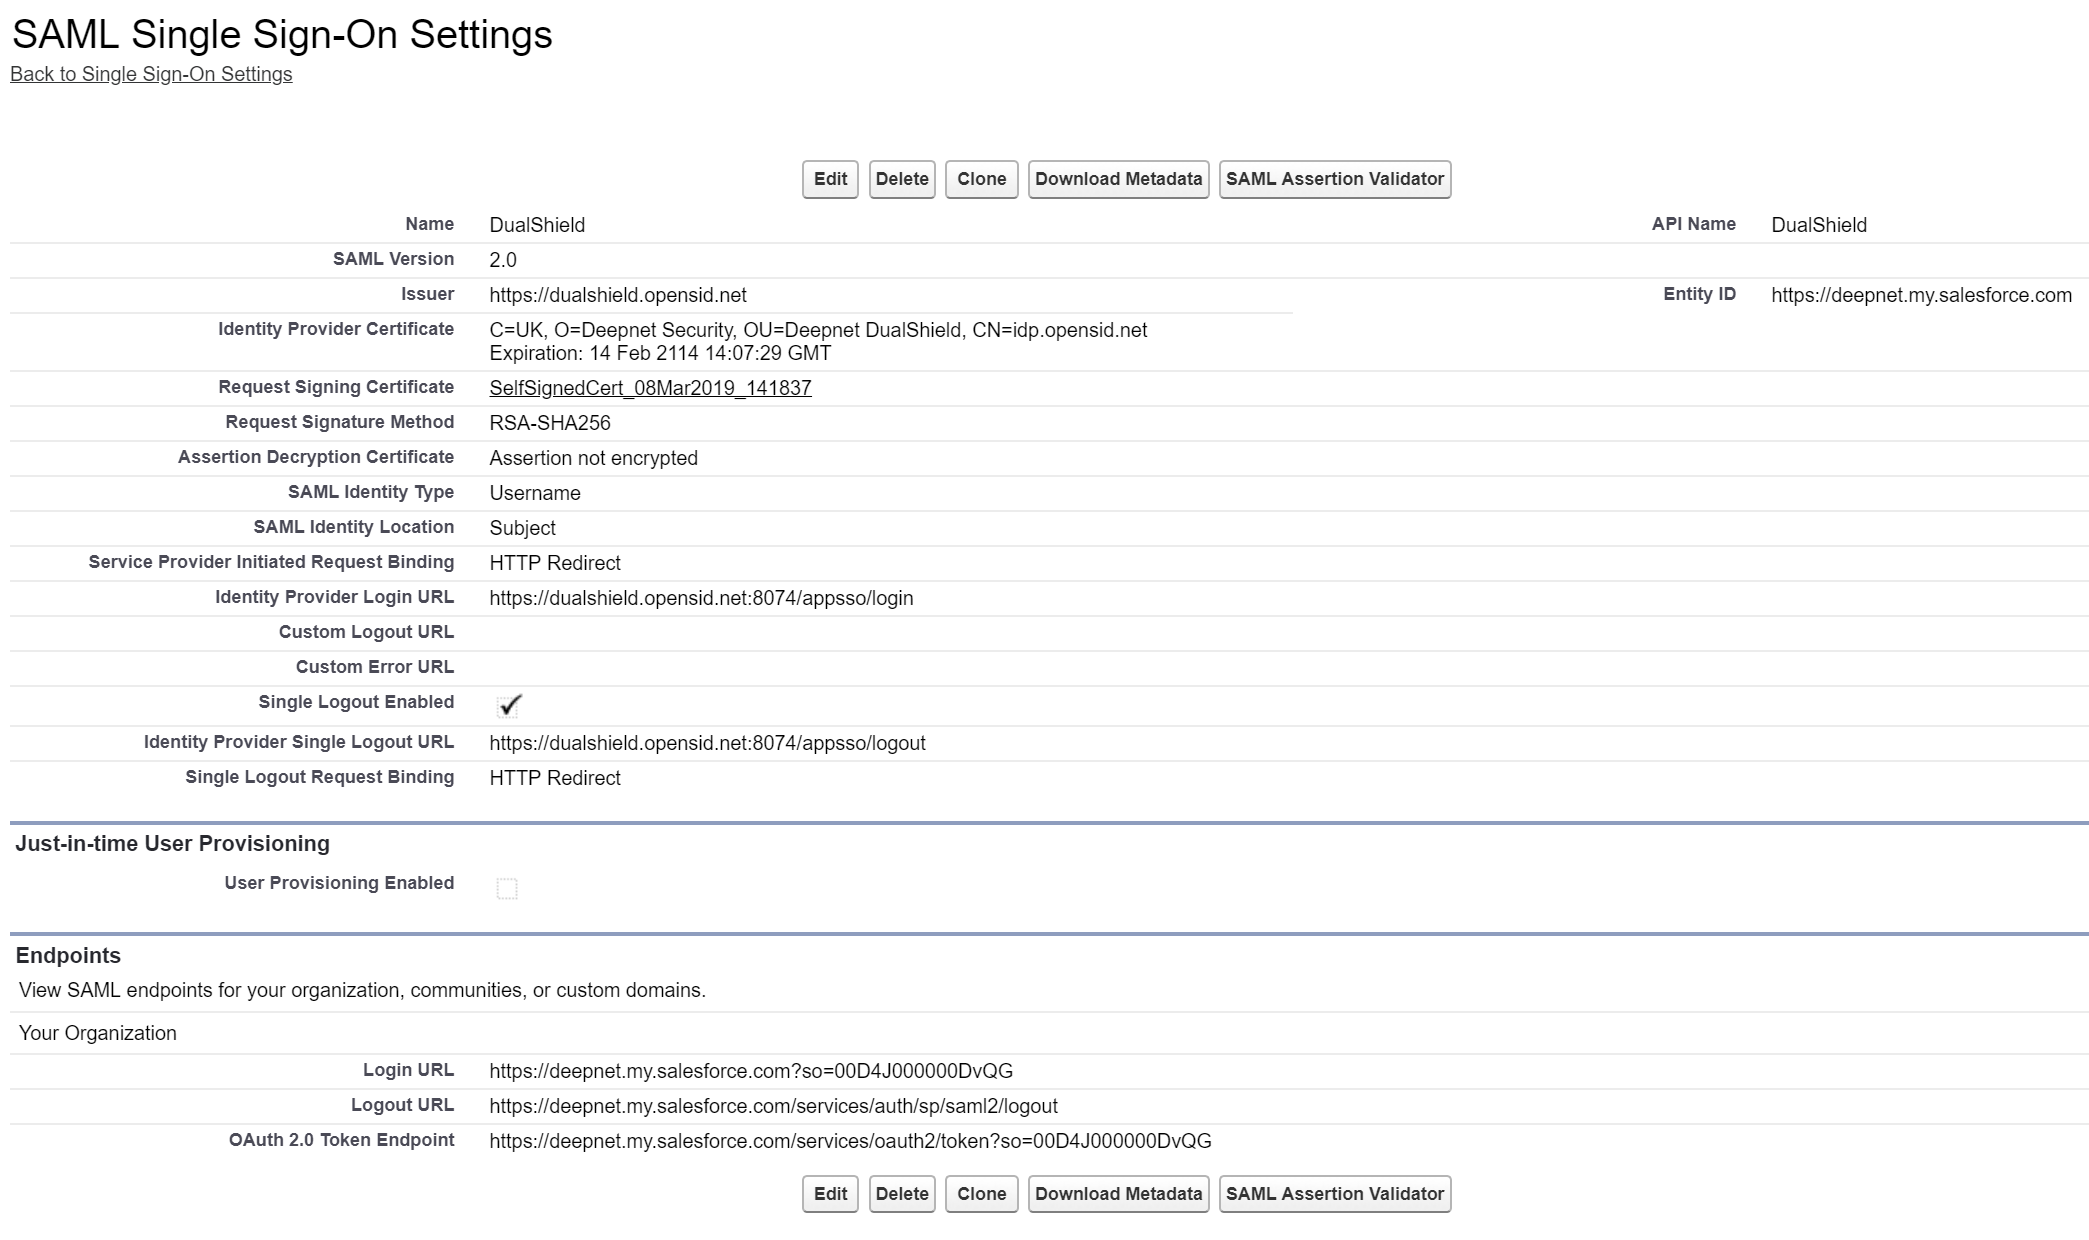
Click "Download Metadata" and save it to a local file, e.g. Salesforce.xml
Configure Authentication Service
- Click “Setup” icon, Expand “Company Settings” and click “My Domain”
- Scroll down to the "Authentication Configuration" section
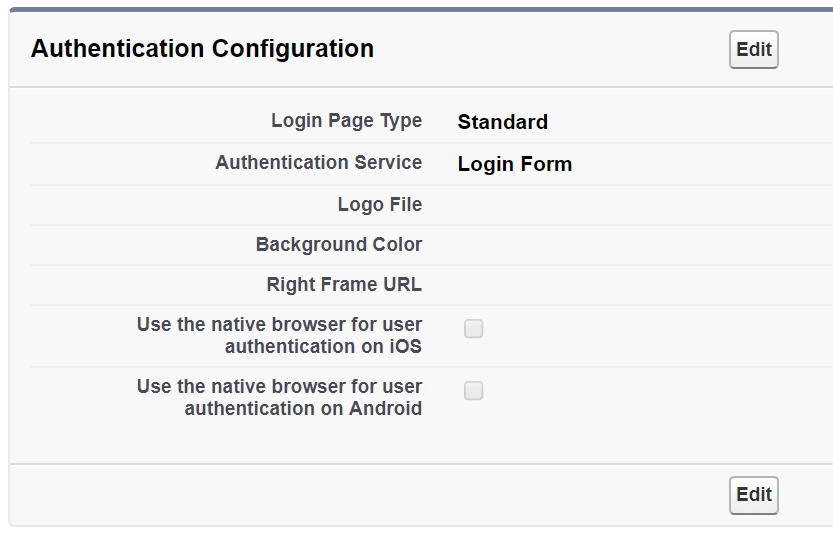
- Click “Edit”
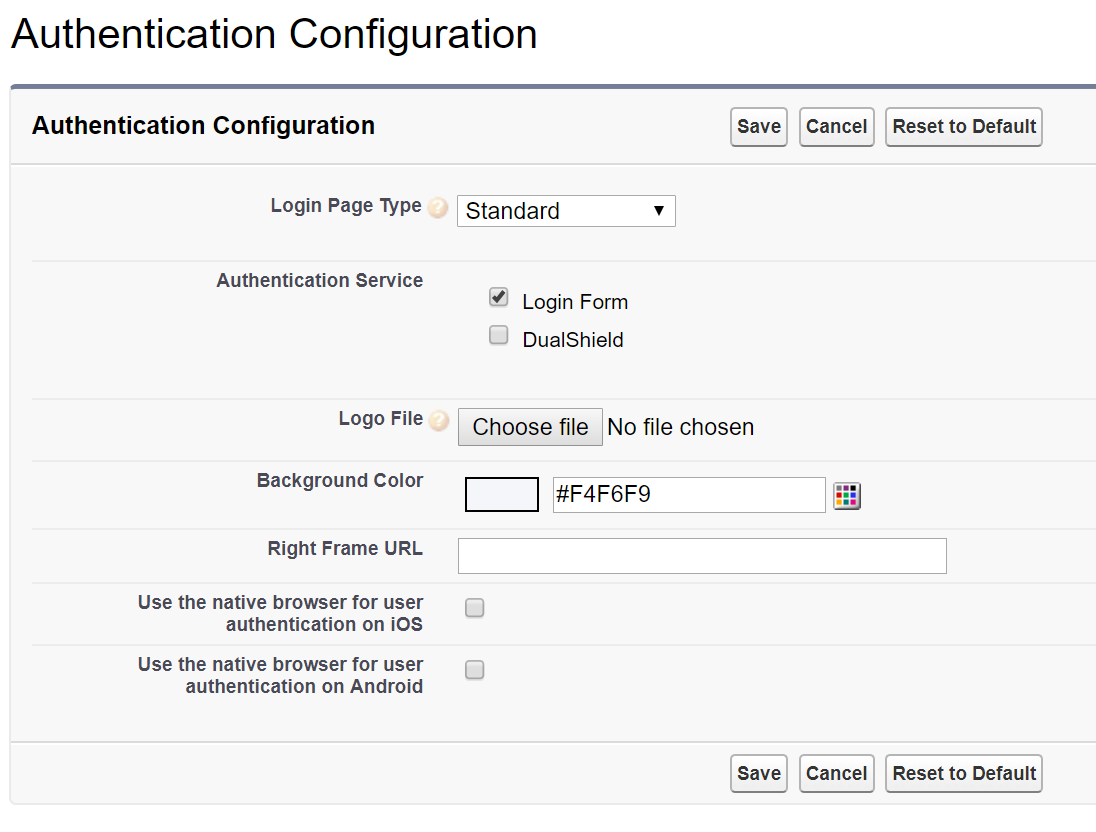
In "Authenticatrion Service", turn on the newly created single sign-on service, i.e. “DualShield”
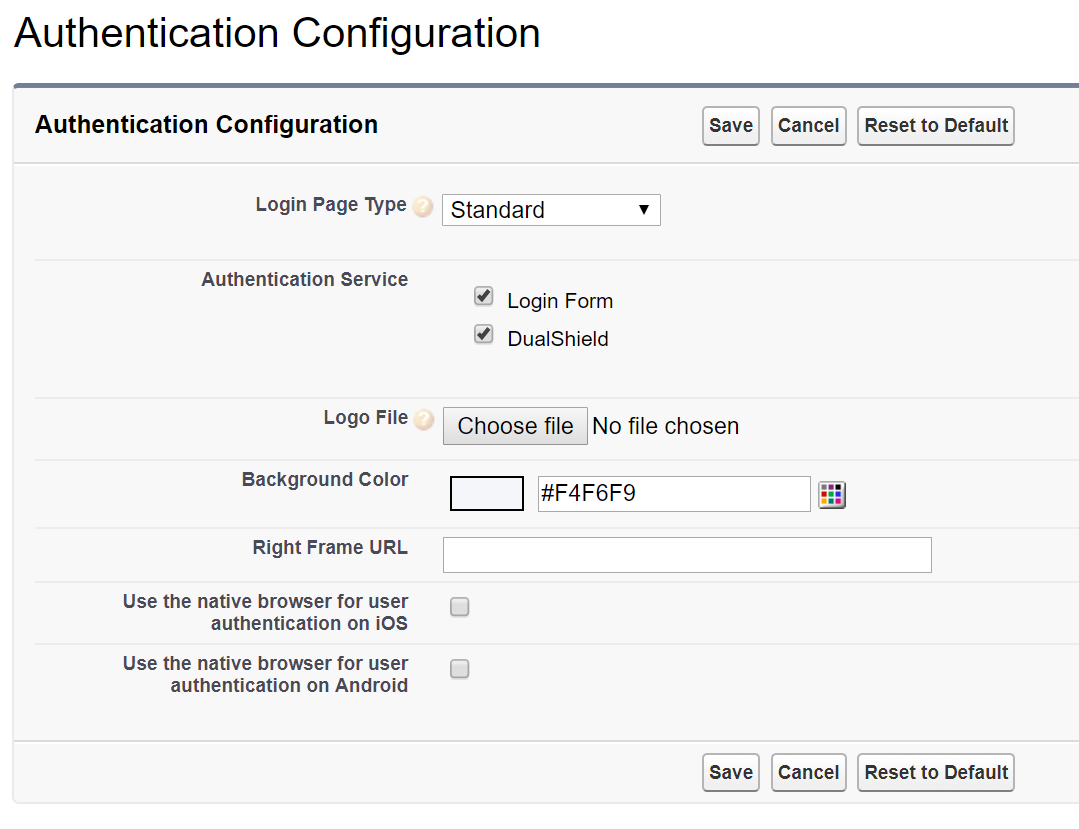
The "Login Form" service is the SalesForce's original login form. Once you have fully tested the new SSO logon service with 2FA enabled, e.g. "DualShield" you will want to turn off the "Login Form" option.
Click "Save"