Install the DualShield SSO Server CA certificate
Log into the DualShield Authentication server, in the main menu, select “SSO”
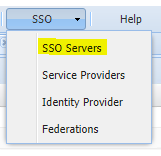
2. Click the SSO Server context menu, select “Download IdP Certificate” and save the file.

3. Log in to the NetScaler VPX web console, select “Traffic Management | SSL | Certificates | CA Certificates”, click “Install”
4. Enter the “Certificate-Key Pair Name”
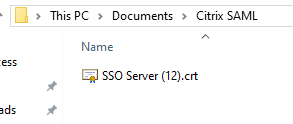
5. Upload the DualShield SSO server certificate from local store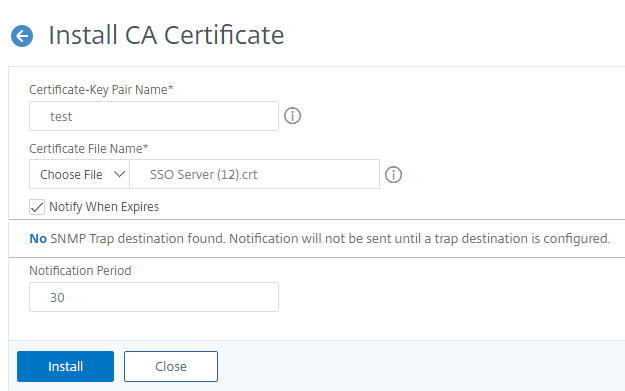
Create SAML Authentication server*
- Log into the NetScaler VPX web console, select “Configuration | NetScaler Gateway | Policies | Authentication | SAML”
- Click the “Servers” tab, and click “Add”
Enter the “Name”
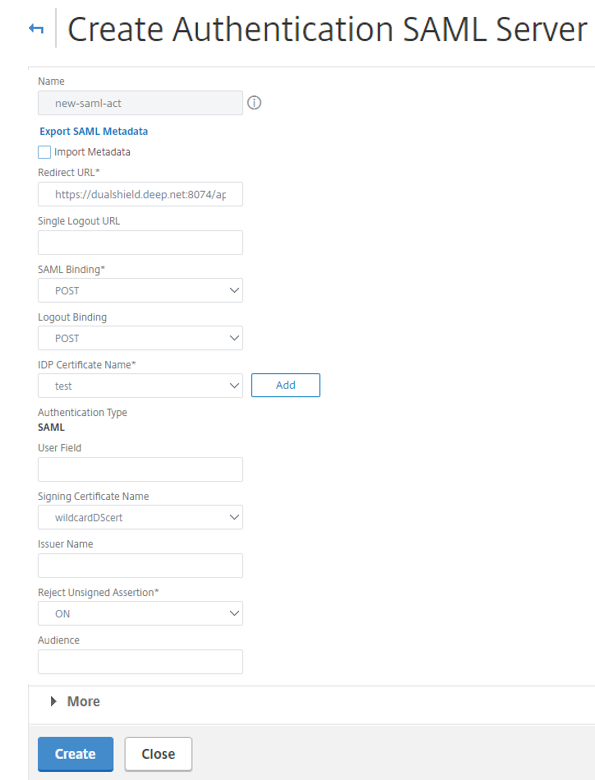
In the "Redirect URL" field, enter the URL below:
http://dualShield.deepnetqa.com:8074/appsso/login?DASApplicationName=Access Gateway SAML
Replace "dualShield.deepnetqa.com" with the FQDN of your DualShield server, "Access Gateway SAML" with the application name of the Netscaler Access Gateway in your DualShield server.<Optional> In the "SAML Issuer Name" field, enter the FQDN of your NetScaler Gateway Virtual Server. (The SAML Issuer Name must be identical to the EntityID in the metadata of the service provider that was set up in the previous section)
- Select the newly installed DualShield SSO server certification on "IDP Certificate name" field
- Click "Create" and "Close"
*Citrix ADC VPX V 13.0
When testing setup of SAML Authentication server on version 13.0 there is a known bug which gives the following error when you try to create it on the console:

The work around is to set this up via the CLI. I therefore logged in via Putty and added the following command, such as:
add authentication samlaction new-saml-act -samlIdPCertName test -samlredirectUrl https://dualshield.deep.net:8074/appsso/loginDASApplicationName=Citrix

If you are not familiar with Citrix Netscaler CLI then please refer to the section titled 'To configure the NetScaler appliance as a SAML SP by using the command line interface' in following guide:
https://docs.citrix.com/en-us/netscaler/12/aaa-tm/saml-authentication/netscaler-saml-sp.html
Create SAML Authentication policy
- Select “Configuration | NetScaler Gateway | Policies | Authentication | SAML”
- Click the “Policy” tab, and click “Add”
- Enter the “Name”
- Select the SAML authentication Server
- Create an “ns_true” expression
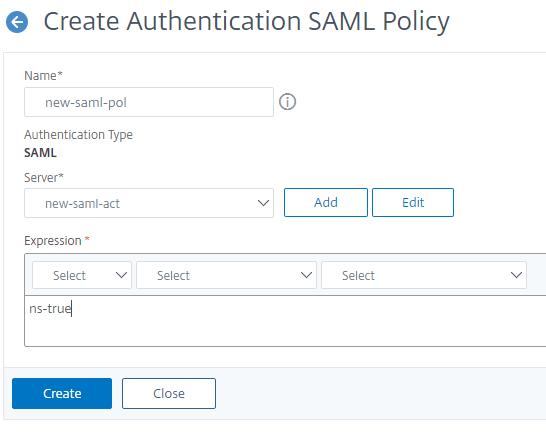
6. Click "Create"
Modify NetScaler Gateway Virtual Server Authentication Policy
- Select “Configuration | NetScaler Gateway | Virtual Servers”
- Click the “Basic Authentication”, select the newly create SAML policy as the primary authentication policy by clicking “Insert Policy”
- Select "SAML" as Choose Policy, "Primary" as Choose Type.
- Select newly created SAML policy.
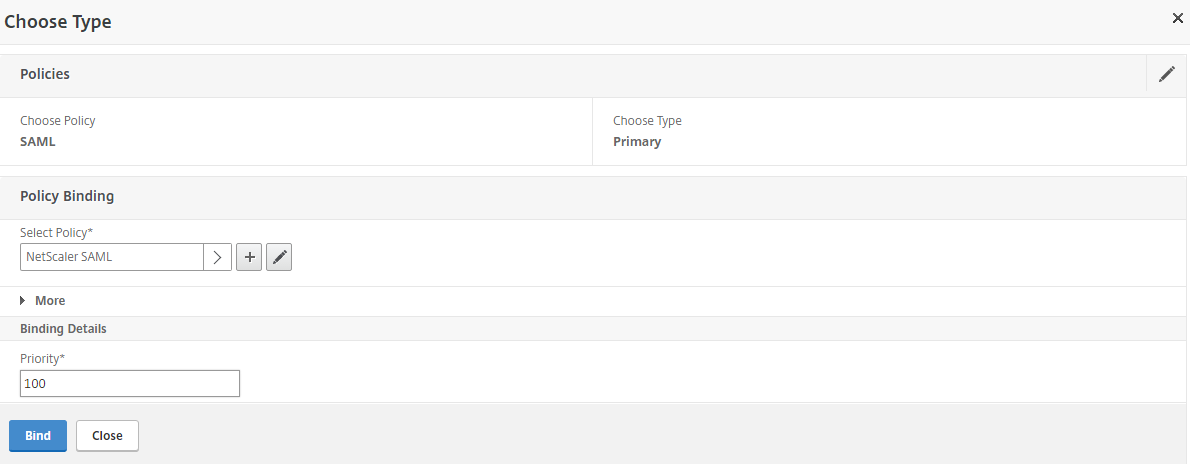
- Click "Bind"
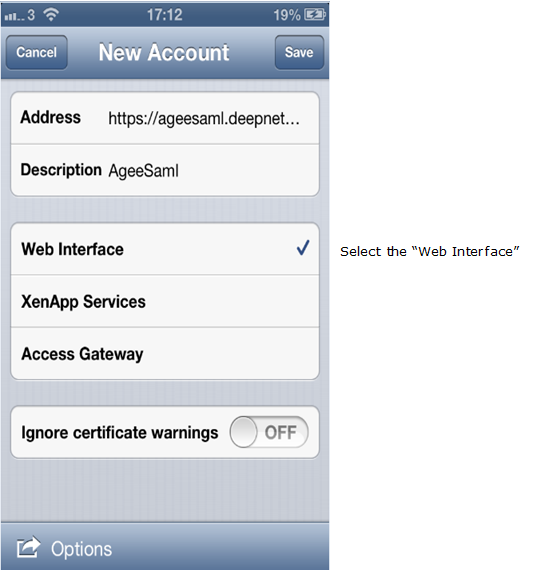
Configure Citrix Receiver