To build an application, you need to first build a realm and a logon procedure for the application
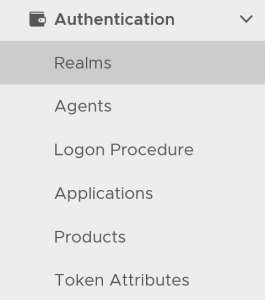
In the DualShield Admin Console, in the side panel, select "Authentication | Realms"
Click the "Create" button. This will bring up the new realm dialog window:
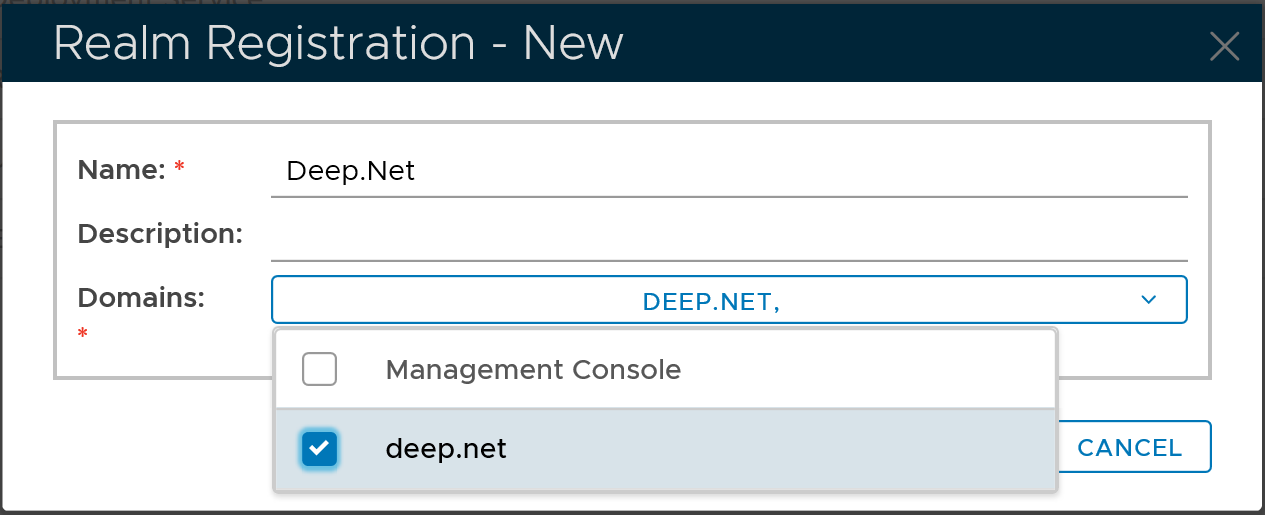
Select the domain to be included in the new relam, e.g. "deep.net"
Click the "Save" button to finish
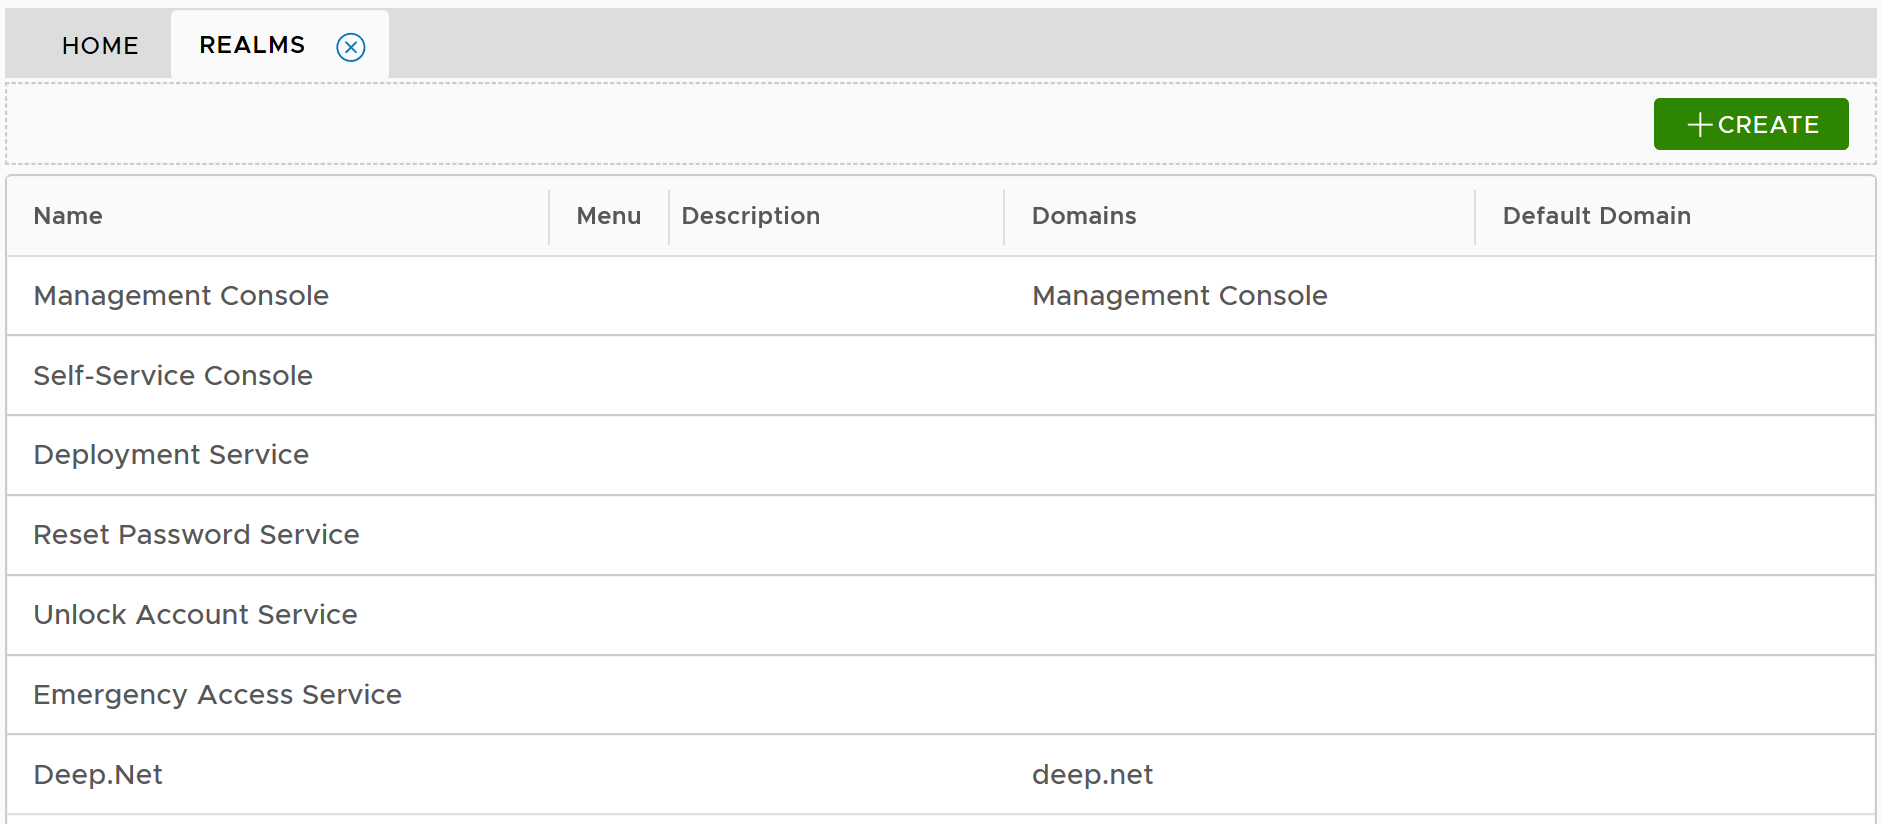
Click the "CREATE" button on the toolbar
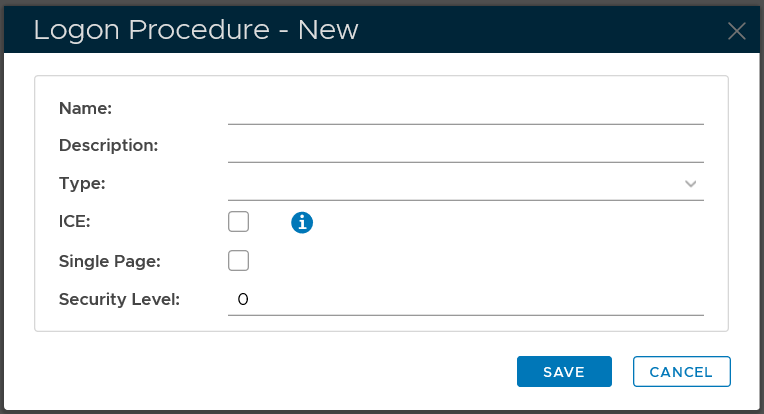
In the "Name" field, enter a name for this new logon procedure, e.g. "Office 365"
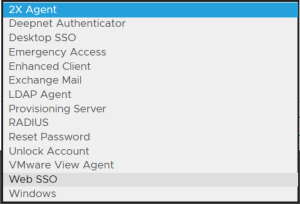
In the "Type" field, select the type of the logon procedure from the drop list, e.g. "Web SSO"

Click the "SAVE" button to save it.
Now that a new logon procedure is created, you want to add logon steps.
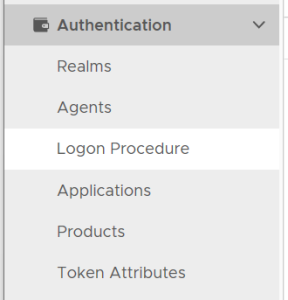
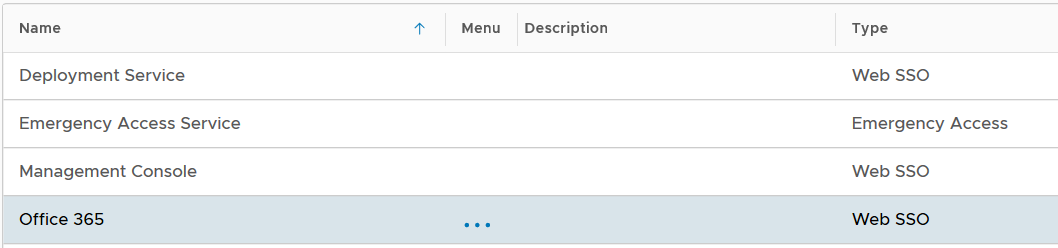
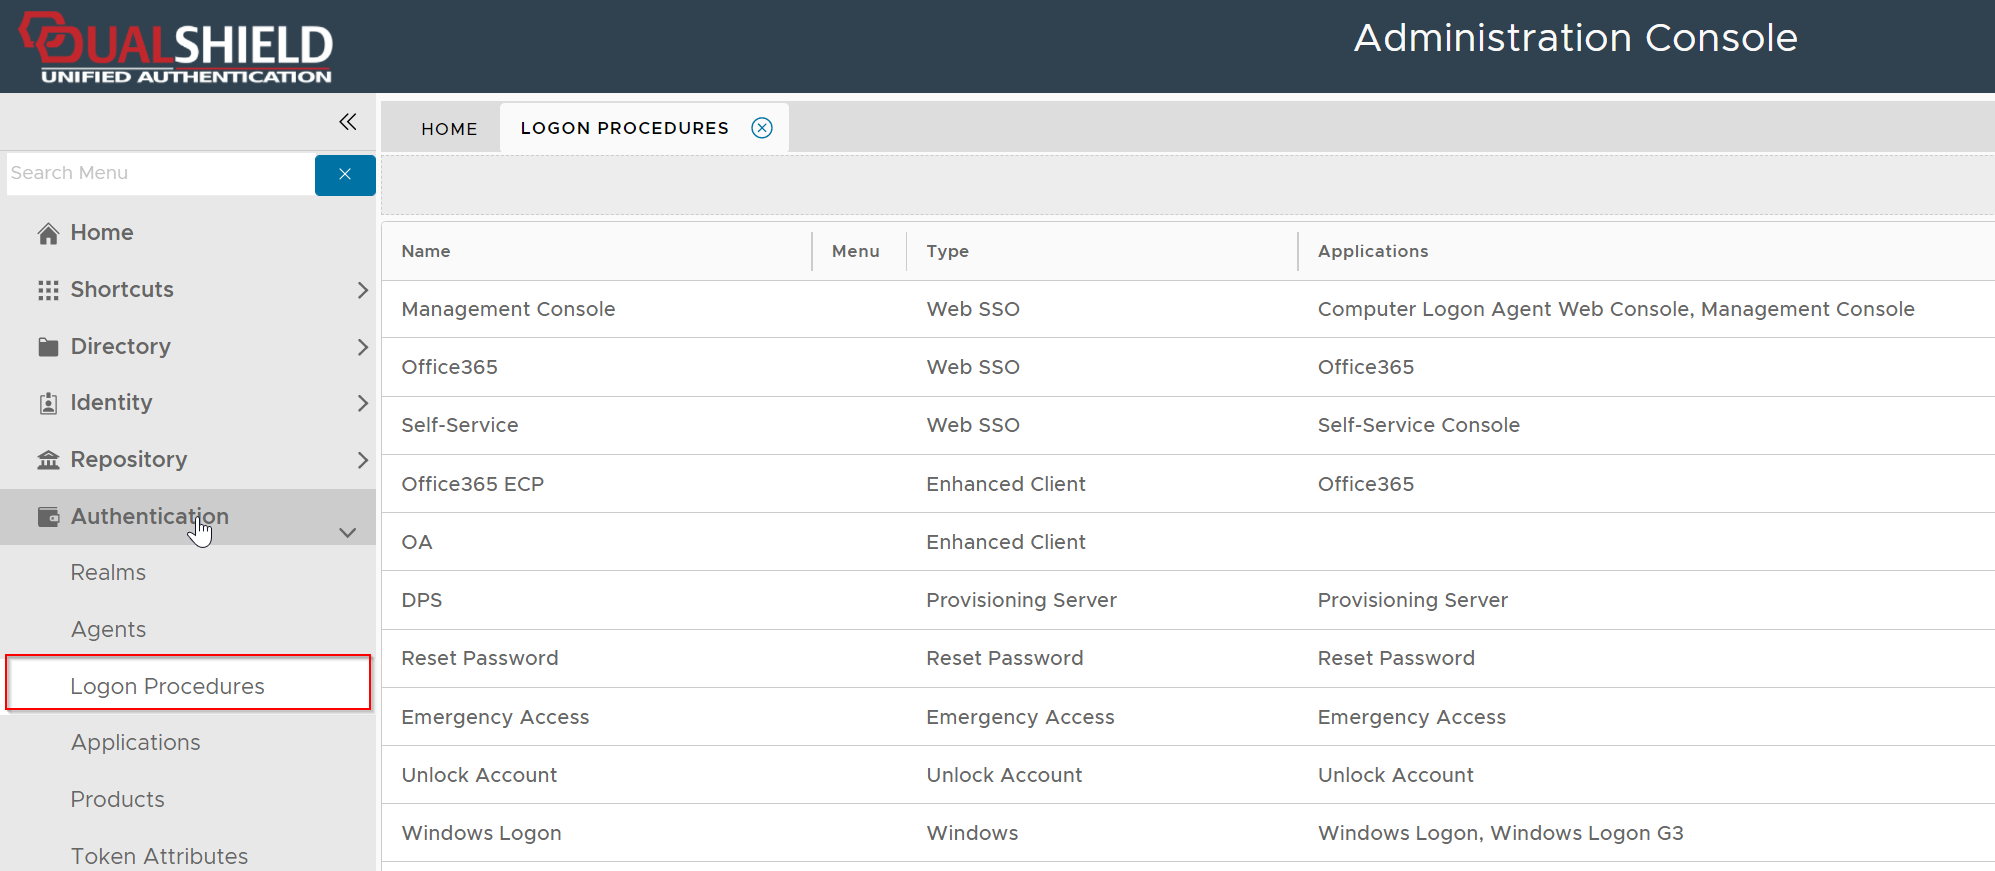
Navigate to Authentication | Logon Procedures
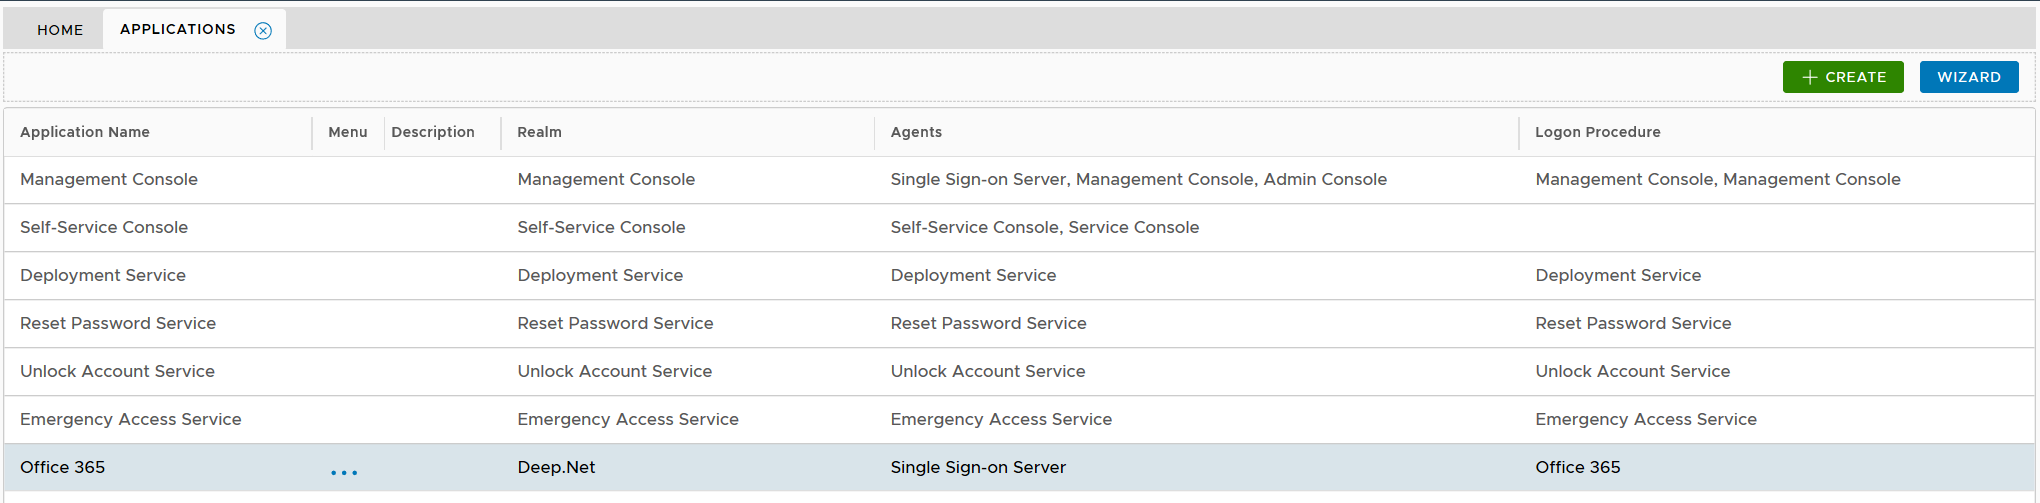
Click the context menu icon "..." of the application to be edited, e.g. "Office 365"
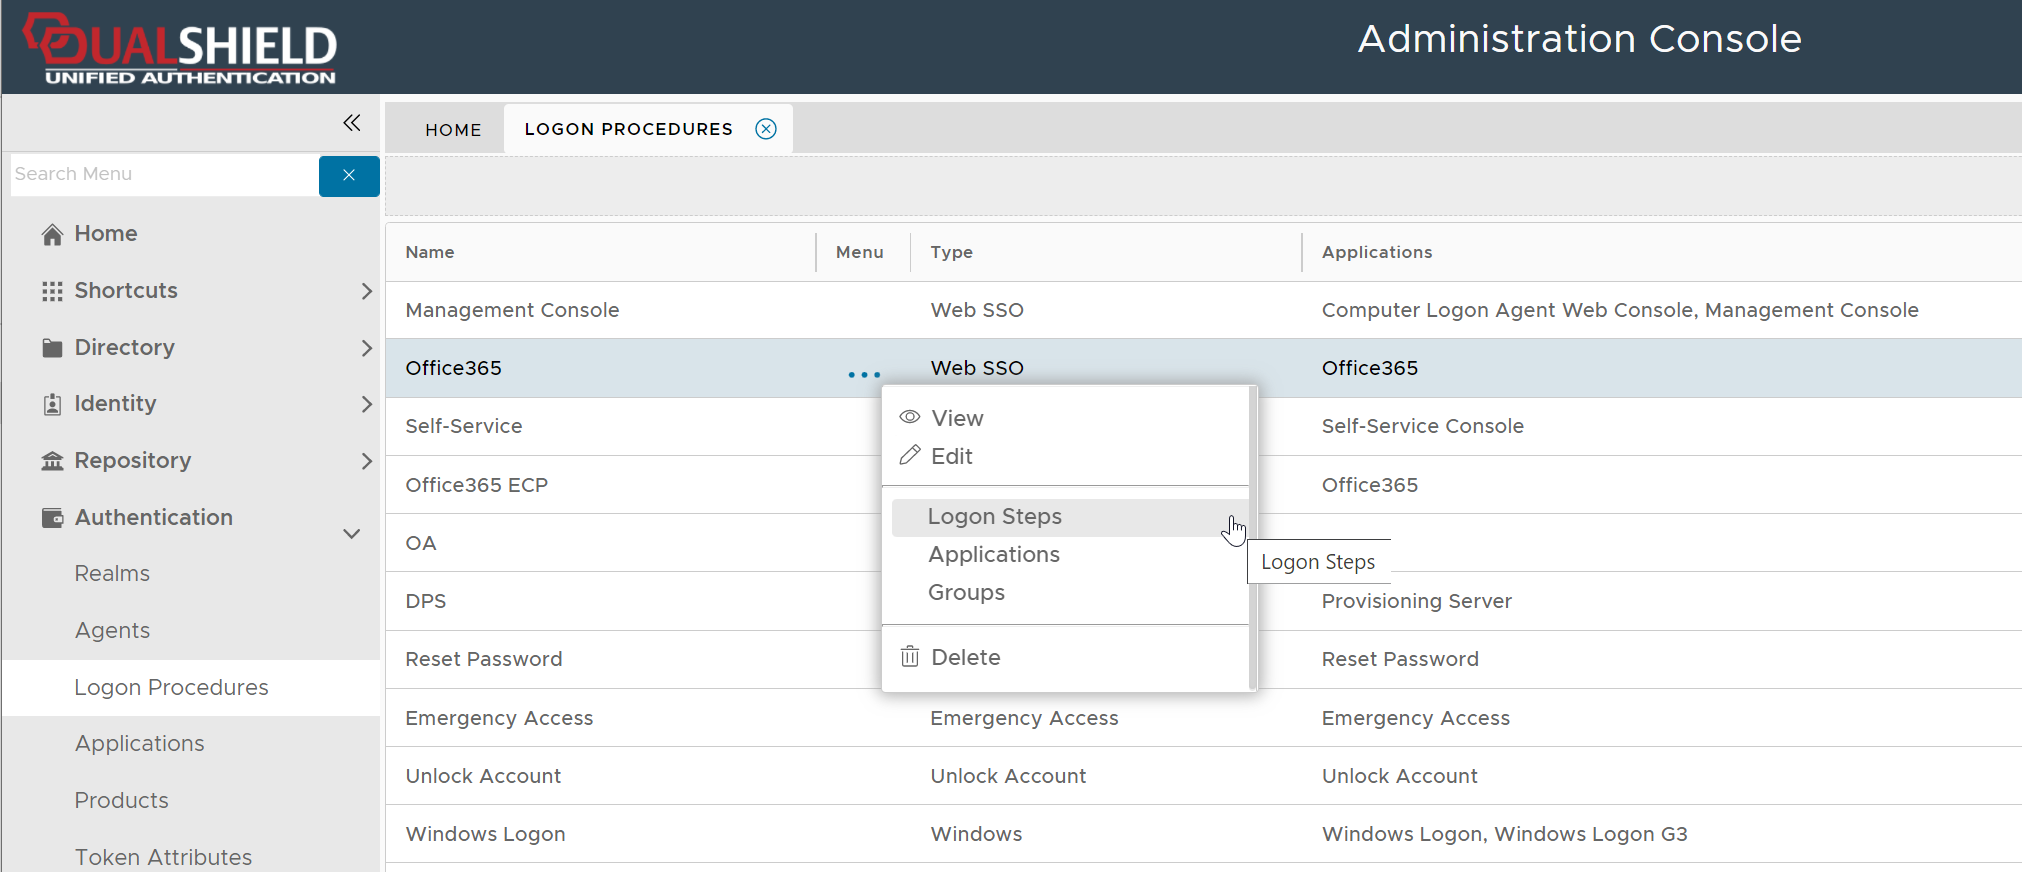
select "Logon Steps" to bring up the logon steps editor

To add a logon step, click the "ADD" button
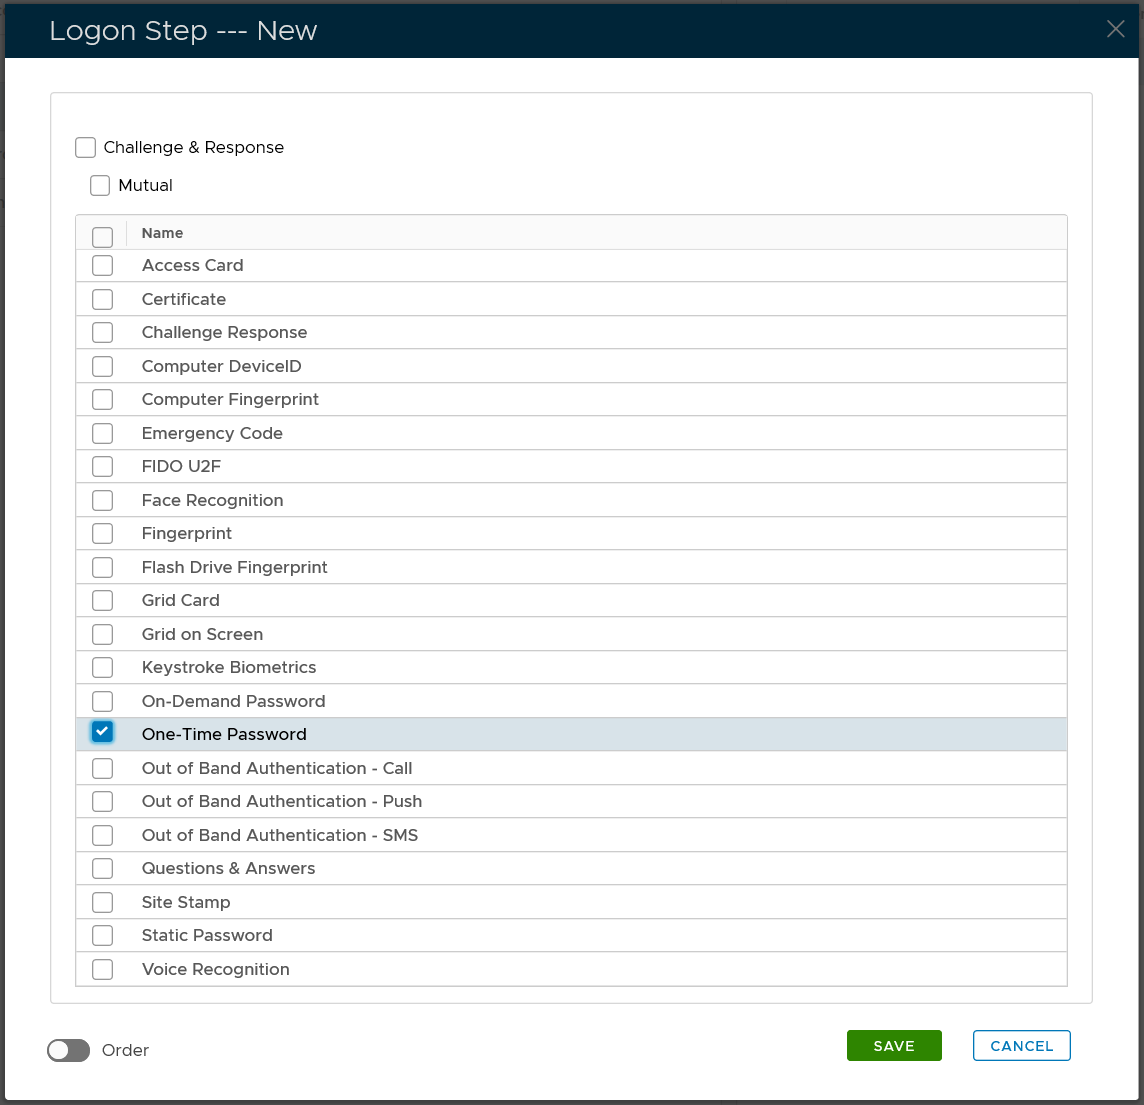
Select the one or multiple authentication methods that you want to add to this step, e.g. "One-Time Password"
Click the "SAVE" button to save it

You can change the order of the steps by clicking the "UP" and "DOWN" buttons.
Navigate to Authentication | Logon Procedures
Click the context menu icon "..." of the application to be edited, e.g. "Office 365"
select "Logon Steps" to bring up the logon steps editor
To add a logon step, click the "ADD" button
Select the one or multiple authentication methods that you want to add to this step, e.g. "One-Time Password"
Click the "SAVE" button to save it
You can change the order of the steps by clicking the "UP" and "DOWN" buttons.
Then, you need to publish the application on an authentication agent so that the application will be visible to users and accessible by the users.
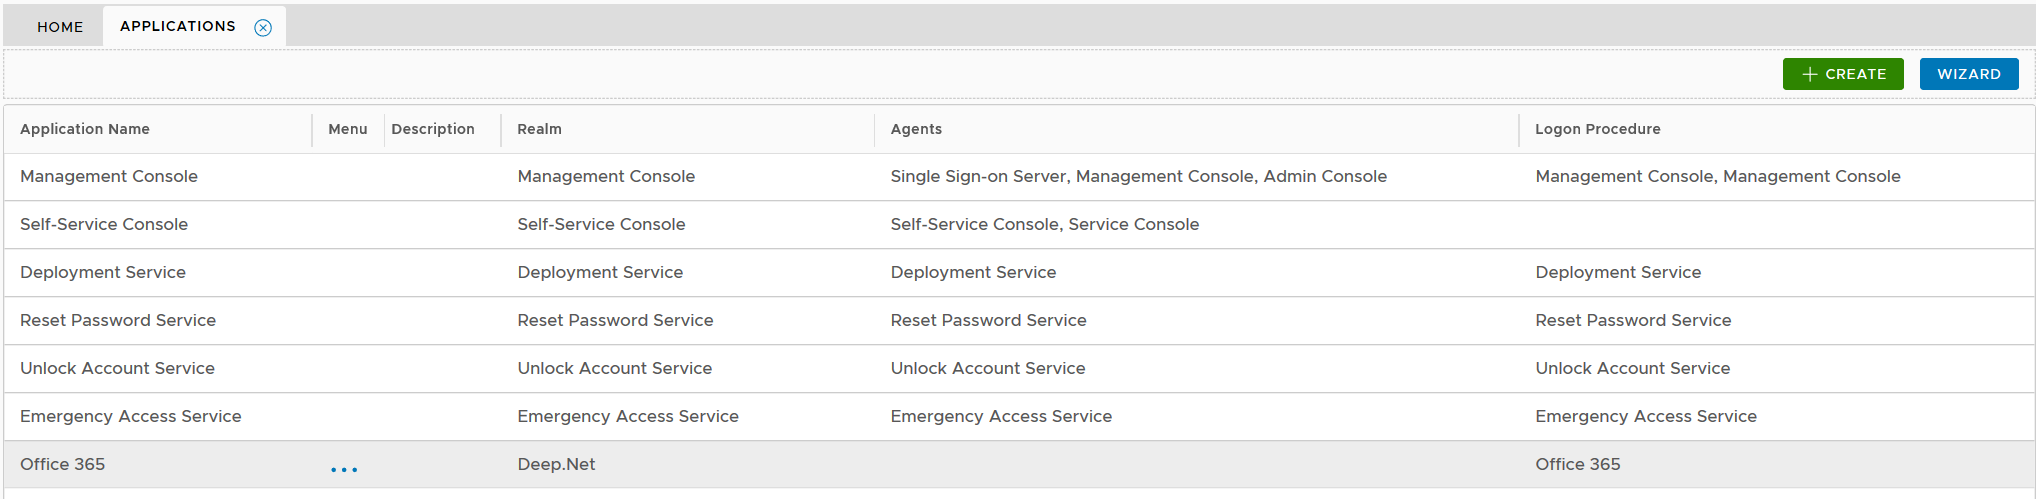
Click the conext menu icon "..." of the application, e.g. "Office 365" to access its context menu

select "Agents" in the context menu
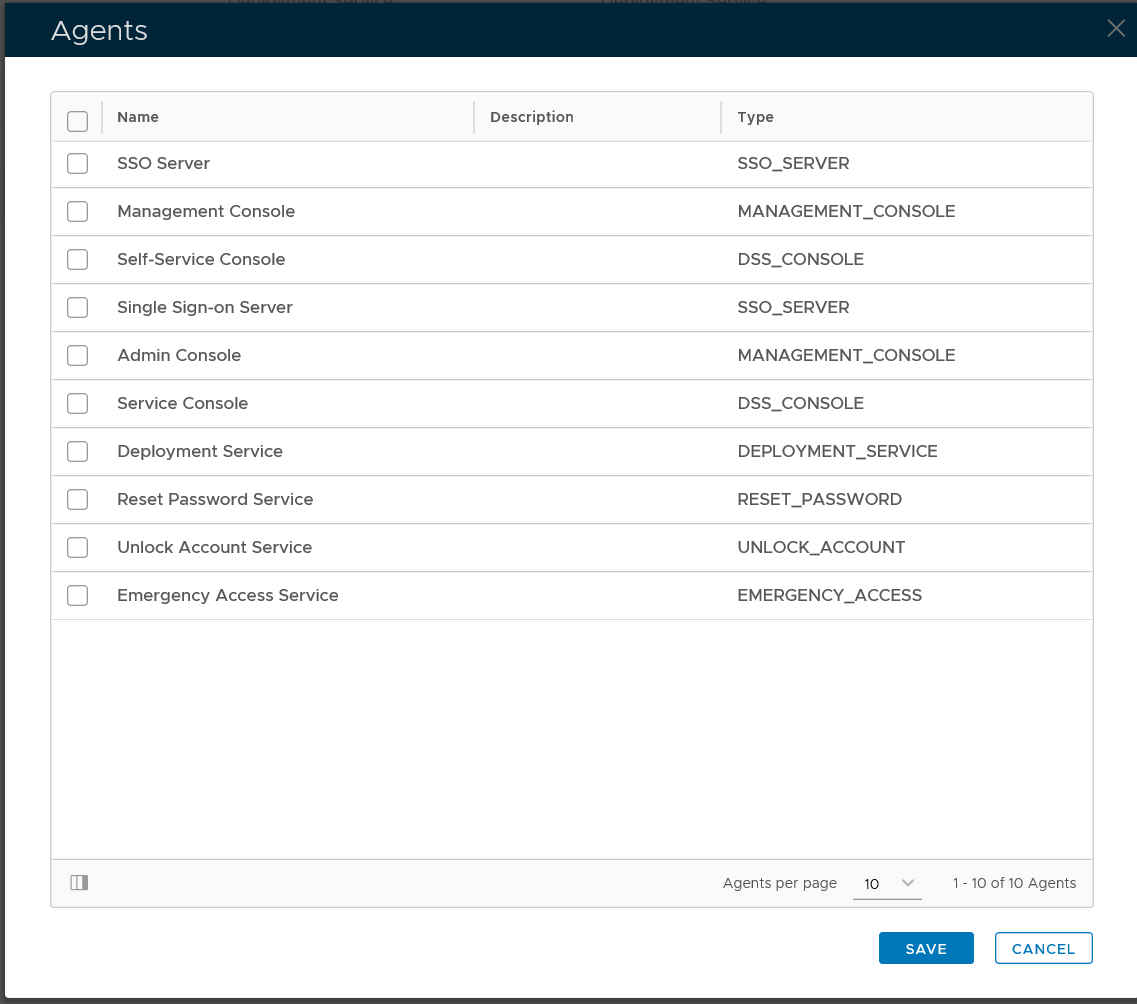
select the authentication agent on which the application is to be published, e.g. "Single-Sign-on Server"

Click "SAVE" button to save settings
By default, a newly application inherits its logon policy from the default system logon policy. It is optional but recommended that you should create a dedicated logon policy for the application so that you can have a clear and granular control on how 2FA or MFA should be enforced on users who are allowed to access the application.