For extra security, you can force the device to have a limited lifetime. This is particularly useful if you have contractors who require temporary access to emails.
There are two parts to this:
- Token Lifetime
- Expiry Notifice
- Token Notification Service
Token Lifetime

| Option | Value | Explanation |
|---|---|---|
| Token Lifetime (Days) | Set number of days you wish the token to be live for | The "Token Lifetime" option specifies the default lifespan in days of any newly created token. When a token has reached its lifespan, it is expired. (Please note: '0' = No expiration) |
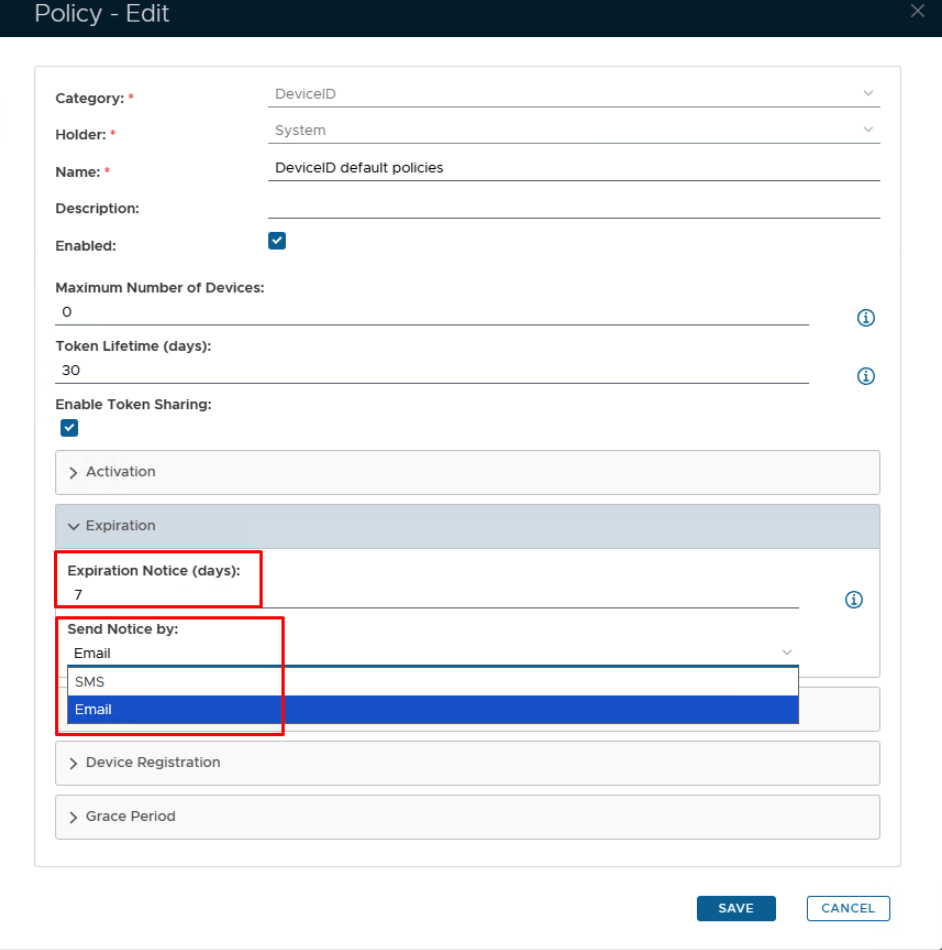
Expiration Notice
By default, token expiration is triggered reactively. The DualShield server will only check a device's expiration when the device is trying to access the Exchange server and the device has passed its lifespan time.

| Option | Value | Explanation |
|---|---|---|
| Expiration Notice (Days) | Set number of days before token is due to expire | If you want the expiry notification to be sent out proactively, then you need to set this option ('0' = Disabled) |
| Send Notice by | SMS/Email | Set the method in which the expry notice will be delivered. |
Set up Token Notification Service
If you have enabled the token expiry notice option in the DeviceID policy, then you must also set up the task called "Token Notification Service"
Introduction
The "Token Notification Service" task periodically checks if tokens are about to reach their expiration time, and sends out notification messages to the users.
A token expiry notification may be sent based on the date of token creation and the value specified in the DeviceID policy setting "Expiration Notice (days):" (see below);
The task can be found by navigating to "Administration | Tasks", then scrolling down to the task "Token Notification Service";

Editing and Scheduling the Task
Viewing and Editing the task
By default, the Token Notification task is not enabled, but may be enabled by left clicking on the context menu of the task and selecting "Edit";

A new window will now open titled "Task - Edit";

Scheduling the Task
Select the "Enable Schedule" checkbox to ensure the task schedule is activated, then use the pencil icon ("![]() ") to specify the time and frequency settings for automated task execution.
") to specify the time and frequency settings for automated task execution.

- Tasks can be scheduled for automatic execution by selecting the "Schedule Enable" option then clicking on the
 icon;
icon;
When the
is pressed a window will open titled "Schedule" that can be used to specify the when the report is scheduled to run; 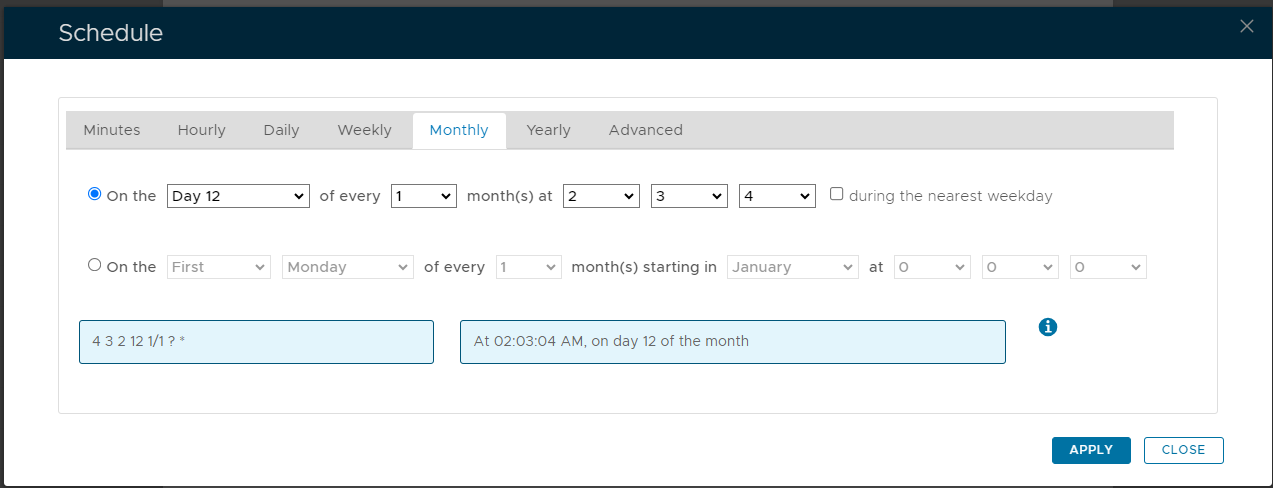
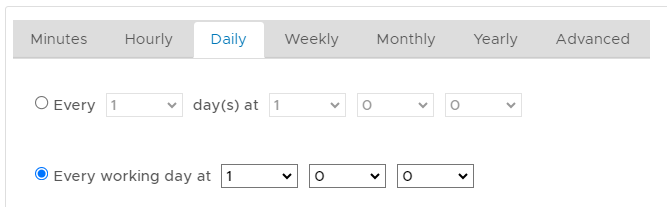
As an example, we can schedule the report to run at 1am every weekday using the following settings;
After clicking on
 the schedule details will be converted into text form and added against the report parameter "Schedule";
Manual Task Execution
The task can be run manually from the management console by left click on the context menu of the task, then selecting "Run";

A new window will open titled "Execute Task" will then open;

You can add a description, however, this is optional. Click the  button.