To setup MFA for computer logon, complete the following steps.
Build Application
Complete the following steps to build an application for computer MFA logon.
Create logon procedure for computer MFA
Below is the general guide for creating a logon procedure in DualShield
Click the "CREATE" button on the toolbar
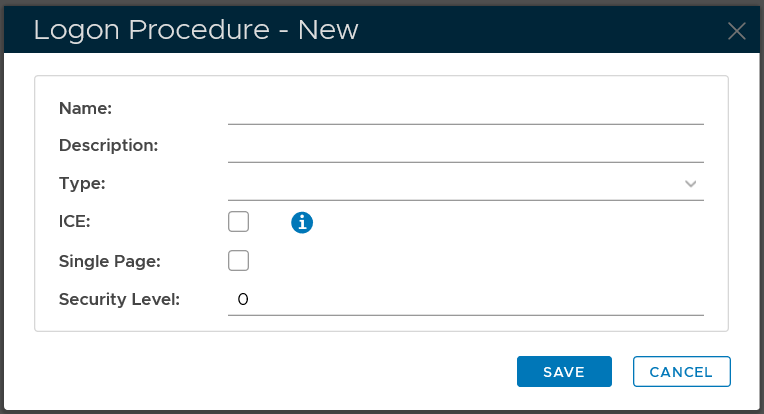
In the "Name" field, enter a name for this new logon procedure, e.g. "Office 365"
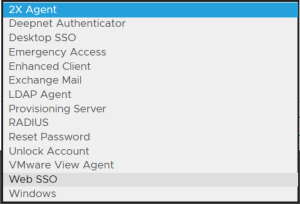
In the "Type" field, select the type of the logon procedure from the drop list, e.g. "Web SSO"

Click the "SAVE" button to save it.
Now that a new logon procedure is created, you want to add logon steps.
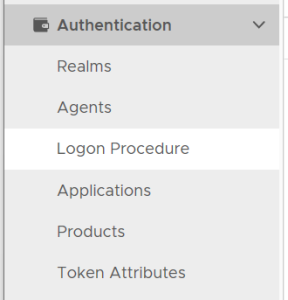
Navigate to Authentication | Logon Procedures
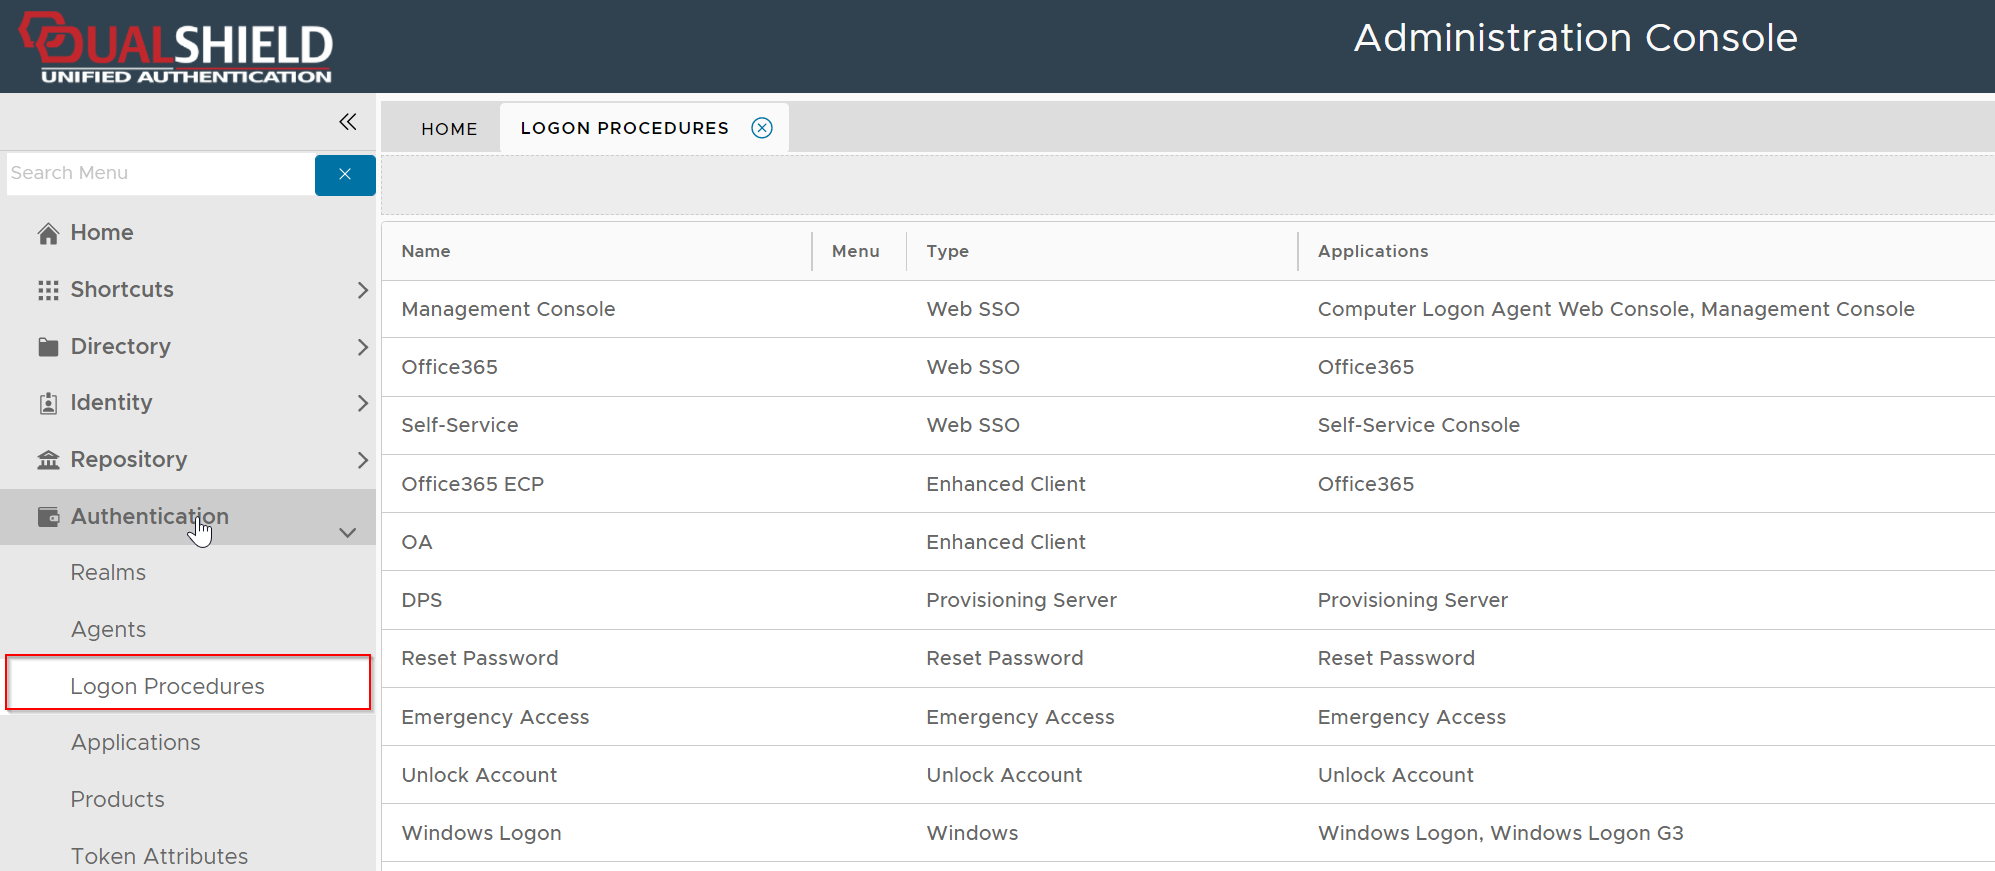
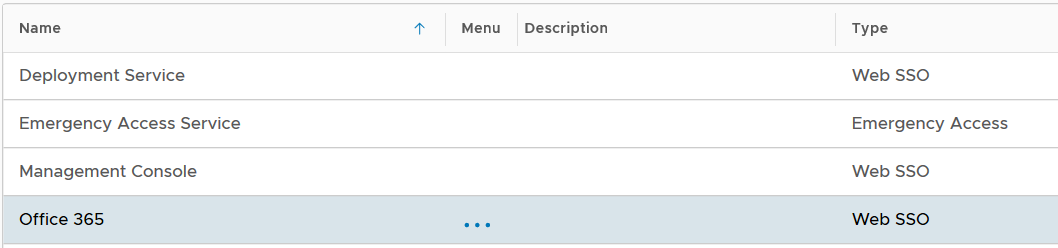
Click the context menu icon "..." of the application to be edited, e.g. "Office 365"
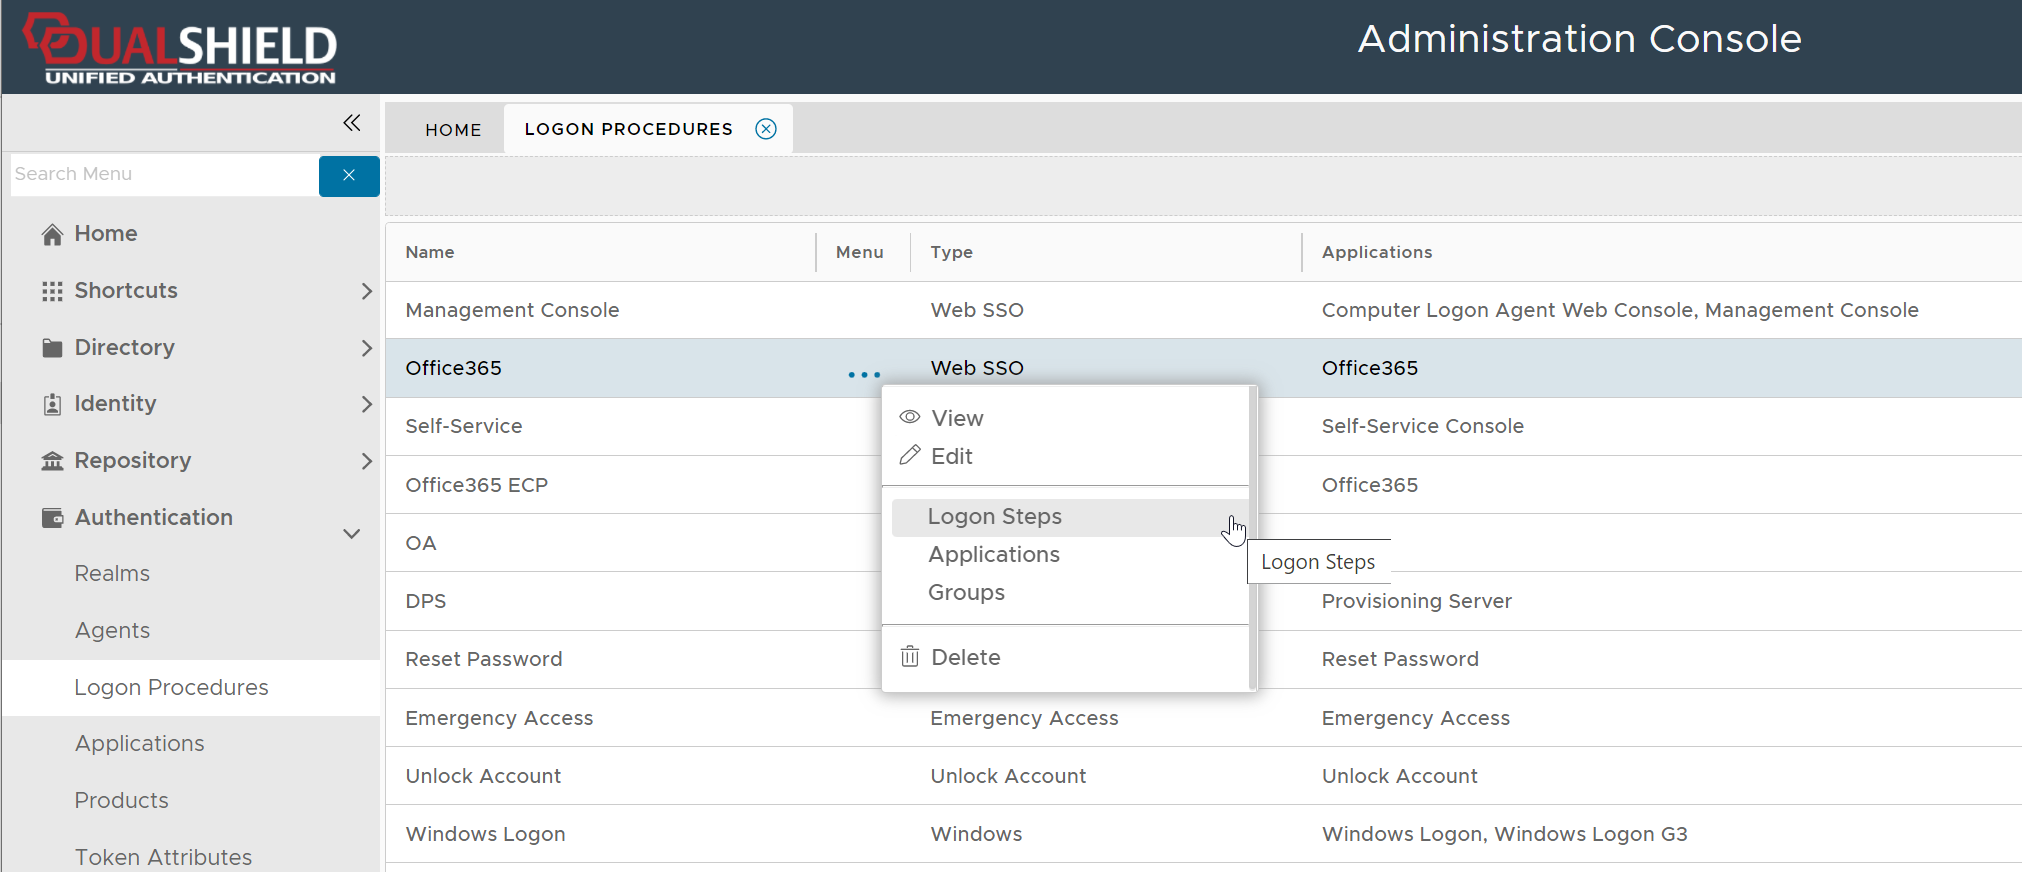
select "Logon Steps" to bring up the logon steps editor

To add a logon step, click the "ADD" button
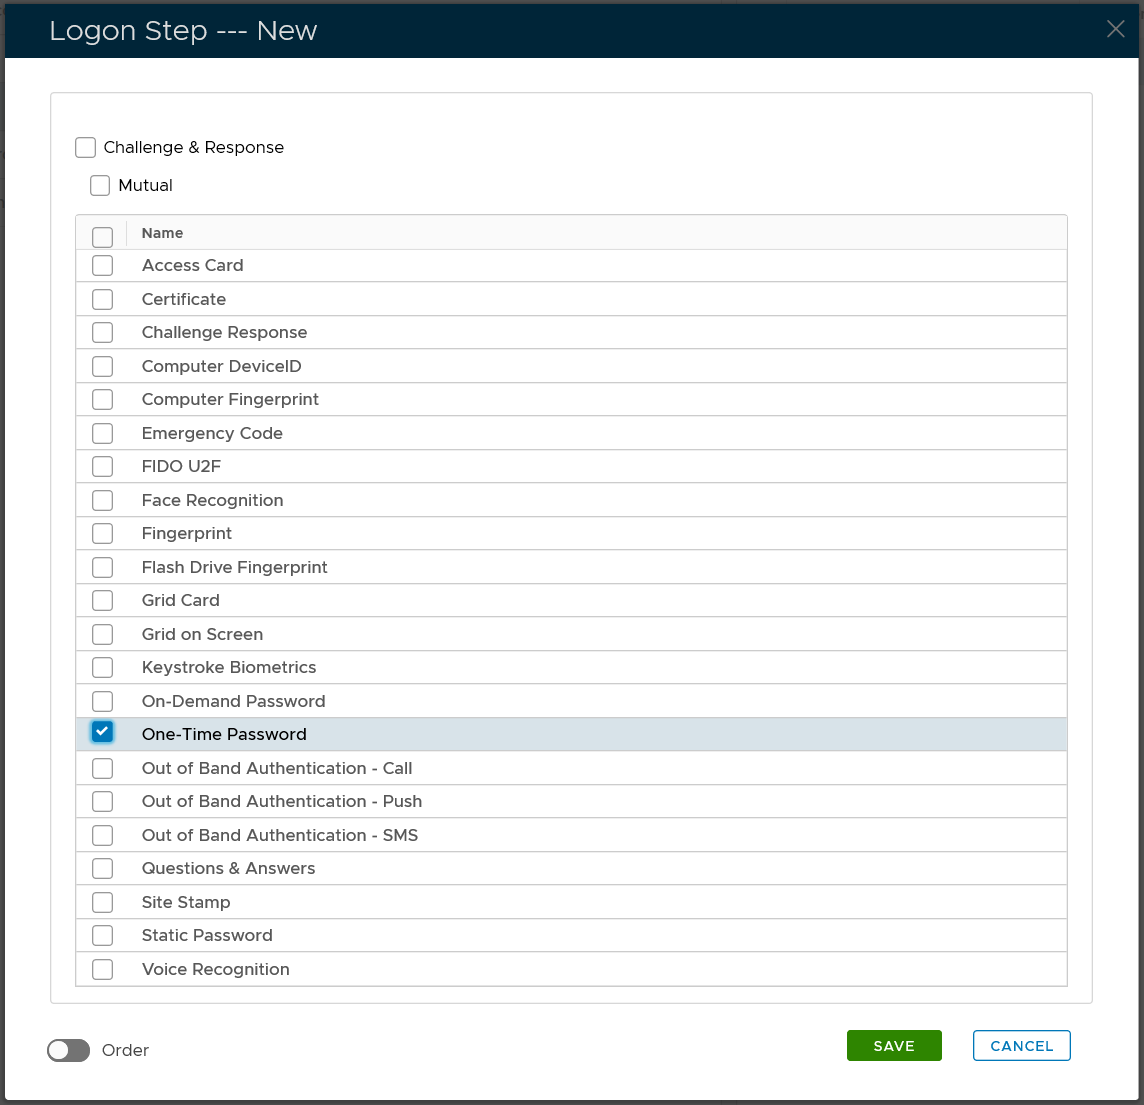
Select the one or multiple authentication methods that you want to add to this step, e.g. "One-Time Password"
Click the "SAVE" button to save it

You can change the order of the steps by clicking the "UP" and "DOWN" buttons.
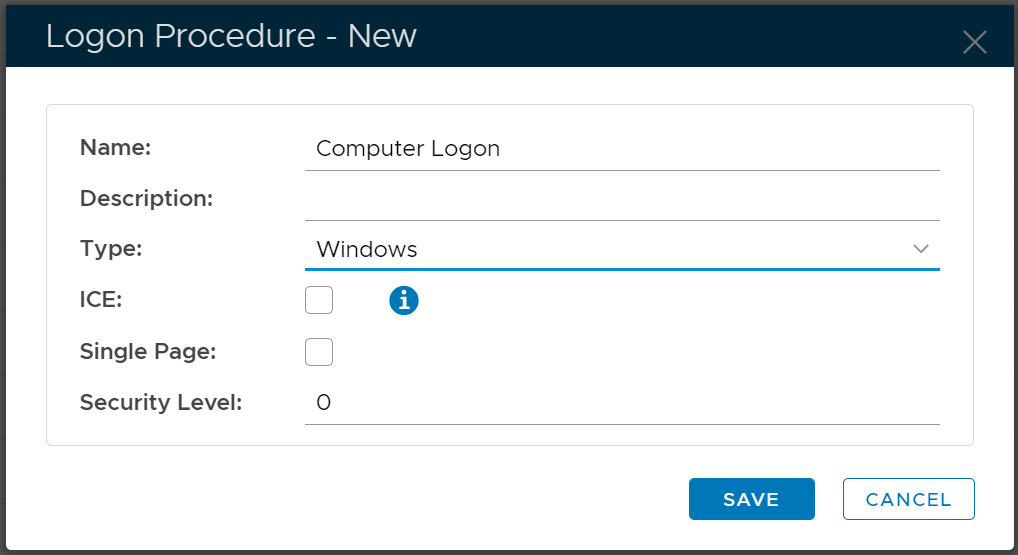
Make sure that the type of the Logon Procedure you have created is Windows
Once a logon procedure has been created, you need to add logon steps into the newly created logon procedure.
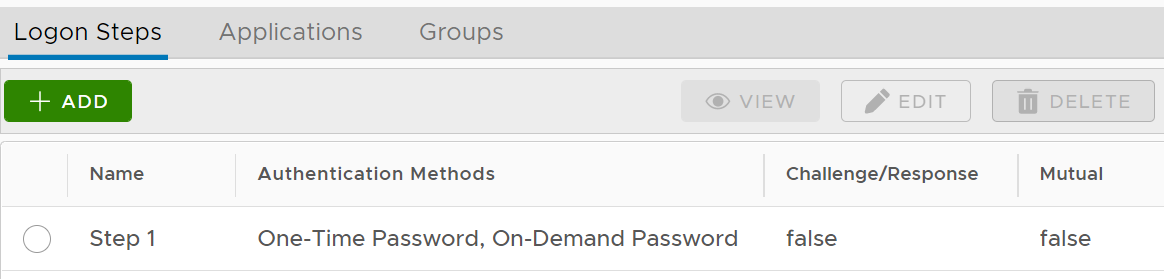
Logon Step for Computer MFA Logon
The computer 2FA or MFA logon process is a 2-step or multi-step verification procedure. The first step is the AD credential (i.e. AD password) verification, and the second step is the second factor such as one-time passcode etc. The first factor, i.e. AD password, is always required and actually verified by the AD itself, and the second factor, such as an OTP token or FIDO key, is verified by the DualShield MFA server. Therefore, for 2FA, you only need to add one logon step into the logon procedure and you only need to add a second factor into the logon step.
The example below is a logon step that includes 2 authentication options, one-time password and on-demand password, which means that the users will be allowed to authenticate themselves using either of the credentials.
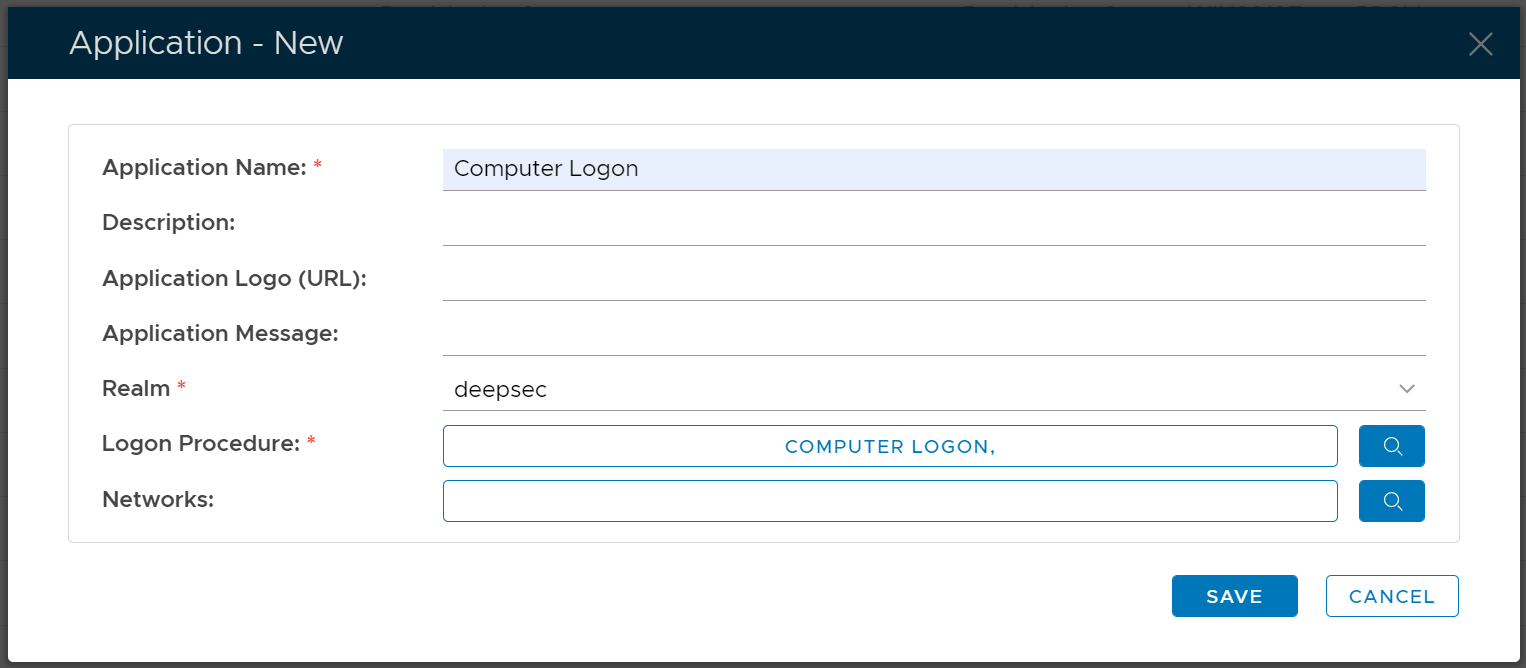
Create application for computer MFA

Select "CREATE" on the toolbar

Select the Realm to be linked to this application, e.g. Deep.Net
Select the Logon Procedure to be used by this application, e.g.. Office 365
Click "SAVE" to save the application.

However, you must select a Logon Procedure that is of the type of Windows. In the example below, we create an application with a name called "Computer Logon" and the logon procedure we select is a logon procedure called "Computer Logon" that we have already created.

Setup Policies
Install Logon Agent
The Windows Logon Agent can be installed on any Windows server machine in the network. For a small or medium system, you can install the computer logon agent on the same machine where your DualShield authentication server is installed and running. Please note, you should not install the logon agent on a client PC.
Prerequisites
Before you run the setup wizard, you must have your DualShield Authentication Server installed and operating, and make sure that the computer on which you are going to install the Windows Logon Agent meets the following minimum hardware and software requirements:
- A Windows 2008 R2, 2012 R2, 2016 or 2019 Server with the latest service pack installed.
- TCP/IP Networking
- TCP ports 8086, 8088 and 12841 must be available on the Windows server for use by the DualShield Computer Logon Agent.
Install DualShield Computer Logon Agent
To install the DualShield Computer Logon Agent, launch the installer Computer-Logon-Agent-Installer-xxx.yyyy.exe (where xxx is the version number and yyyy the build number) and go through the following steps:
Step 1: Welcome

Step 2: License Agreement

Step 3: Installation Path

Step 4: Installation Completed

Register Logon Agent
On the machine where the Logon Agent in installed, start a Web browser and enter "http://localhost:8086" in the address bar go through the following steps:
Step 1 - Agent Console FQDN
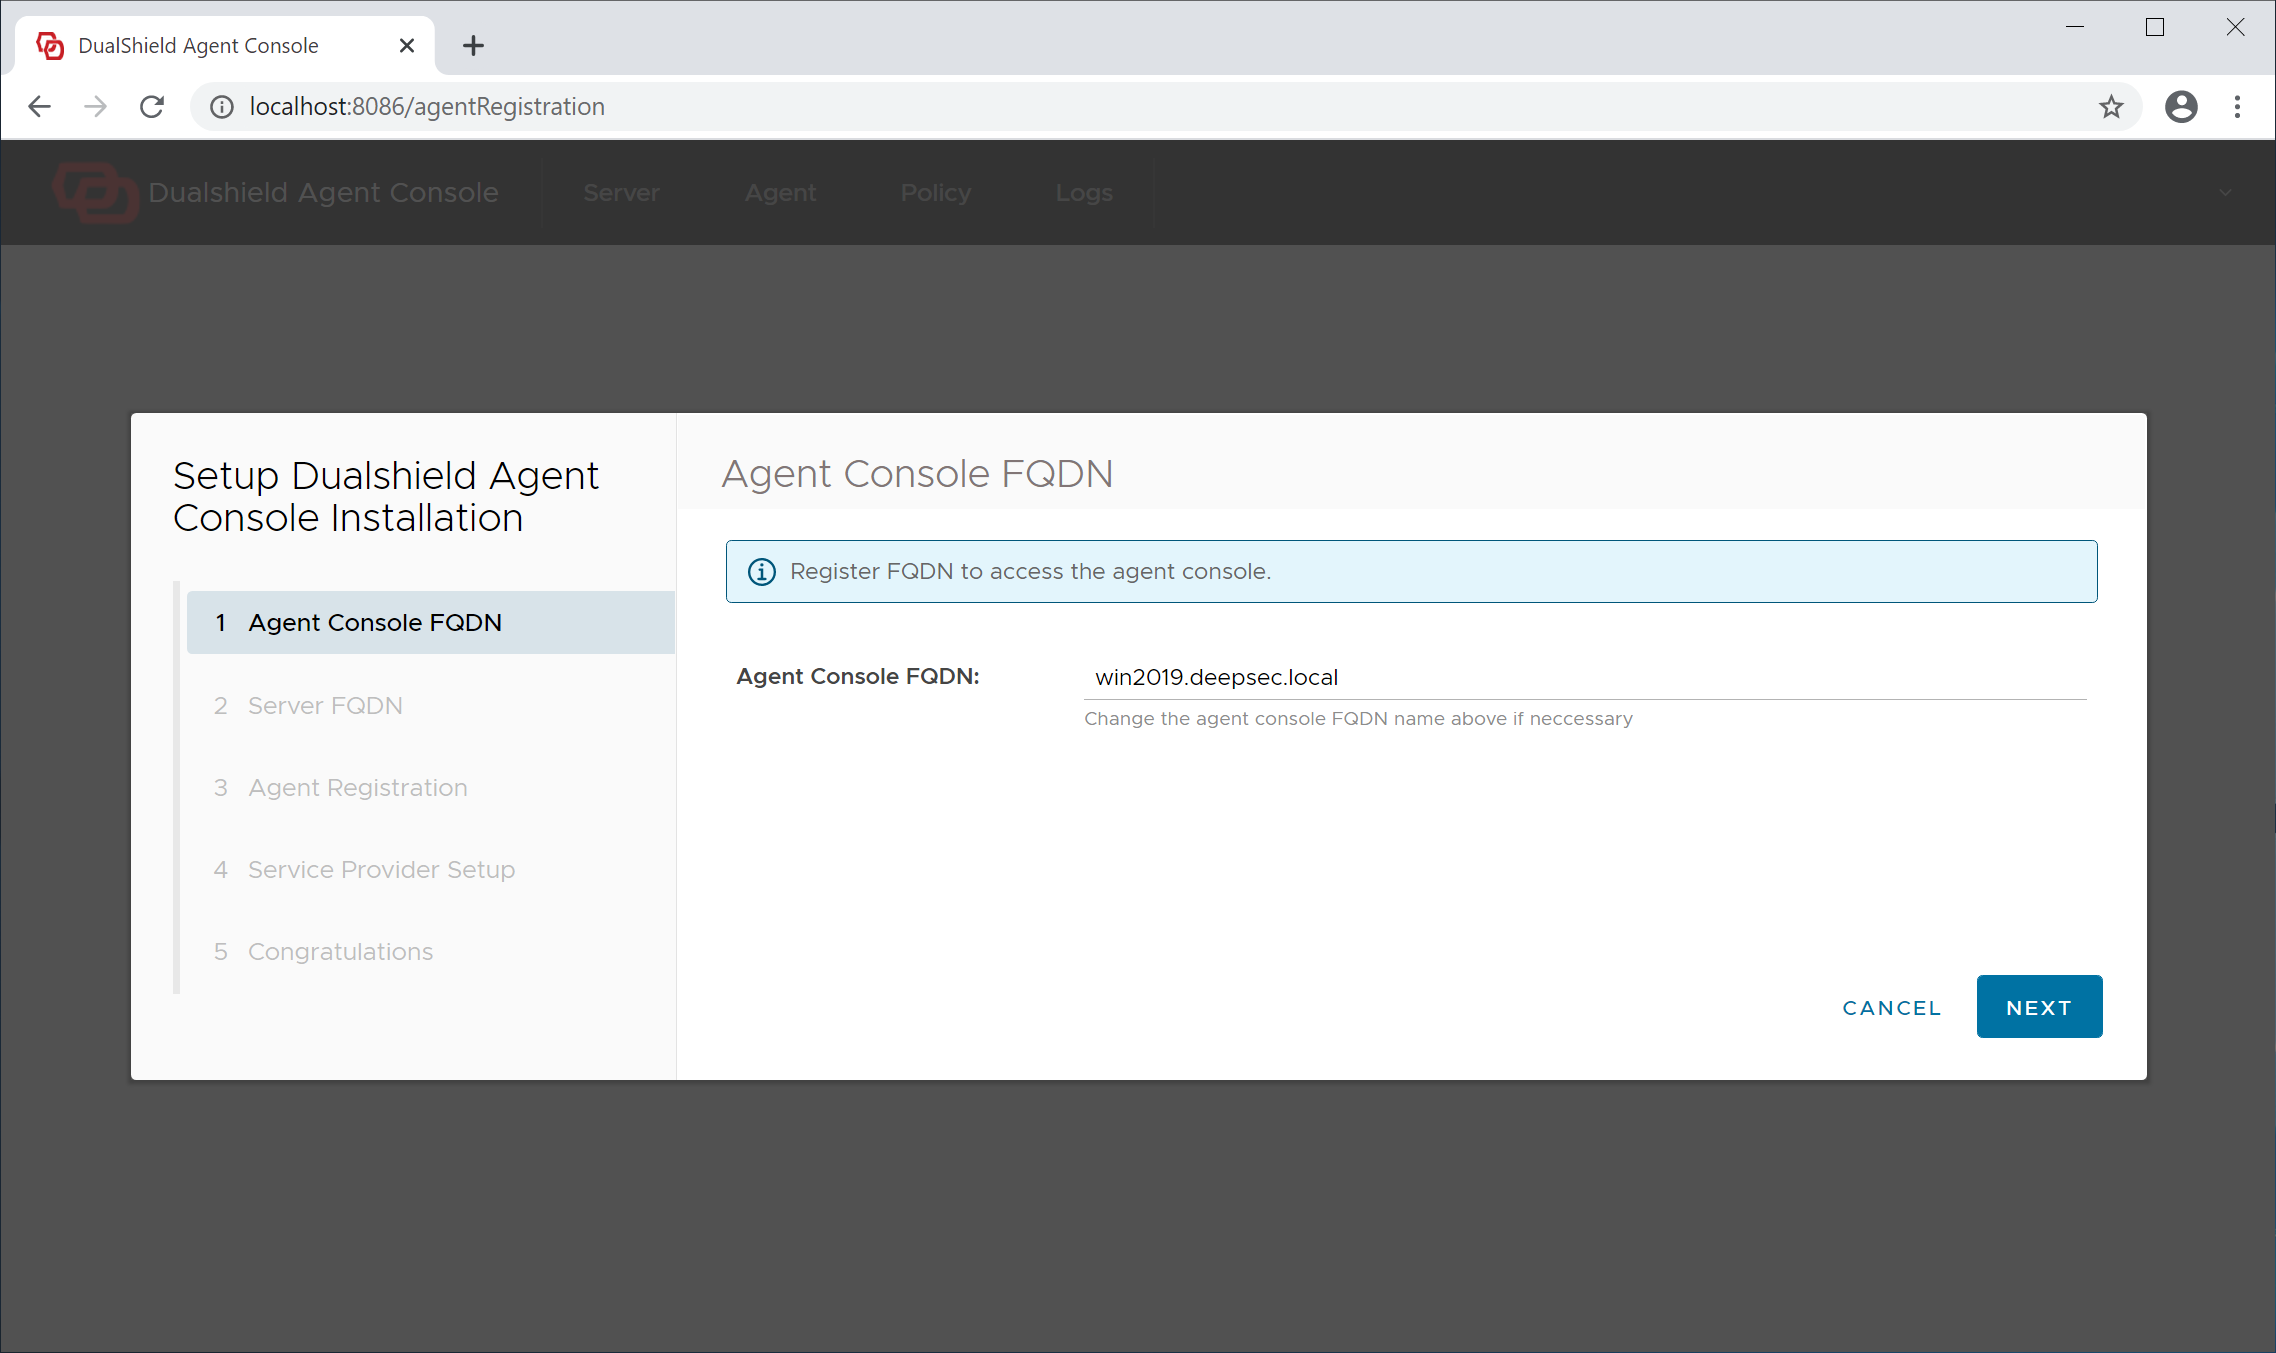
The admin console of the Logon Agent is a web portal, therefore it needs to have a hostname, or fully qualified domain name (FQDN). By default, the full computer name is suggested as the Agent's hostname.
Step 2 - Server FQDN
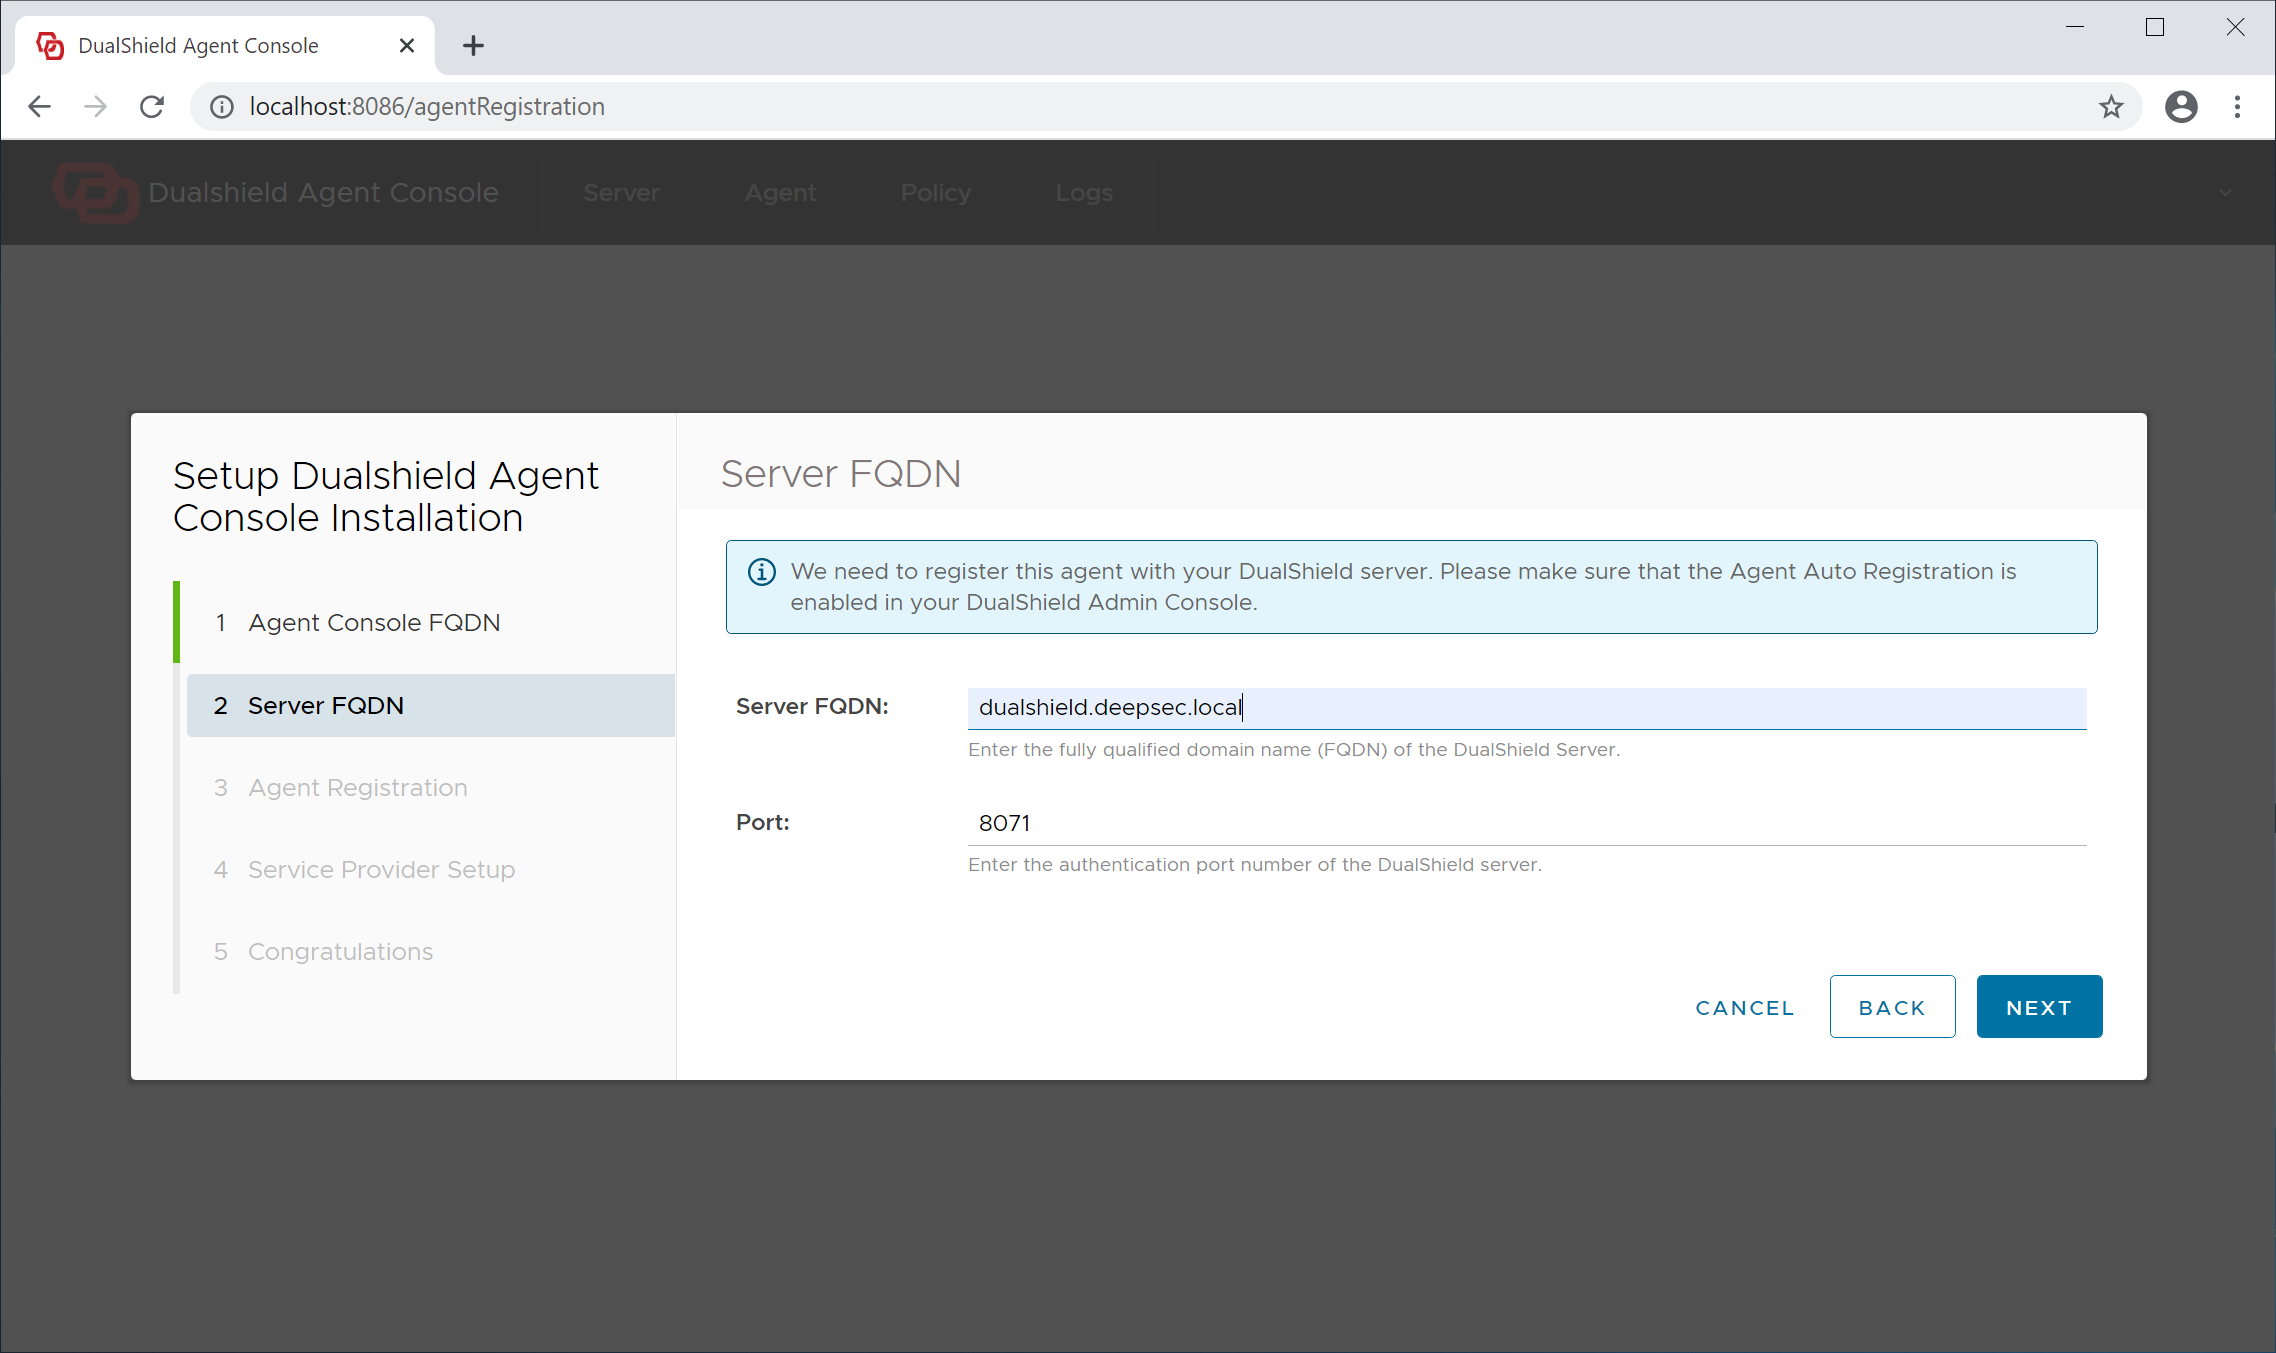
Server FQDN: Enter the FQDN of your DualShield authentication server
Click "Next" to continue
Step 3 - Agent Registration
In order to register the Logon Agent with the Authentication Server, we need to first enable the Agent Registration option.
For security purposes, the agent registration function is disabled by default. You need to enable the Agent Auto Registration function in your DualShield authentication server.
From the management console, navigate to "Authentication | Agents", then click 
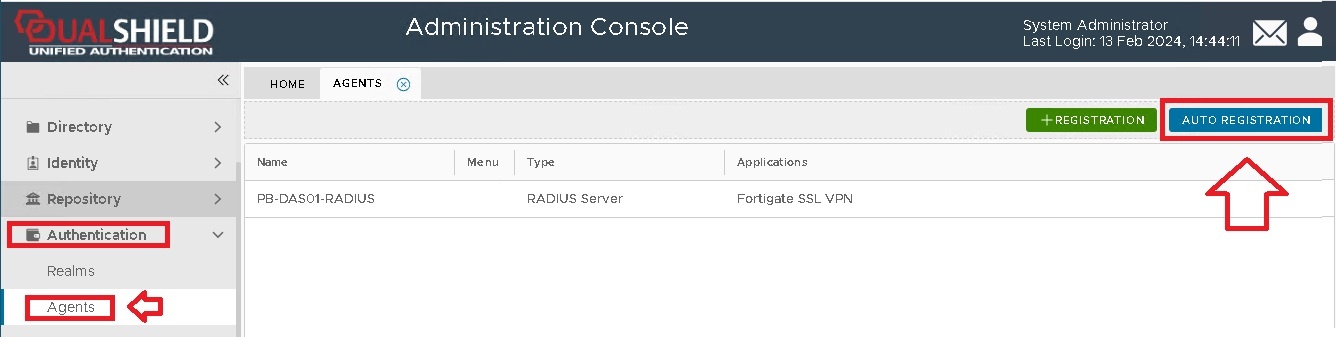
A new window will now open titled "Auto Registration", ensure the "Enabled" option is selected, then click ;
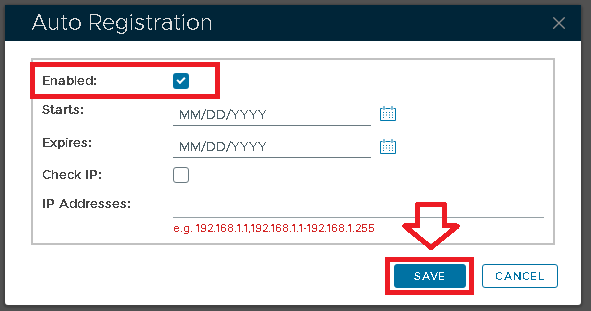
Tick the "Enabled" option first, then fill in the Starts and Expires date.
You may want to enable the "Check IP" option for extra security. If this option is enabled, then in the "IP Addresses" field you must enter the IP address of the machine where the authentication agent is being installed.
Click on the  button, and Auto-Registration will now take place during the installation of the RADIUS server.
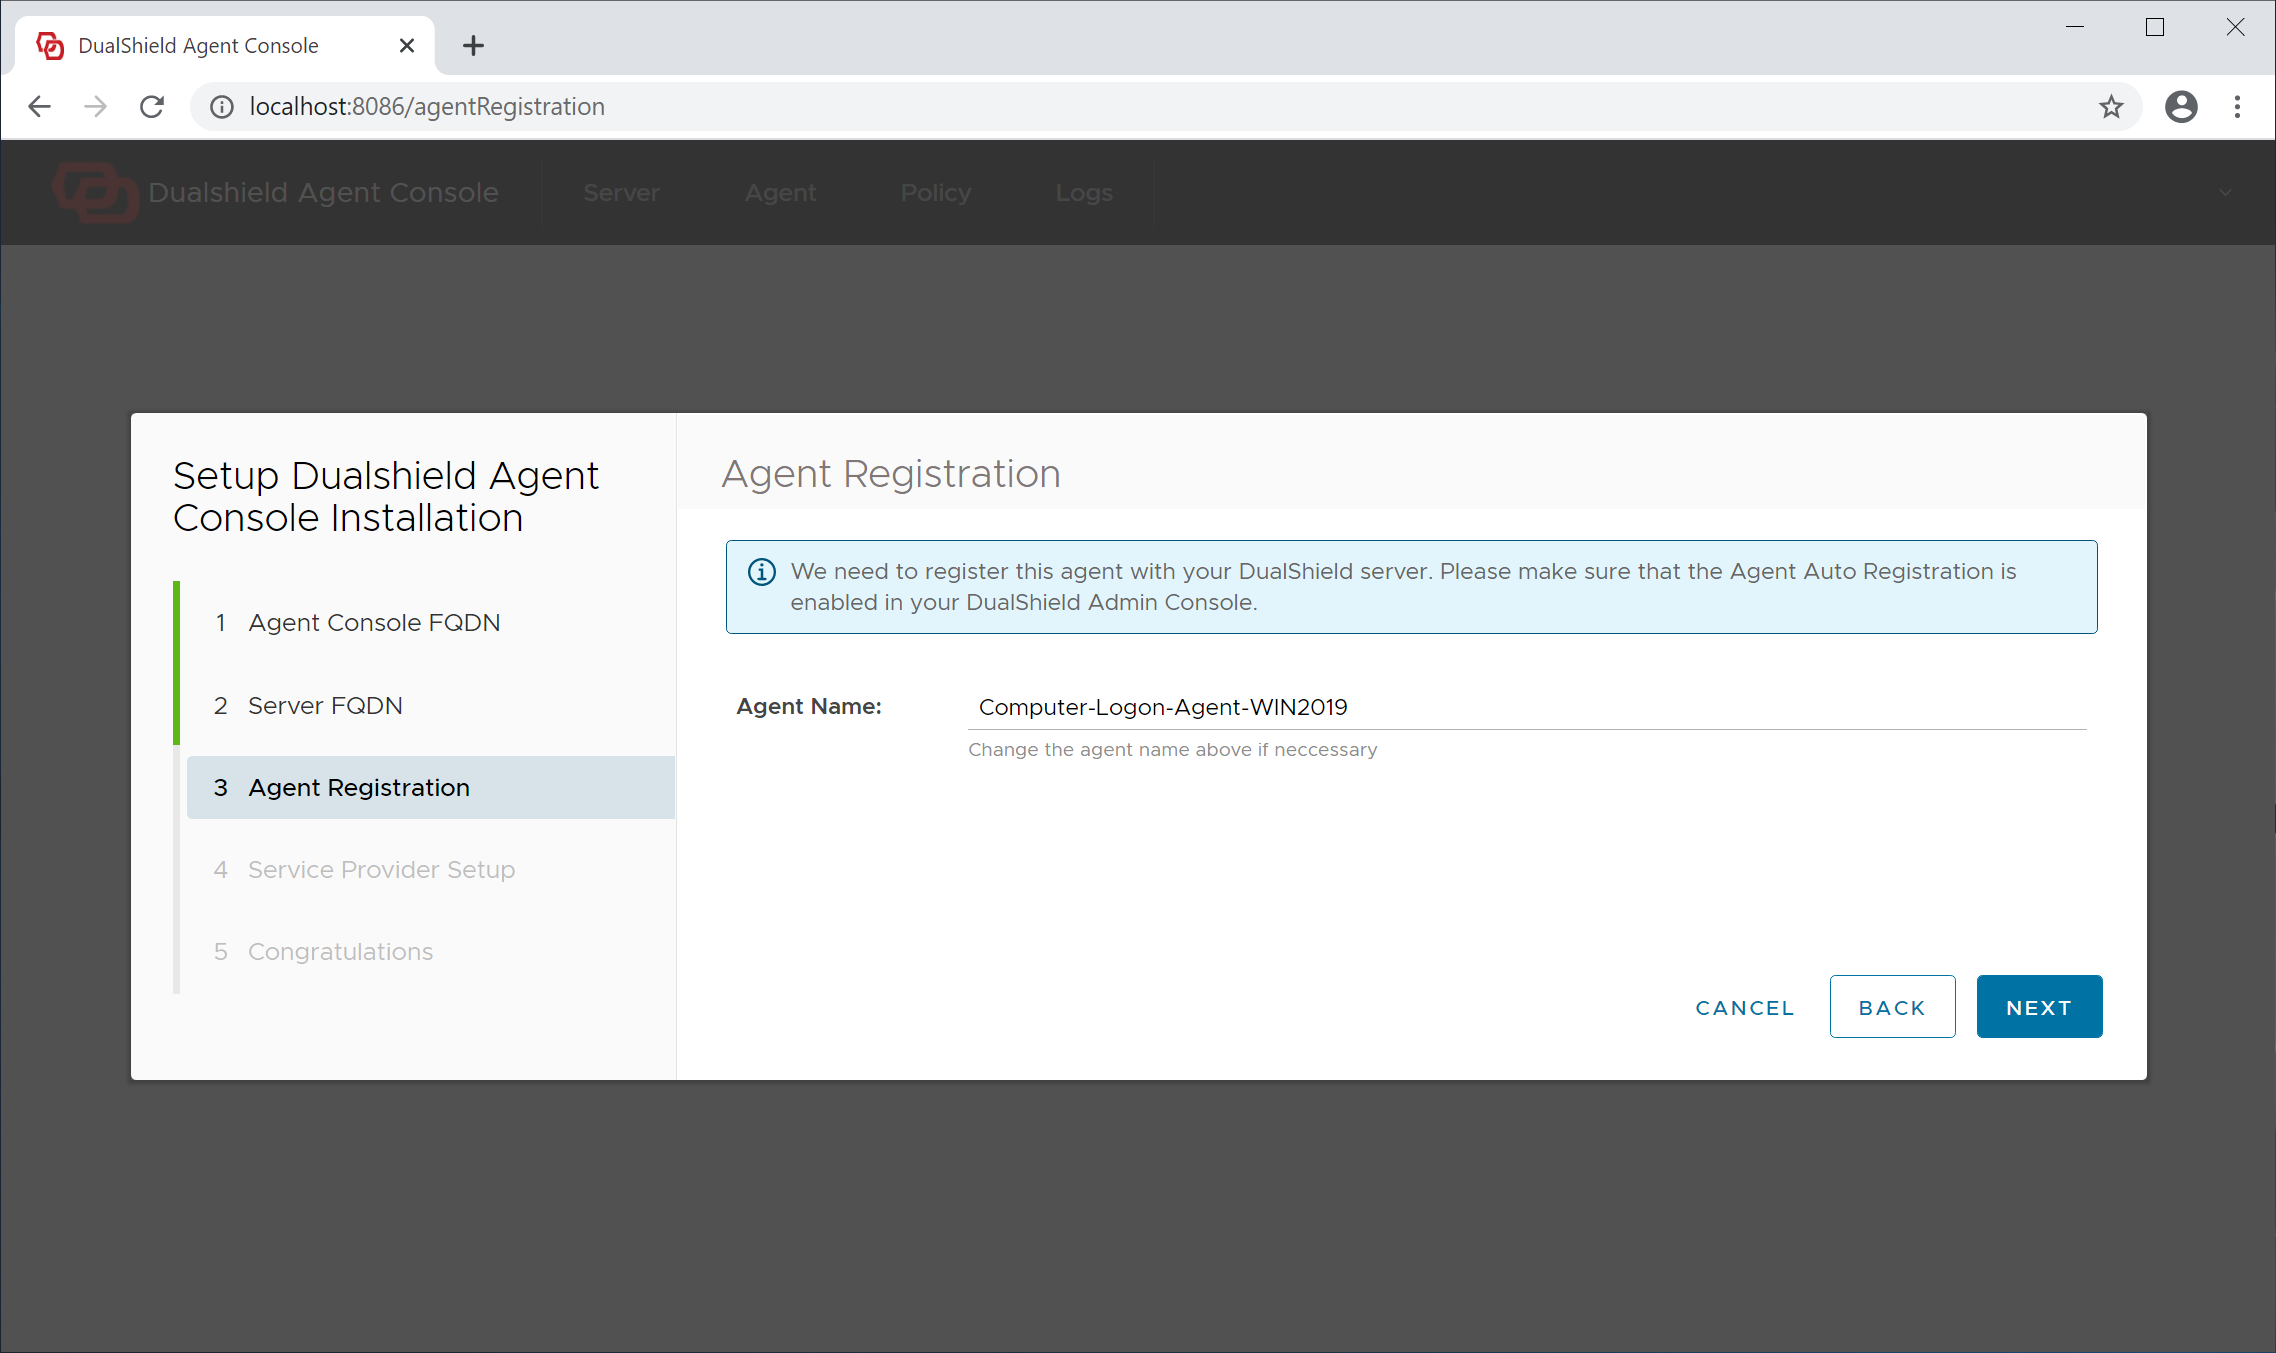
Agent Name: A agent name is only used to describe the agent. If you are going to install multiple agents, make sure that you name each of the agent with a distinctive and easy to identify name.
Click "Next" to continue
Step 4 - Service Provider Setup

For security, the agent console will require user authentication, therefore it needs to be registered with your DualShield SSO as a service provider.
Please note, if you are installing multiple logon agents, then you need to make sure that every agent has its own service provider. In other words, a service provider cannot be shared by multiple agents.
If this is the very first time that you're setting up this agent, click the "Create New Service Provider" button to create a new service provider for this agent.
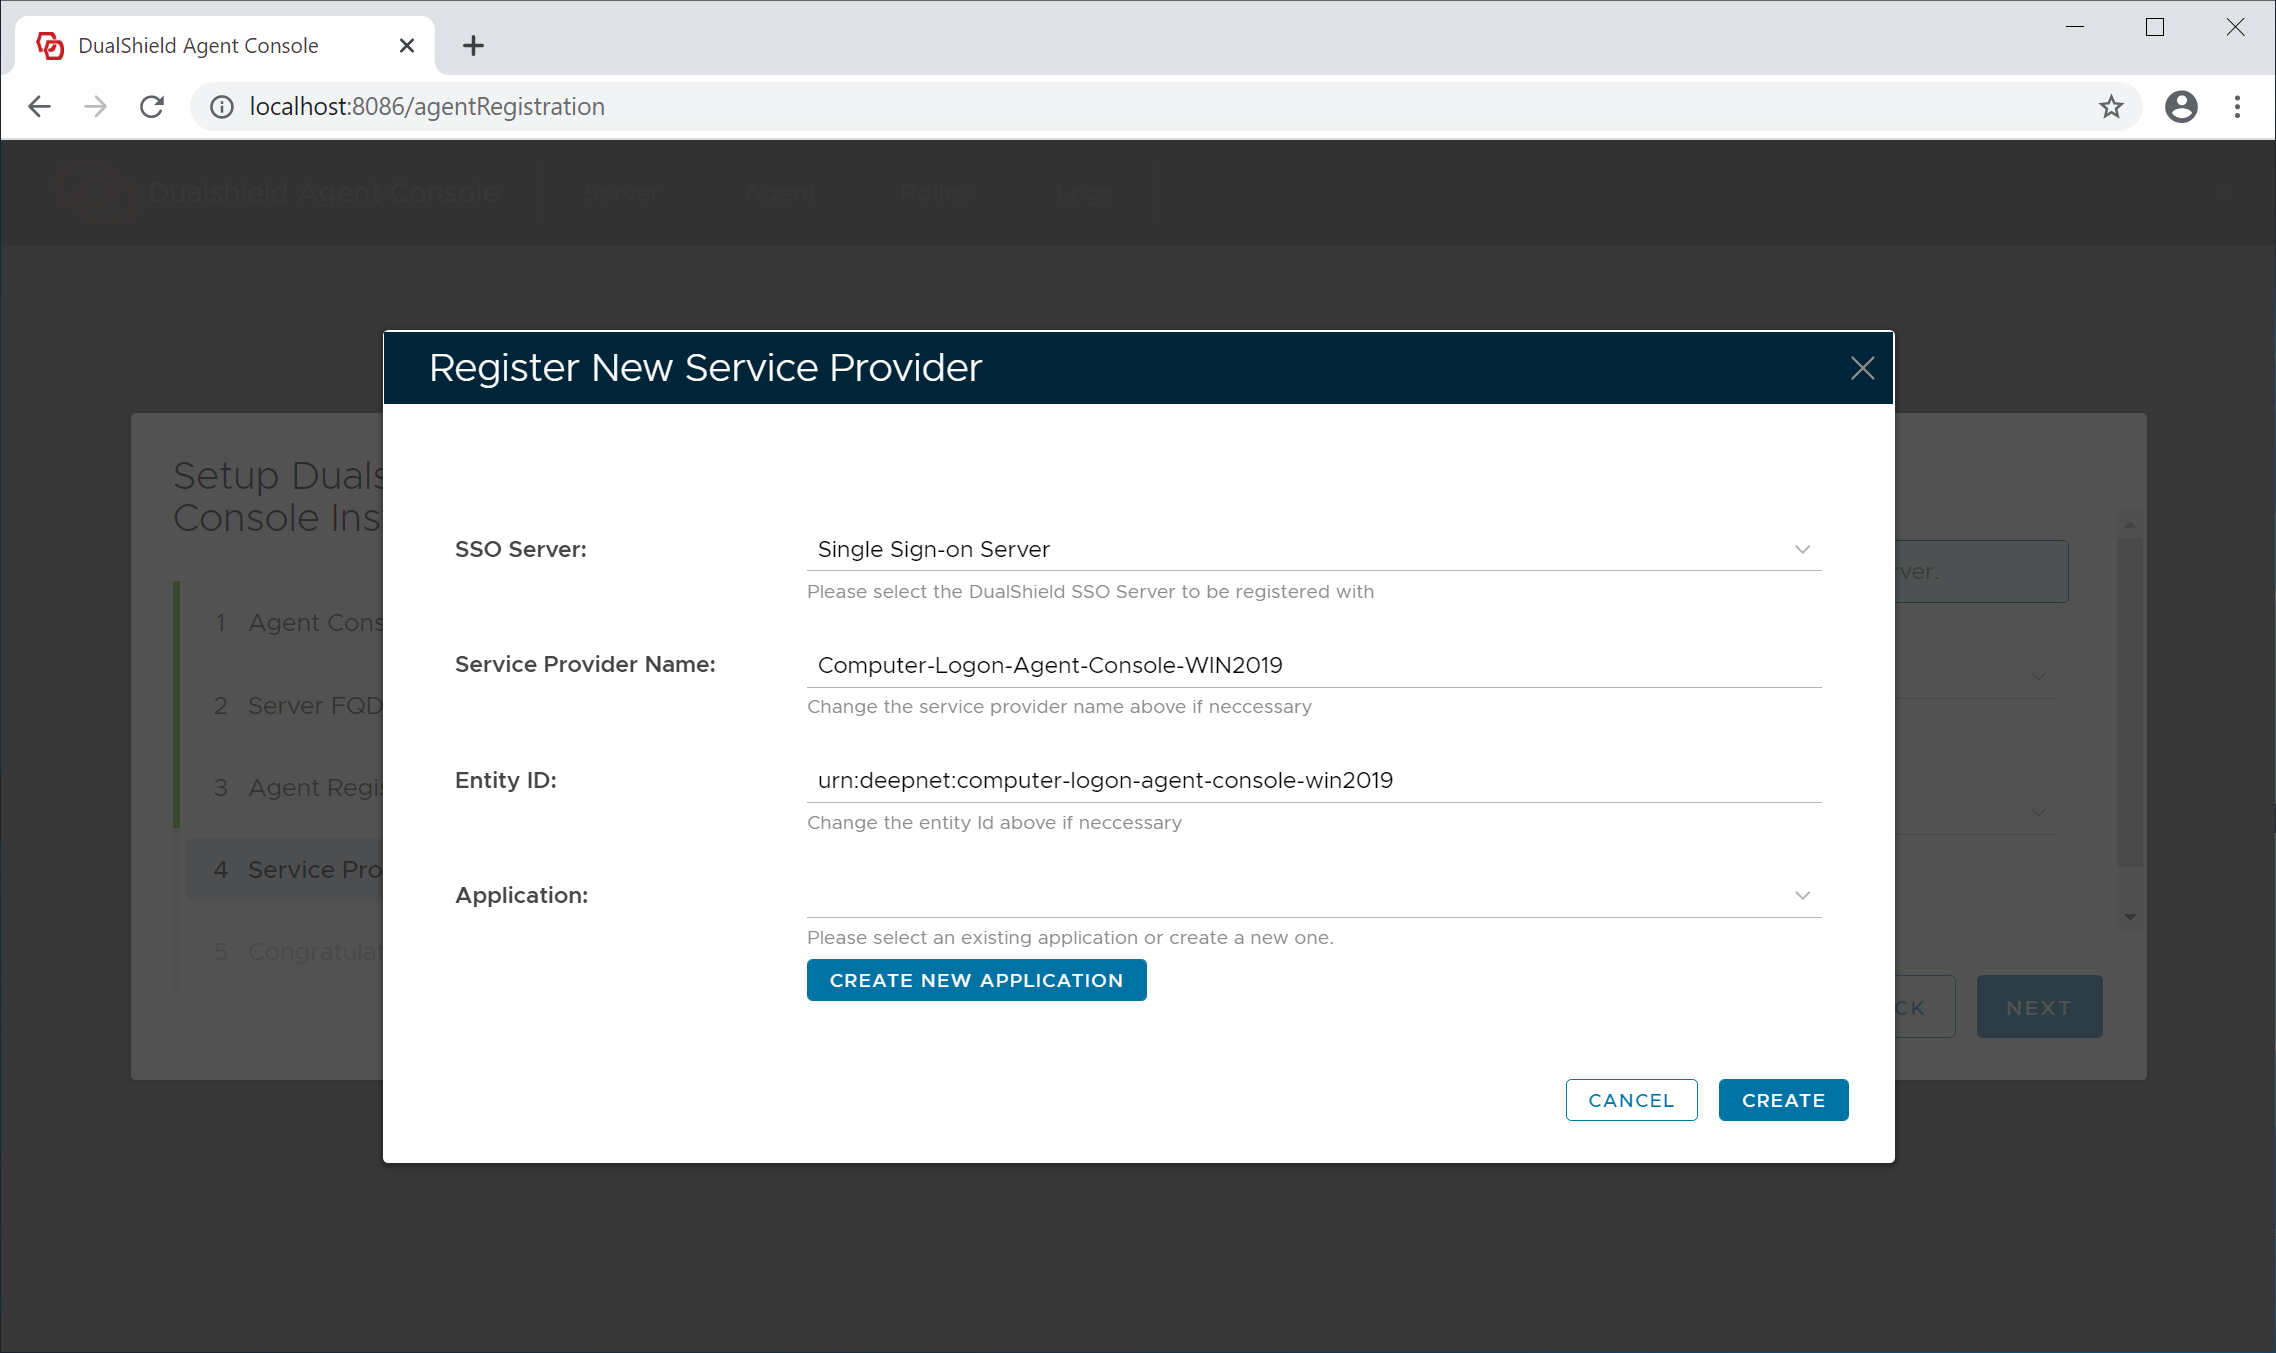
A service provider needs to be associated with an application in your DualShield server.
Please note, in contrary to that a service provider should not be shared by multiple agents, an application can be shared and generally should be shared by all logon agents.
If this is the very first time that you're setting up an agent, select the existing "Management Console" application from the application list. Do not create a new application.
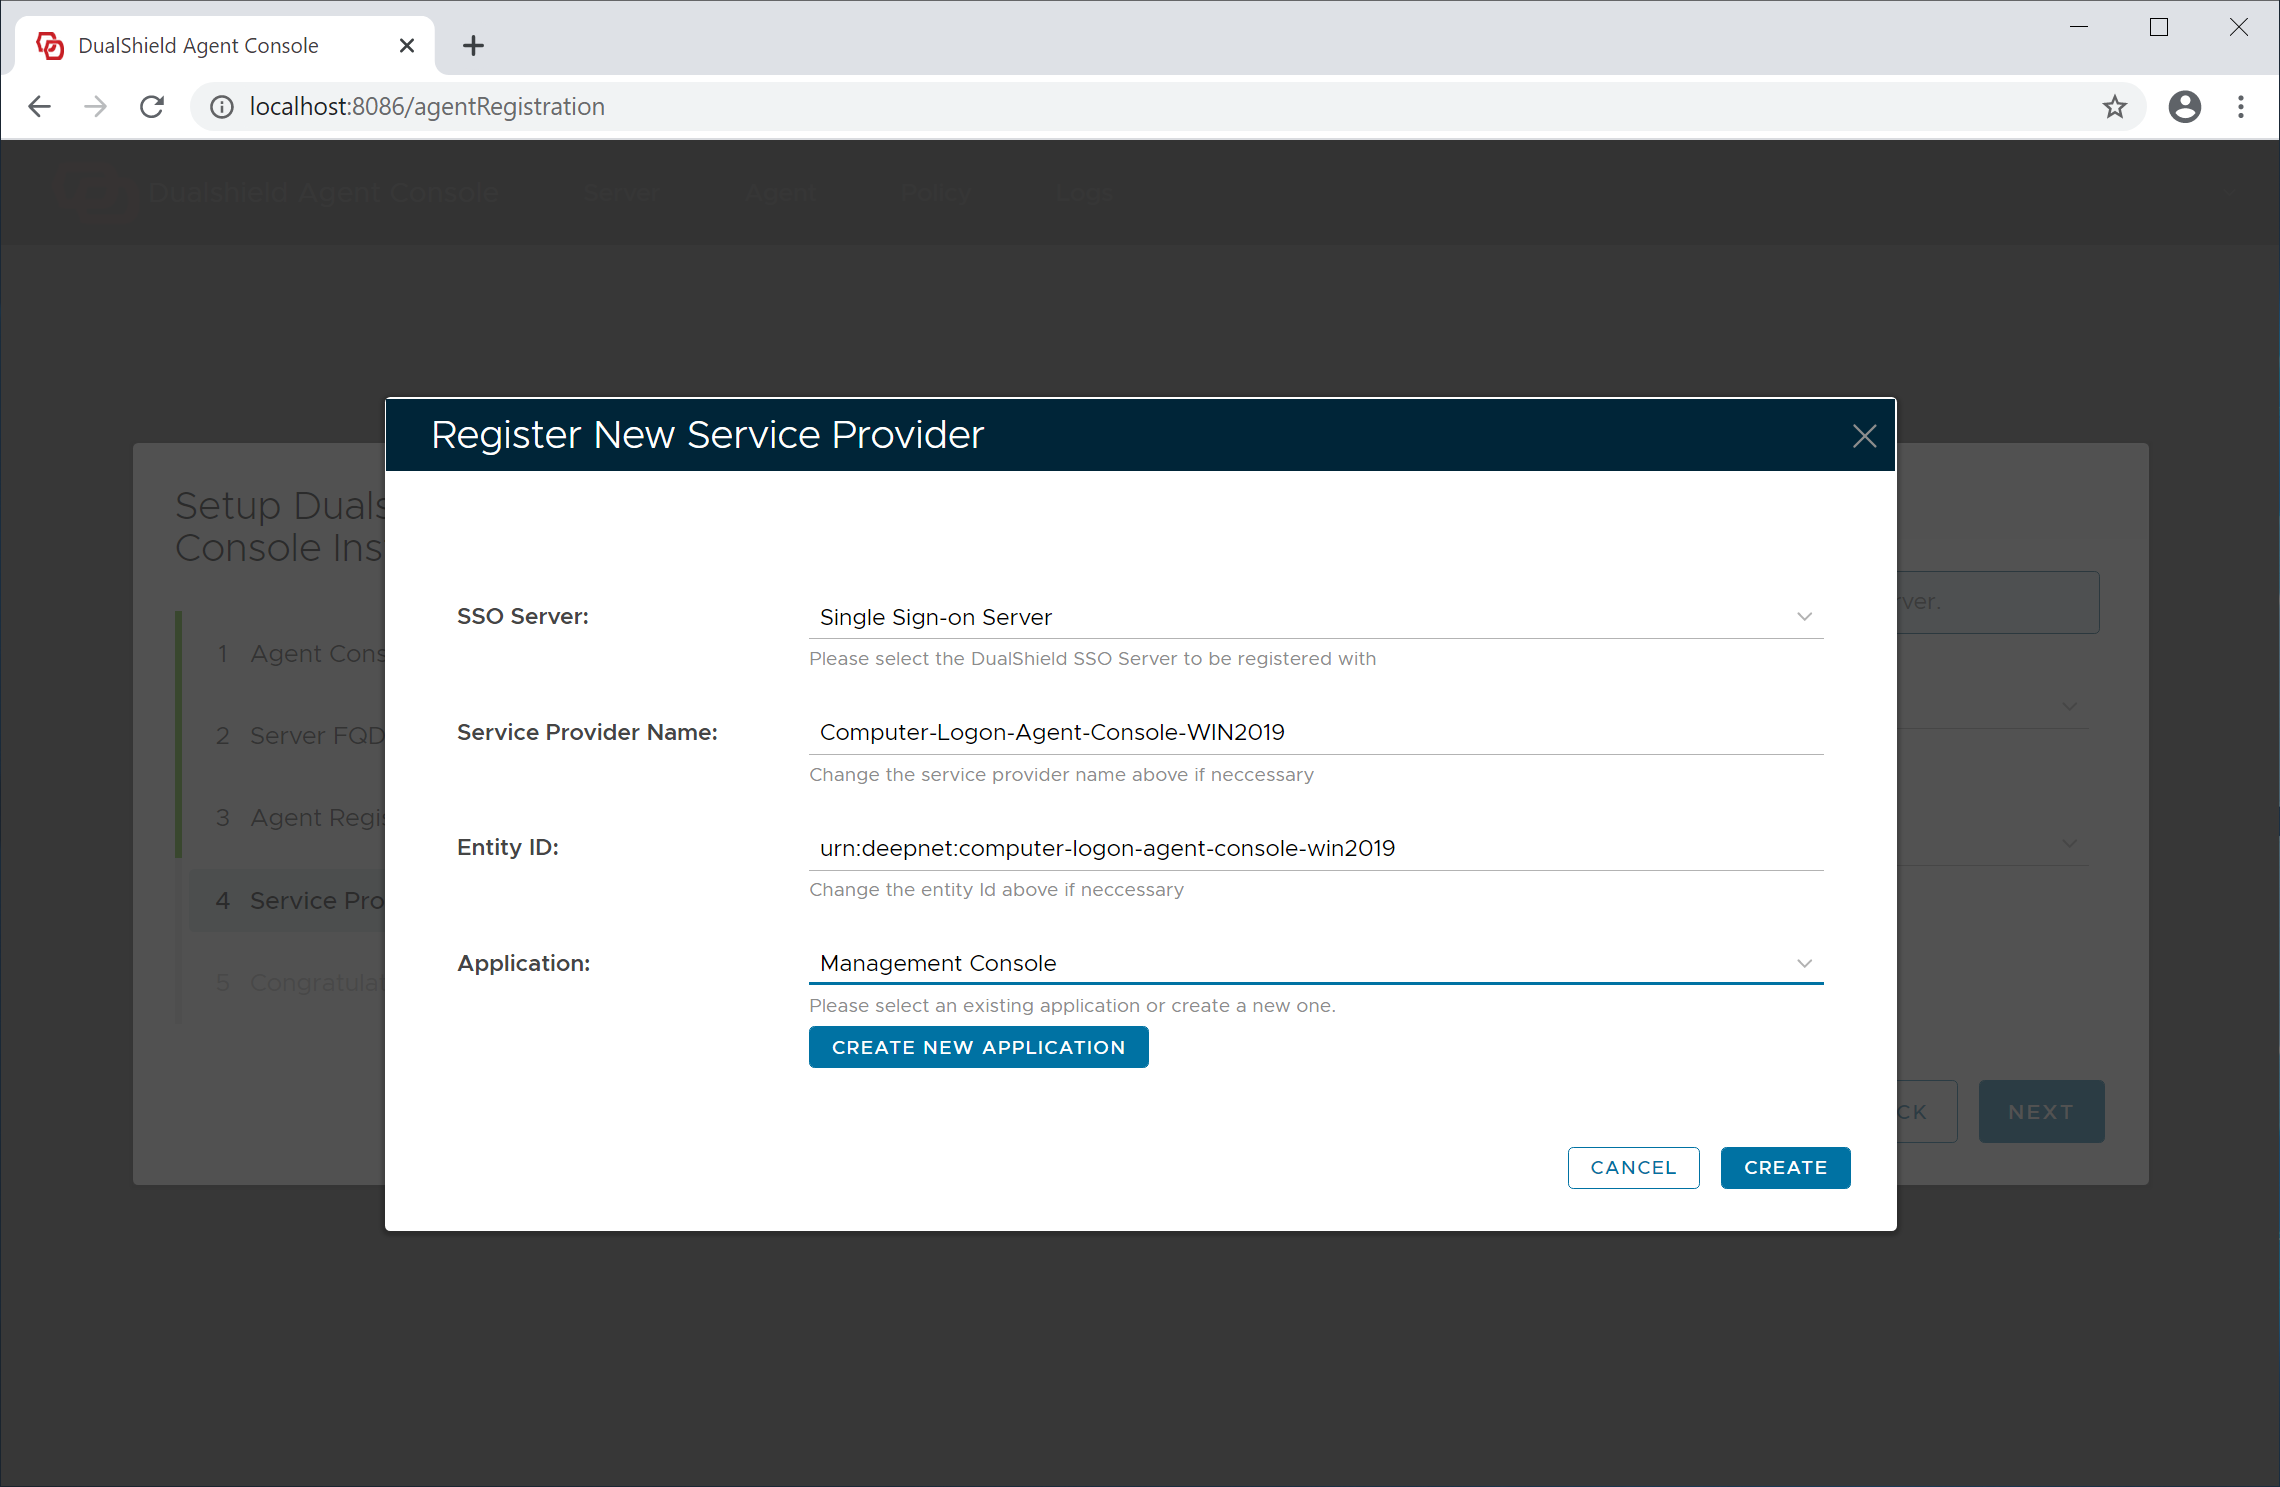
Now, click the "Create" button to create a new service provider for this agent
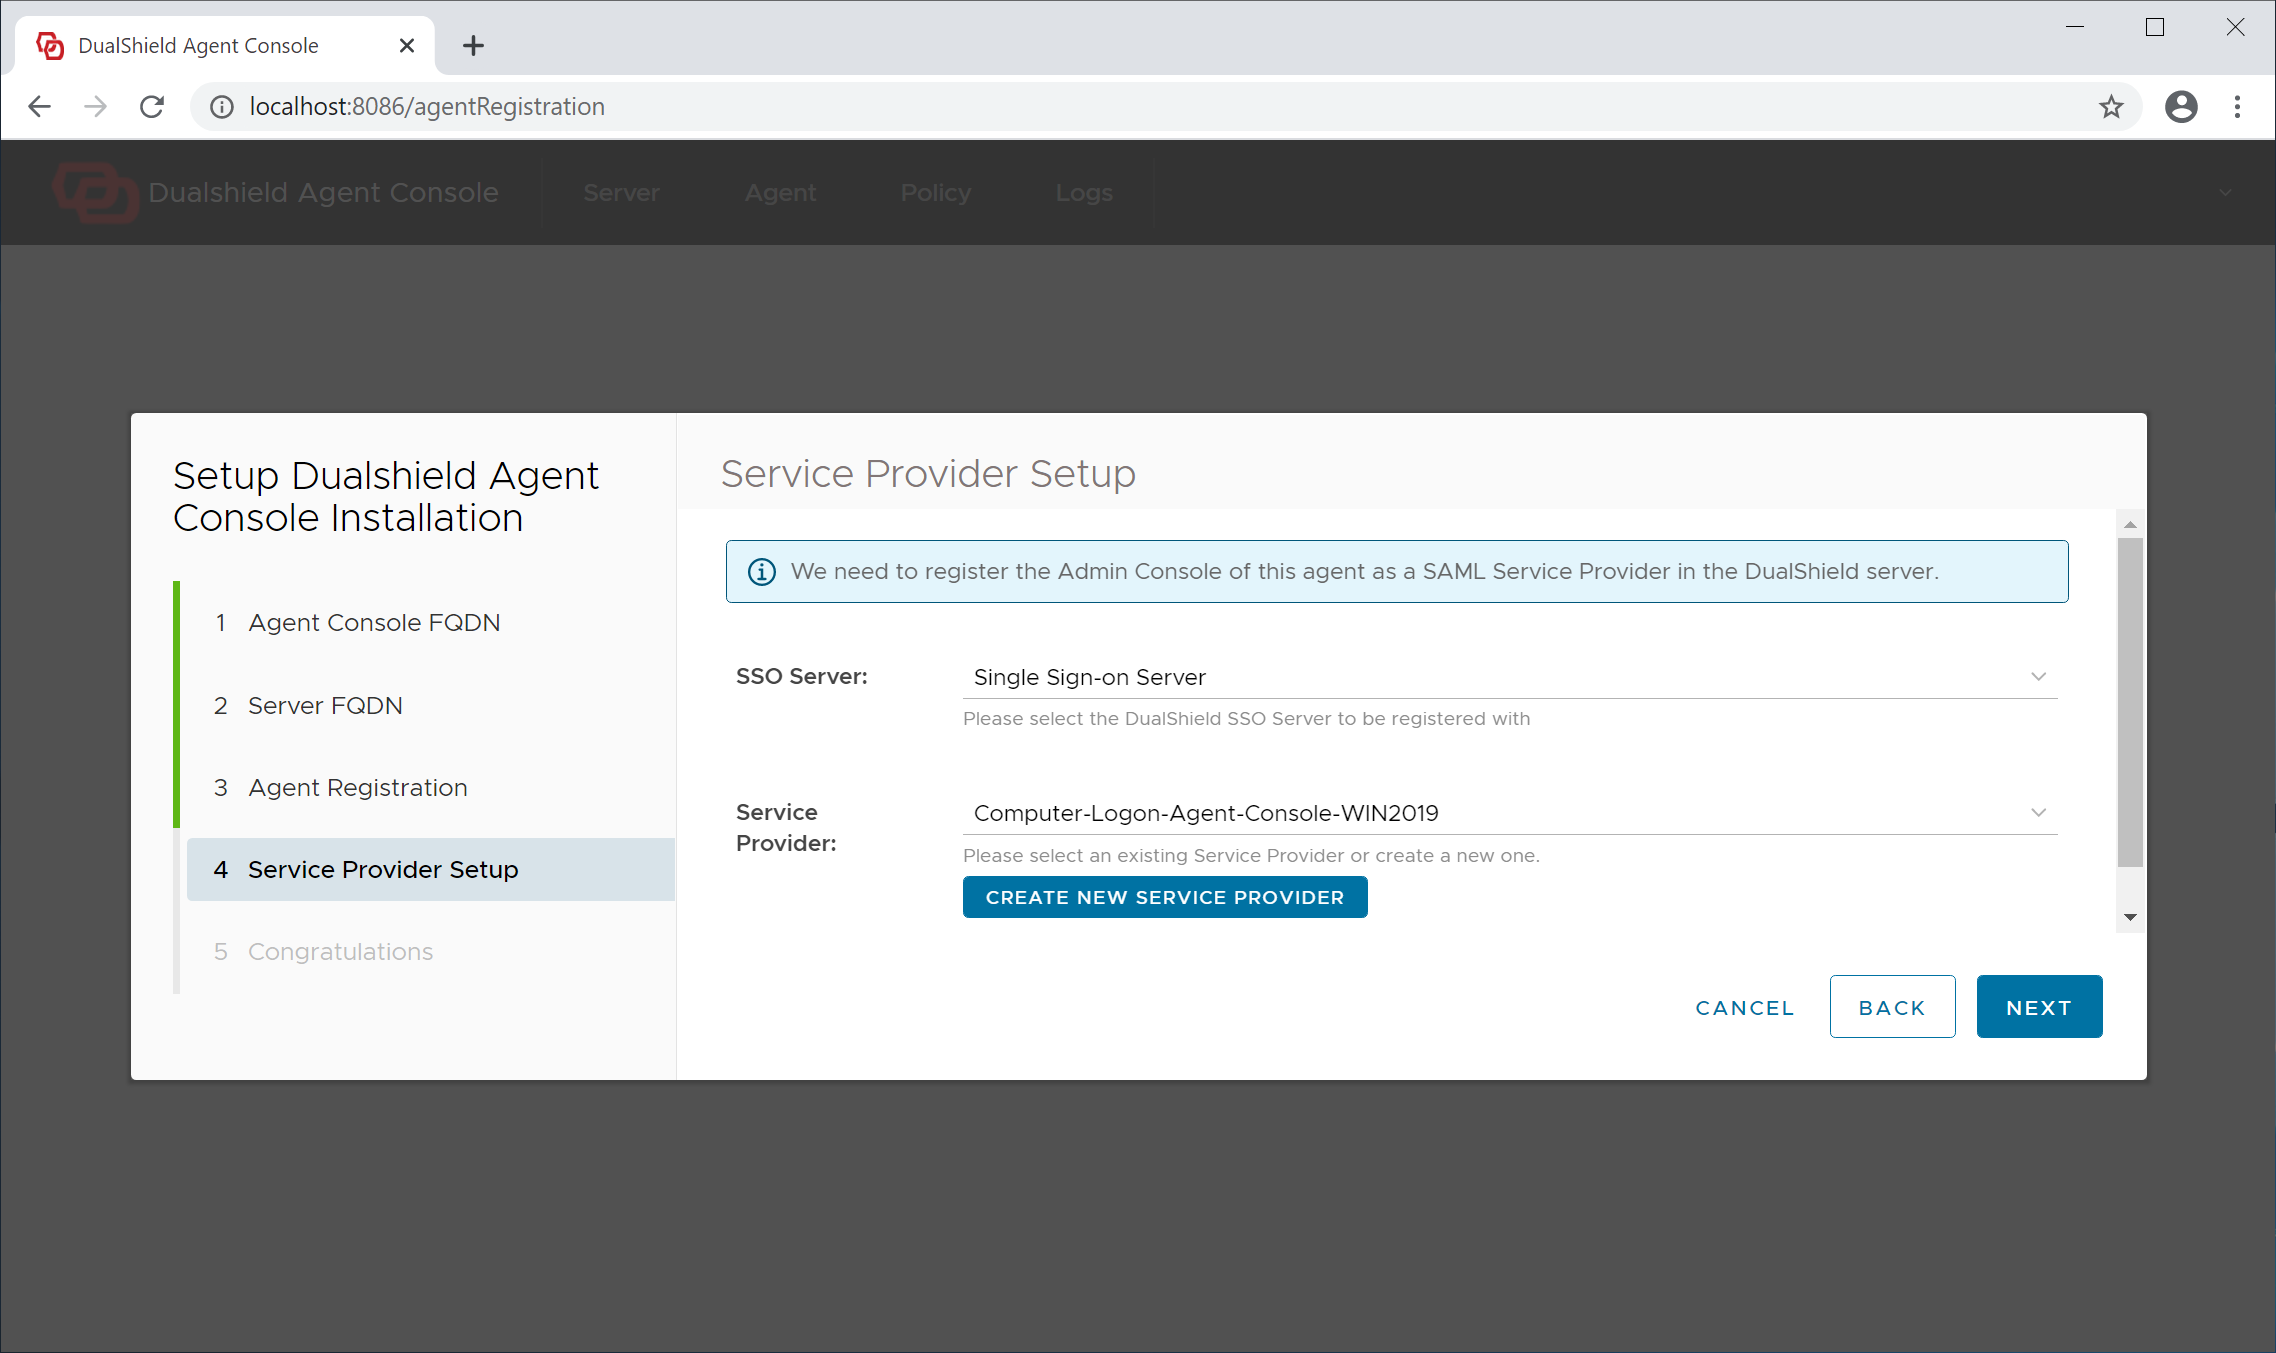
Click "Next" to continue
Step 5 - Completion

The agent has now been successfully registered.
Click "Finish" to continue. The agent admin console will be launched
Step 6 - Set up Agent Application
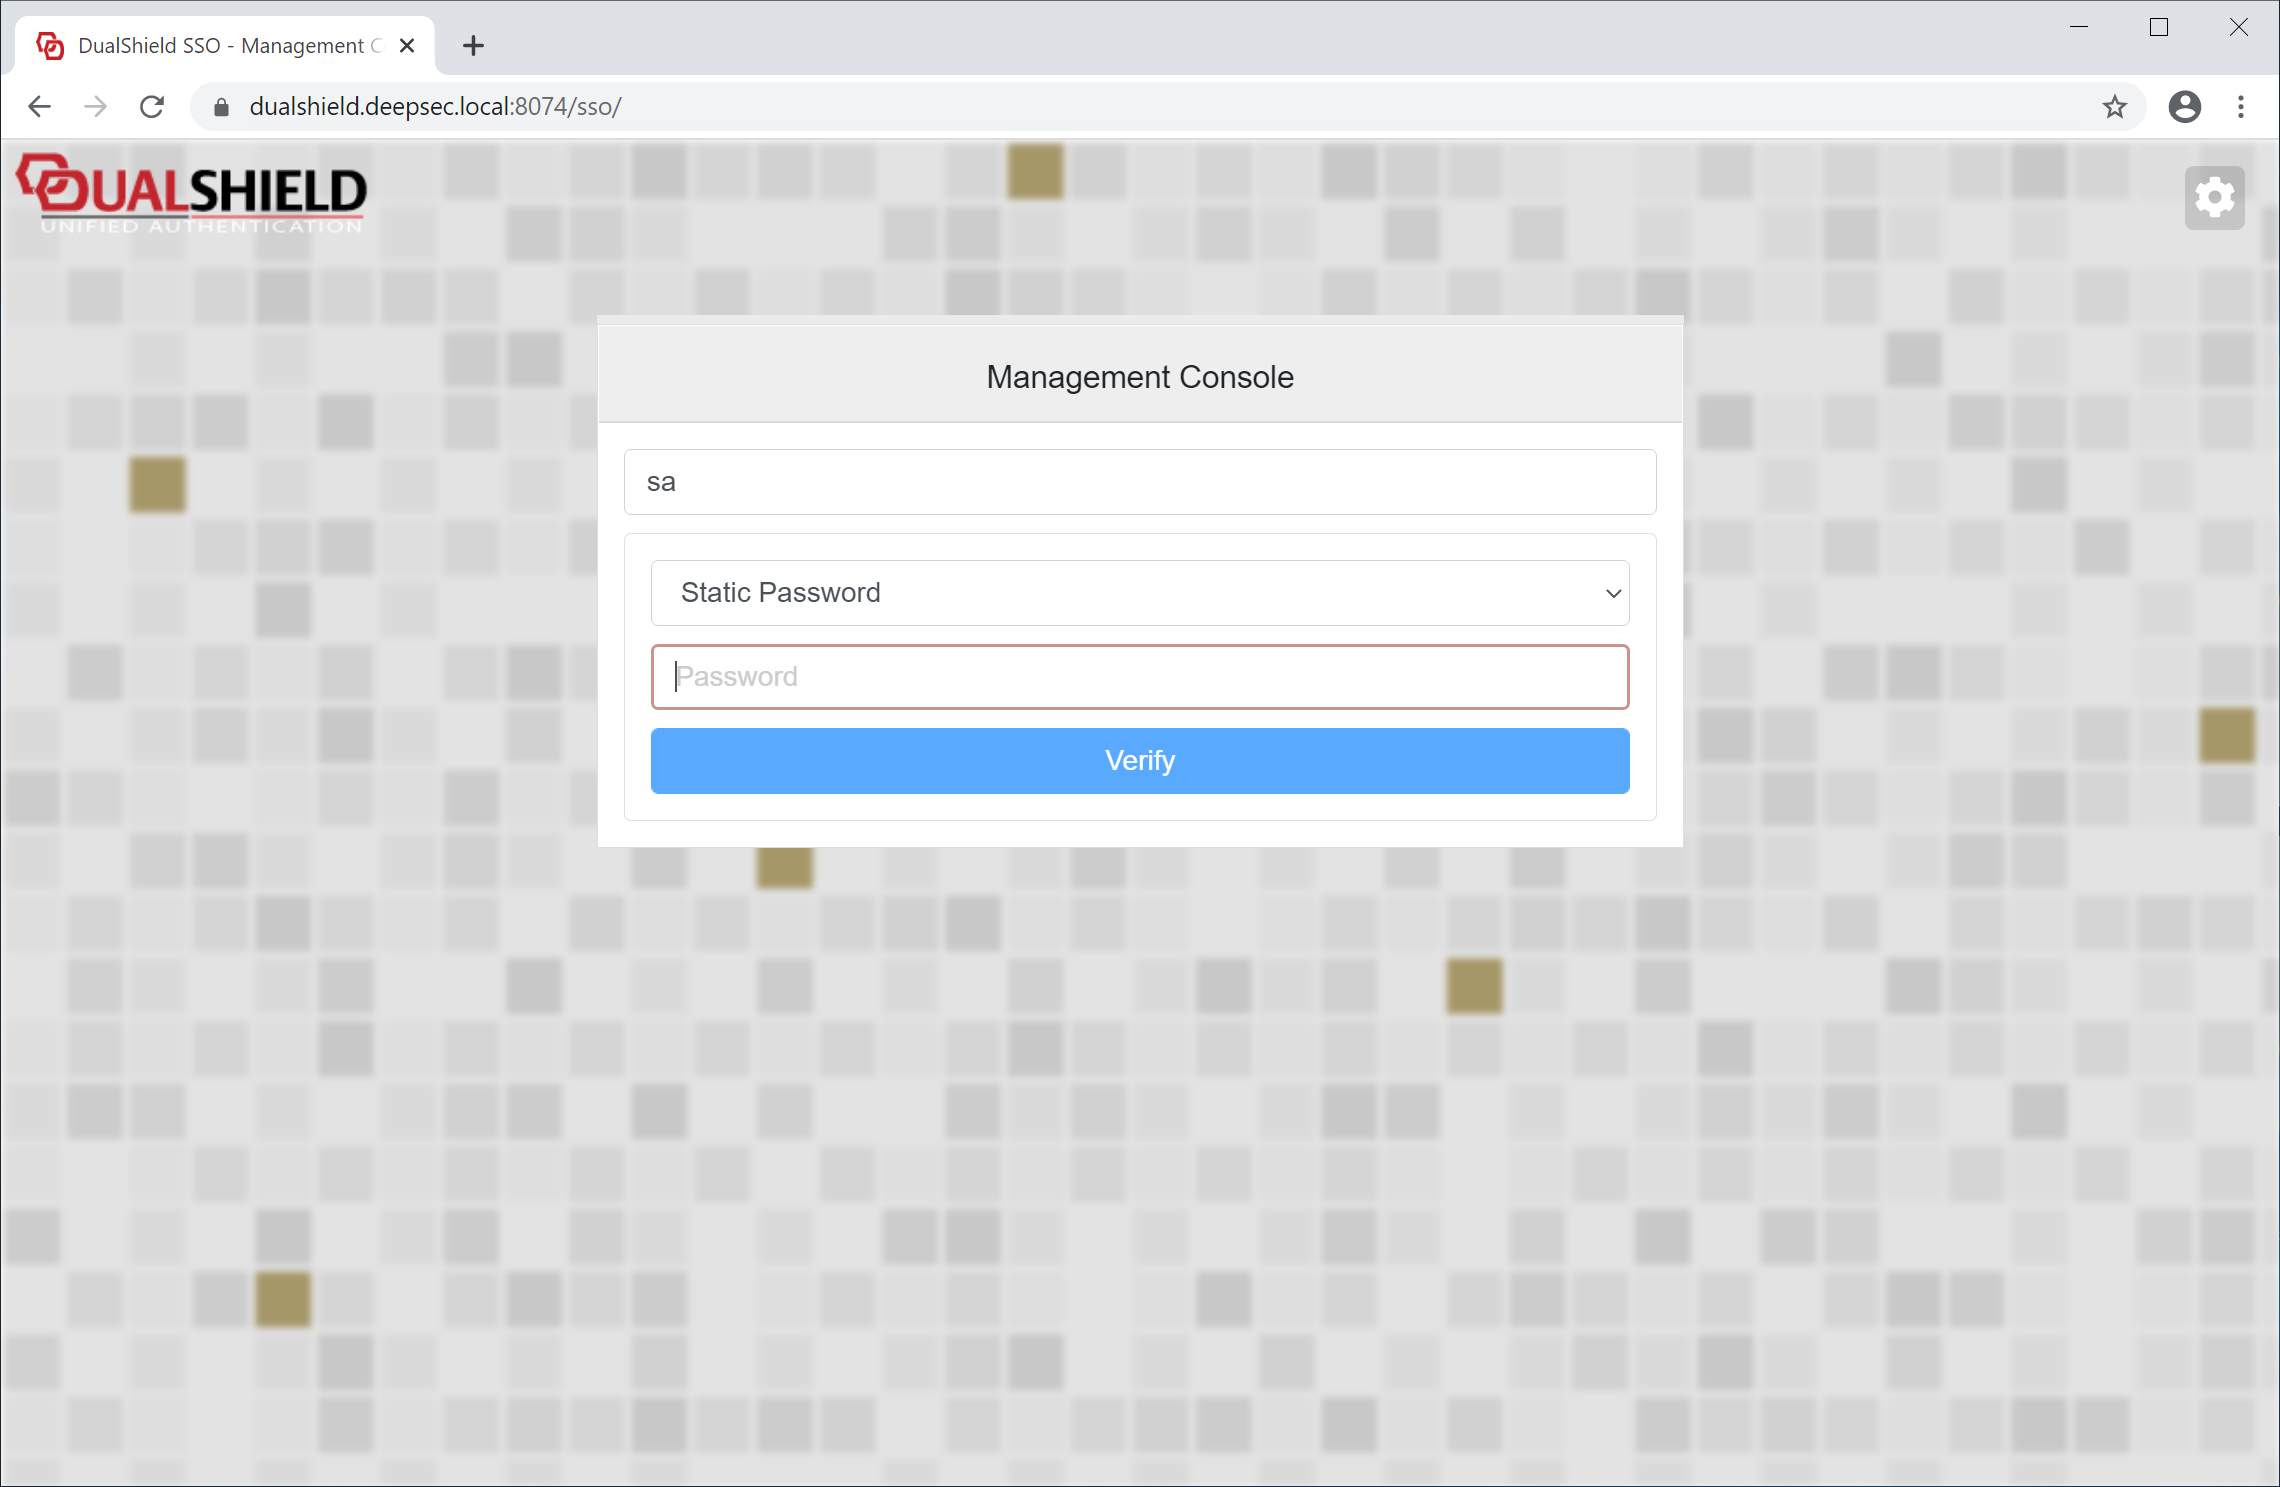
Sign in to the admin console
Click "Agent" in the main menu on the top
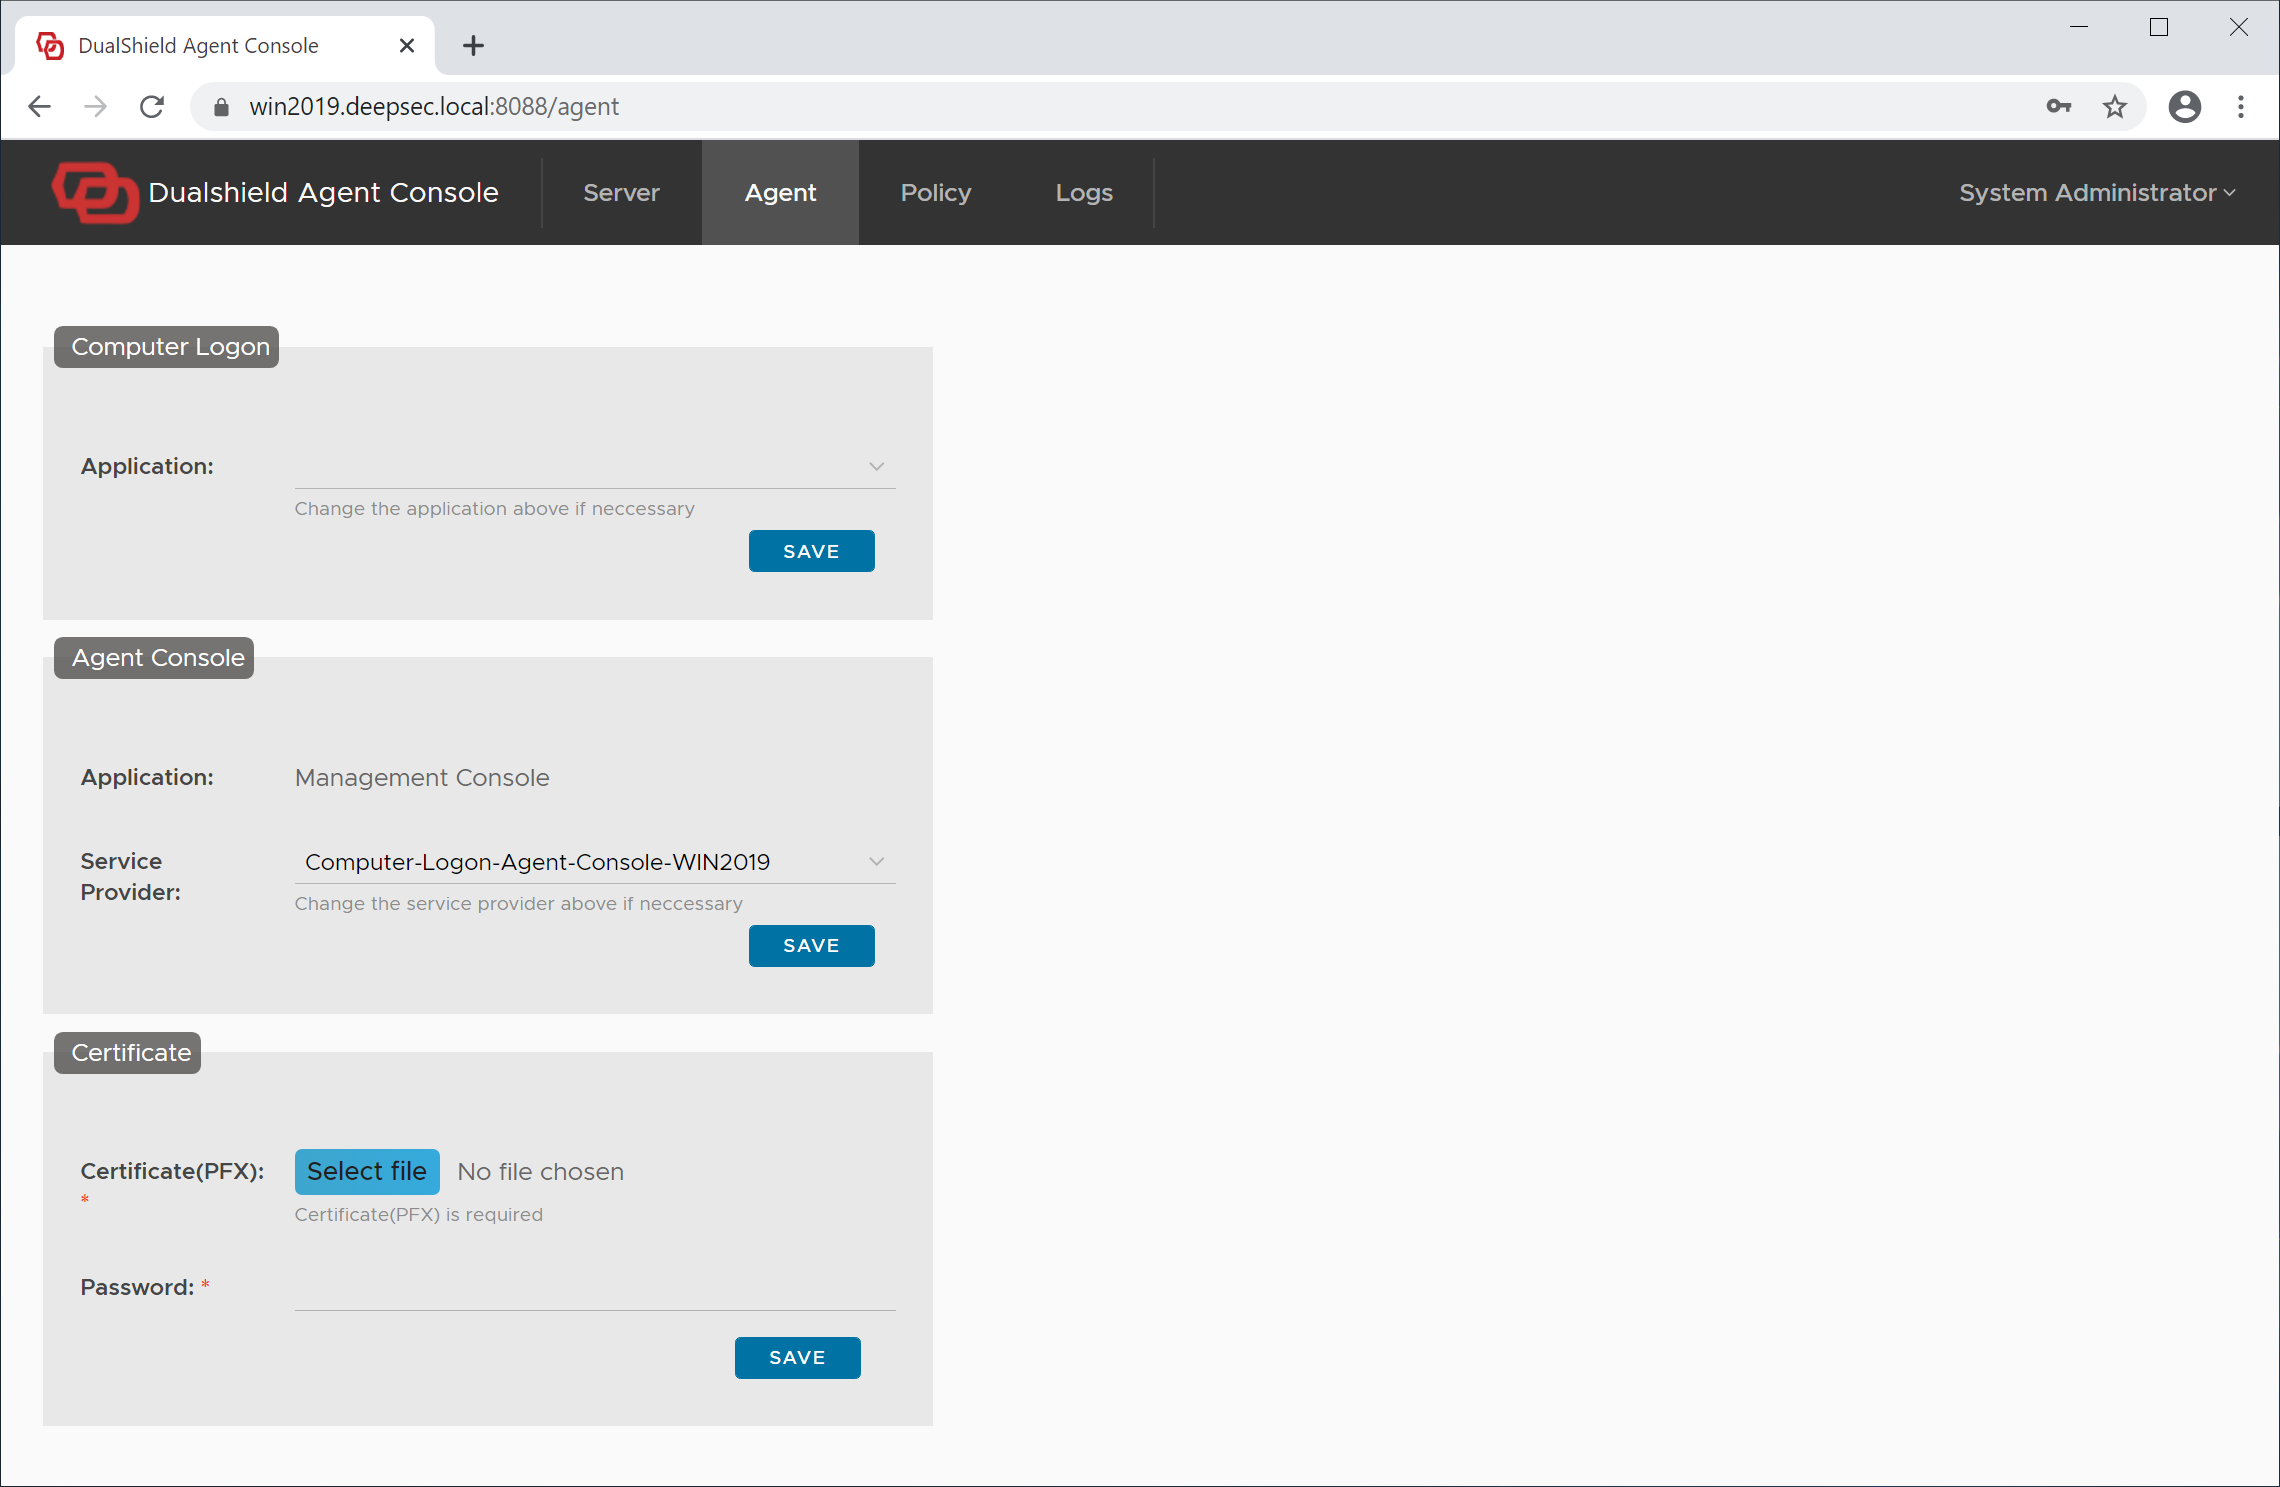
In the Computer Logon section, from the application list, select the application that you have set up earlier for computer logon, e.g. Computer Logon
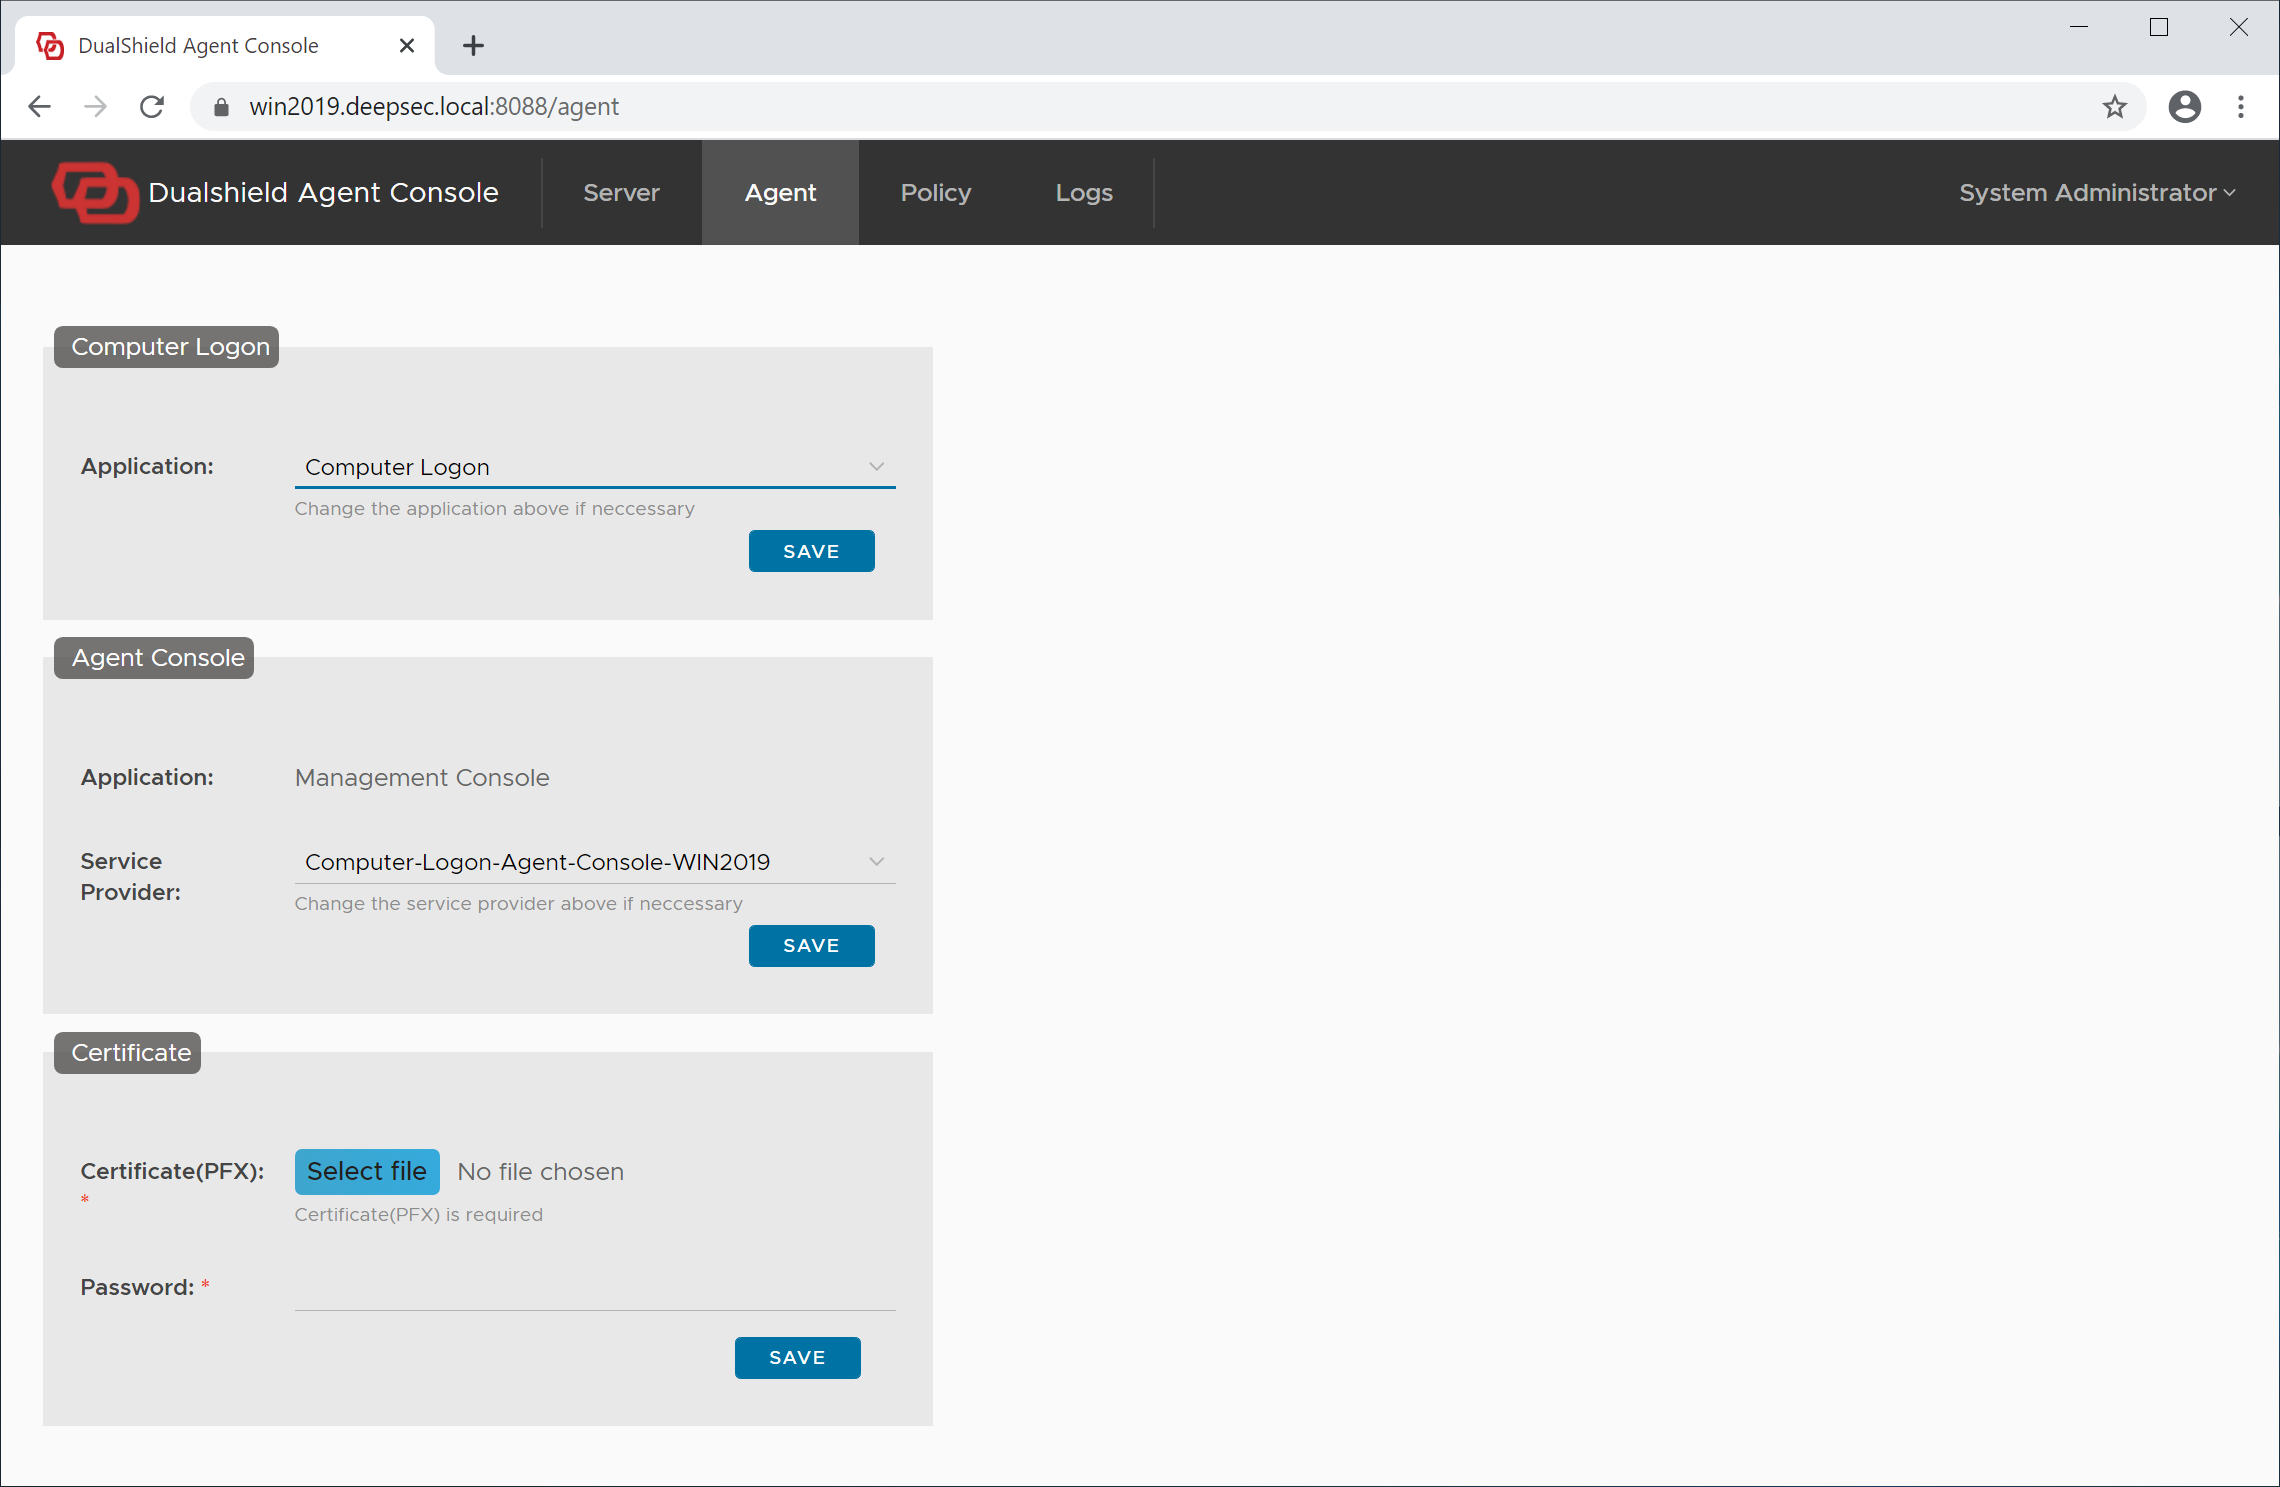
Click the "Save" button in the Computer Logon section.

You have now completed the agent registration and application setup.
Discover Logon Agent
Instal Logon Client
Linux Logon Client