...
Configure Oracle Access Manager for SAML Integration
Create a New Identity
...
Provider
This section assumes that Oracle Access Manager federation services have been enabled.
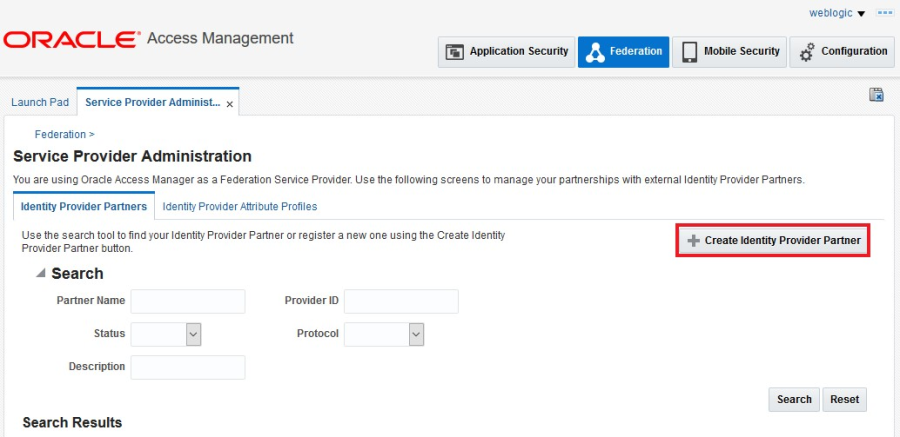
- Sign to the Oracle Access Manager console as an Administrator.
- Click the Federation tab at the top of the console.
- In the Federation area of the Launch Pad tab, click Service Provider Management. For an explanation of why you select this option when creating an identity provider, see the OAM Federation: Identity Provider & Service Provider Management[ |http://www.ateam-oracle.com/oam-federation-identity-provider-service-provider-management/] blog post.

On the Service Provider Administration tab, click Create Identity Provider Partner.
In the General area, enter a name for the Identity Provider partner and select both the Enable Partner and Default Identity Provider Partner check boxes. Go to the next step before saving.

In the Service Information area:
- Select SAML2.0 as the protocol.
- Select the Load from provider metadata option.
- Click Browse (for Windows) or Choose File (for Mac) and select the Azure AD SAML metadata file that you saved previously.
D. Go to the next step before saving. 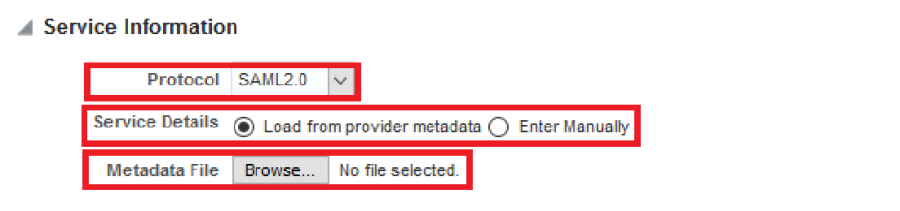
...

Important: This configuration defines the user mapping between Azure AD and Oracle Access Manager. Oracle Access Manager will take the value of the NameID element in the incoming SAML assertion and try to look up that value against the mail attribute across all user entries in the configured identity store. Therefore, it's imperative that the Azure AD user principal name (in the Azure AD configuration shown previously) is synchronized with the mail attribute in Oracle Access Manager's identity store.
- Click Save to save the identity provider partner.
- After the partner is saved, come back to the Advanced area at the bottom of the tab.
...
<?xml version="1.0"?> |
...
- Click Apply to save the change.
...
This section provides simple steps to verify that federation authentication works when initiated from the service provider (SP) and the identity provider (IDP). The steps in this section assume that a user has been created in Azure AD and has been provisioned to the Oracle Access Manager LDAP server and the E-Business Suite database.
...
- In a browser, enter https://<ebs_portal_hostname>:<port>/OA_HTML/OA.jsp?OAFunc=OAHOMEPAGE.
- When Azure AD prompts you for a username or to pick an account, enter the username.
- When you are prompted for a password, enter it and click Sign in.
- If you are prompted to Stay signed in?, click Yes.
If the login is successful, you are redirected to the E-Business Suite home page using your user credentials stored in Azure AD.
- To log out, click the power button icon in the top-right corner of the E-Business Suite portal.
You are redirected to the Oracle Access Manager host, your session is cleared, and a signed-out message appears.

...
- In a browser, enter https://<azure_portal_hostname>/.
- When Azure AD prompts you for a username or to pick an account, enter the username.
- When you are prompted for a password, enter it and click Sign in.
- If you are prompted to Stay signed in?, click Yes.
You are directed to your home page.
- Click the E-Business Suite application icon.
You are redirected to the E-Business Suite portal.
- To log out of E-Business Suite, click the power button icon in the top-right corner of the portal.
...
- .