...
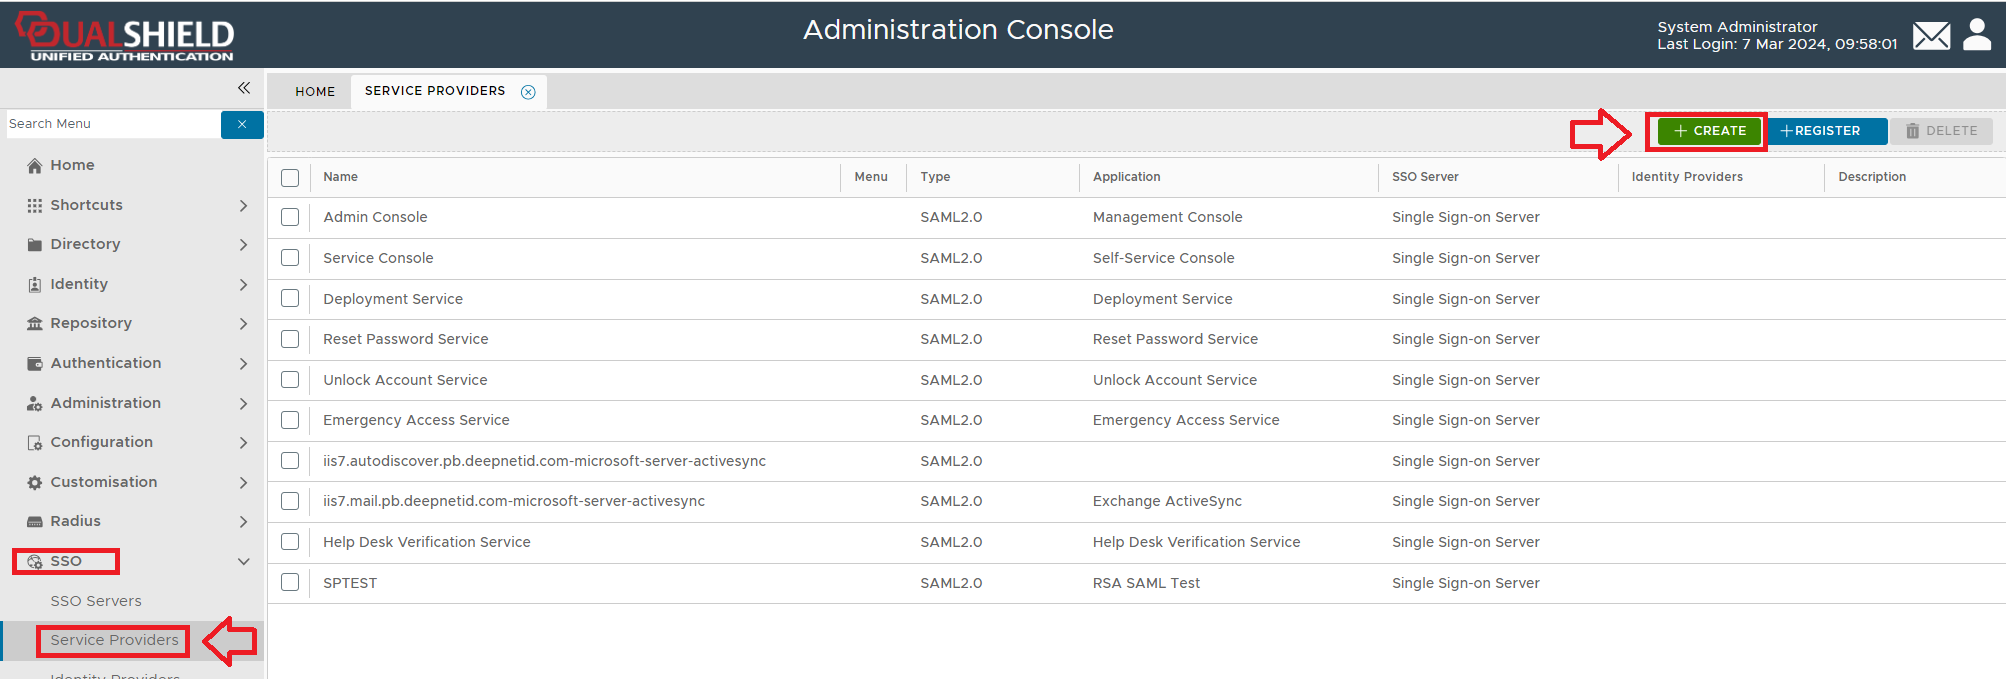
On the Management Console, go to SSO>Service Providers

navigate to "SSO | Service Providers", then click  ;
;
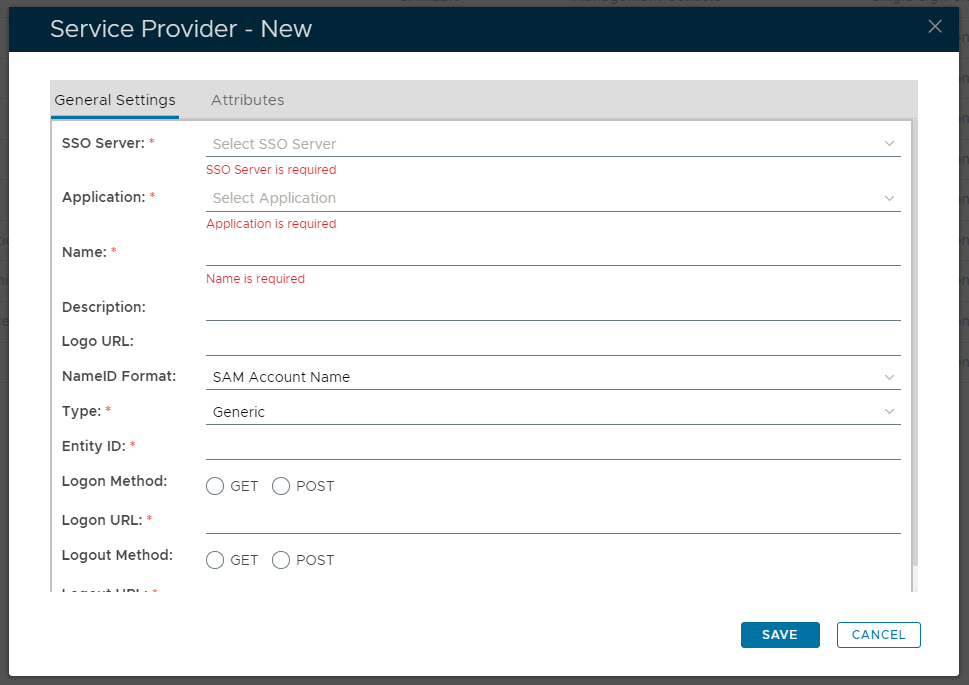
A new window titled "Service Provider - New" will now open;
 Click on
 ![]() on the top left.
on the top left.
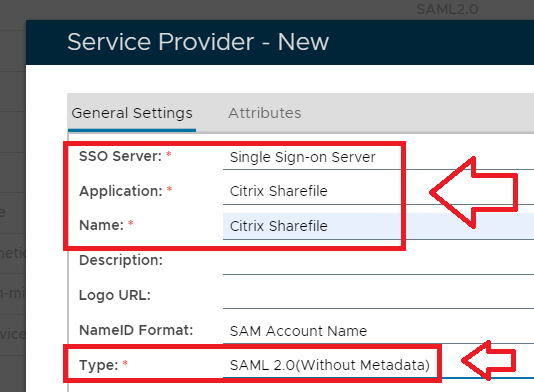
Fill in the details as below and make sure you select SAML 2.0(Without Metadata) as Type.;

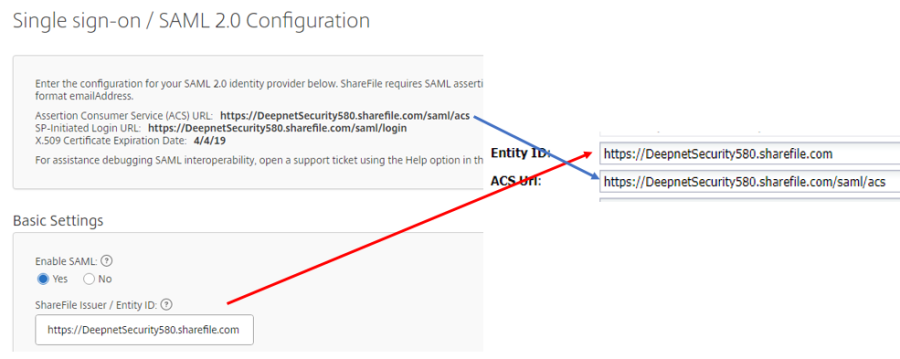
Now fill out Entity ID and ACS URL. This can be copied from the ShareFile SAML Configuration screen
The completed Service Provider dialogue box will look like this:

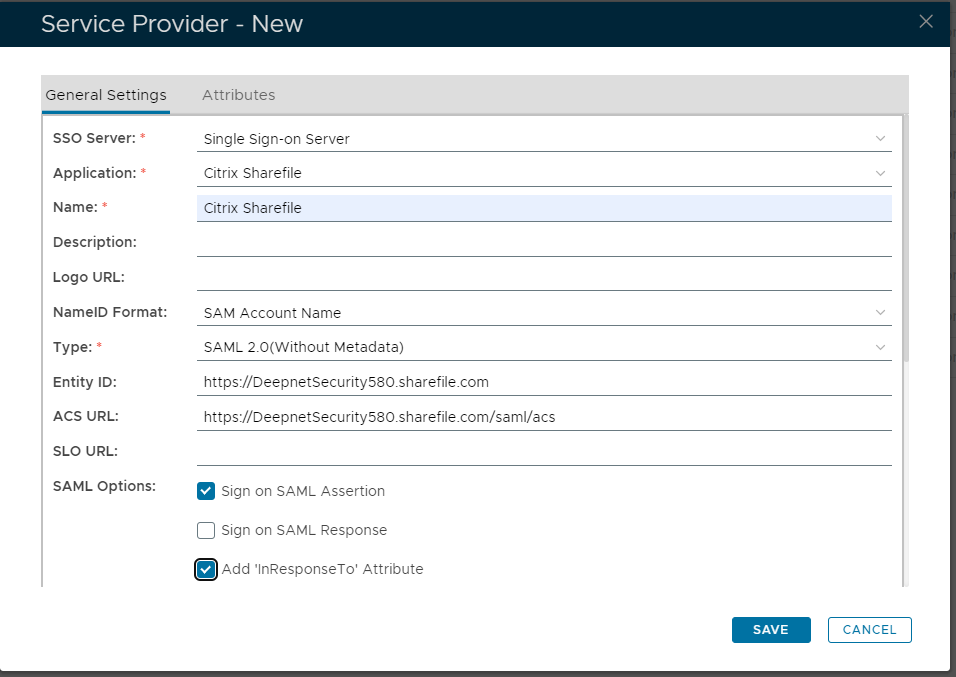
…..but do not hit Save just yet.
...
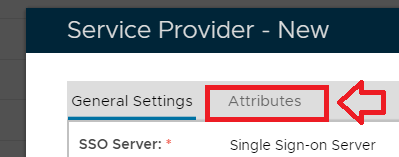
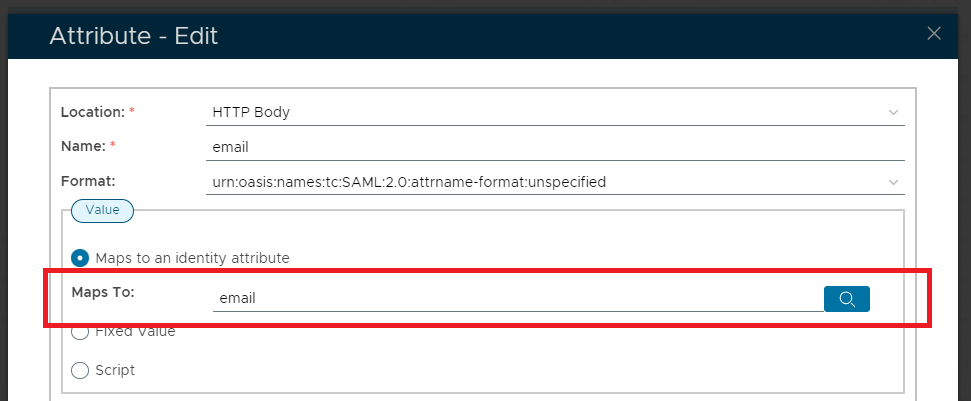
2) Add an Email Attribute
Click the Attributes Edit tab
The window will now show service provider attribute details, click on the  button

Click ![]() at the top.
at the top.
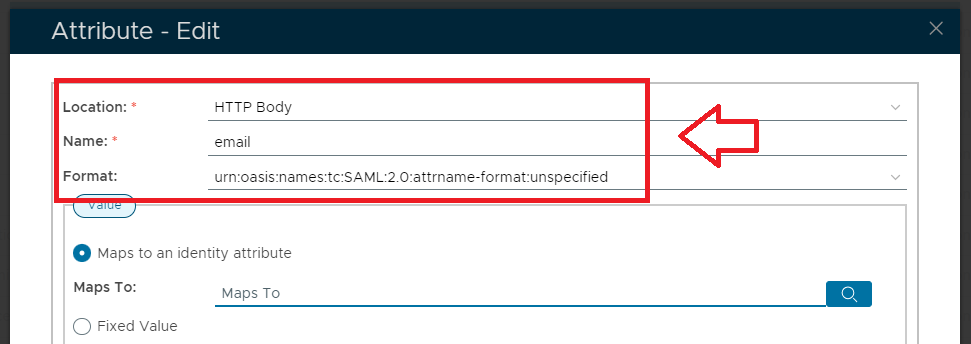
Set the following parameters

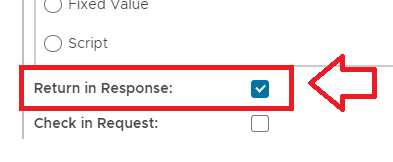
Make sure Return Response is checked and then hit Save.

Click Save on the Attributes window.
Specify NameID Format and Attribute as follows:
![]()
;

A new window titled "Attribute - New" will now open;

Fill in the parameters as follows;
At the "Maps To:" prompt, do not enter the parameter manually, instead click on the  icon, and a new window titled "Maps To" will open;
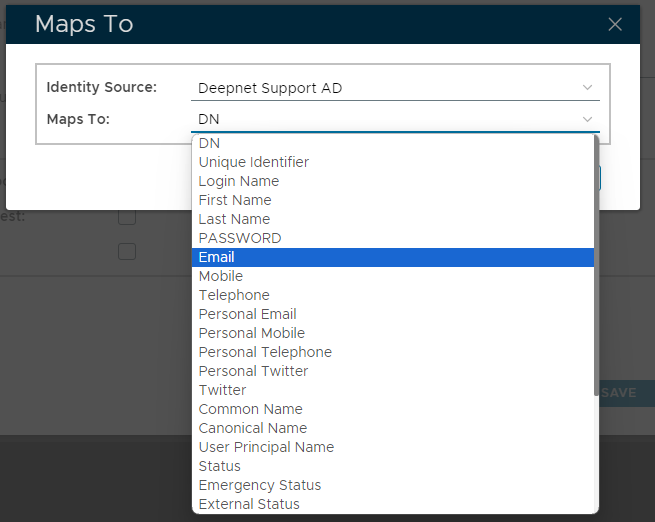
Specify the Identity Source, then at the "Maps To:" prompt, use the dropdown to select "Email", then click  ;
;
Make sure the option "Return in Response" is selected,
Then click ;

Click , and the new service provided will be added to the list;
 Click Save.