The Deepnet Computer Logon Agent for Entra ID requires a custom configuration file in order to function correctly for the customer. IT administrators can distribute the off-the-shelf installer to their users, together with the custom configuration file. User can easily install the software using the off-the-shelf installer. However, after installation, users must manually update the configuration file with the custom configuration file.
A better way of distributing the software is to create a custom installer package that includes both the off-the-shelf installer and the custom configuration file. The custom installer will install the software and automatically update the configuration file. This way, users will not need to carry out any manual work.This guide describes guide explains how to create a custom installer package using the Windows tool called "IExpress"
| Table of Contents |
|---|
Step 1: Download the off-the-shelf installer package
Download the off-the-shelf installer package and unzip it to a local folder on your PC, e.g. "D:\Software\CLO"
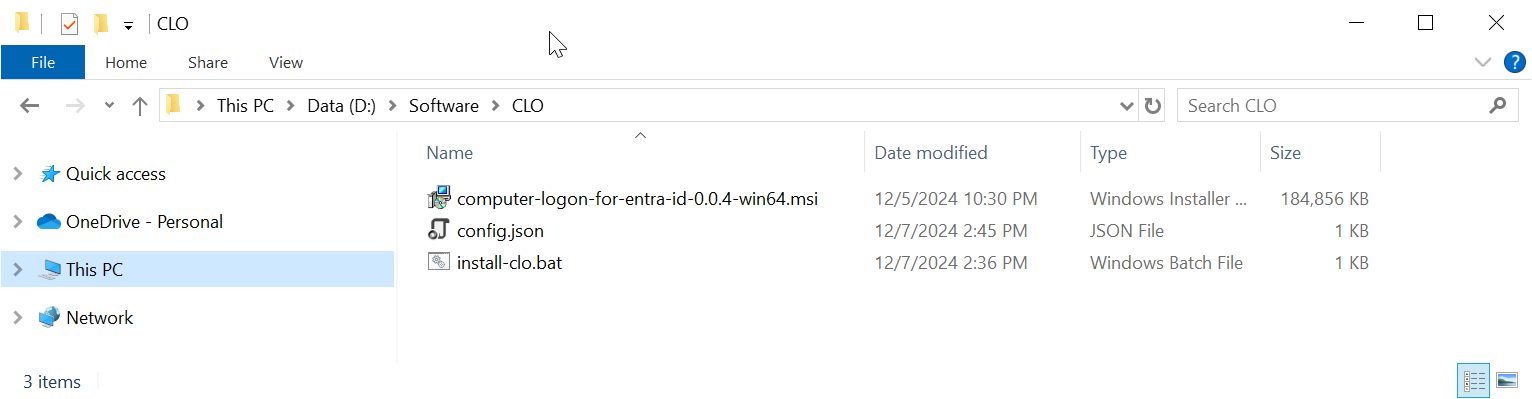
The package contains 3 files:
...
FILE
...
config.json
...
for manual installation.
| Include Page | ||||
|---|---|---|---|---|
|
Step 4
Step 2: Customise the configuration file
Open the config.json in a text editor, such as Notepad

If the application you set up for Computer Logon with MFA supports single tenant

then, replace "YOUR-TENANT-ID" in the configuration file with your Tenant ID in the Entra ID.
However, if the application you set up for Computer Logon with MFA supports multitenant

then, replace "YOUR-TENANT-ID" in the configuration file with the word "common"
Now, replace "YOUR-CLIENT-ID" with the "application (client) ID"

Save the configuration file.

...
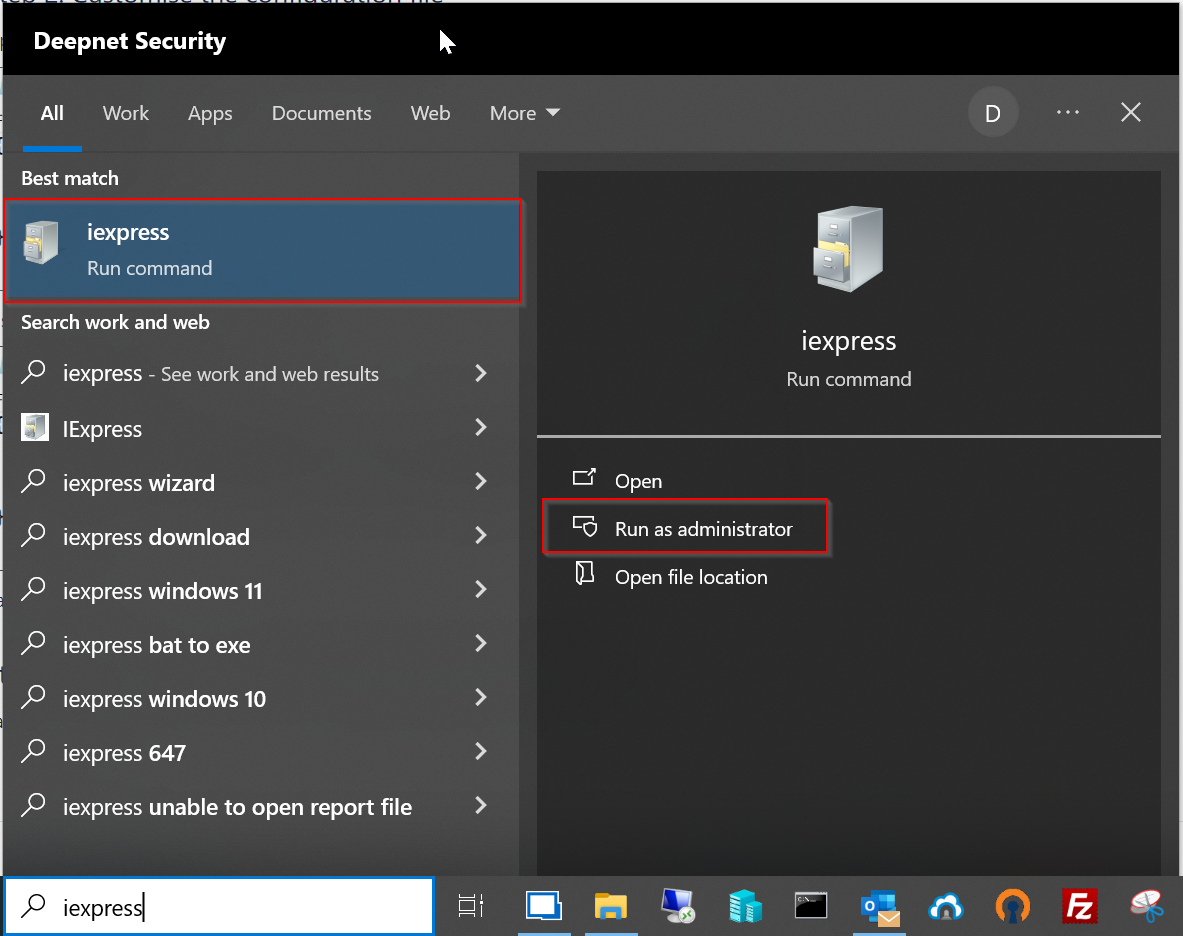
: Create a custom installer package using iExpress
Run iExpress as administrator
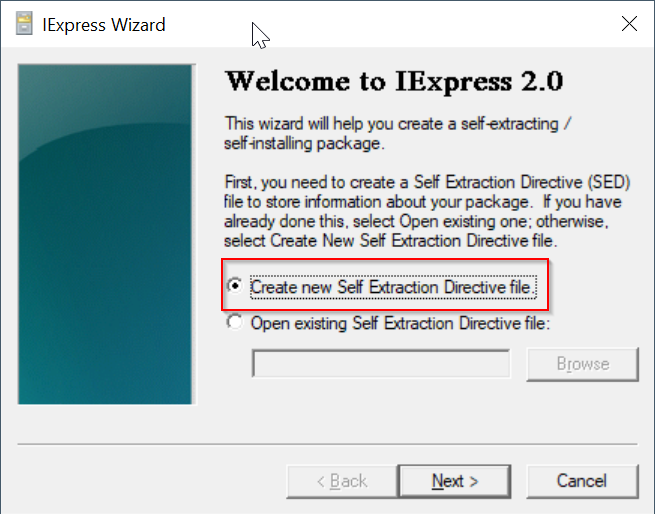
Select the option "Create new Self Extraction Directive file"
Click "Next
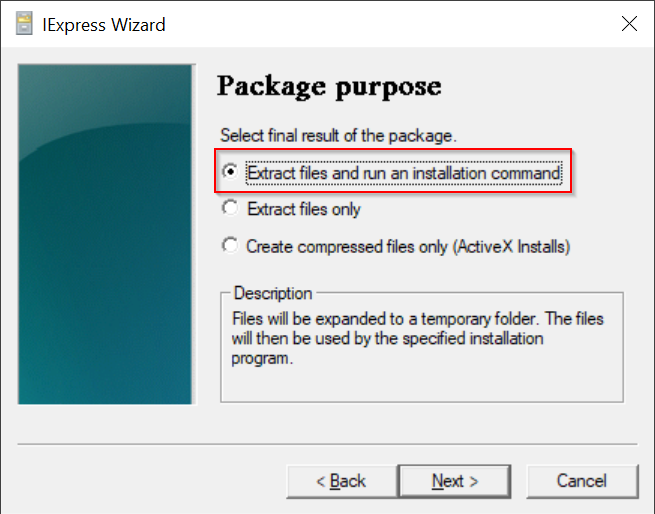
Select the option "Extract files and run an installation command"
Click "Next"
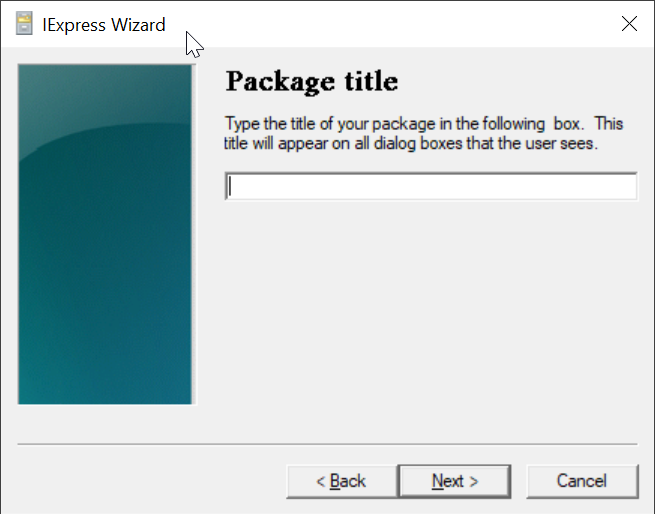
Enter "Deepnet Computer Logon Agent for Entra ID"

Click "Next"

Select "No prompt"
Click "Next"
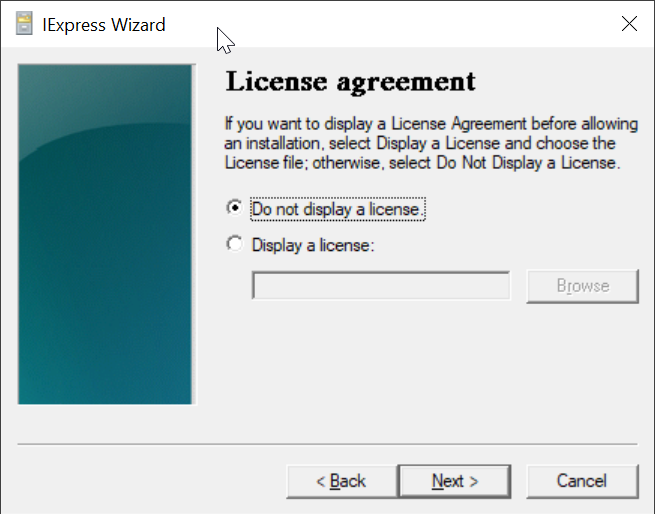
Select "Do not display a license"
Click "Next"
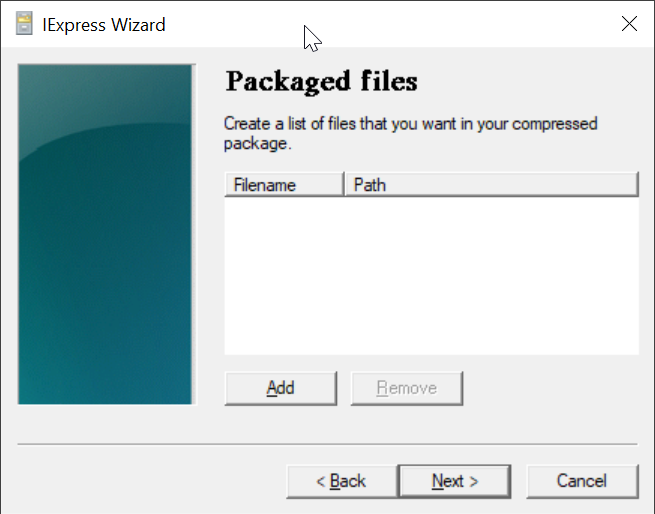
Click "Add"

Navigate to the folder where the files are kept, e.g. "D:\Software\CLO"
Select all files in the folder
click "Open"

All 3 files are added
Click "Next"
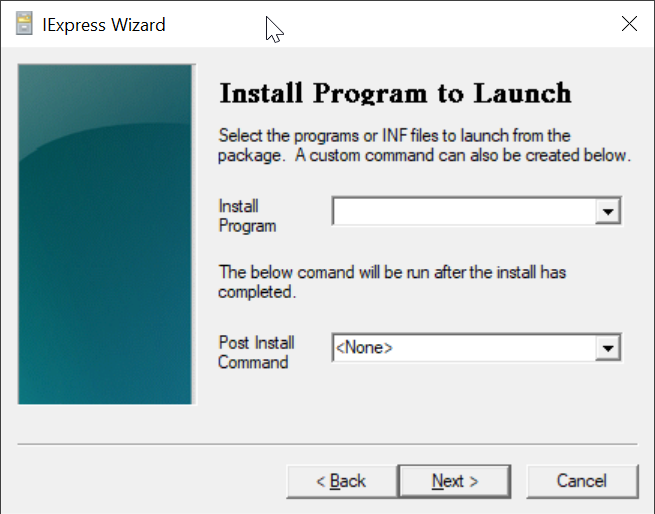
In the "Install Program" box, enter "cmd /c install-clo.bat"
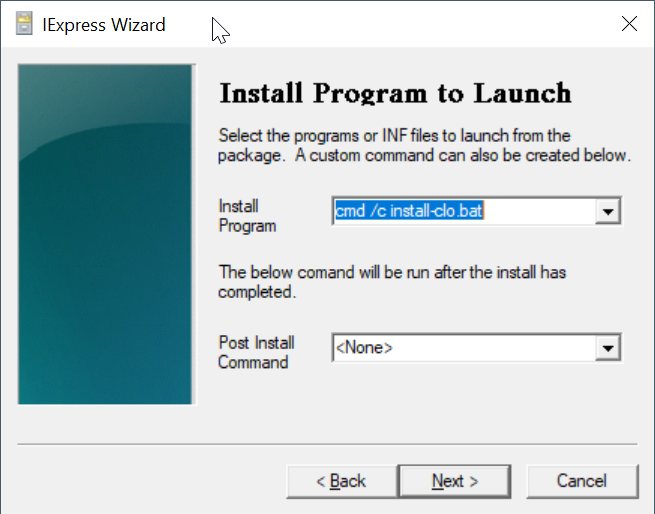
Click "Next"
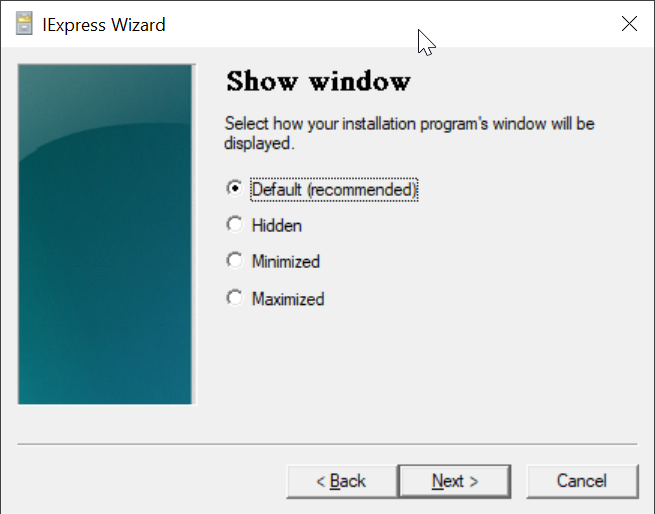
Click "Next"
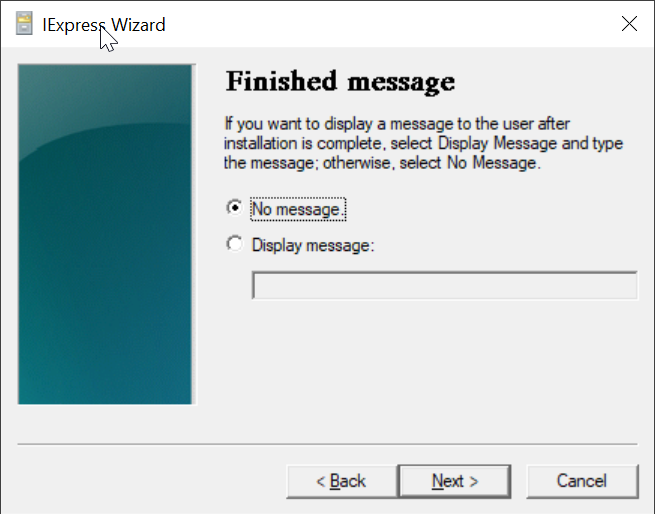
Click "Next"
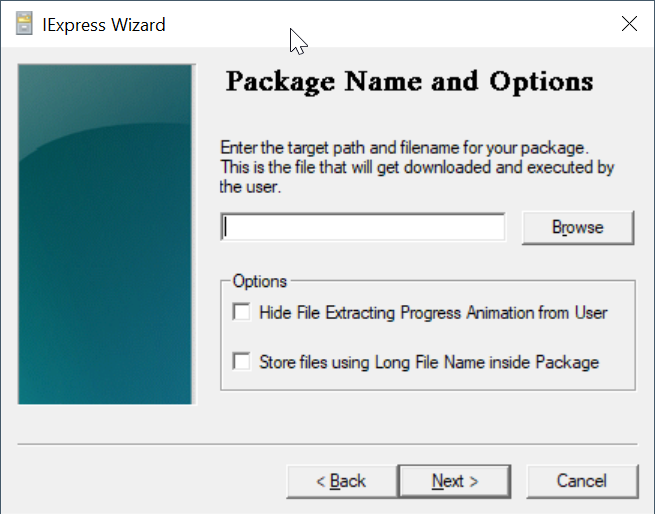
Click the "Browse" button to select a folder where you want to save the custom installer file. e.g. "D:\Software\CLO"
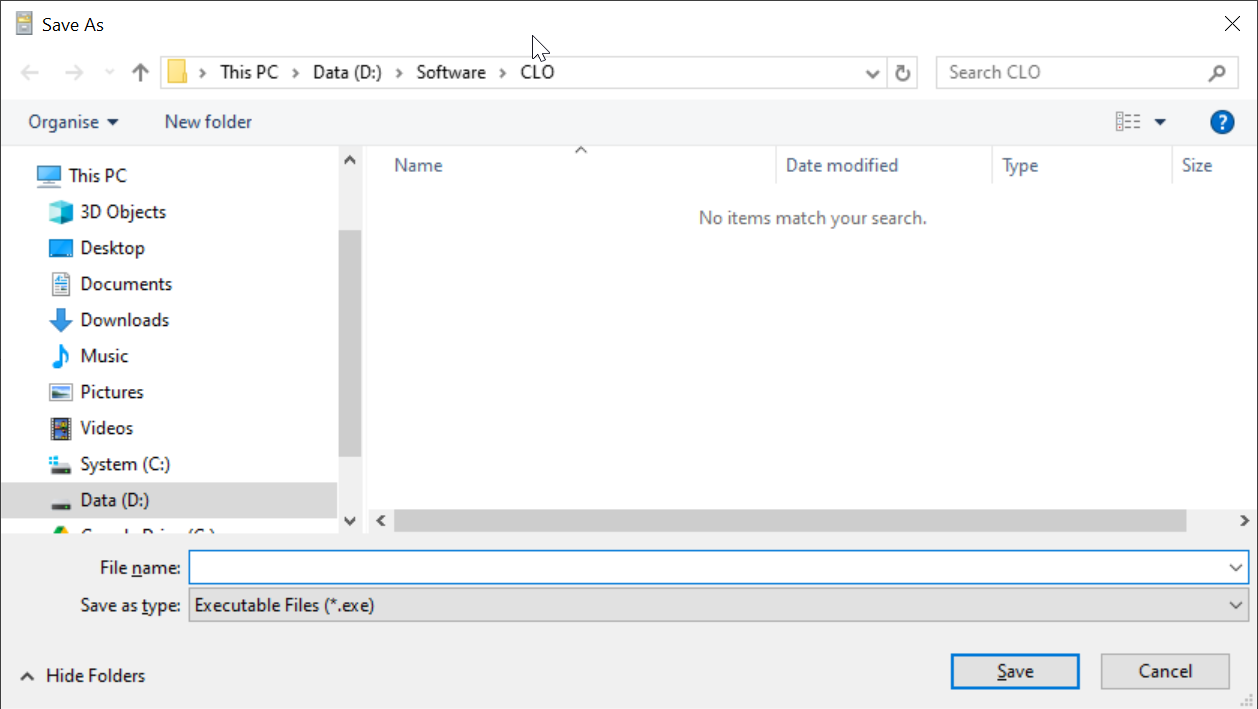
In the "File name" box, enter the name for your customer installer, e.g. Deepnet-CLO-Installer
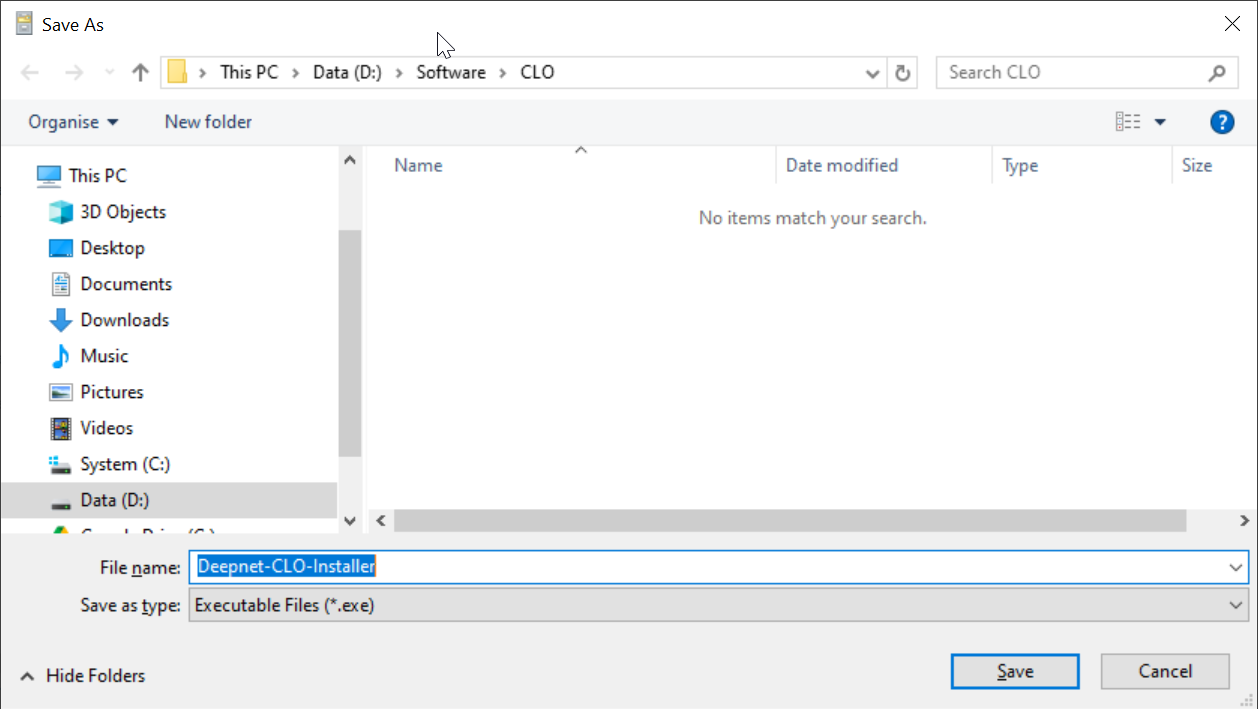
Click "Save"

Select "Store files using Long File Name inside Package"
Click "Next"

Click "Next"

Select "Don't save"
Click "Next"

Click "Next"

Wait for it to finish

Click "Finish"

| Include Page | ||||
|---|---|---|---|---|
|