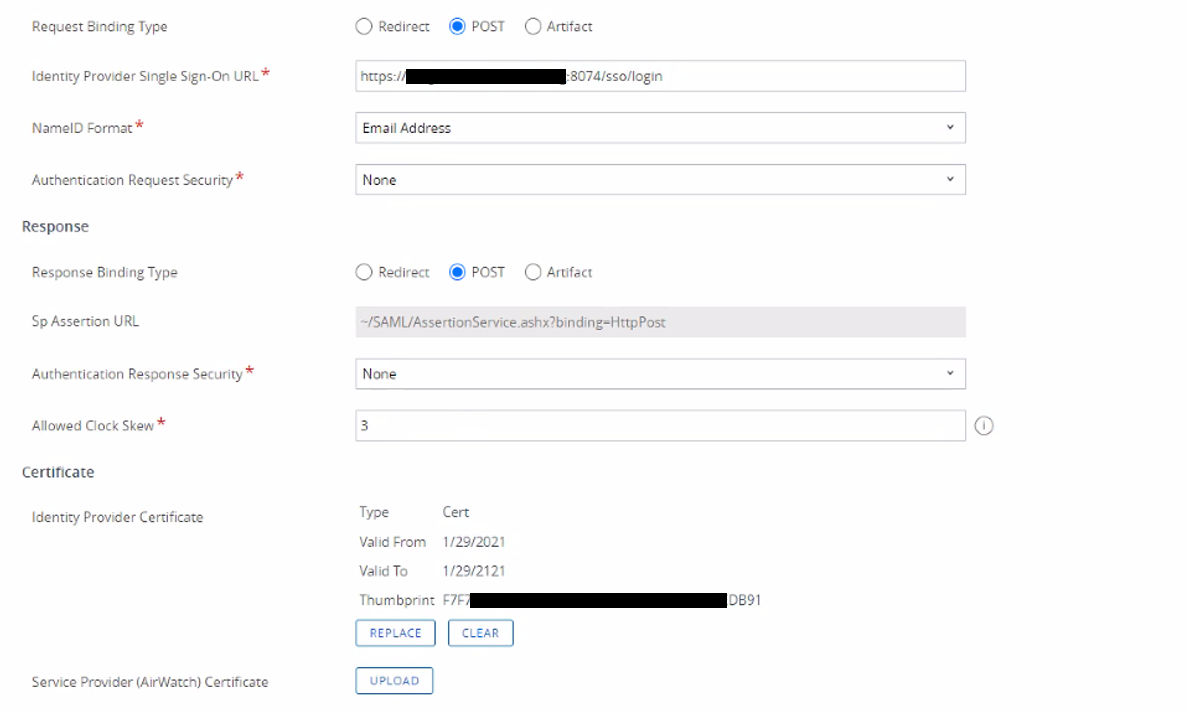
The fields regarding IDP Suingle Single Sign-On URL; Sp SP Assertion and Certificate will autopoulateauto populate.
Leave other settings such as NameID Format as default.
Column
width
50%
Panel
borderColor
#9EBEE5
bgColor
#f0f0f0
borderWidth
1px
Image RemovedImage Added
Configure SAML SSO:
Section
border
true
Column
Navigate toAdmin > Configuration.
Click theSAMLtab
Click theEditbutton in theSAML General Settingssection.
Click to select theSAML Enabledcheck box.
Click theSavebutton.
Column
width
50%
Panel
borderColor
#9EBEE5
bgColor
#f0f0f0
borderWidth
1px
Image Removed
Section
border
true
Column
Click theEditbutton in theSAML Service Providerssection.
Type a name for your service provider, in theNametext box.
Click theSelect Certificatelink. The Upload Certificate popup appears:
Click the Upload Certificate button to upload your commercial SSL certificate (Usually in pfx format)
Type Password
Click OK.
Click on Download Service Provider Metadata.
Column
width
50%
Panel
borderColor
#9EBEE5
bgColor
#f0f0f0
borderWidth
1px
Image Removed
Section
border
true
Column
Under Identity Providers click on Create New Service Provider
ClickImport IDP from XML Metadataand select the IdP metadata.xml file you saved previously. (refer to Obtain the IDP Metadata File section)on Export Service Provider Settings to download the SP metadata that you will edit and copy into DualShield.