...
| Section | ||||||||||||||||
|---|---|---|---|---|---|---|---|---|---|---|---|---|---|---|---|---|
| ||||||||||||||||
|

| Section | ||||||||||||||||
|---|---|---|---|---|---|---|---|---|---|---|---|---|---|---|---|---|
| ||||||||||||||||
|

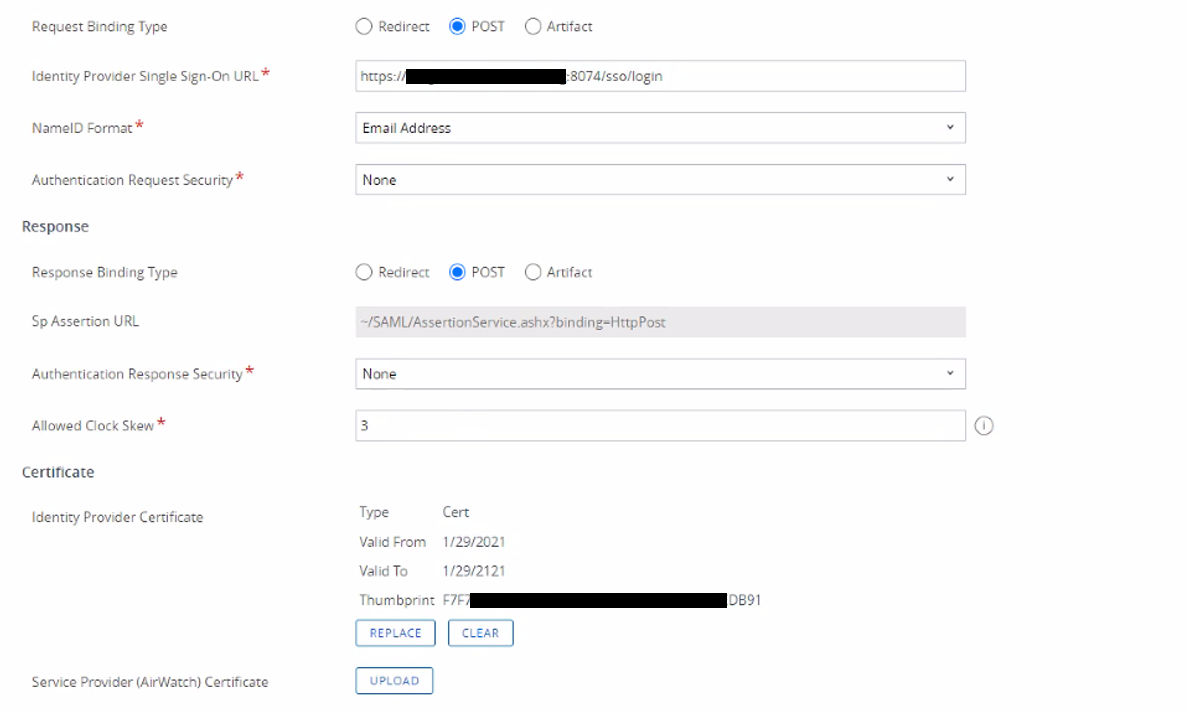
Configure SAML SSO:
...
| border | true |
|---|
| Column |
|---|
Navigate to Admin > Configuration. Click the SAML tab Click the Edit button in the SAML General Settings section. Click to select the SAML Enabled check box. Click the Save button. |
...
| 50% |
| Panel | ||||||
|---|---|---|---|---|---|---|
| ||||||
|

| border | true |
|---|
| Column | ||||||
|---|---|---|---|---|---|---|
Click the Edit button in the SAML Service Providers section. Type a name for your service provider, in the Name text box. Click the Select Certificate link. The Upload Certificate popup appears: Click the Upload Certificate button to upload your commercial SSL certificate (Usually in pfx format) Type Password Click OK. Click on Download Service Provider Metadata. | ||||||
| Column | ||||||
|
| Panel | ||||||
|---|---|---|---|---|---|---|
| ||||||
|

| border | true |
|---|
| Column |
|---|
Under Identity Providers click on Create New Service Provider Click Import IDP from XML Metadata and select the IdP metadata.xml file you saved previously. (refer to Obtain the IDP Metadata File section)on Export Service Provider Settings to download the SP metadata that you will edit and copy into DualShield. |
| Column | |||||||||
|---|---|---|---|---|---|---|---|---|---|
| |||||||||
|

