There are 2 ways you can set up pre-programmed hardware tokens with Azure AD:
- Use Azure AD Portal
- Use SafeID Token Service
Azure AD Portal
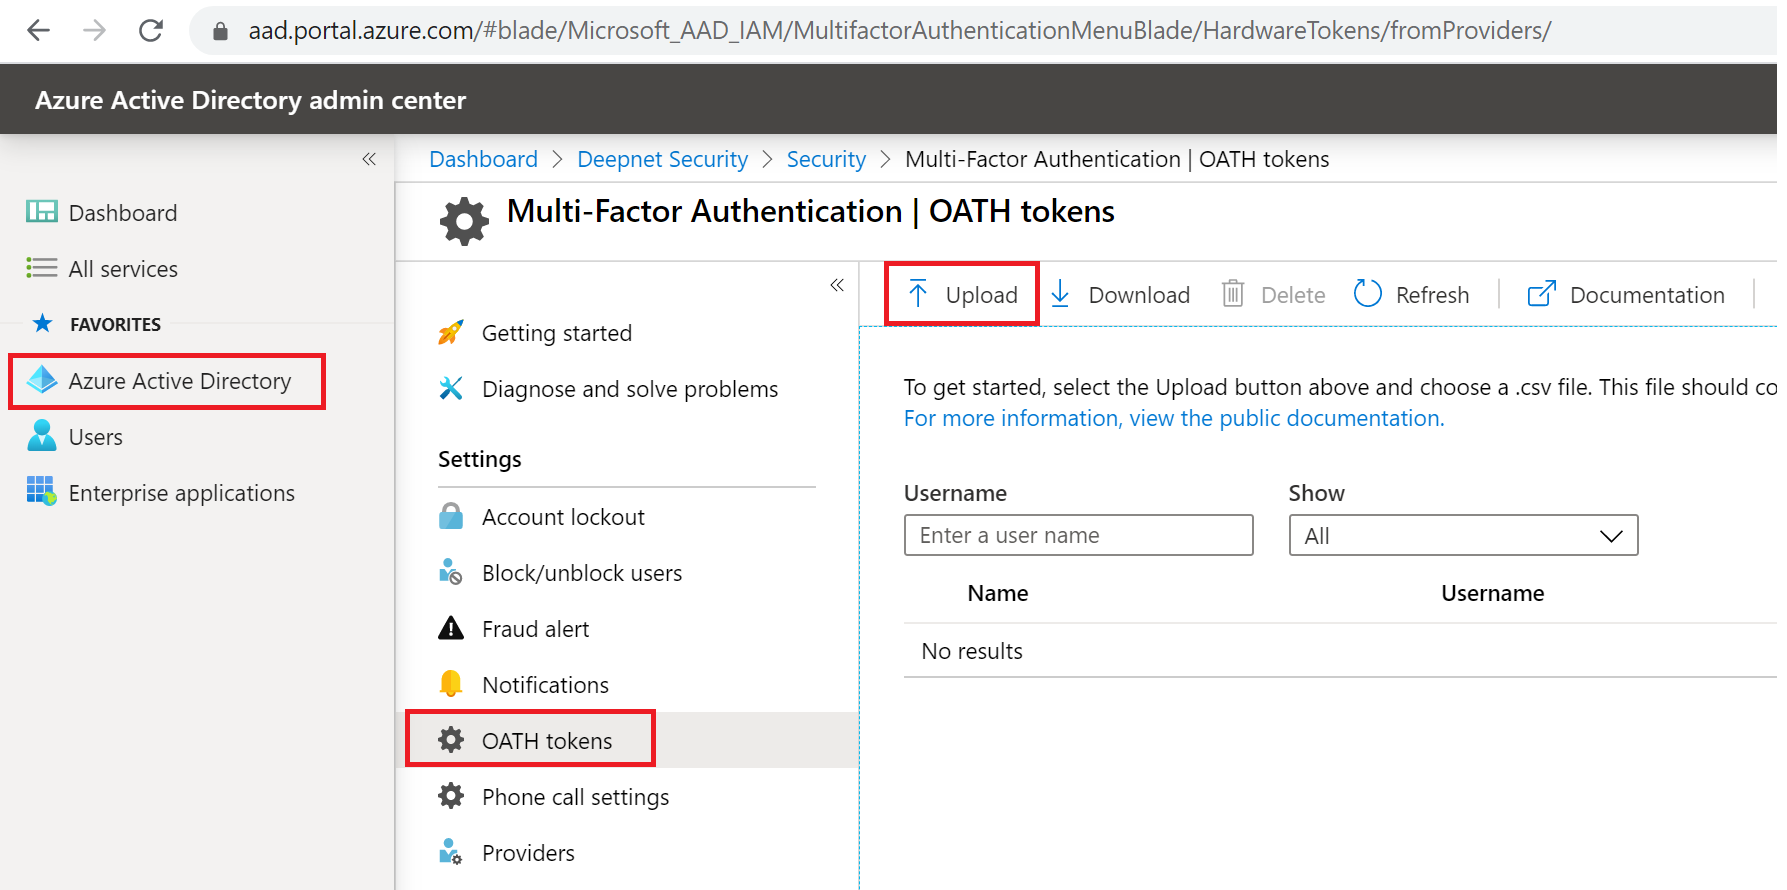
Microsoft Aure AD portal does provide a facility that allows you to enroll the pre-programmed hardware tokens. To set up hardware tokens using Azure AD portal, you will need to go through 3 steps
- Assign tokens to users
- Upload tokens to Azure AD
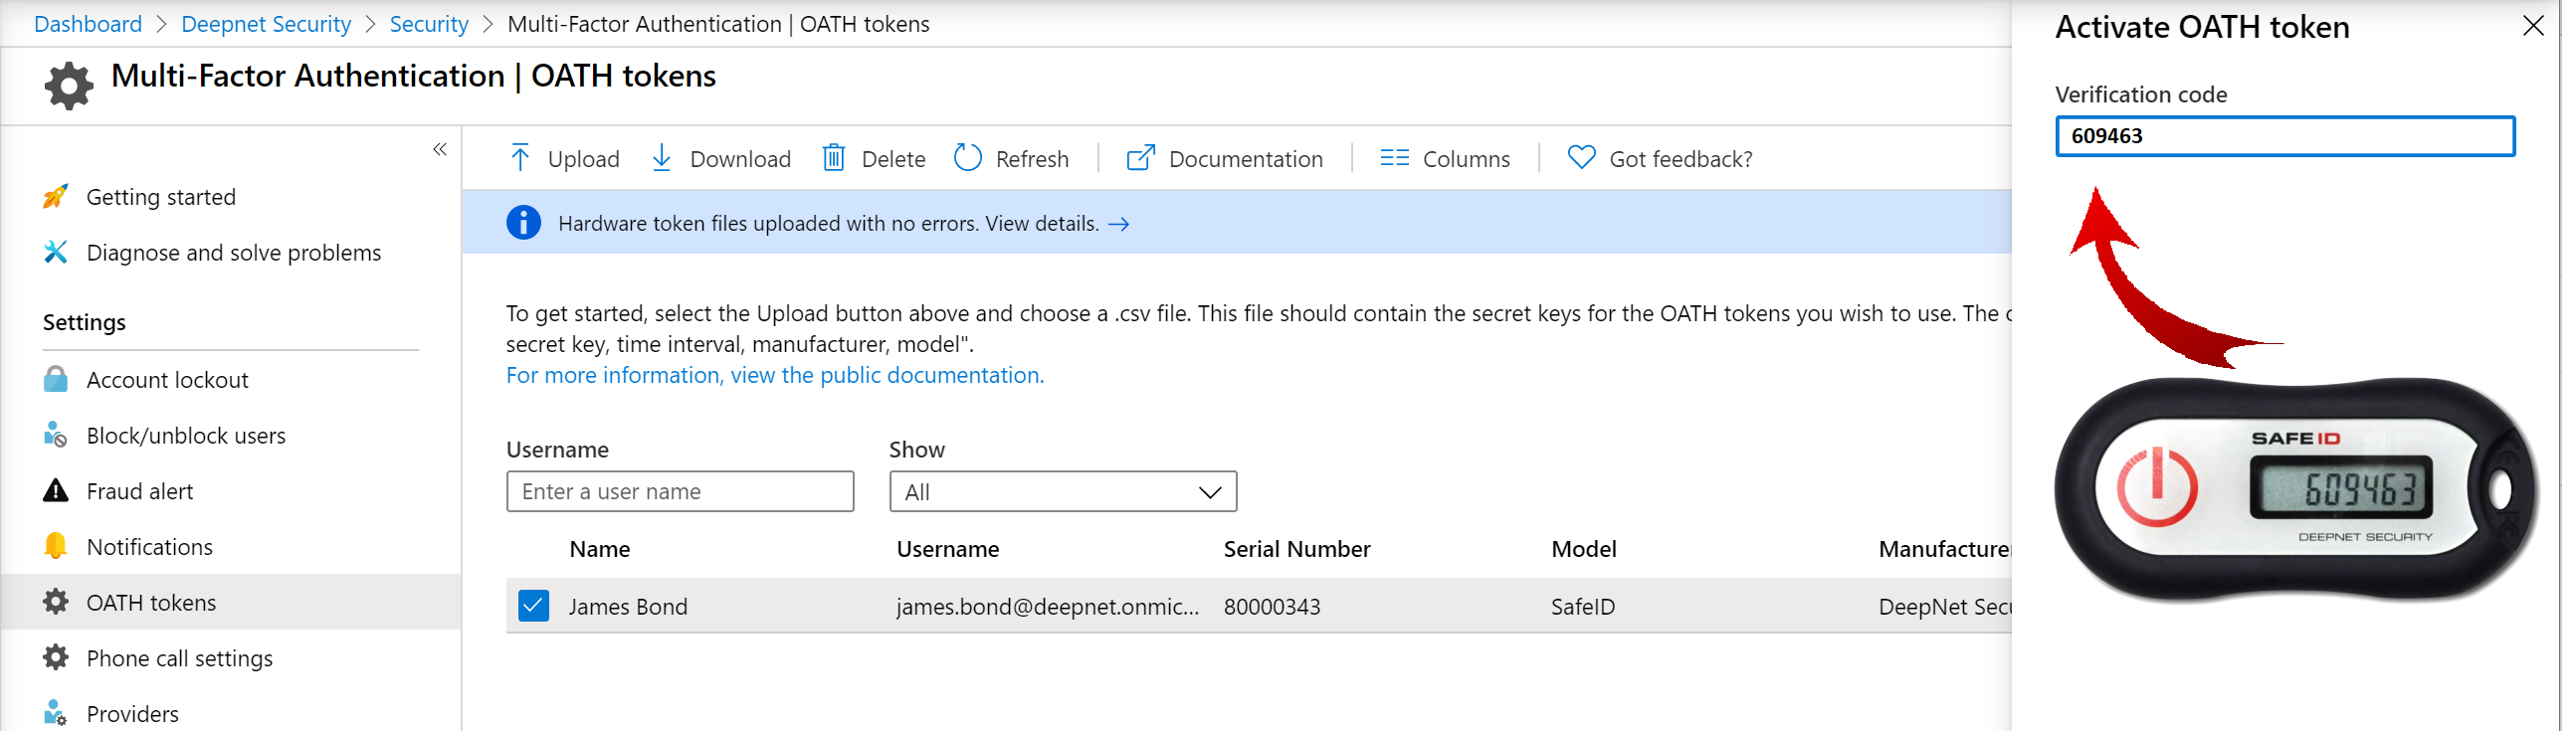
- Activate Tokens
In step 1, you will need to edit the secret file of the hardware tokens with a text editor and assign all of your tokens to your users by adding the user's UPN against the token's serial number, one by one

In step 2, you will need to upload the secret file of the hardware tokens onto Azure AD
In step 3, you will need to activate tokens by providing a verification code from the token, one by one.
Click here for detailed instructions on how to set up pre-programmed hardware tokens with Azure AD
SafeID Token Service
As you will see, the facility provided by Azure AD is very basic and not flexible. It does not provide functions for you to quickly assign only one token to a user or to reassign a token, for instance. If you have a small number of hardware tokens to manage, then it is OK to use the Azure AD portal. However, if you have a large number of hardware tokens to manage, then we would recommend the SafeID Token Service
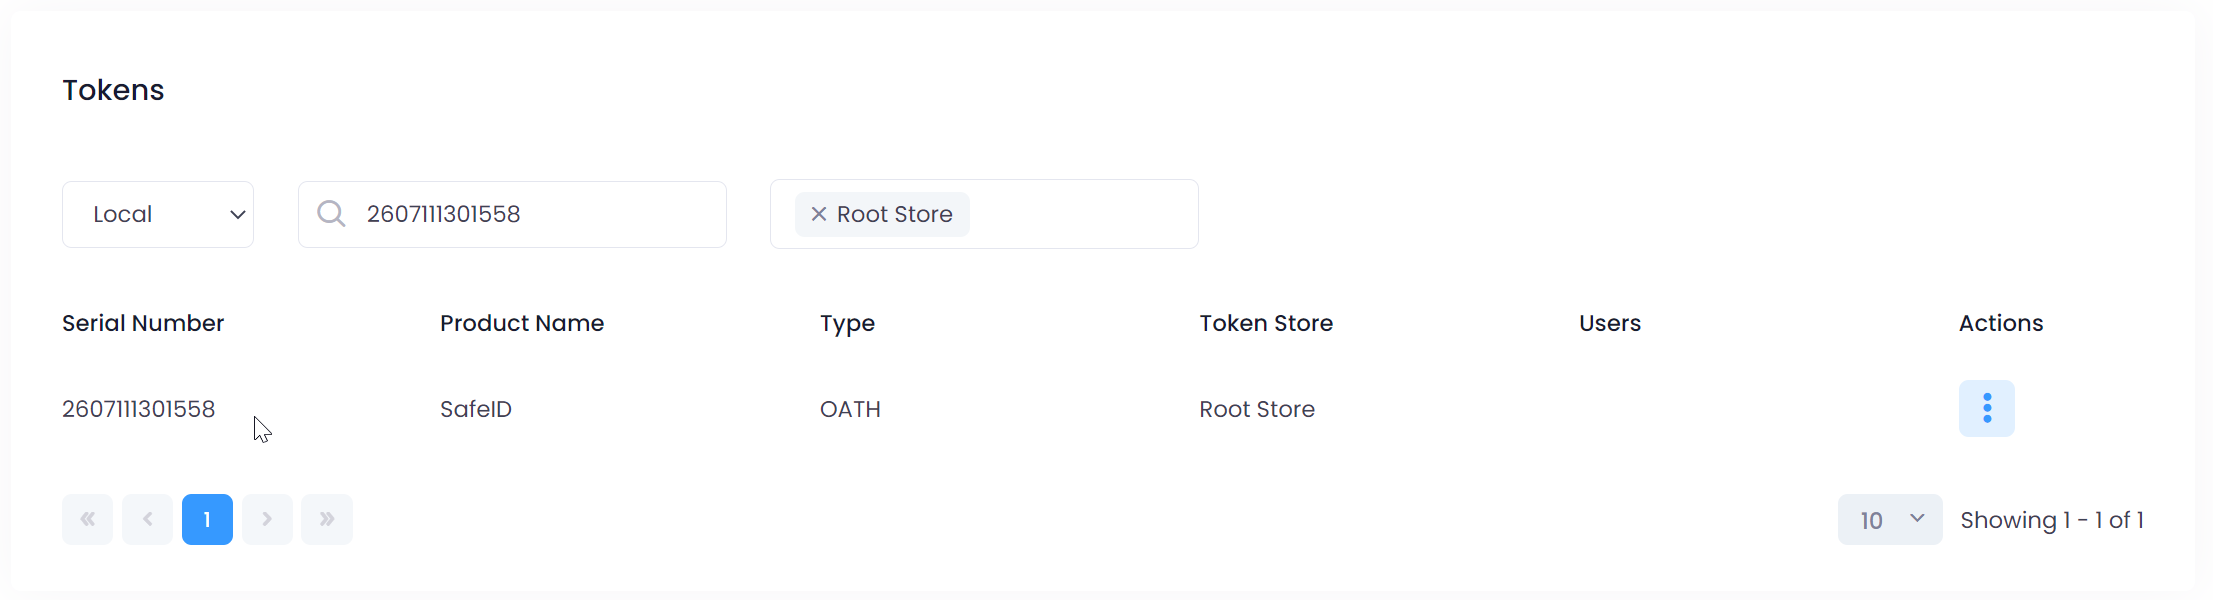
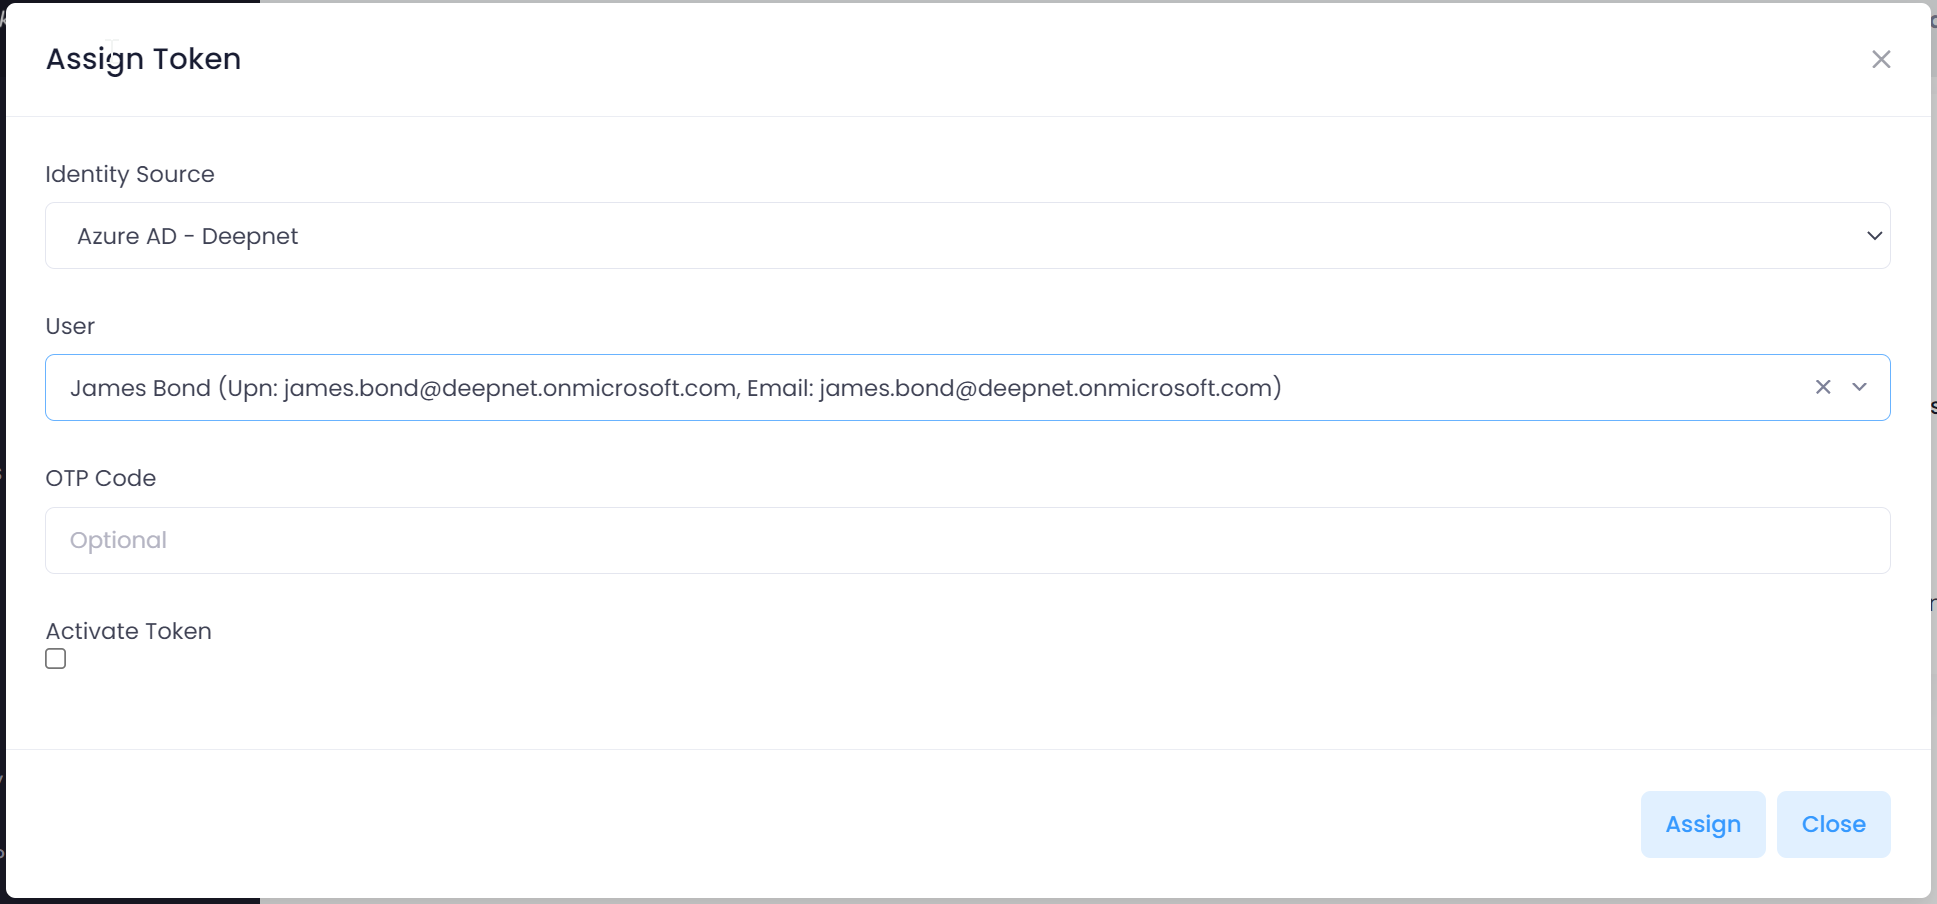
SafeID Token Service provides a Web-based GUI console that allows customers to manage the full life cycle of the SafeID hardware tokens by simply pointing and clicking. You can assign, activate, deactivate, unassign, delete and replace a token, etc with one single click.
Click here for detailed instructions on how to manage hardware tokens with SafeID Token Service