There are 2 ways you can import pre-programmed OATH hardware OTP tokens such as SafeID tokens into Salesforce:
- Use Salesforce Data Loader
- Use SafeID Token Service
Use Salesforce Data Loader
Install Salesforce Data Loader
Install the Java Open SDK
Download Salesforce Data Loader from https://developer.salesforce.com/tools/data-loader
Extract files from the zip to a temp folder

Launch the Windows Command Shell
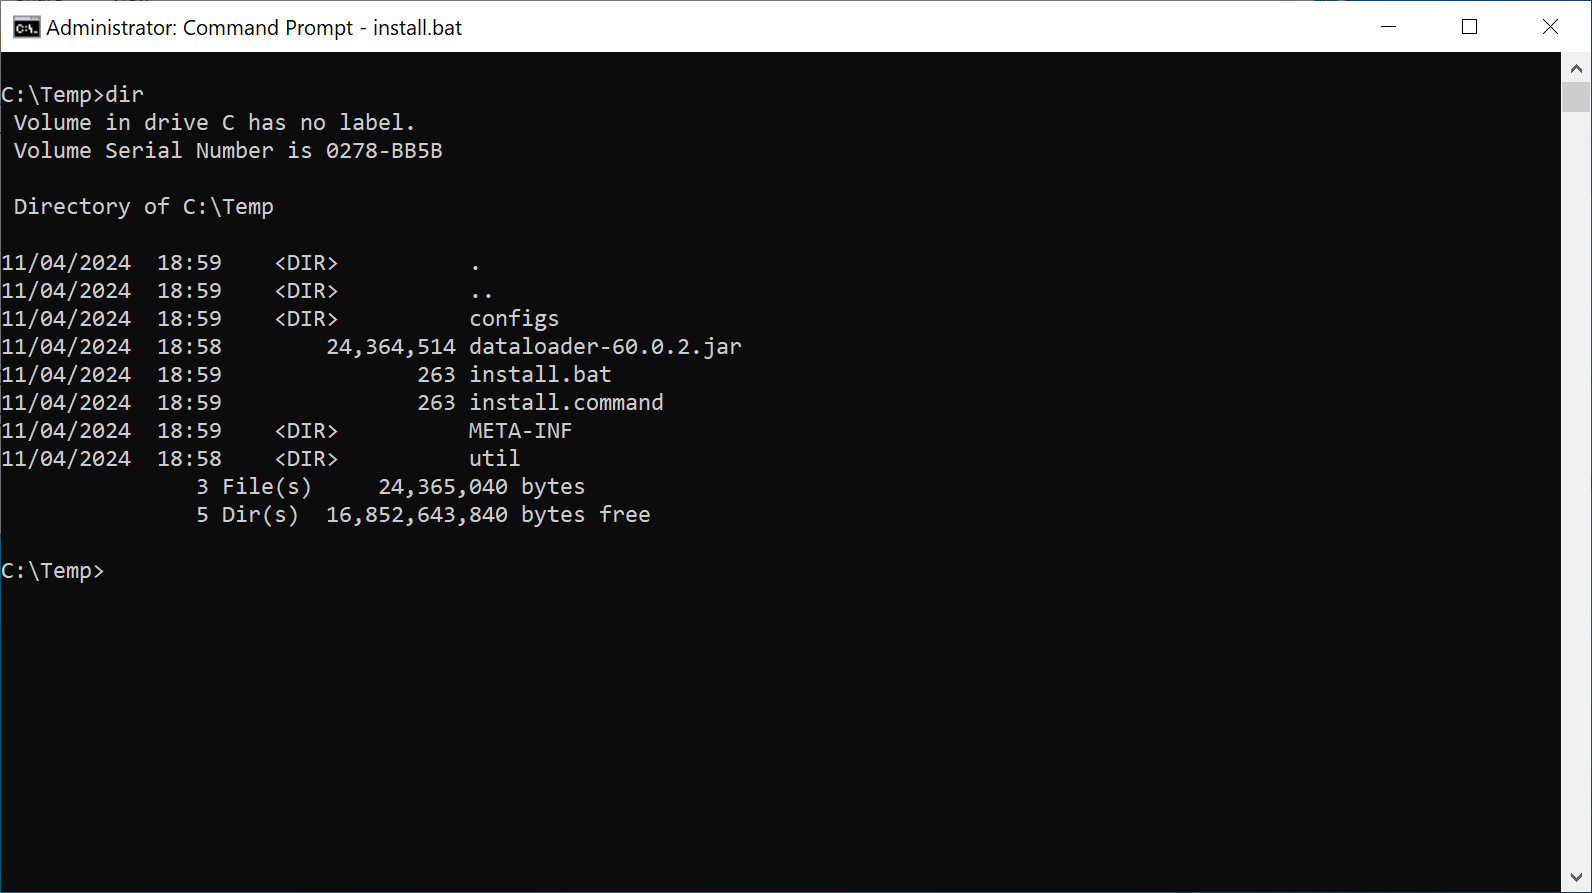
Run "install.bat"

Follow the on-screen instructions to install the Data Loader

Prepare the Token Assignments CSV File
How to request token seed or secret file
On the page where you need to specify the Seed File Format, select "Salesforce CSV"

Once you have downloaded the token seed file, you need to make the following changes to the seed file:
1 - Insert user names
Open the token file that you have downloaded in a text editor, such as Notepad (do not edit the token file using Excel)

In the first line, insert "User Name," at the begining

Now, you can assign tokens to users by adding the name of the user against the token to be assigned
The example below assigns the first token to a user named "user1@deepnetsecurity2.com"
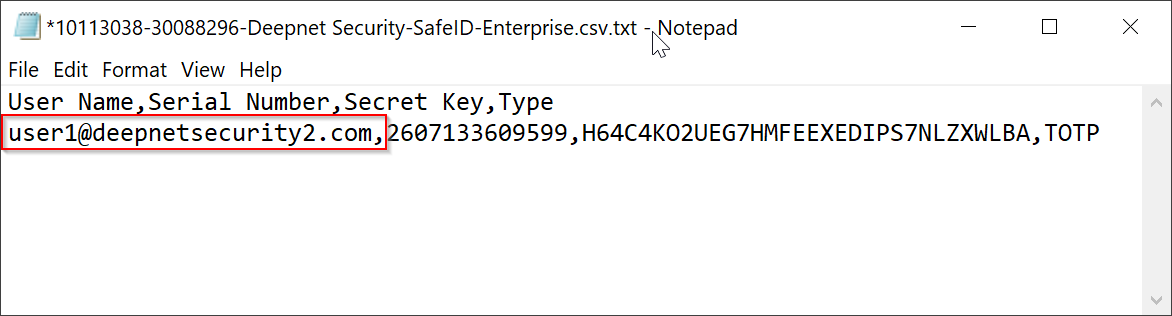
Once you have assigned all tokens. save the file
2 - Change the file extension
The token seed file you have downloaded has the file extension "xxxxxxxx.csv.txt". Remove ".txt" at the end. In other words, rename the file name as "xxxxxxxx.csv".
(The reason why the file name comes with ".txt" extension is that it prevents you from automatically opening the file in Excel. And, the reason why it needs to be renamed to ".csv" is that Salesforce only accepts ".csv" files)
Upload the Token Assignments CSV File
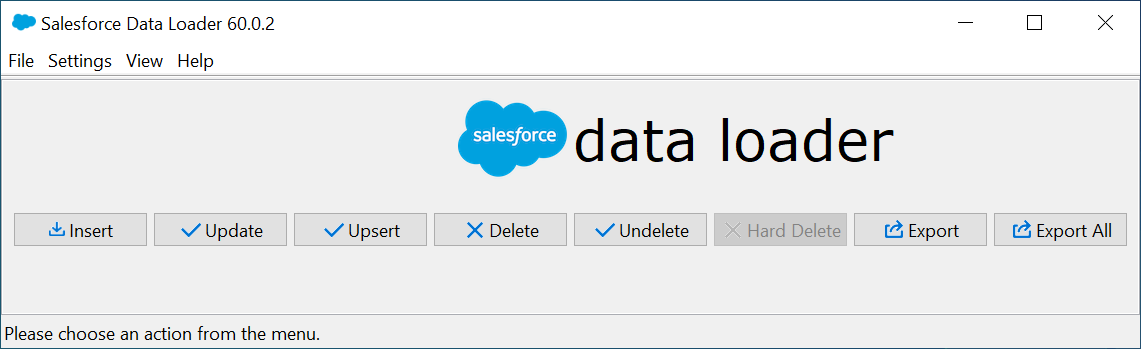
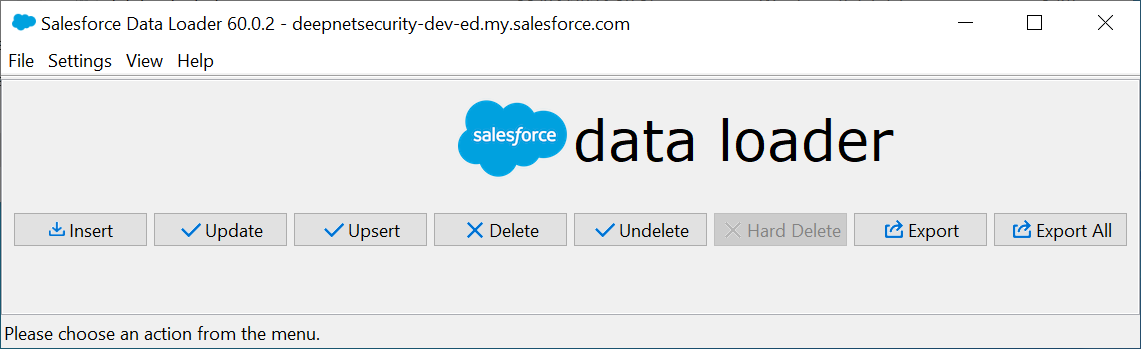
Press the "Insert" button
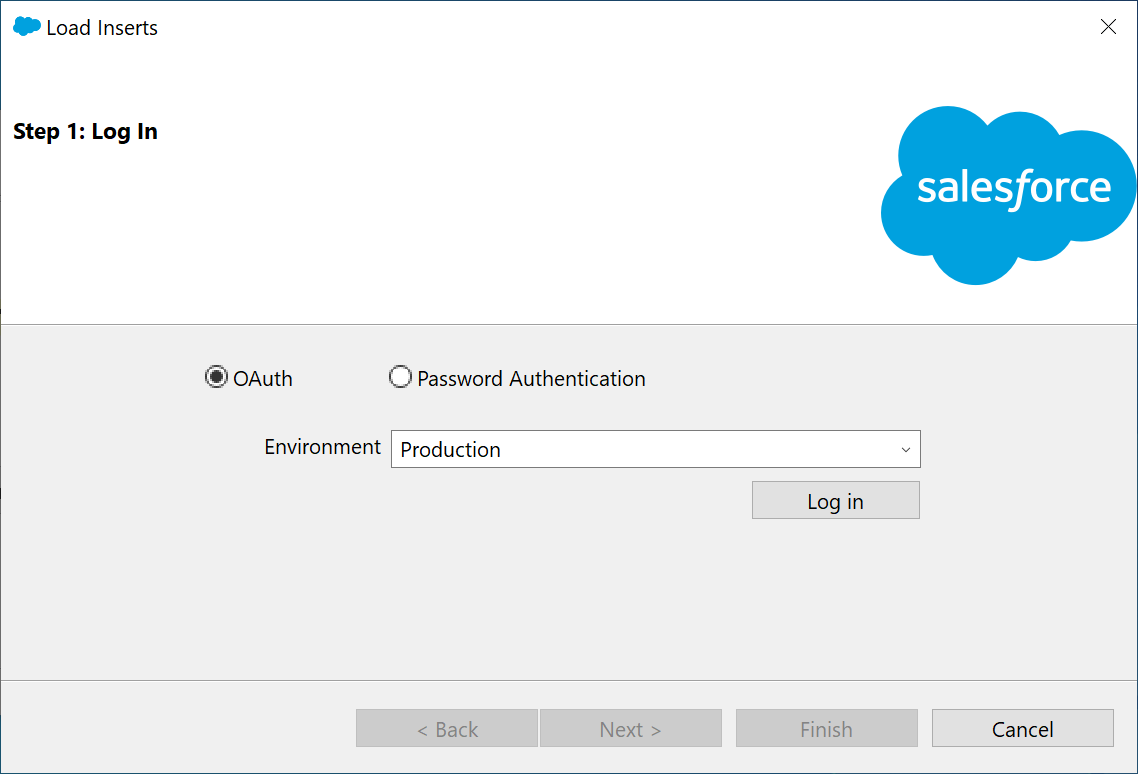
Press the "Log in" button
A web browser will open asking you to enter a code which has been prefilled

Press the "Connect" button

You will now need to log in to Salesforce
Enter your username and password, then press "Log in"

Click the "Allow" button to allow the Data Loader application access to your SalesForce account

Press "Continue"
Now, switch back to the Salesforce Data Loader application
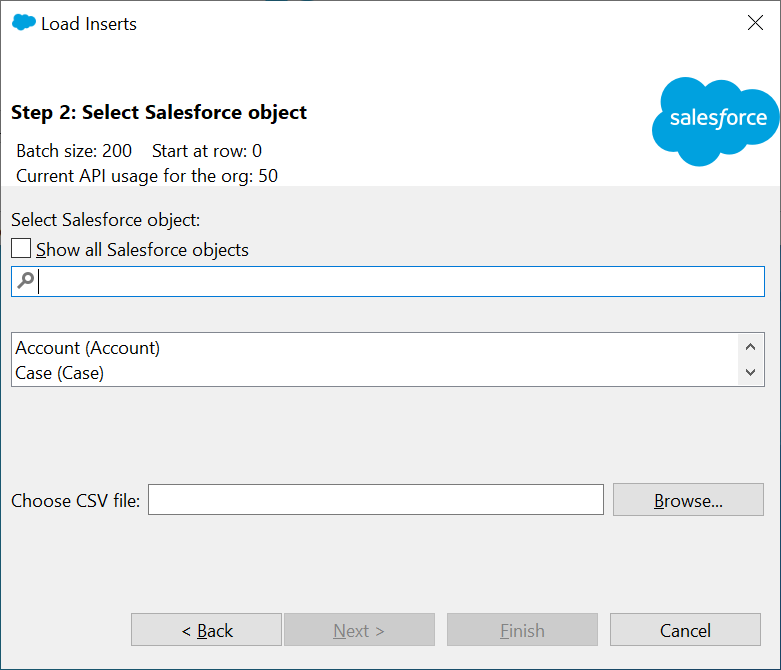
Tick the option "Show all Salesforce objects"
Enter "twofactorinfo" in the search box
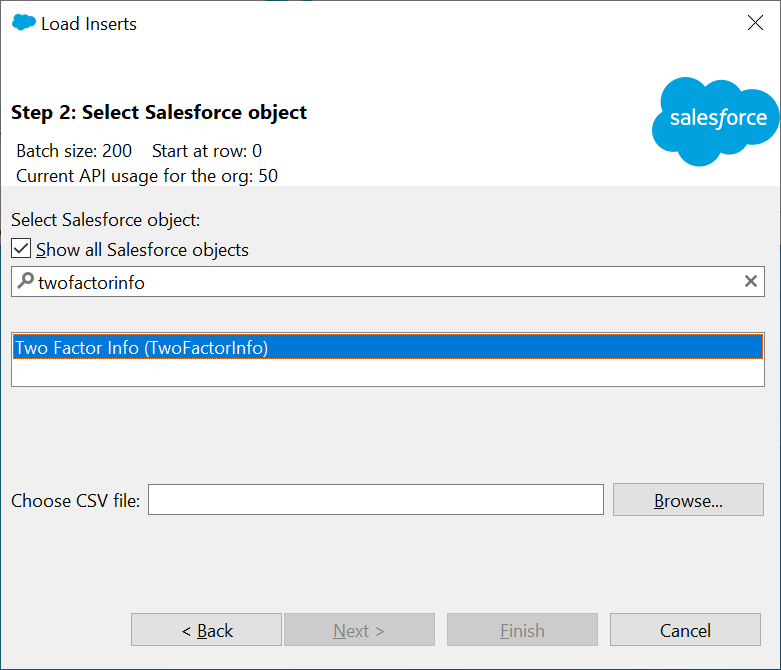
Select "Two Factor Info (TwoFactorInfo)
Click "Browse..." to select the Token CSV file you have prepared

Press "Next"
You should be presented with a data selection window confirming the number of rows
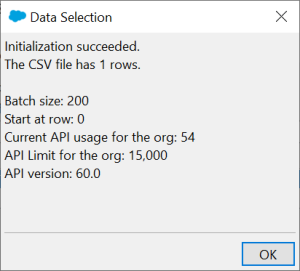
Click "OK"
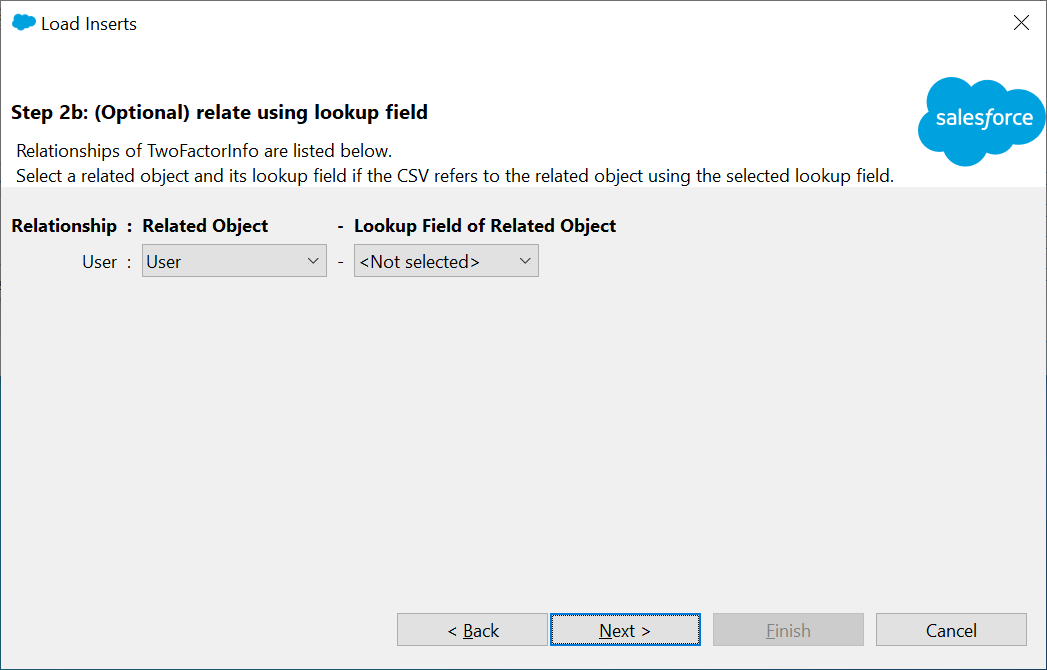
Select "Username" in the Lookup Field of Related Object drop-down list

Press "Next"
You will now be presented with the page below
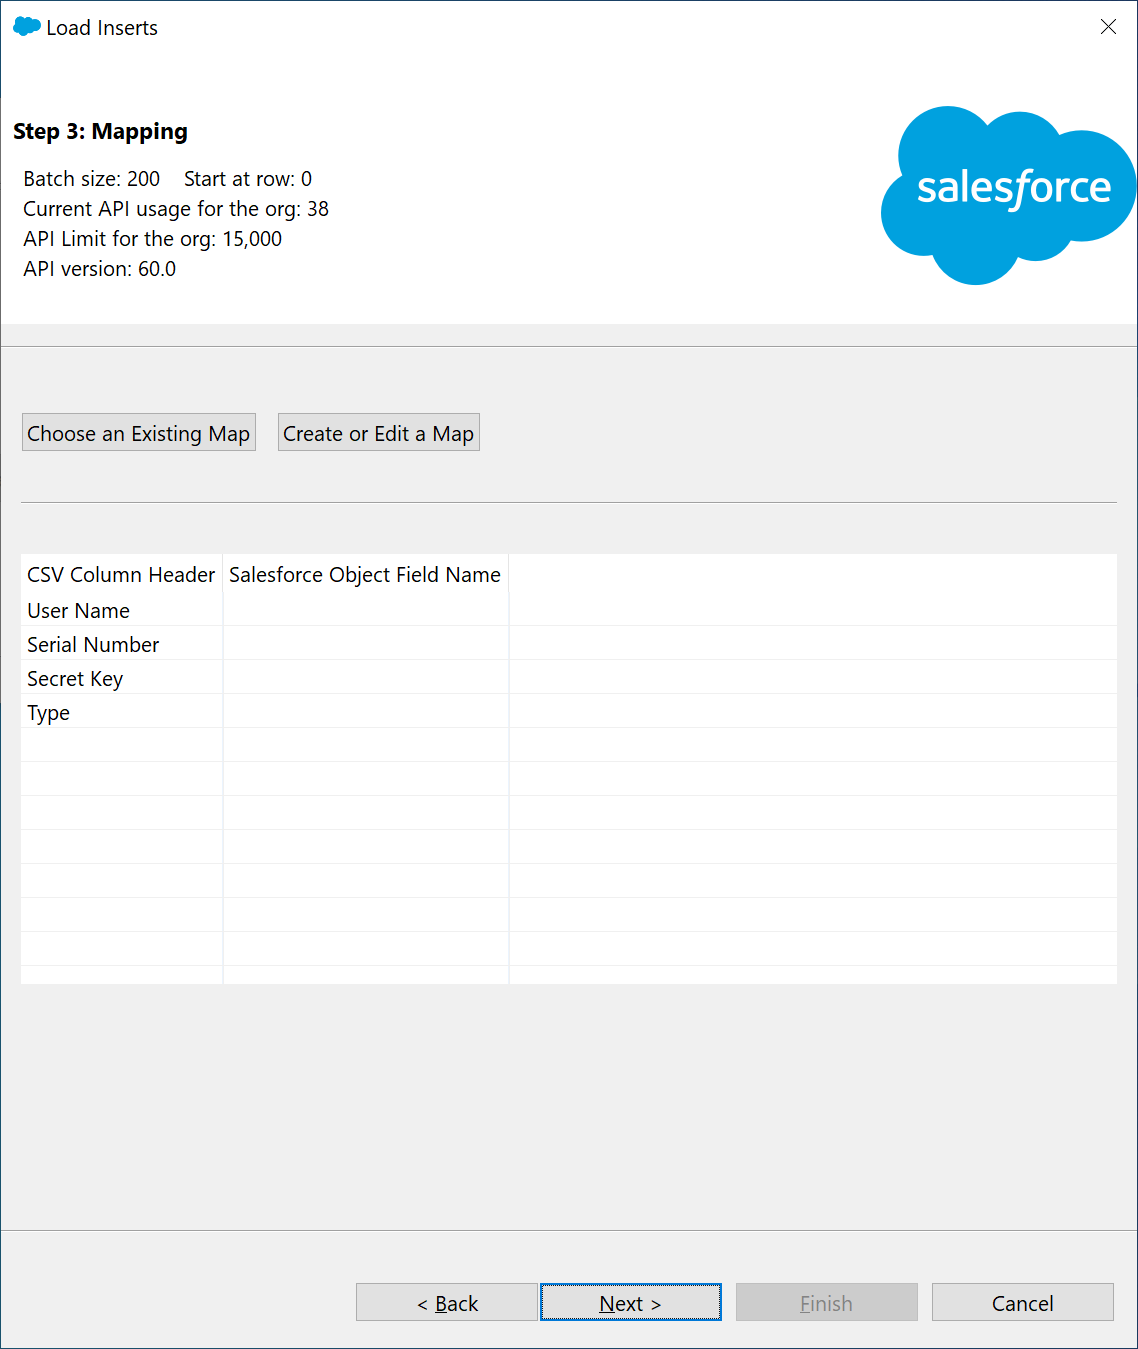
Click “Create or Edit a Map”
You will now be presented with the page below

Drag the Salesforce object fields down below to the CSV Column, so that the result looks the same as the one below.
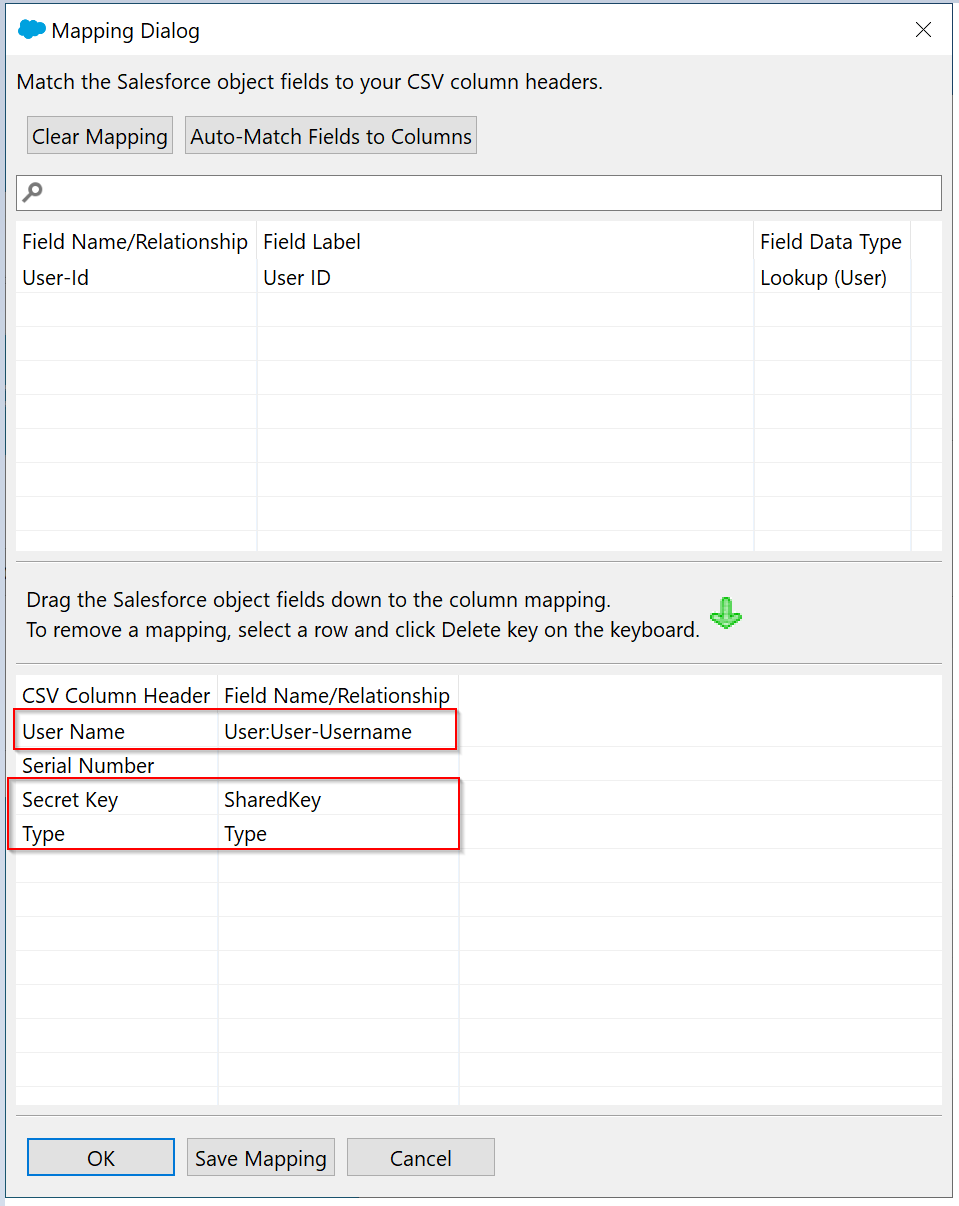
Click "OK"
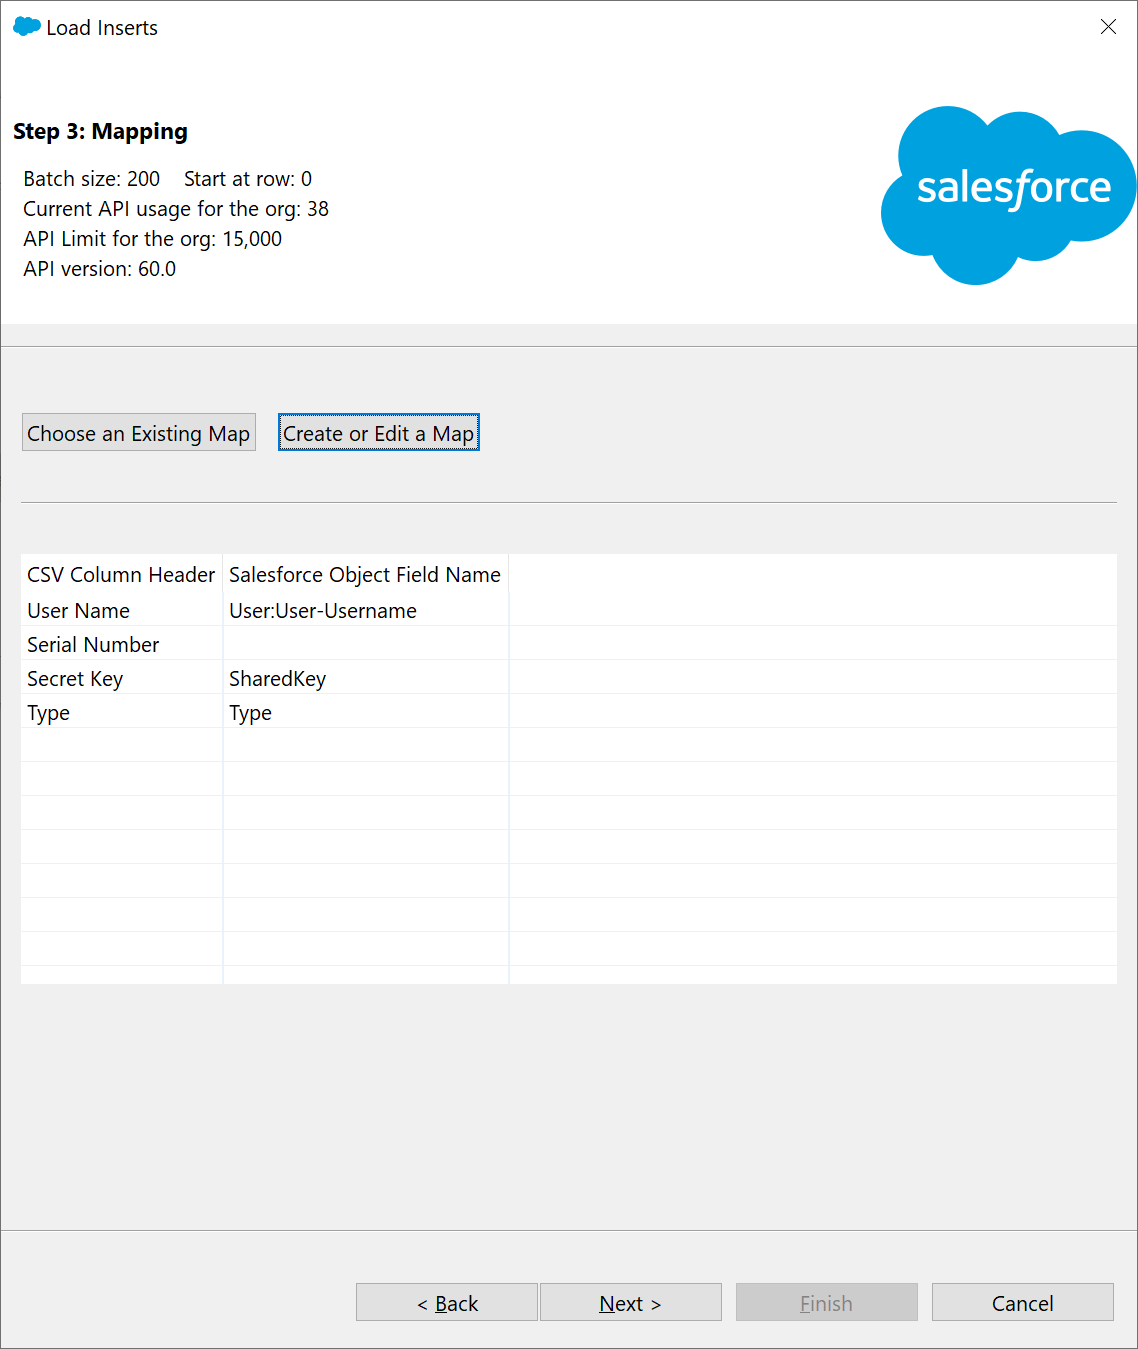
Click "Next"
You will then be asked to select a folder where the log of the Data Loader activity should be written to
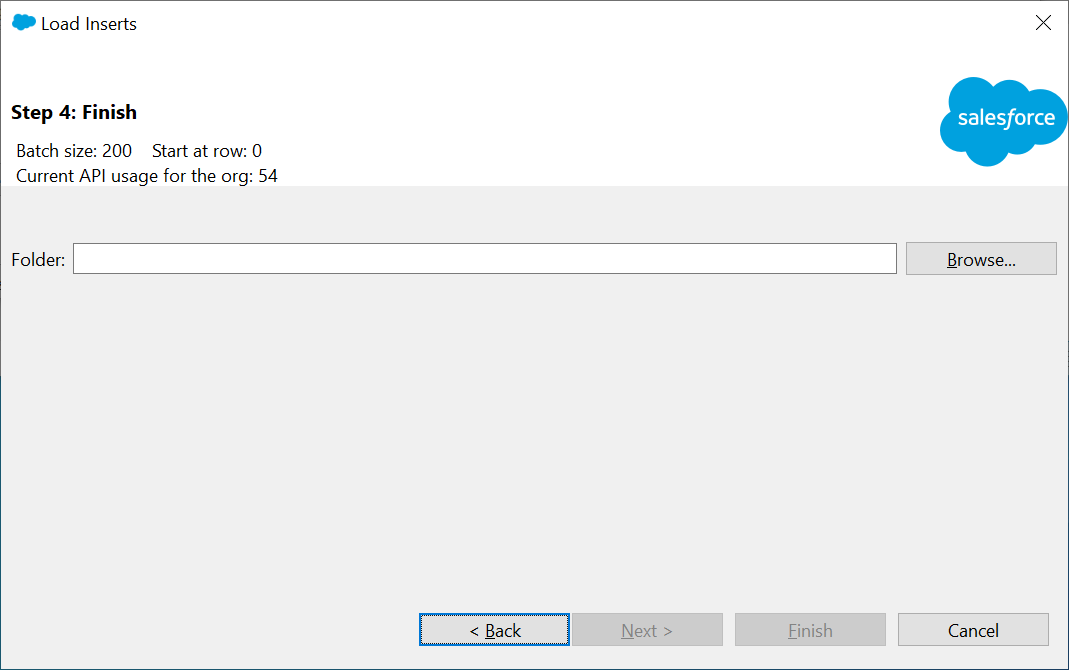
Click "Browse..." to select a folder, e.g. C:\Temp

Click "Finish"
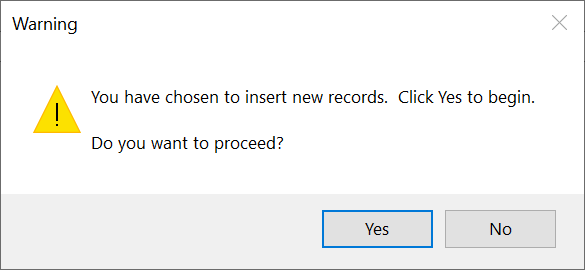
Click "Yes" to confirm you wish to proceed with inserting the data
You should now be presented with a window confirming that the records have been inserted into Salesforce
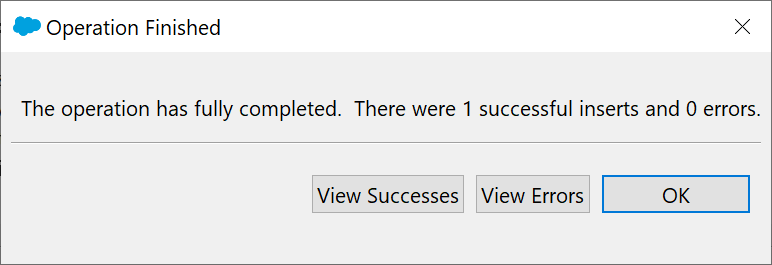
Tokens have now been successfully assigned to users
Click "OK"
You can now close the Data Loader
Use SafeID Token Service
SafeID Token Service (STS) is a product/service that we have developed for customers who need to manage a large quantity of SafeID tokens with Azure AD, OKTA, Salesforce etc
SafeID Token Service provides a Web-based GUI console that allows customers to manage the full life cycle of the SafeID token by simply pointing and clicking. You can assign, activate, deactivate, unassign, delete and replace a token, etc with one single click.
For more details, click SafeID Token Service