Before you install the DualShield MFA system, you must prepare your environment and plan for choices that you will make during the installation process.
To prepare for installation:
1. A Windows or Linux server machine (virtual or real machine) with 8GM RAM, 4-core CPU, and 10GB free disk space
2. An FQDN for your DualShield MFA server consoles, e.g. mfa.acme.com
3. An SSL certificate for your DualShield MFA server consoles in a PFX file (a wildcard certificate is acceptable, e.g. *.acme.com)
Furthermore, if you are going to use the Out of Band Authentication (OOBA) from iOS and Android mobile devices, then you will have to make the DualShield Deployment Service and the Single Sign-On portals accessible by end users from the public network. In this case, you must not use a self-signed certificate because it will not be accepted by iOS and Android devices.
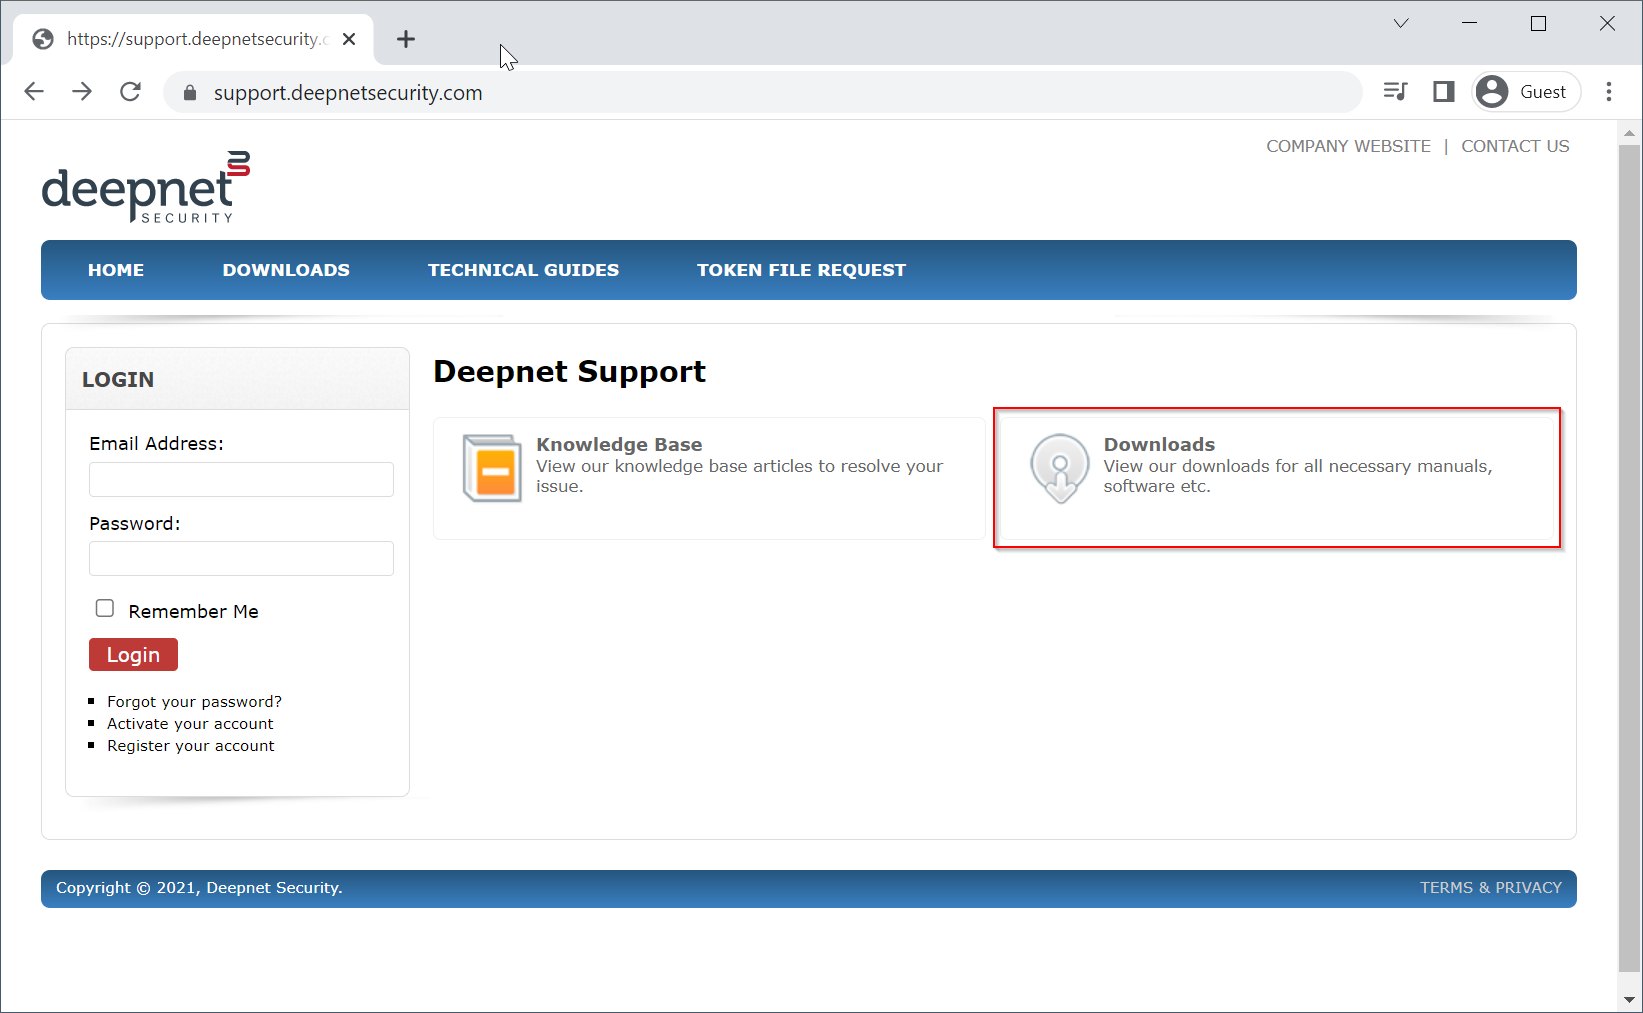
A web SSL certificate is issued to a specific FQDN (Fully Qualified Domain Name), e.g. "support.deepnetsecurity.com" in the certificate below:
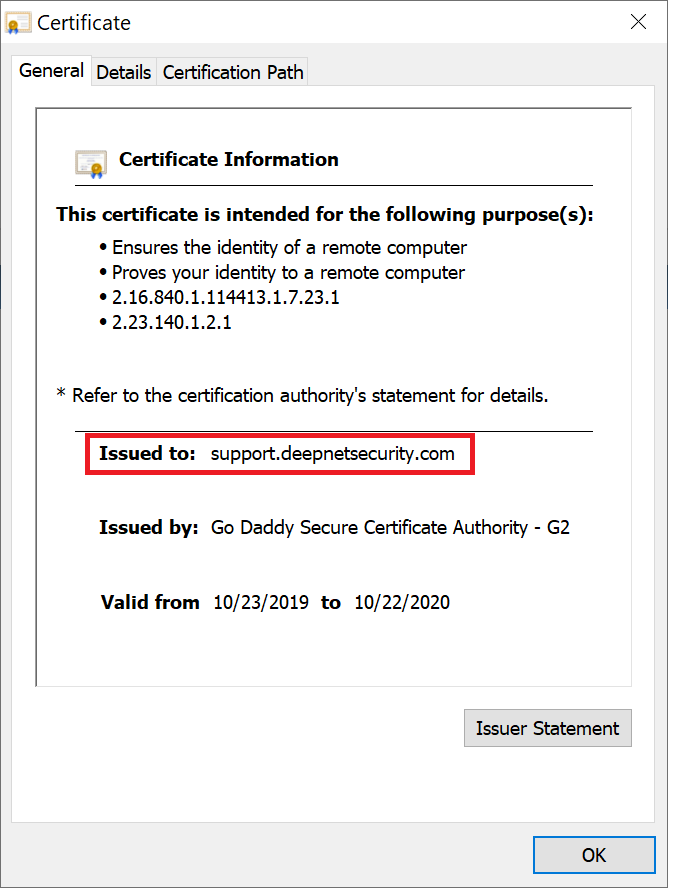
Therefore, before you purchase a web SSL certificate from a commercial Certificate Providers such as GoDaddy, Comodo, DigiCert etc, you need to decide the FQDN for your DualShield server.
The certificate must be provided in the PFX format. There are various third-party tools that you can use to apply for and download an SSL certificate, or you can use the tool below:
4. An AD service account for the connection between your MFA server and AD server. For a quick start, you can use an existing domain admin or domain user account. Or, you can create a new service account with the appropriate privileges
Introduction
Most organisations use Microsoft Active Directory as their user directory. When implementing DualShield they will need to connect their DualShield authentication server to their Active Directory server, so that DualShield can carry out operations such as searching users, reading account properties etc. The access from DualShield to AD requires a user account with necessary access rights and privileges.
DualShield is capable of performing most of the tasks that are required of it, and requires no additional access rights other than those it would have by default as a Domain User.
There are however three optional features of the software that if used would require additional task access privileges to be designated.
Optional Features
Lock/Unlock User Accounts:
In order for DualShield to be able to lock and unlock users, write access is required to the Active Directory property "Write lockoutTime”.
Enable/Disable User Accounts:
In order for DualShield to be enable or disable user accounts, write access is required to the Active Directory property “Write account restrictions”.
Change and Reset Users Passwords:
In order for DualShield to be enable or disable user accounts, write access is required to the Active Directory properties "Write Useraccount Control” and “Write pwdLastSet” .
Additionally, these features also need to obtain the permissions “Change Password” and “Reset Password”.
Creating a Domain User Account
First we need to create a user account called “DualShield” that will be a member of the group “Users”.
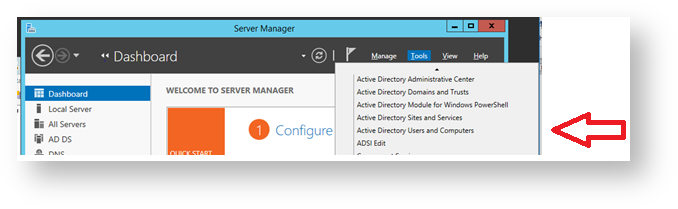
- From the server manager dashboard select “Tools”, then “Active Directory Users and Computers”
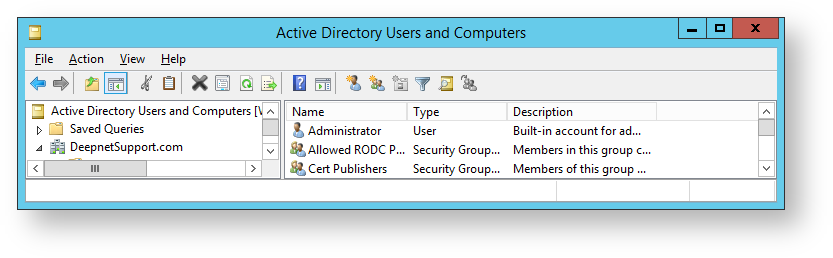
- A new window opens titled “Active Directory Users and Computers”.
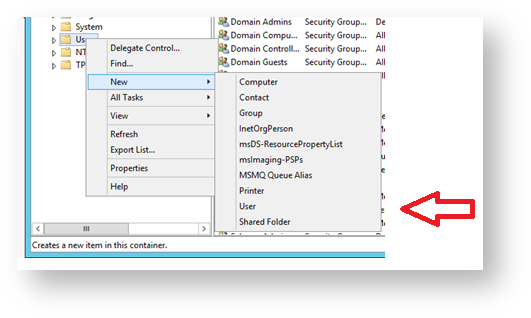
- Right click on the folder named “Users”, then Select “New”, then “User”.
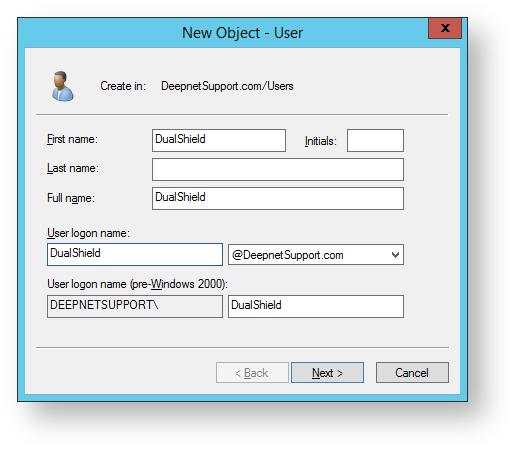
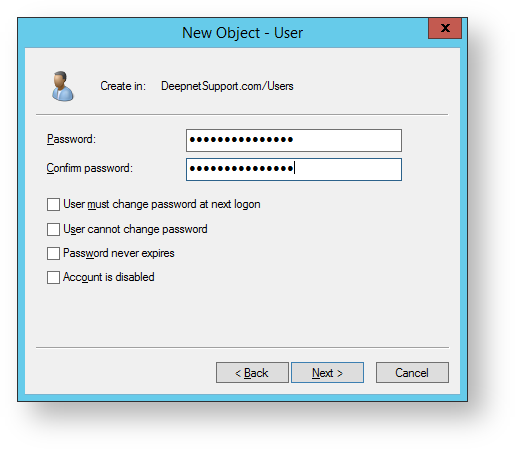
- A form will open with the title “New Object – User”. Type in “DualShield” at the prompts “First Name:” and “User logon name:”. “DualShield” will automatically be copied to the other fields (as below). Click on “Next >” to supply the password information.
- Remove the tick from “User must change password at next logon”. Fill in the fields “Password” and “Confirm password” with a password compliant with your company password policy then click on “Next >”.
- A confirmation window will now open. Click on “Finish” to exit this window.
Preparation for adding properties and permissions
The next steps will add this user account to the list of security managers of the users folder in preparation for designating the necessary additional write properties and permissions.
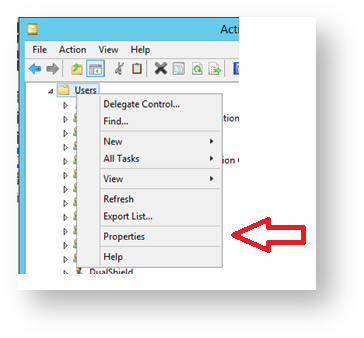
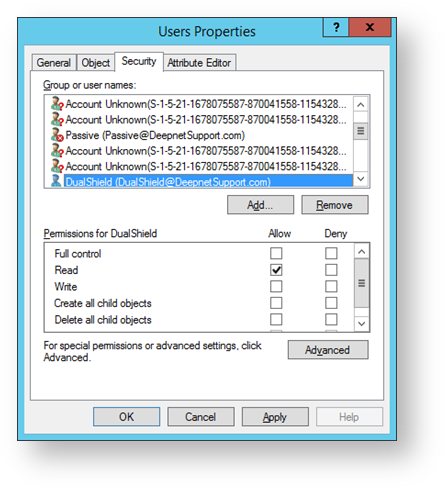
- You will now return to the window titled “Active Directory Users and Computers, Select the “Users” folder, Right click on the folder “Users” then select “Properties”.
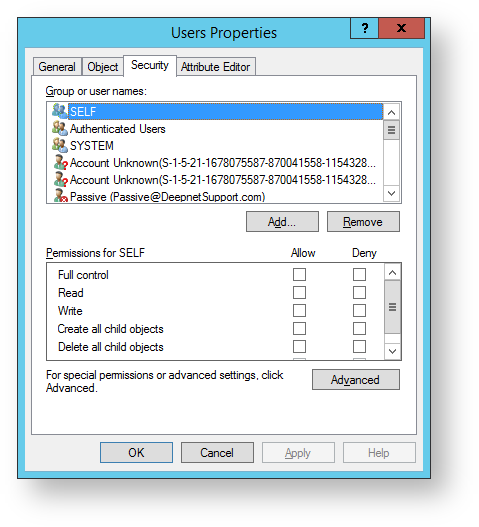
- A new window now opens up headed “Users Properties”, Select the “Security” tab, then click on the “Add” button.
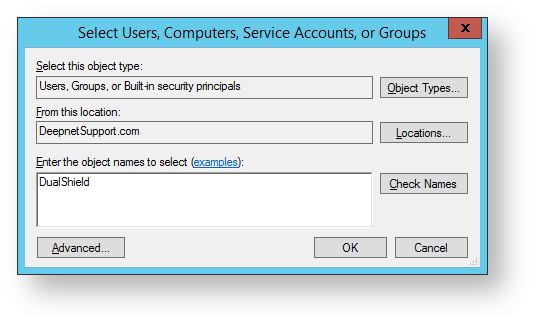
- A form now opens with the title “Select Users, Computers, Service Accounts , or Groups”. In the field “Enter the object names to select (examples):” type “DualShield”, Click on “Check Names”. You will return to the window below with the account name updated, then click on the “OK” button.
- You will now return to the Users Properties form. The user “DualShield” has now been added to the list of users in the tab “Security”. Click on "Apply" then “Advanced”.
Adding properties and permissions
We will now add the necessary additional properties and permissions to the user account within the scope of the users folder.
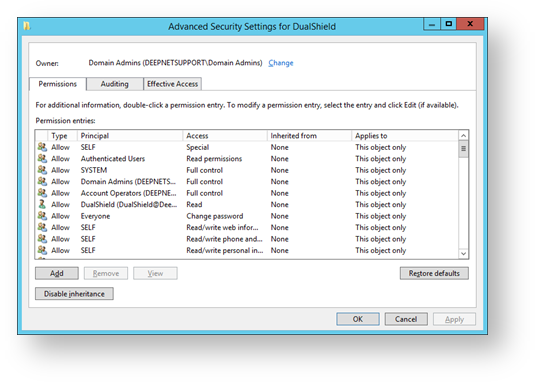
- A window now opens titled “Advanced Security Settings for DualShield”, click on the “Add” button.
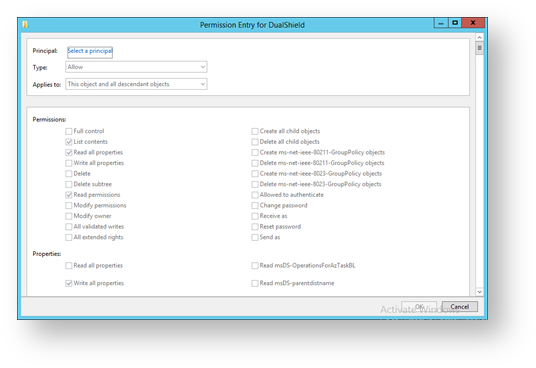
- A window now opens titled “Permission Entry for DualShield”, click on “Select a principle".
- A form now opens with the title “Select Users, Computers, Service Accounts , or Groups”. In the field “Enter the object names to select (examples):” type “DualShield”, then click on “Check Names”.
You will return to the window below with the account name updated, click on the “OK” button”.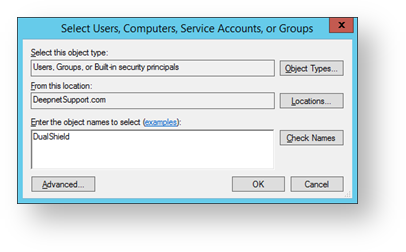
You will return to the form headed “Permission Entry for DualShield”. Against the option “Applies to:” select the last option “Descendant User objects”. Next, in the section headed “Permissions:” select the permissions “Change password” and “Reset password”.
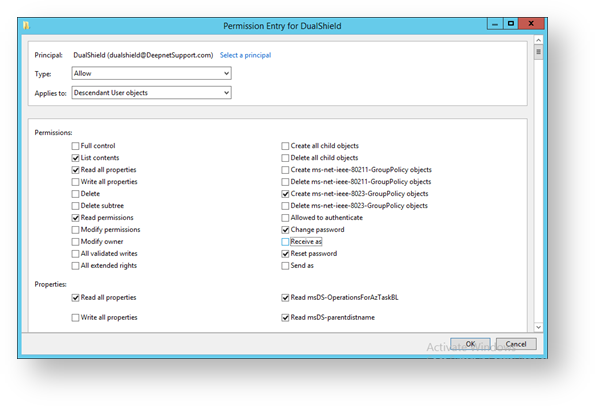
- We now need to select options “Write account restrictions” (to Enable/Disable users), “Write lockoutTime” (to Lock/Unlock users), “Write userAccountControl” (to Reset user passwords) and “Write pwdLastSet” (to Reset user passwords) in the “Properties:” section.
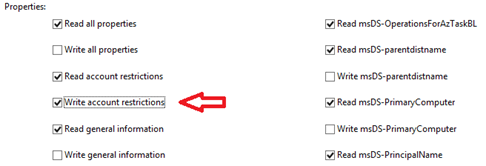
Scroll down to the properties section and select “Write account restrictions”.
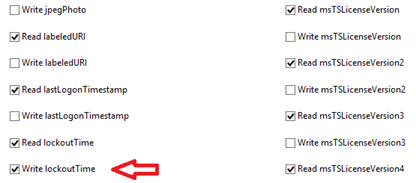
- Scroll down about halfway through the properties section then select “Write lockoutTime”.
- Scroll further down the properties section then select “Write pwdLastSet”.
 .
.
Towards the end of the properties section then select “Write userAccountControl” then press the “OK” button.

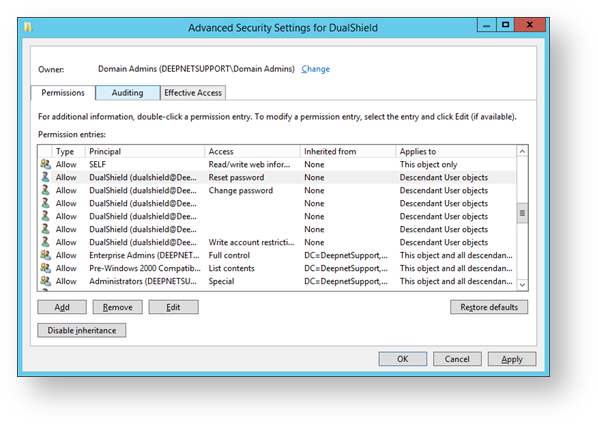
You will now return to the window titled “Advanced Security Settings for DualShield”. Scroll through the list of permission entries. The 6 option selections made above will each create an entry in the permission entries list (in the example below they are the permissions int the “access” column from the “Reset password” to the “Write account restrictions”). Click on the “Apply” button”.
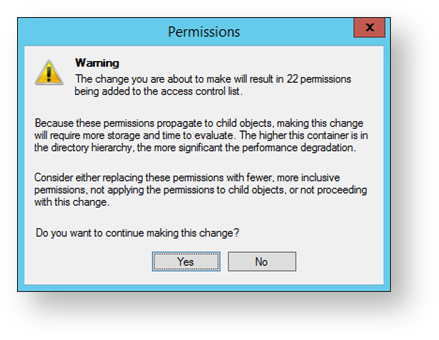
A window will now open with the title of “Permissions”, click on the “Yes” button.
 .
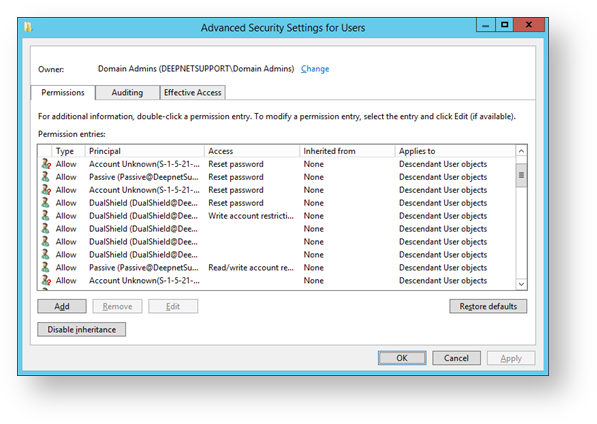
.You will now return to the window titled “Advanced Security Settings for Users”.
In the section “Permission entries:” you will be able to find 6 entries against DualShield click on the “OK” button.
 .
.We have now return to the “Users Properties” window, and have created an account in the users folder called “DualShield” with the necessary security access rights, press “OK”.
5. (Optional) An AD user group for MFA enforcement
6. (Optional) An SQL service account
7. (Optional) Configure corporate firewall
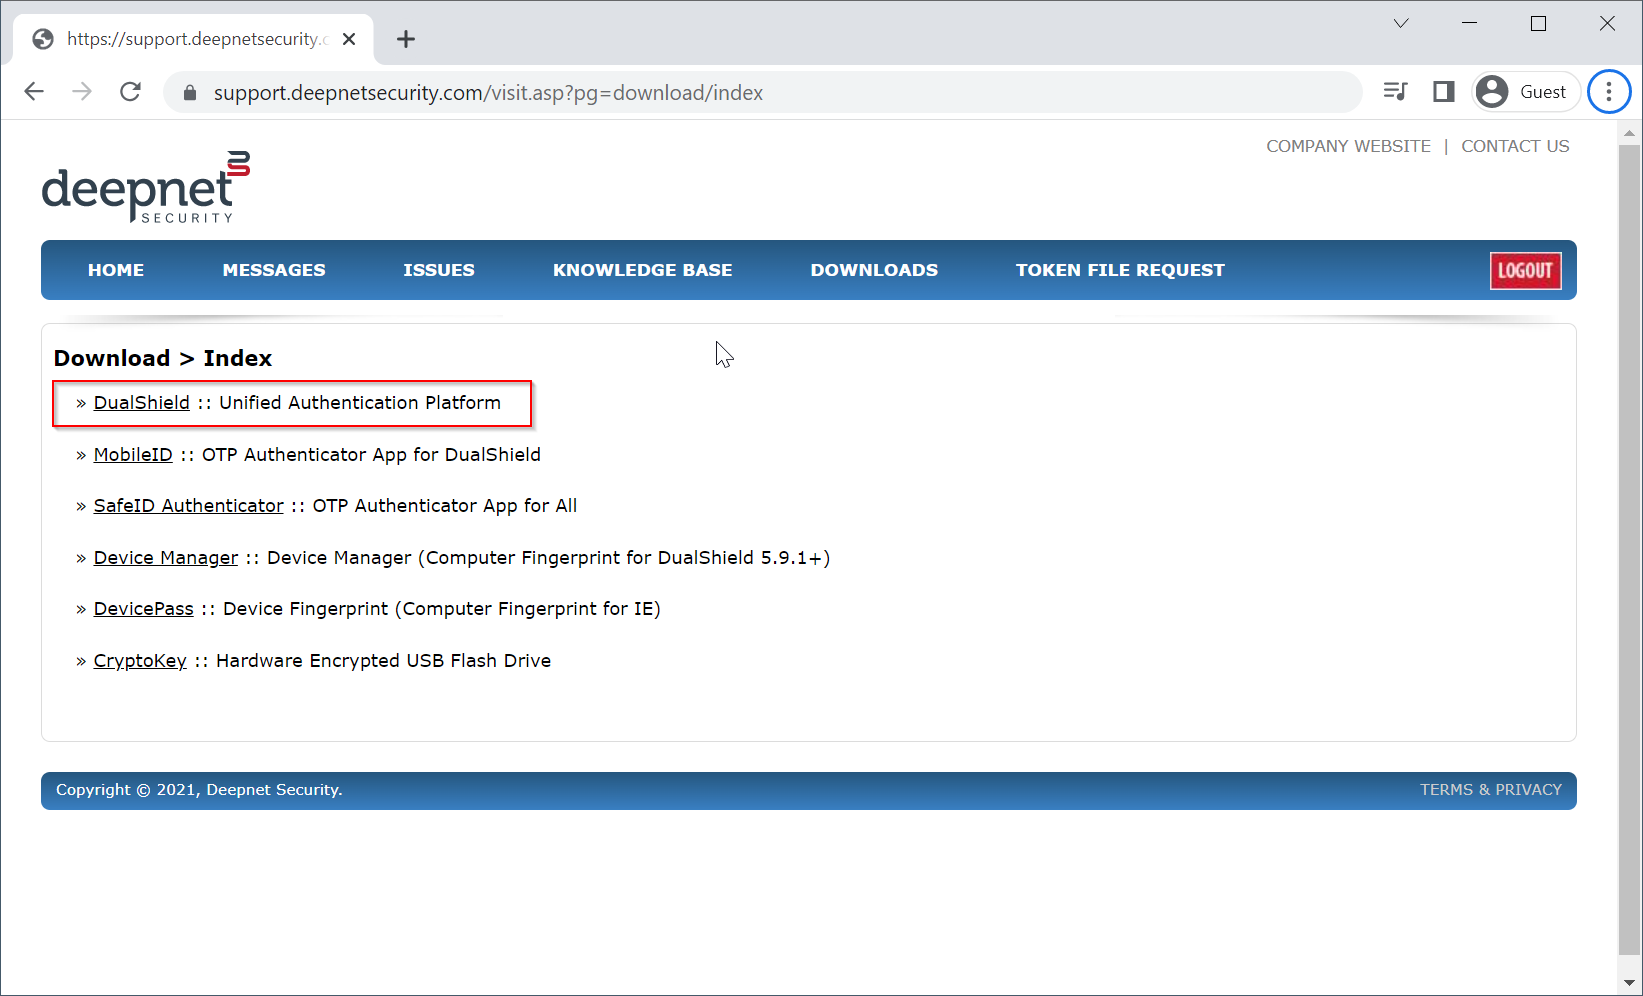
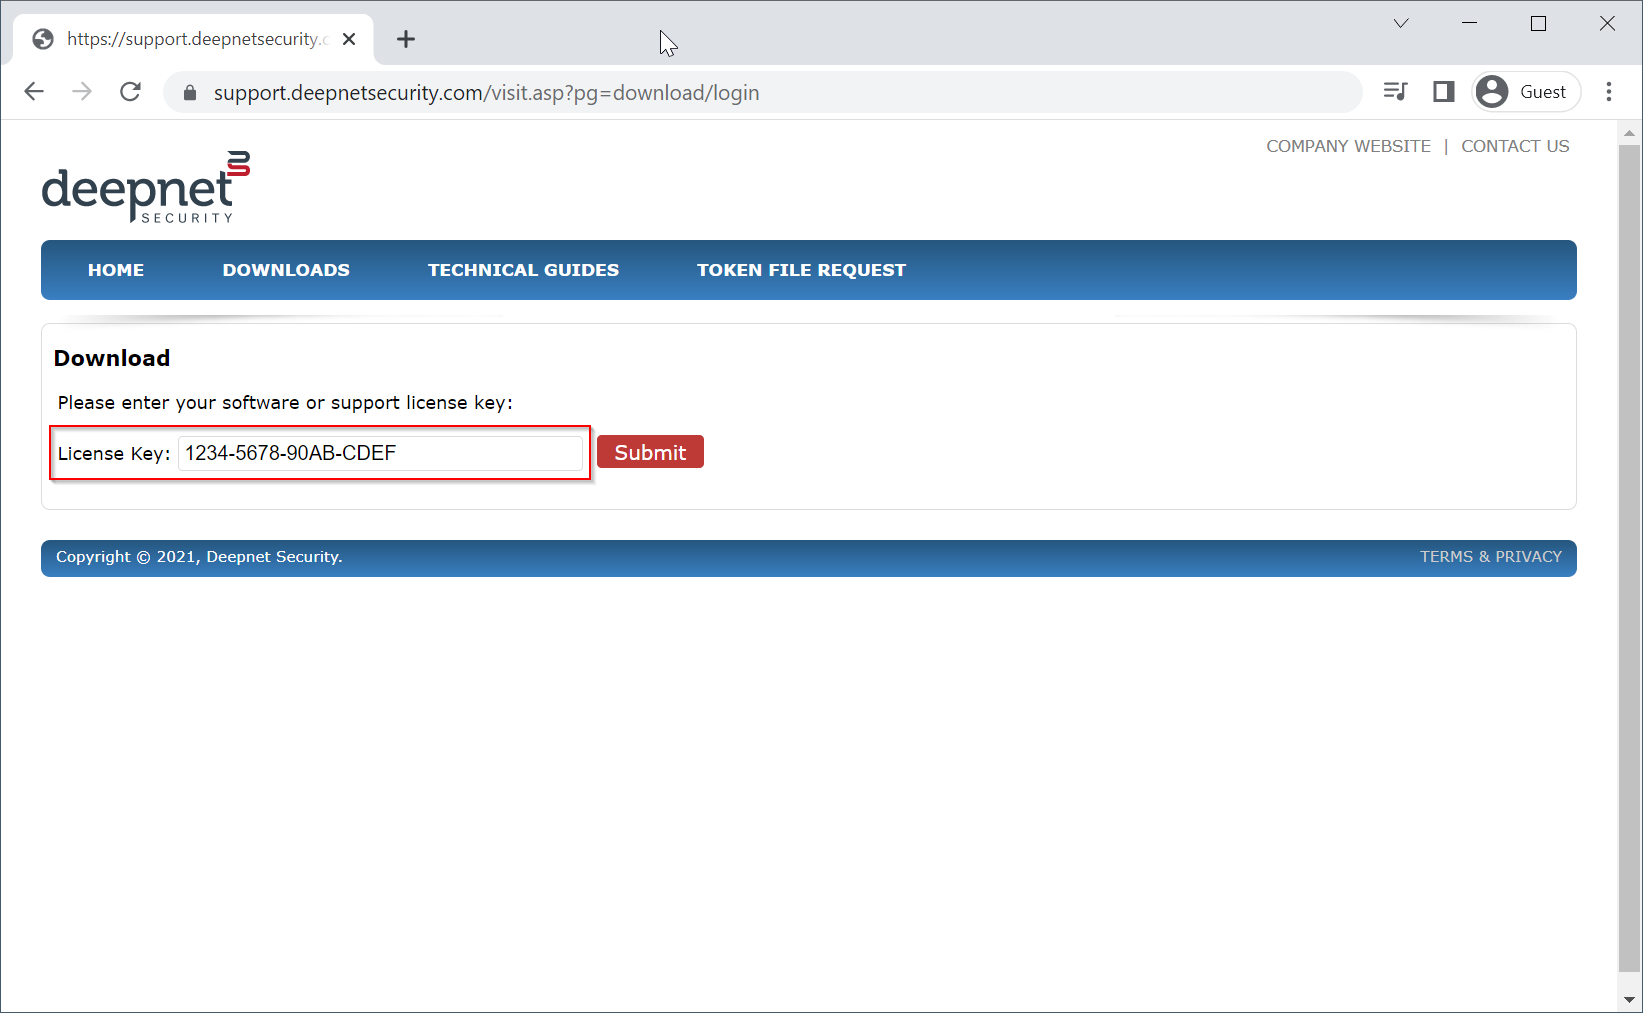
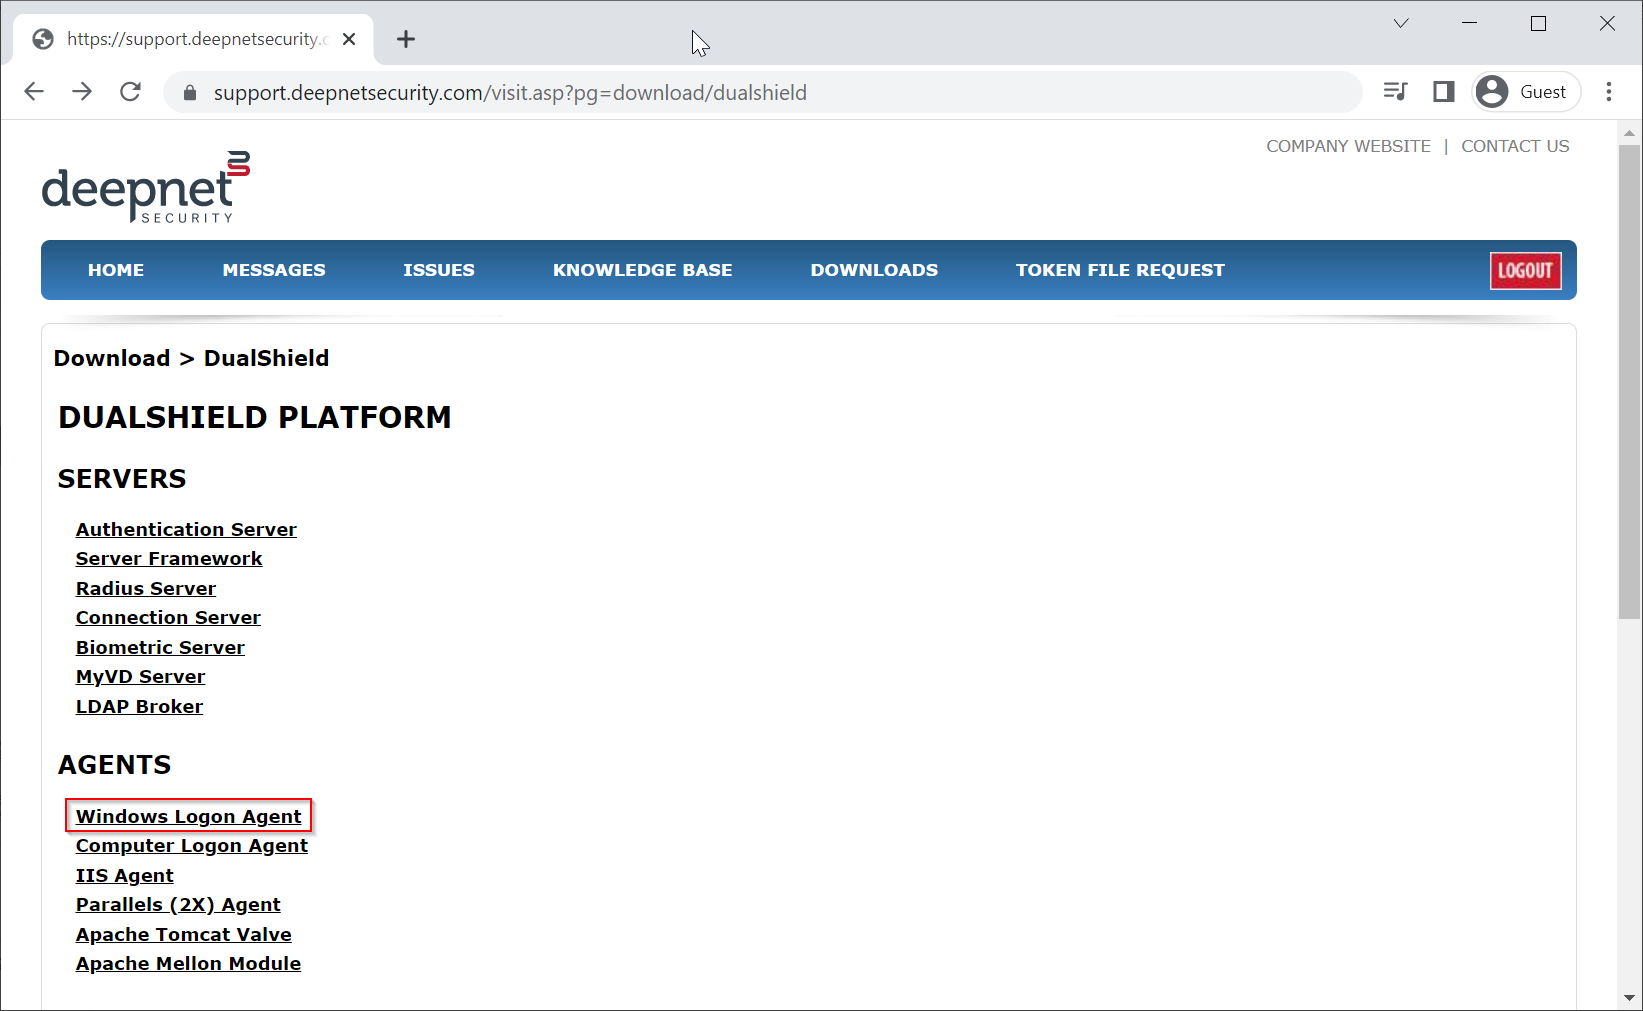
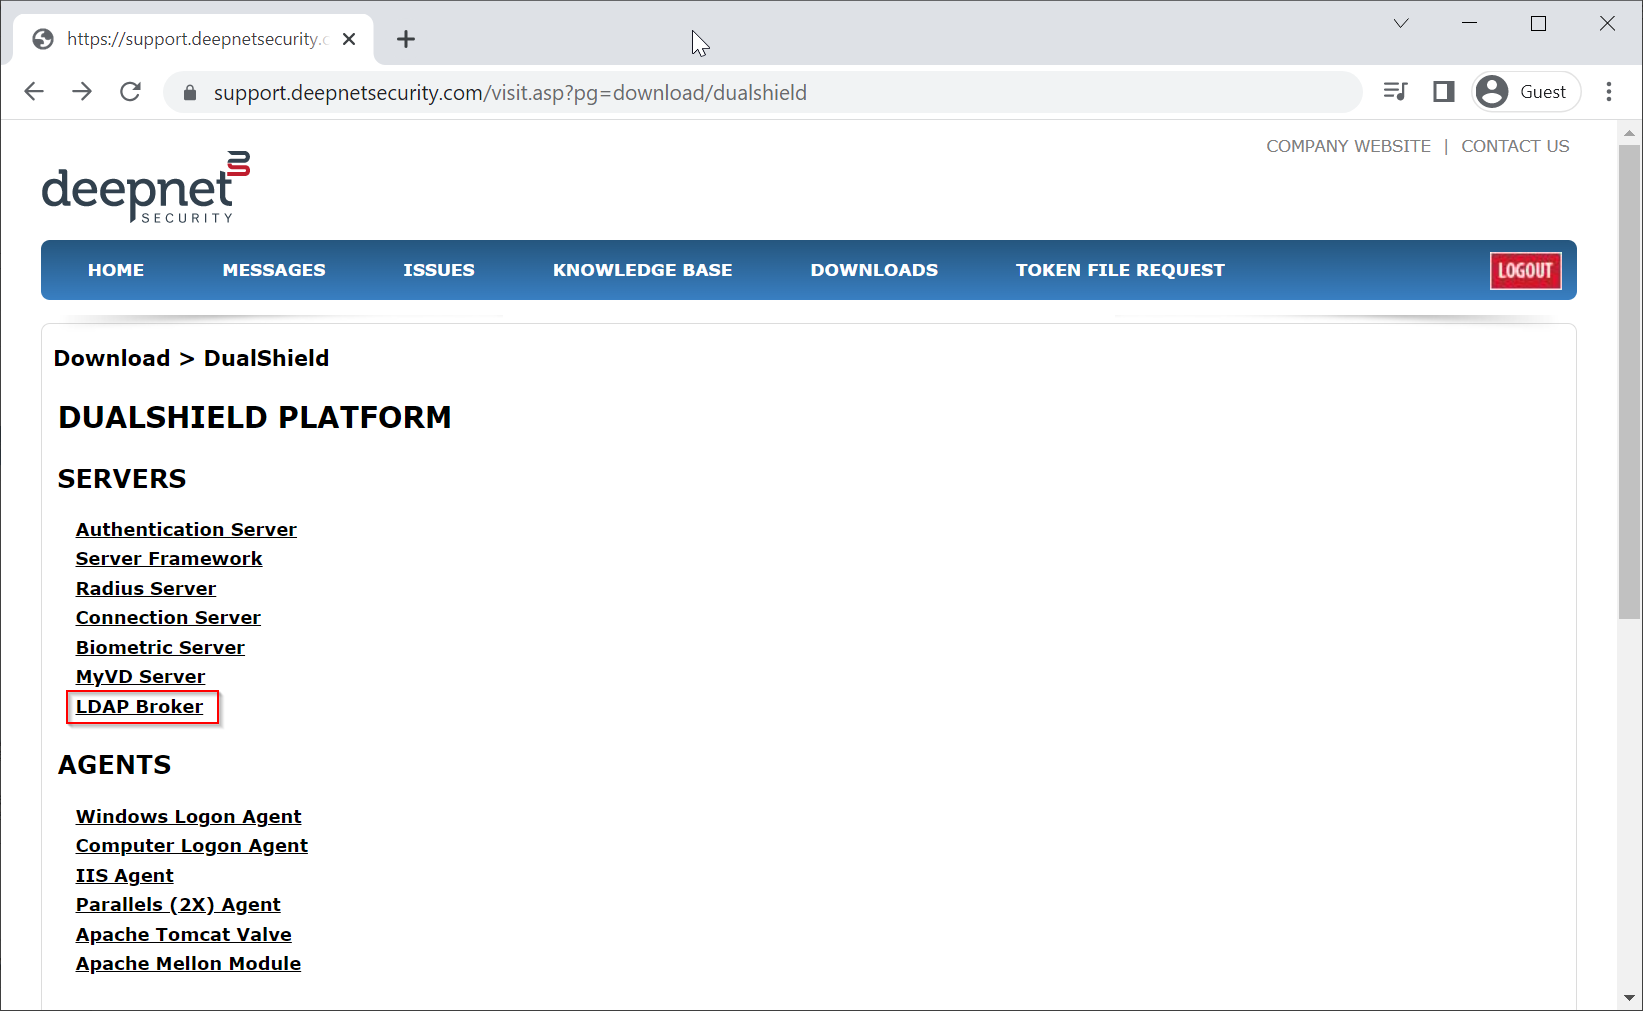
8. Download the DualShield server software, and save it on your DualShield MFA server machine
Depending on the MFA solution that you plan to implement, you need to download the following software components:
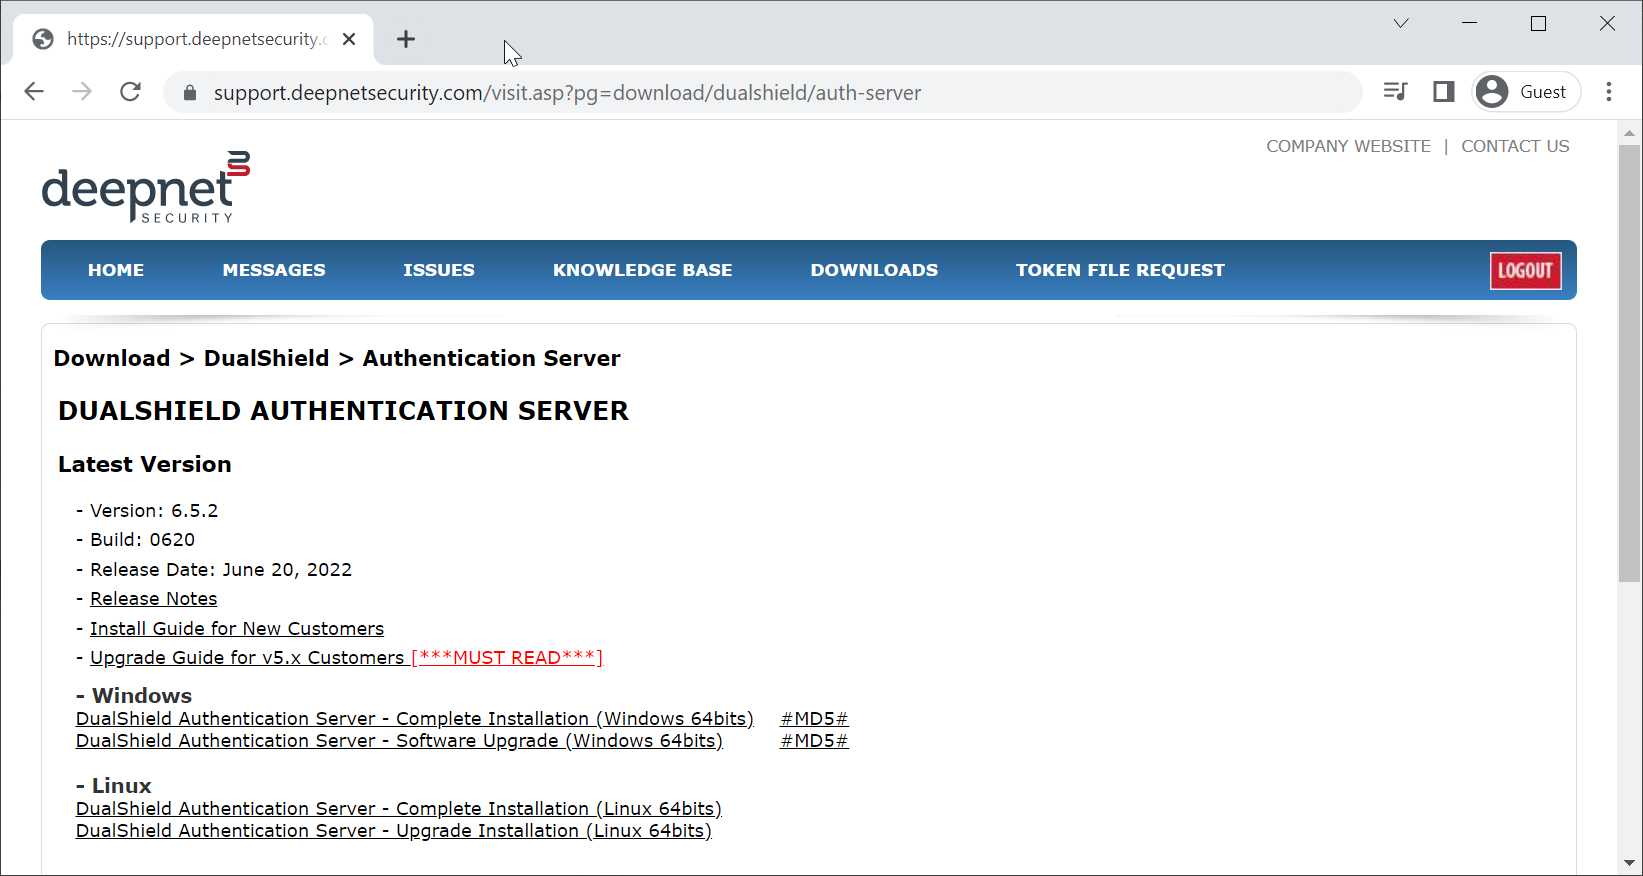
DualShield Authentication Server
Regardless of the MFA solution that you plan to implement, you always need the DualShield Authentication Server (DAS). DAS is the core of the entire DualShield MFA platform and is the first software component to be downloaded and installed.

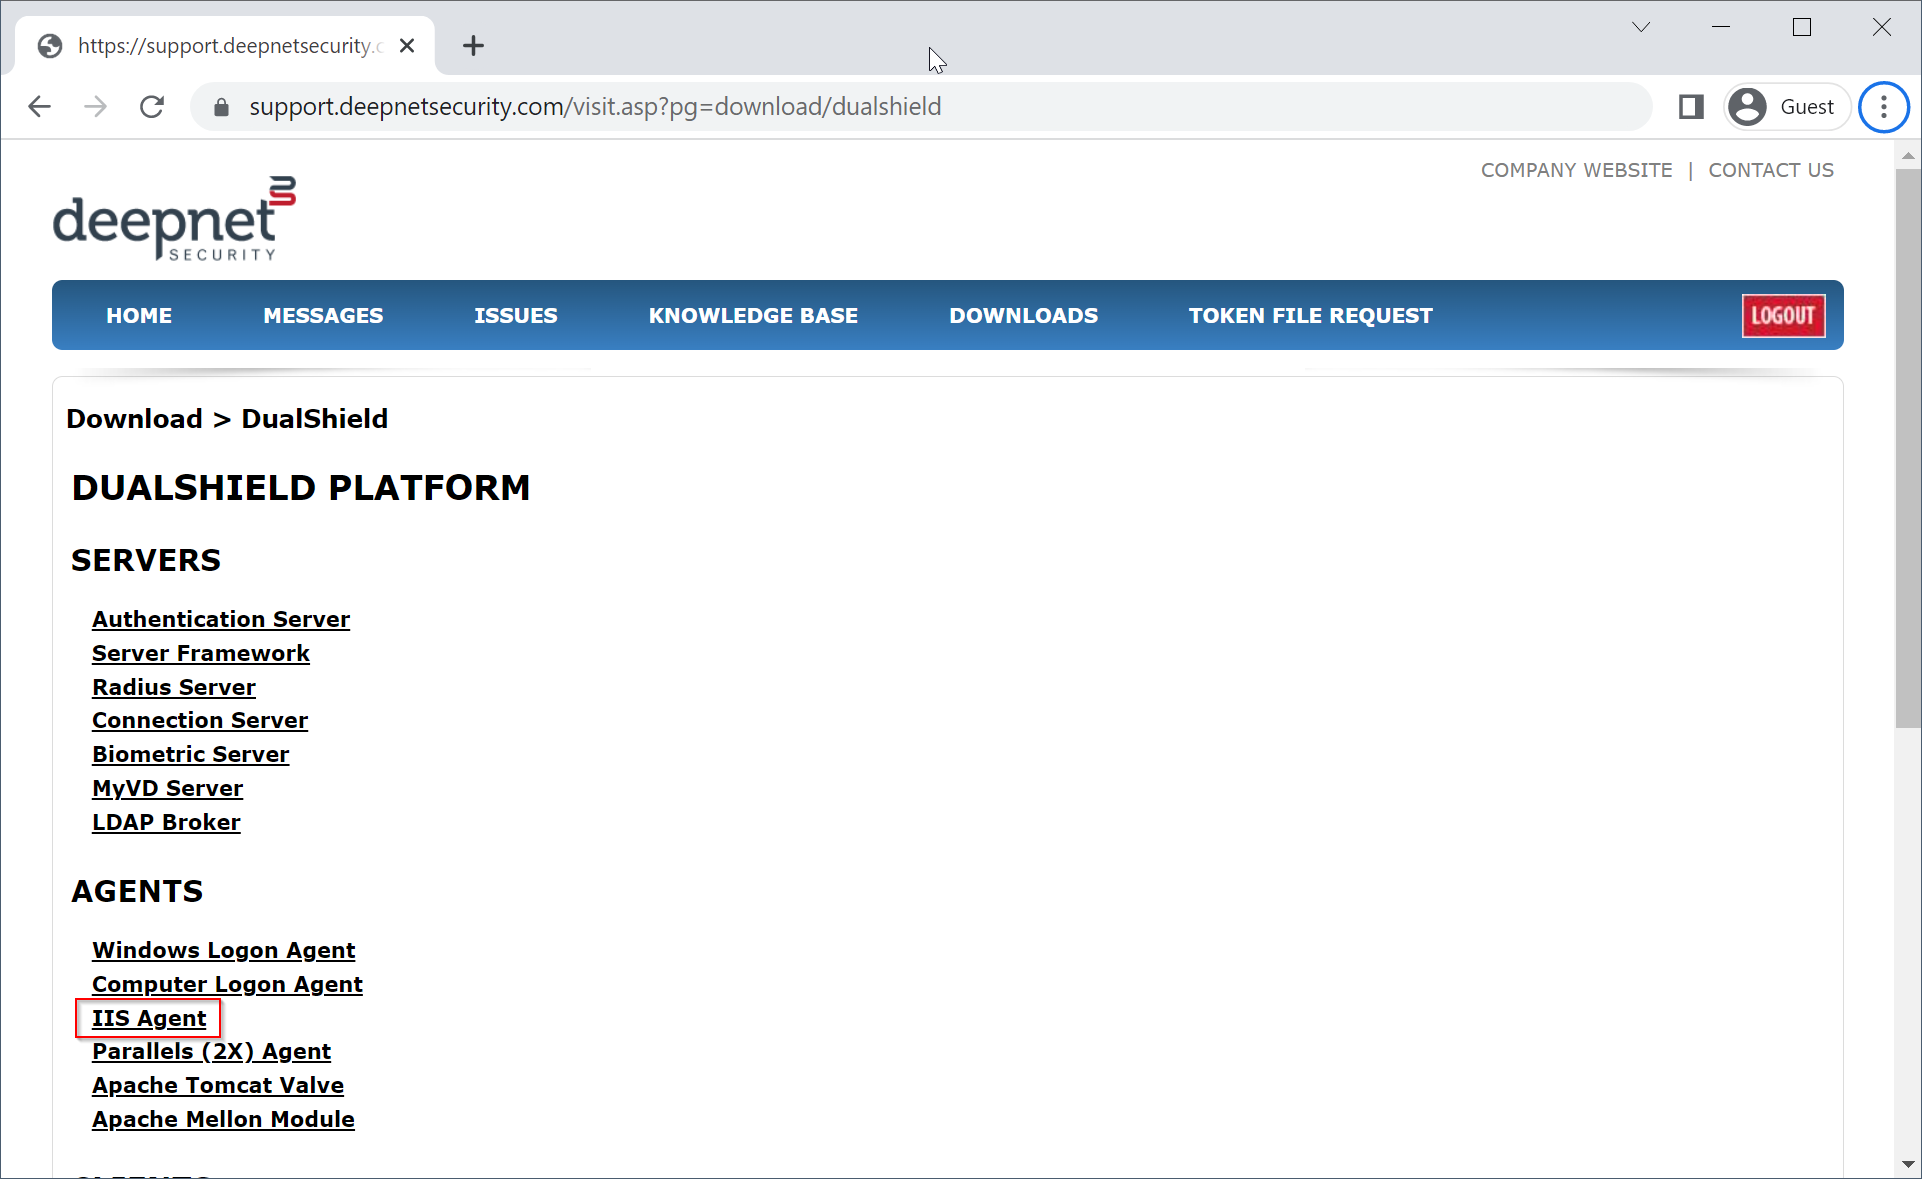
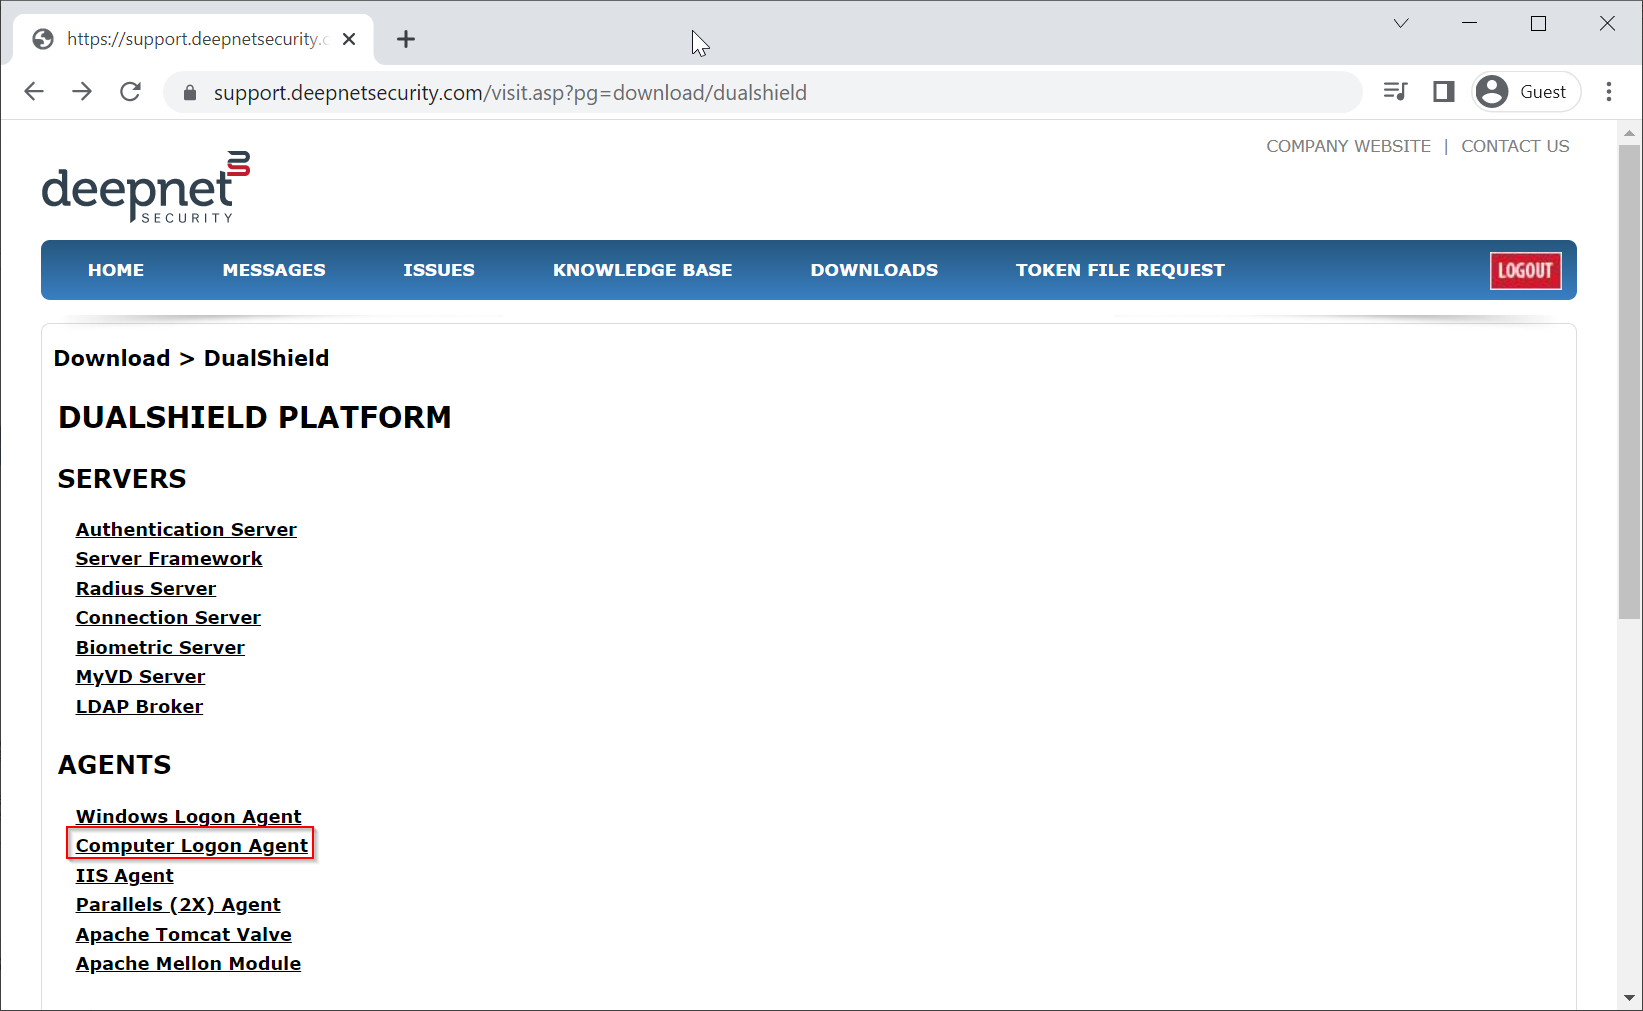
DualShield Authentication Agent
Depending on the MFA solution that you plan to implement, you need to download the appropriate authentication agent
| MFA Solution | MFA Agent Software | |
|---|---|---|
| MFA for Exchange Emails | DualShield IIS Agent |
|
| MFA for Computer Domain Logon | DualShield Computer Logon Agent |
|
| MFA for Windows Domain Logon | DualShield Windows Logon Agent |
|
MFA for VPN & Network Appliances - RADIUS Enabled | DualShield RADIUS Server |
|
MFA for VPN & Network Appliances - LDAP Enabled | DualShield LDAP Broker |
|
| MFA for RDWeb | DualShield IIS Agent |
|
MFA for Cloud Services - SAML Enabled | DualShield SSO | DualShield SSO is a part of the Dualshield Authentication Server.
|
| MFA for Parallels Remote Access Server | Parallels (2X) Agent |

DualShield Authentication Client
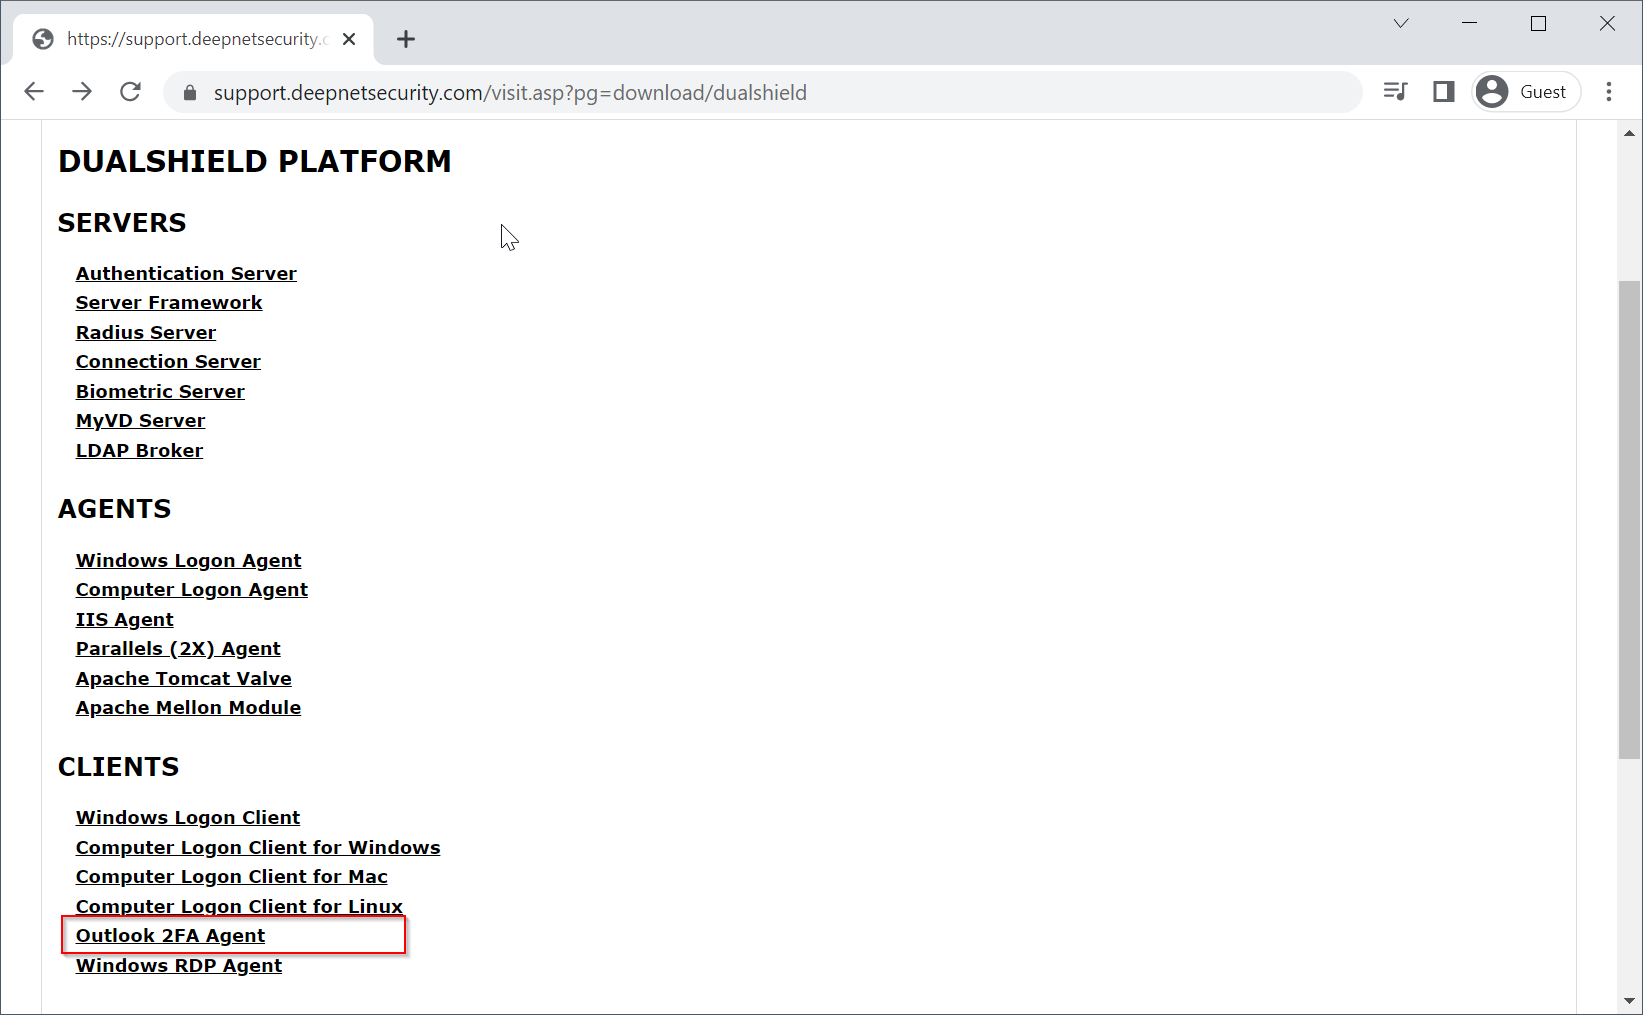
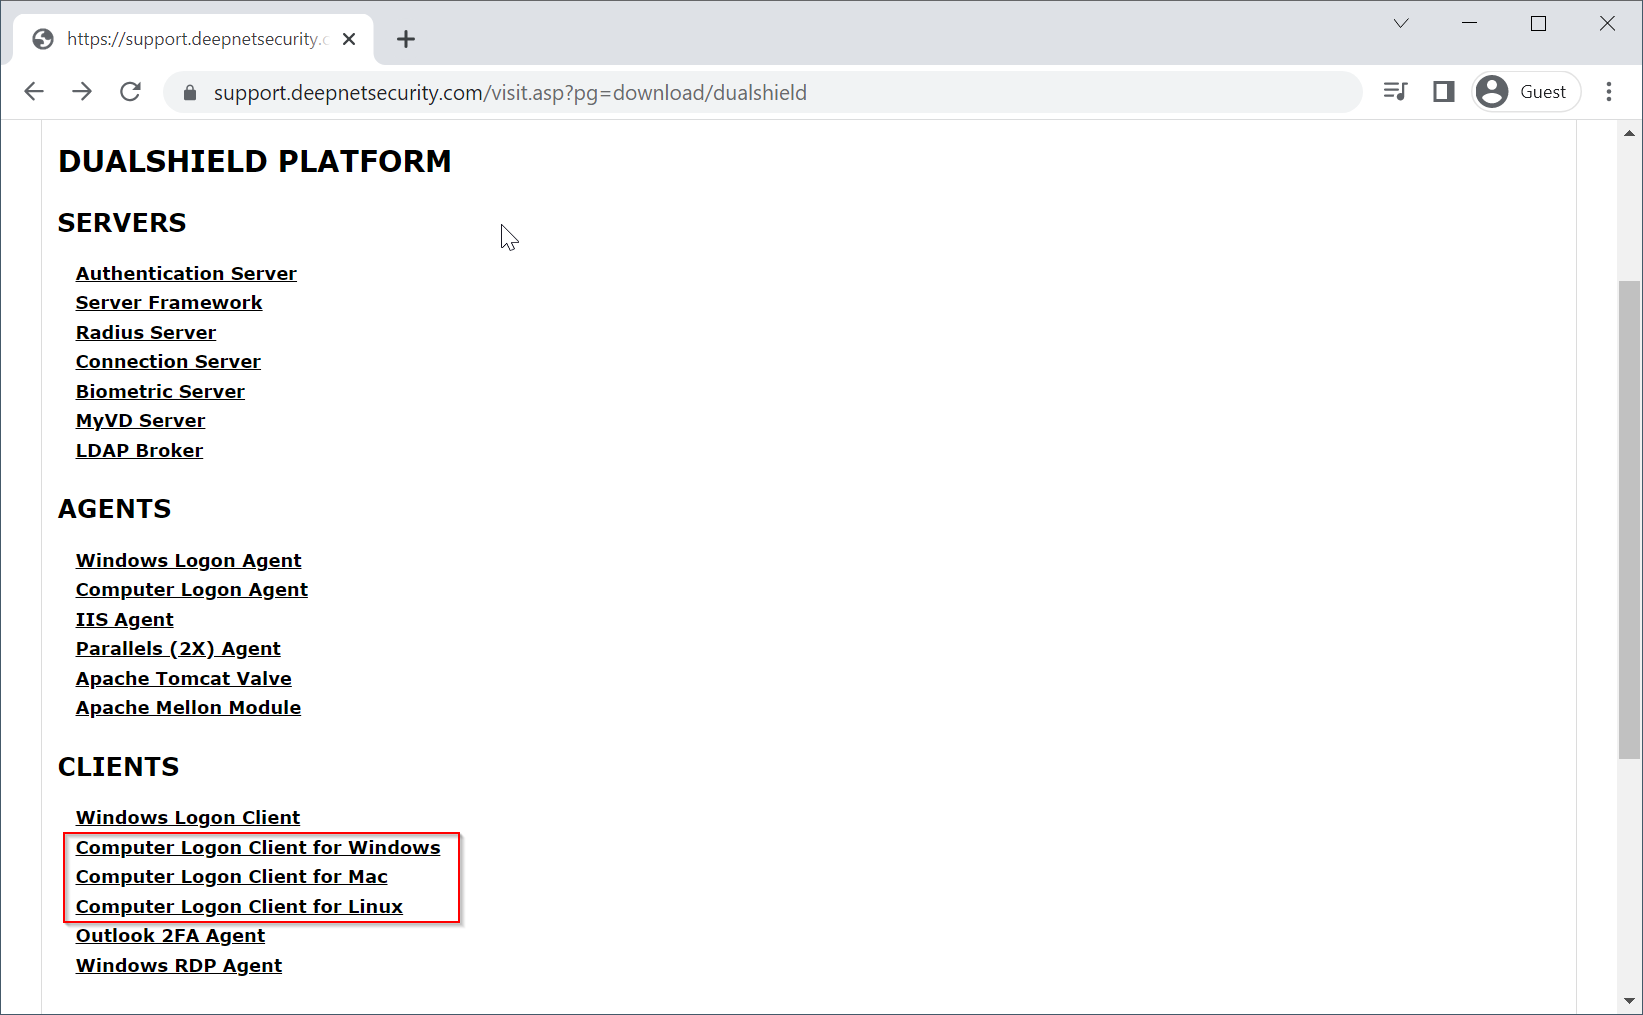
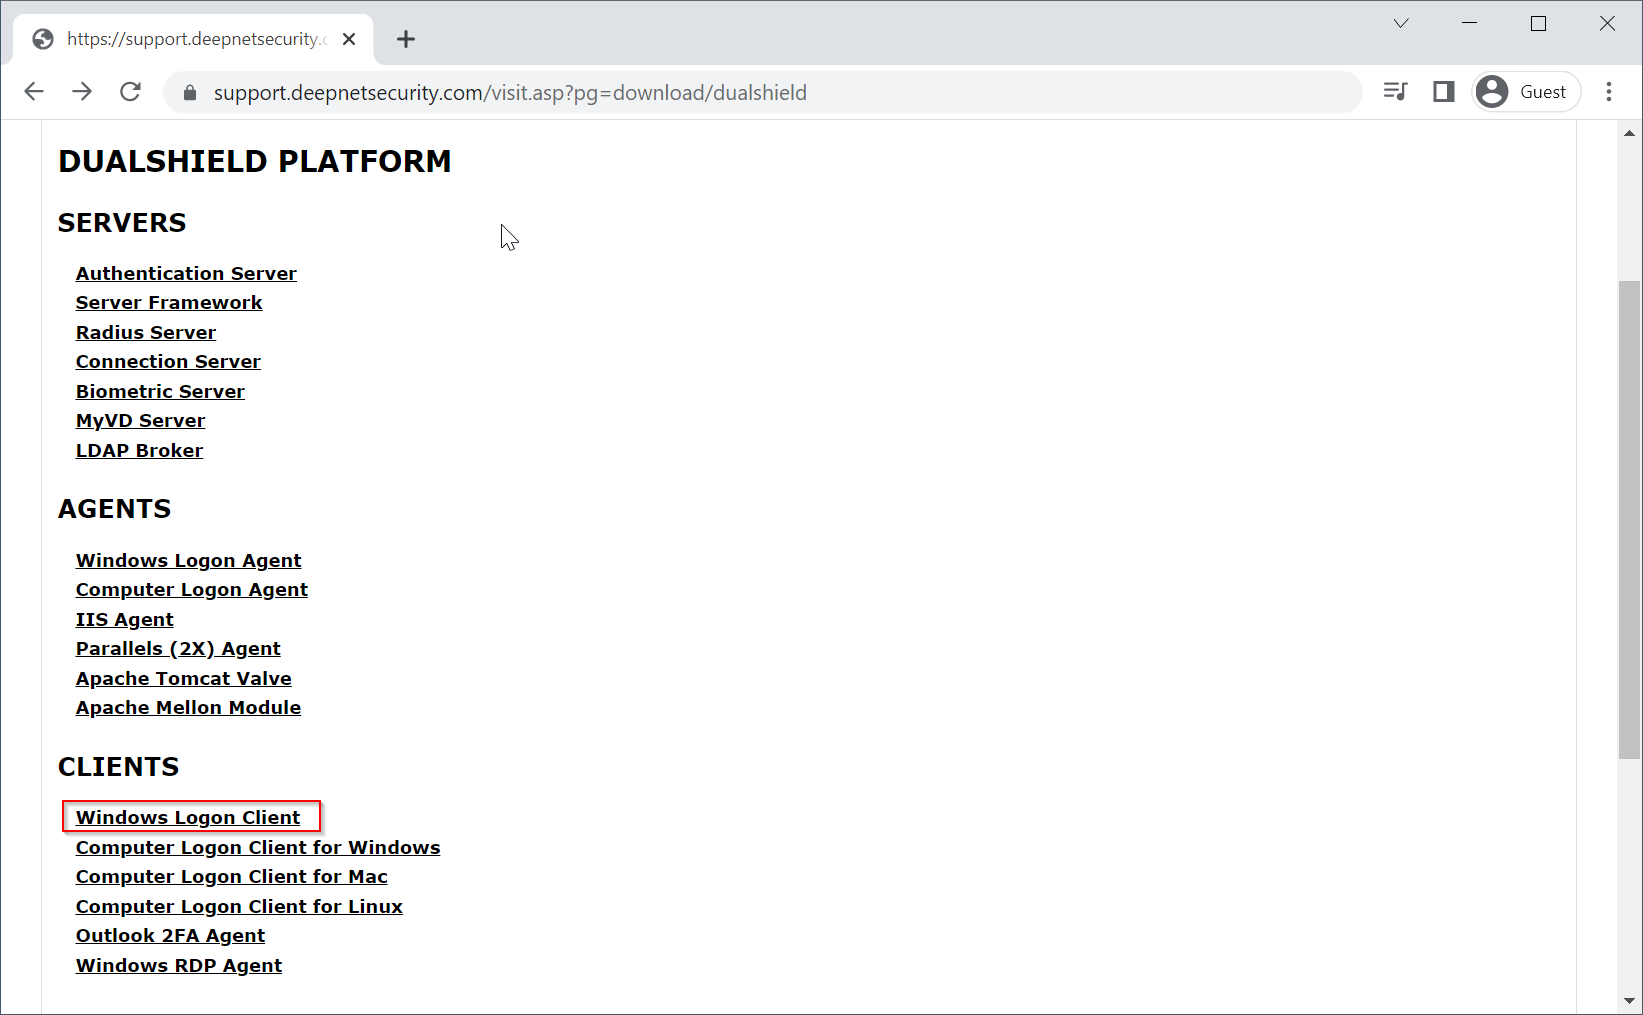
Depending on the MFA solution that you plan to implement, you might also need to download the appropriate authentication client
| MFA Solution | MFA Client Software | |
|---|---|---|
MFA for Outlook Anywhere - Agent-Based | Outlook 2FA Agent |
|
| MFA for Computer Domain Logon | DualShield Computer Logon Client |
|
| MFA for Windows Domain Logon | DualShield Windows Logon Agent |
|
| MFA for Remote Desktop Connection | DualShield Windows RDP Agent |
|