- Created by Adam Darwin, last modified on Jan 17, 2022
Whether you are planning to install just one DualShield server or multiple DualShield servers in your organization, you always start from the backend server installation. Also, it is recommended that you install an all-in-one as the first backend server.
| Component | Description |
|---|---|
| Hardware | For a user base of 10,000 users or less, the minimum hardware requirements are:
|
| OS | DualShield Server can be installed and operating on both Windows and Linux servers. Windows
Linux
Only 64bits is supported. |
| Database | DualShield Server uses a SQL database as its data store, and it includes MySQL database sever in its installation package. It is also possible to use an external SQL Server as the data store for DualShield. At the installation, you can opt out to use an external SQL server. Following external SQL servers are officially supported:
If you opt out to use your own SQL server, then you will need the following:
It is possible to use other SQL servers not listed above such as PostgreSQL, although they are not officially supported. |
To prepare for installation:
1. A Windows or Linux server machine (virtual or real machine) with 8GM RAM, 4-core CPU, and 10GB free disk space
| Component | Description |
|---|---|
| Hardware | For a user base of 10,000 users or less, the minimum hardware requirements are:
|
| OS | DualShield Server can be installed and operating on both Windows and Linux servers. Windows
Linux
Only 64bits is supported. |
| Database | DualShield Server uses a SQL database as its data store, and it includes MySQL database sever in its installation package. It is also possible to use an external SQL Server as the data store for DualShield. At the installation, you can opt out to use an external SQL server. Following external SQL servers are officially supported:
If you opt out to use your own SQL server, then you will need the following:
It is possible to use other SQL servers not listed above such as PostgreSQL, although they are not officially supported. |
2. An FQDN for your DualShield MFA server consoles, e.g. mfa.acme.com
The DualShield server includes several web consoles, including
- Admin Console
- User Console
- Single Sign-On Console (mainly used for SAML SSSO)
- Deployment Console (for device and tokens)
DualShield consoles are all web-based portals that can be accessed with a web browser. The FQDN is the web address of the DualShield consoles.
If the DualShield server is a backend server located in the internal network and to be accessed from internal PCs and workstations, then the DualShield's FQDN must be added into the internal DNS server.
If the DualShield server is a frontend server located in the DMZ and to be accessed from external PCs and workstations, then the DualShield's FQDN must be added into the external DNS server.
If the DualShield server is an all-in-one server that is accessed from both internal & external PCs and workstations, then its FQDN must be added into both the internal & external DNS servers.
If you do not plan to make your DualShield MFA server consoles accessible from the public network, then the FQDN can be an internal domain name. However, if you do plan to make one or some of your Dualshield server consoles accessible from the public network, then the FQDN must be an external domain name.
Note: You can change the FQDN after the installation of the DualShield MFA server.
3. An SSL certificate for your DualShield MFA server consoles in a PFX file (a wildcard certificate is acceptable, e.g. *.acme.com)
Furthermore, if you are going to use the Out of Band Authentication (OOBA) from iOS and Android mobile devices, then you will have to make the DualShield Deployment Service and the Single Sign-On portals accessible by end users from the public network. In this case, you must not use a self-signed certificate because it will not be accepted by iOS and Android devices.
A web SSL certificate is issued to a specific FQDN (Fully Qualified Domain Name), e.g. "support.deepnetsecurity.com" in the certificate below:
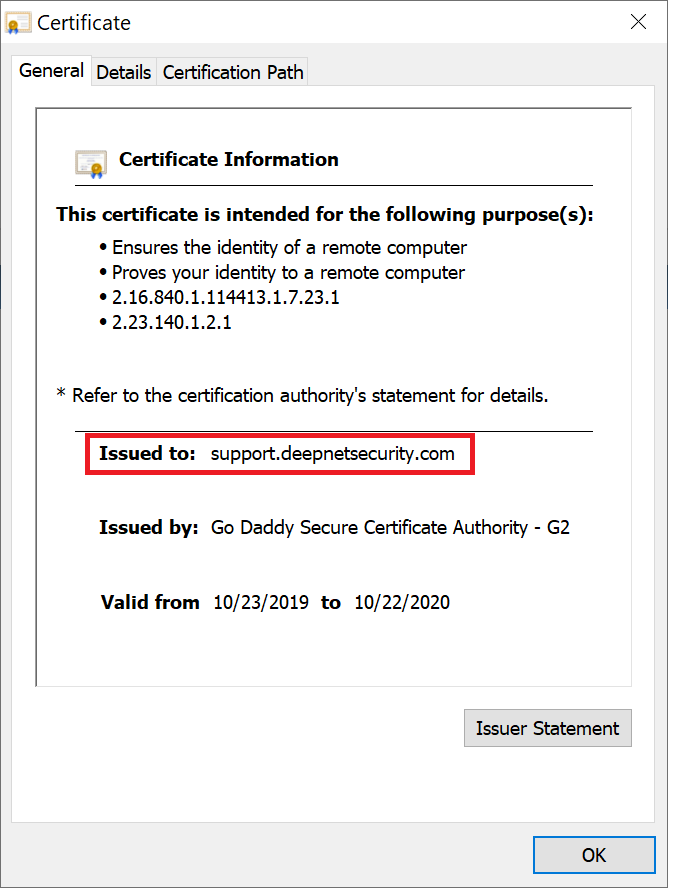
Therefore, before you purchase a web SSL certificate from a commercial Certificate Providers such as GoDaddy, Comodo, DigiCert etc, you need to decide the FQDN for your DualShield server.
The DualShield server includes several web consoles, including
- Admin Console
- User Console
- Single Sign-On Console (mainly used for SAML SSSO)
- Deployment Console (for device and tokens)
DualShield consoles are all web-based portals that can be accessed with a web browser. The FQDN is the web address of the DualShield consoles.
If the DualShield server is a backend server located in the internal network and to be accessed from internal PCs and workstations, then the DualShield's FQDN must be added into the internal DNS server.
If the DualShield server is a frontend server located in the DMZ and to be accessed from external PCs and workstations, then the DualShield's FQDN must be added into the external DNS server.
If the DualShield server is an all-in-one server that is accessed from both internal & external PCs and workstations, then its FQDN must be added into both the internal & external DNS servers.
The certificate must be provided in the PFX format. There are various third-party tools that you can use to apply for and download an SSL certificate, or you can use the tool below:
- Create Certificate Signing Request
- Create PFX Certificate
- Check Certificate Chain
- Fix Certificate Chain
- Renew the DualShield Console Certificate using the tool
- Replace the DualShield Console Certificate using the tool
Download Here - Deepnet Certificate Tool (2.0)
The DualShield Administration Console includes a certificate management facility that allows you to apply, replace and renew certificates.
Therefore, for DualShield Administrators, they are recommended to use the Dualshield Admin Console instead of this tool.
4. An AD service account for the connection between your MFA server and AD server. For a quick start, you can use an existing domain admin or domain user account. Or, you can create a new service account with the appropriate privileges
Introduction
Most organisations use Microsoft Active Directory as their user directory. When implementing DualShield they will need to connect their DualShield authentication server to their Active Directory server, so that DualShield can carry out operations such as searching users, reading account properties etc. The access from DualShield to AD requires a user account with necessary access rights and privileges.
DualShield is capable of performing most of the tasks that are required of it, and requires no additional access rights other than those it would have by default as a Domain User.
There are however three optional features of the software that if used would require additional task access privileges to be designated.
Optional Features
Lock/Unlock User Accounts:
In order for DualShield to be able to lock and unlock users, write access is required to the Active Directory property "Write lockoutTime”.
Enable/Disable User Accounts:
In order for DualShield to be enable or disable user accounts, write access is required to the Active Directory property “Write account restrictions”.
Change and Reset Users Passwords:
In order for DualShield to be enable or disable user accounts, write access is required to the Active Directory properties "Write Useraccount Control” and “Write pwdLastSet” .
Additionally, these features also need to obtain the permissions “Change Password” and “Reset Password”.
Creating a Domain User Account
First we need to create a user account called “DualShield” that will be a member of the group “Users”.
- From the server manager dashboard select “Tools”, then “Active Directory Users and Computers”

- A new window opens titled “Active Directory Users and Computers”.

- Right click on the folder named “Users”, then Select “New”, then “User”.
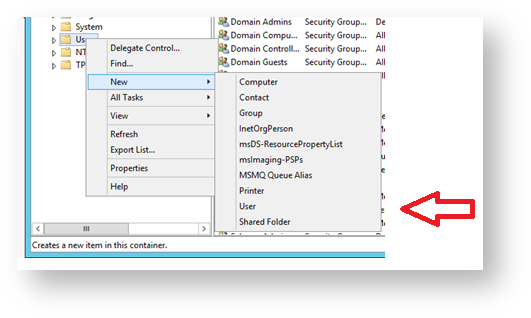
- A form will open with the title “New Object – User”. Type in “DualShield” at the prompts “First Name:” and “User logon name:”. “DualShield” will automatically be copied to the other fields (as below). Click on “Next >” to supply the password information.
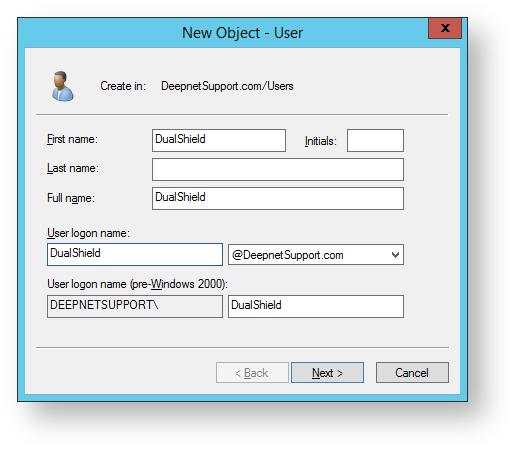
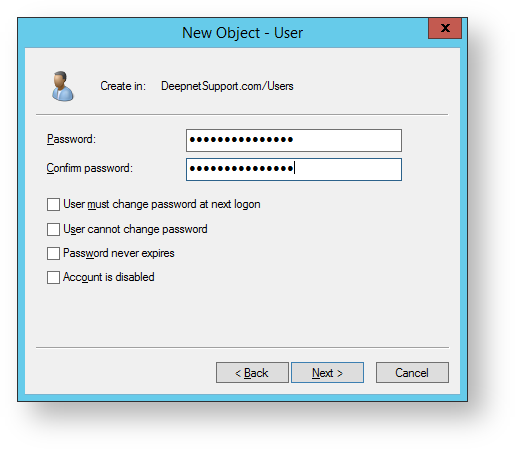
- Remove the tick from “User must change password at next logon”. Fill in the fields “Password” and “Confirm password” with a password compliant with your company password policy then click on “Next >”.
- A confirmation window will now open. Click on “Finish” to exit this window.
Preparation for adding properties and permissions
The next steps will add this user account to the list of security managers of the users folder in preparation for designating the necessary additional write properties and permissions.
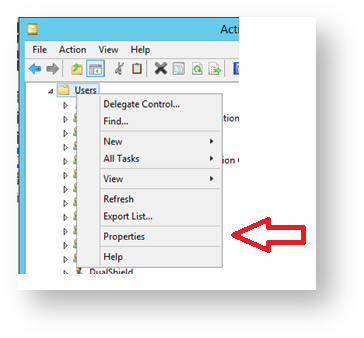
- You will now return to the window titled “Active Directory Users and Computers, Select the “Users” folder, Right click on the folder “Users” then select “Properties”.
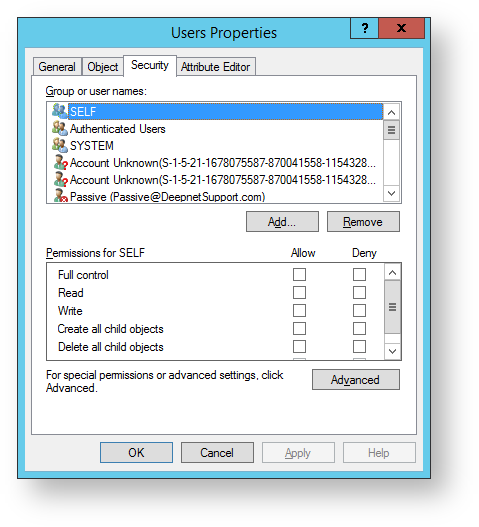
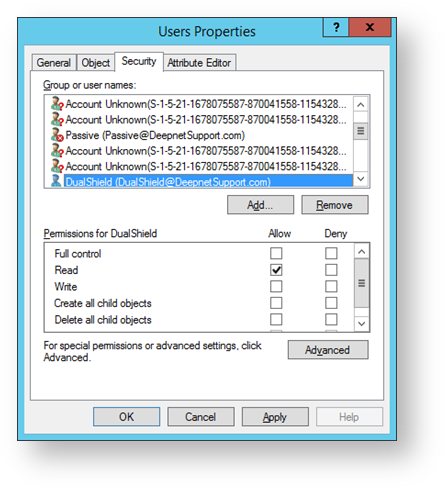
- A new window now opens up headed “Users Properties”, Select the “Security” tab, then click on the “Add” button.
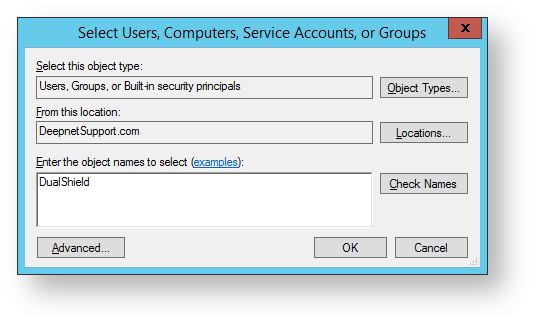
- A form now opens with the title “Select Users, Computers, Service Accounts , or Groups”. In the field “Enter the object names to select (examples):” type “DualShield”, Click on “Check Names”. You will return to the window below with the account name updated, then click on the “OK” button.
- You will now return to the Users Properties form. The user “DualShield” has now been added to the list of users in the tab “Security”. Click on "Apply" then “Advanced”.
Adding properties and permissions
We will now add the necessary additional properties and permissions to the user account within the scope of the users folder.
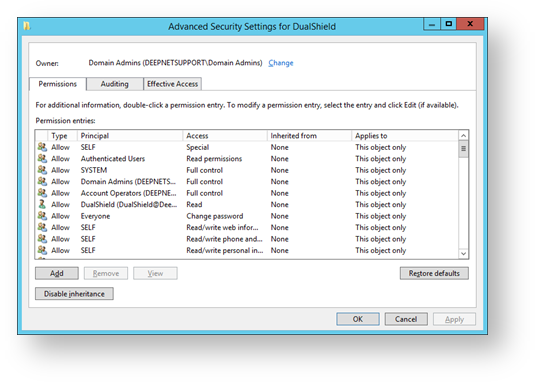
- A window now opens titled “Advanced Security Settings for DualShield”, click on the “Add” button.
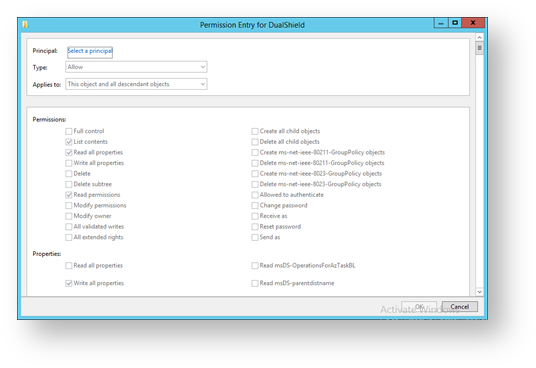
- A window now opens titled “Permission Entry for DualShield”, click on “Select a principle".
- A form now opens with the title “Select Users, Computers, Service Accounts , or Groups”. In the field “Enter the object names to select (examples):” type “DualShield”, then click on “Check Names”.
You will return to the window below with the account name updated, click on the “OK” button”.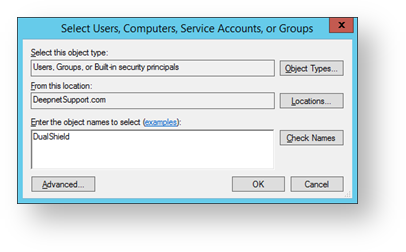
You will return to the form headed “Permission Entry for DualShield”. Against the option “Applies to:” select the last option “Descendant User objects”. Next, in the section headed “Permissions:” select the permissions “Change password” and “Reset password”.
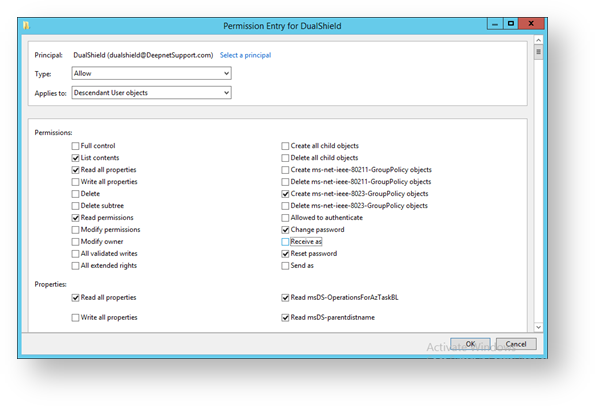
- We now need to select options “Write account restrictions” (to Enable/Disable users), “Write lockoutTime” (to Lock/Unlock users), “Write userAccountControl” (to Reset user passwords) and “Write pwdLastSet” (to Reset user passwords) in the “Properties:” section.
Scroll down to the properties section and select “Write account restrictions”.
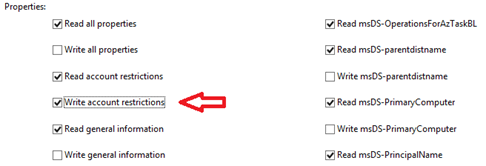
- Scroll down about halfway through the properties section then select “Write lockoutTime”.
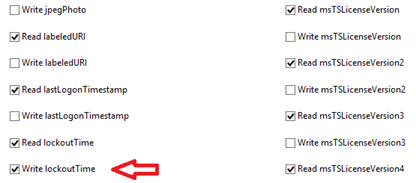
- Scroll further down the properties section then select “Write pwdLastSet”.
 .
.
Towards the end of the properties section then select “Write userAccountControl” then press the “OK” button.
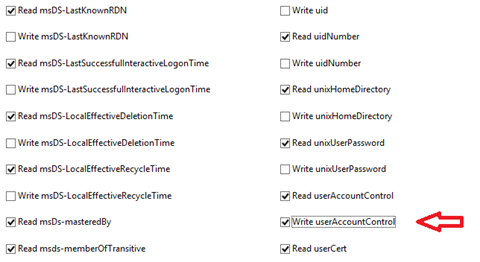
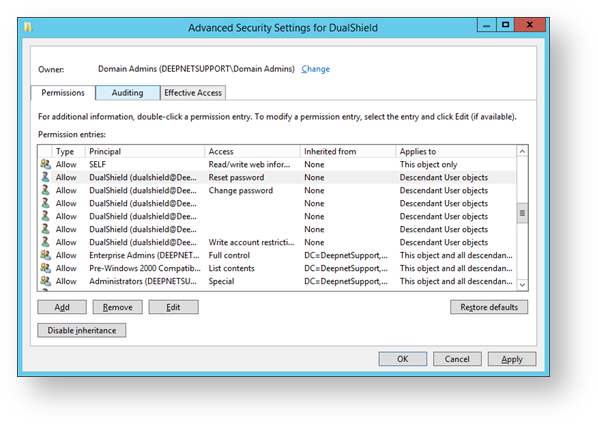
You will now return to the window titled “Advanced Security Settings for DualShield”. Scroll through the list of permission entries. The 6 option selections made above will each create an entry in the permission entries list (in the example below they are the permissions int the “access” column from the “Reset password” to the “Write account restrictions”). Click on the “Apply” button”.
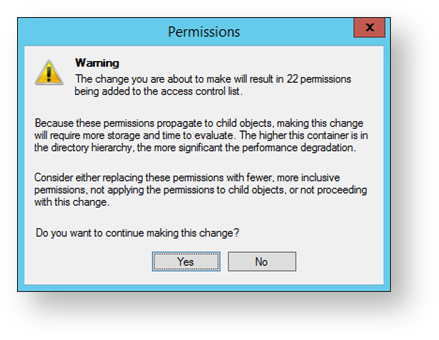
A window will now open with the title of “Permissions”, click on the “Yes” button.
 .
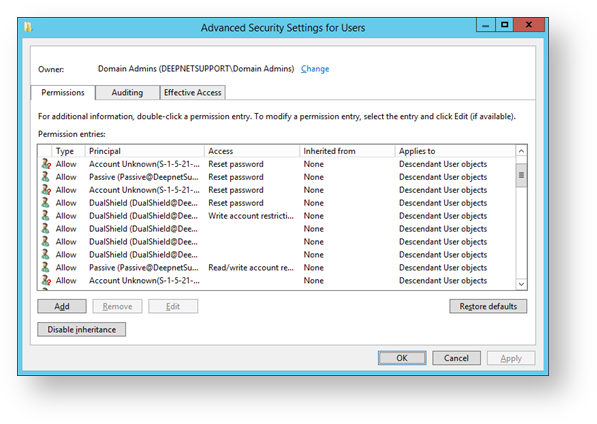
.You will now return to the window titled “Advanced Security Settings for Users”.
In the section “Permission entries:” you will be able to find 6 entries against DualShield click on the “OK” button.
 .
.We have now return to the “Users Properties” window, and have created an account in the users folder called “DualShield” with the necessary security access rights, press “OK”.
5. (Optional) An AD user group for MFA enforcement
In the initial stage of deploying MFA across your entire domain and user base, you might not want to enforce MFA on all user accounts on day one. Instead, you might consider enforcing MFA gradually across your user base, in stages. To do so, you need to create a special user group in AD, so that MFA is only enforced on those users in the group.
6. (Optional) An SQL service account
It is also possible to use an external SQL server as the data store for DualShield. The following SQL servers are supported:
- MySQL
- Microsoft SQL
- Oracle SQL
- IBM DB2
At the installation, you can accept to use the internal database engine or can opt out to use an external SQL server. If you opt out to use your own SQL server, then you will need a SQL service account by which your DualShield server will connect to your SQL server. The account must be able to create databases and tables on the SQL server.
7. (Optional) Configure corporate firewall
- Push Authentication
- Self-Services such as downloading MobileID tokens, activating DeviceID tokens, etc.
- SAML integration with external cloud services such as Office365, SalesForce, Zoom, etc.
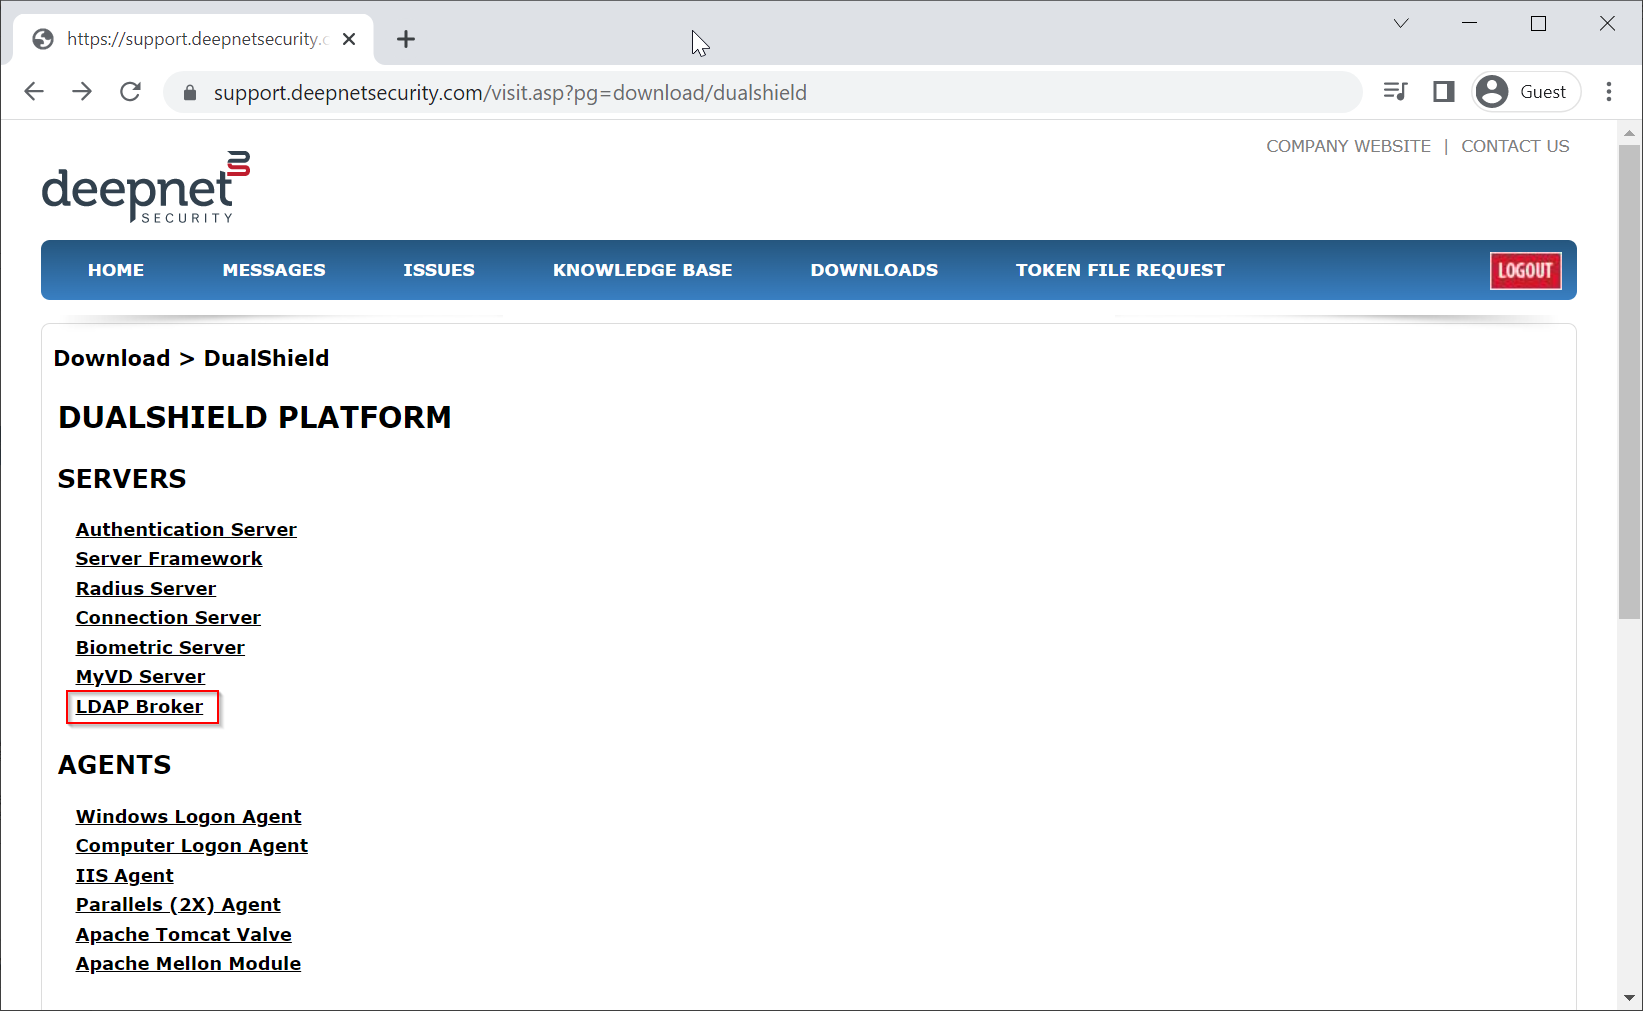
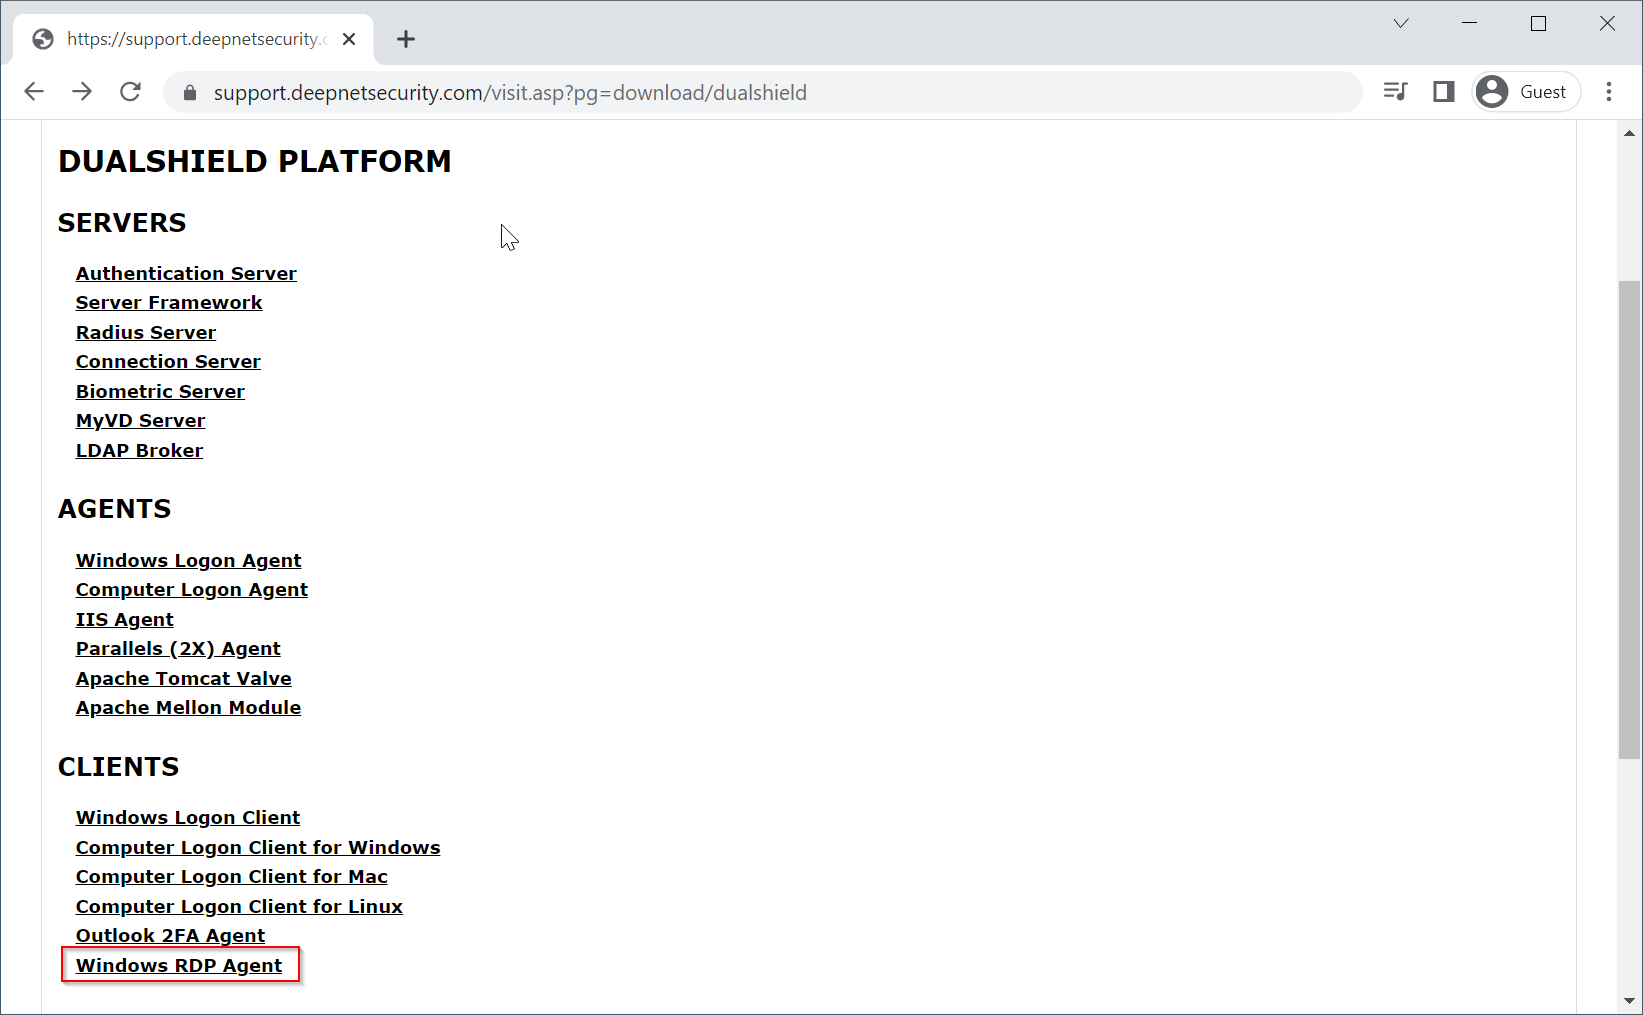
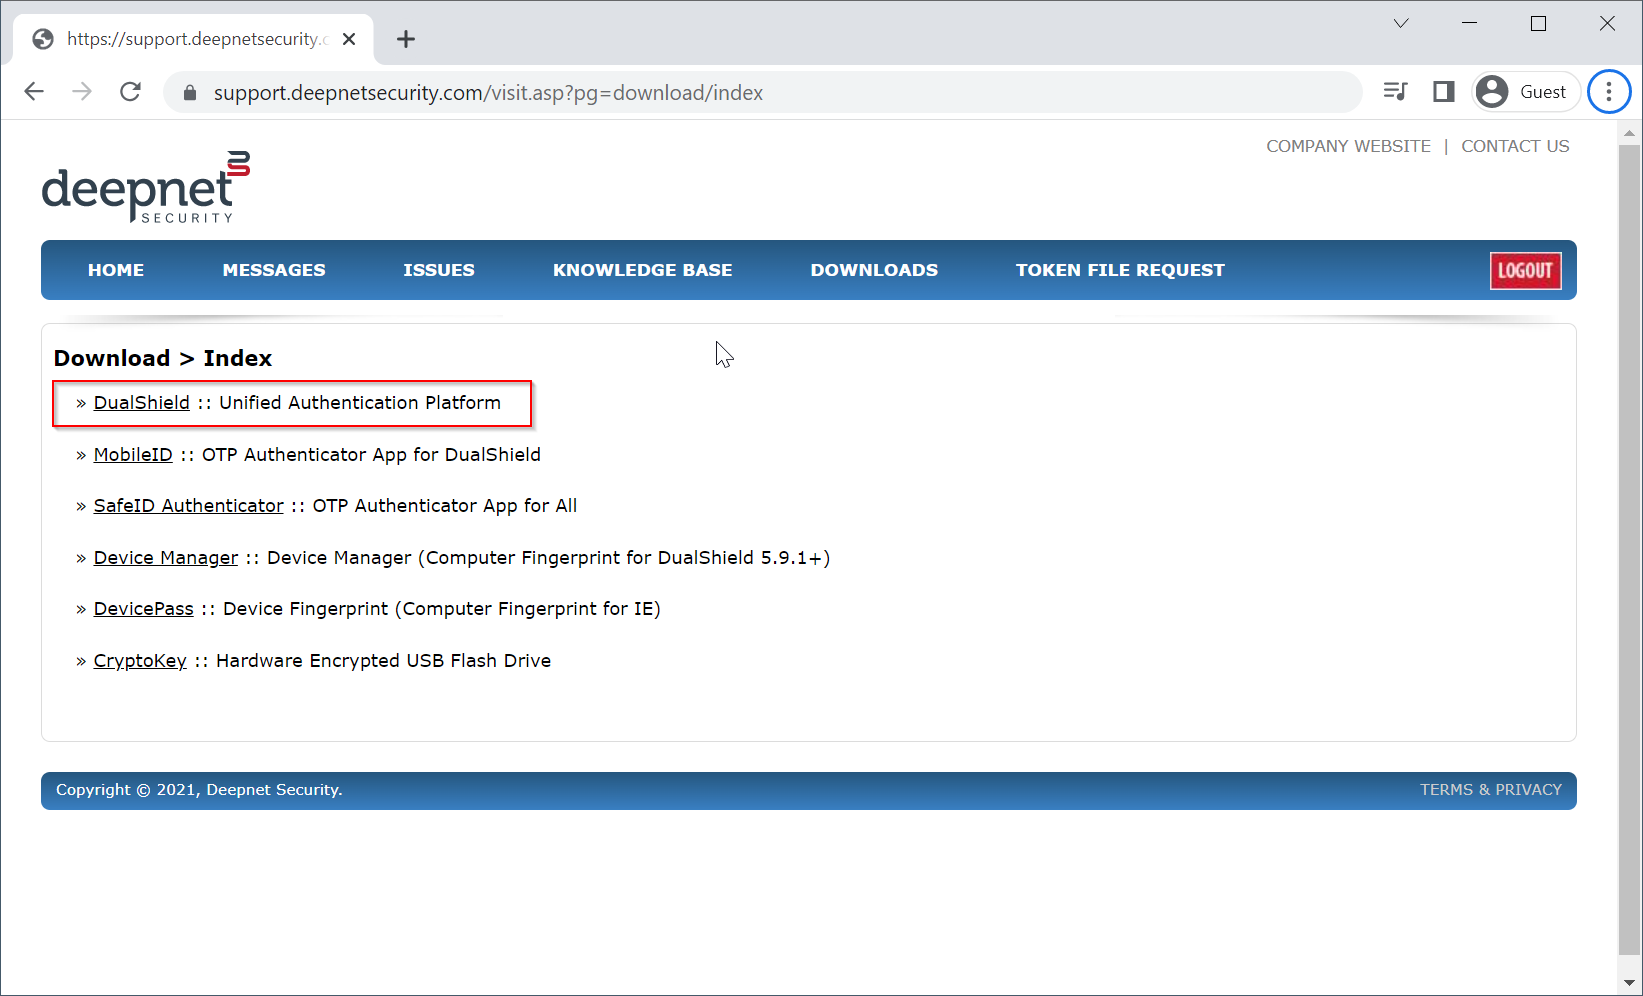
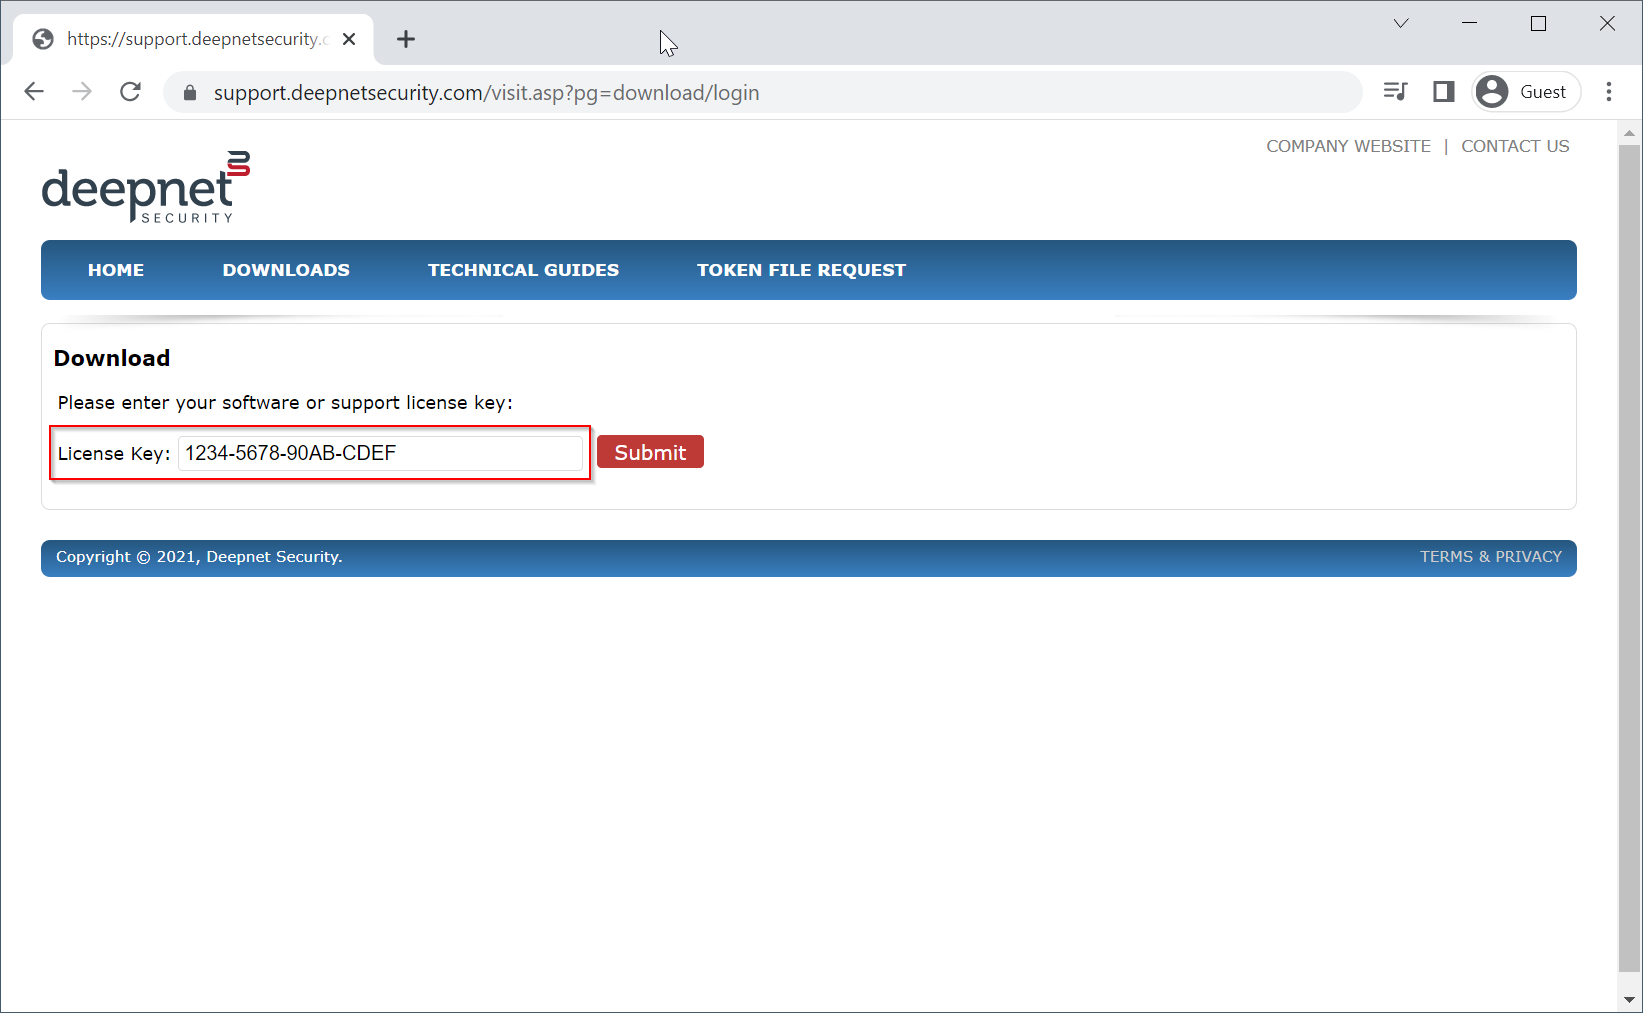
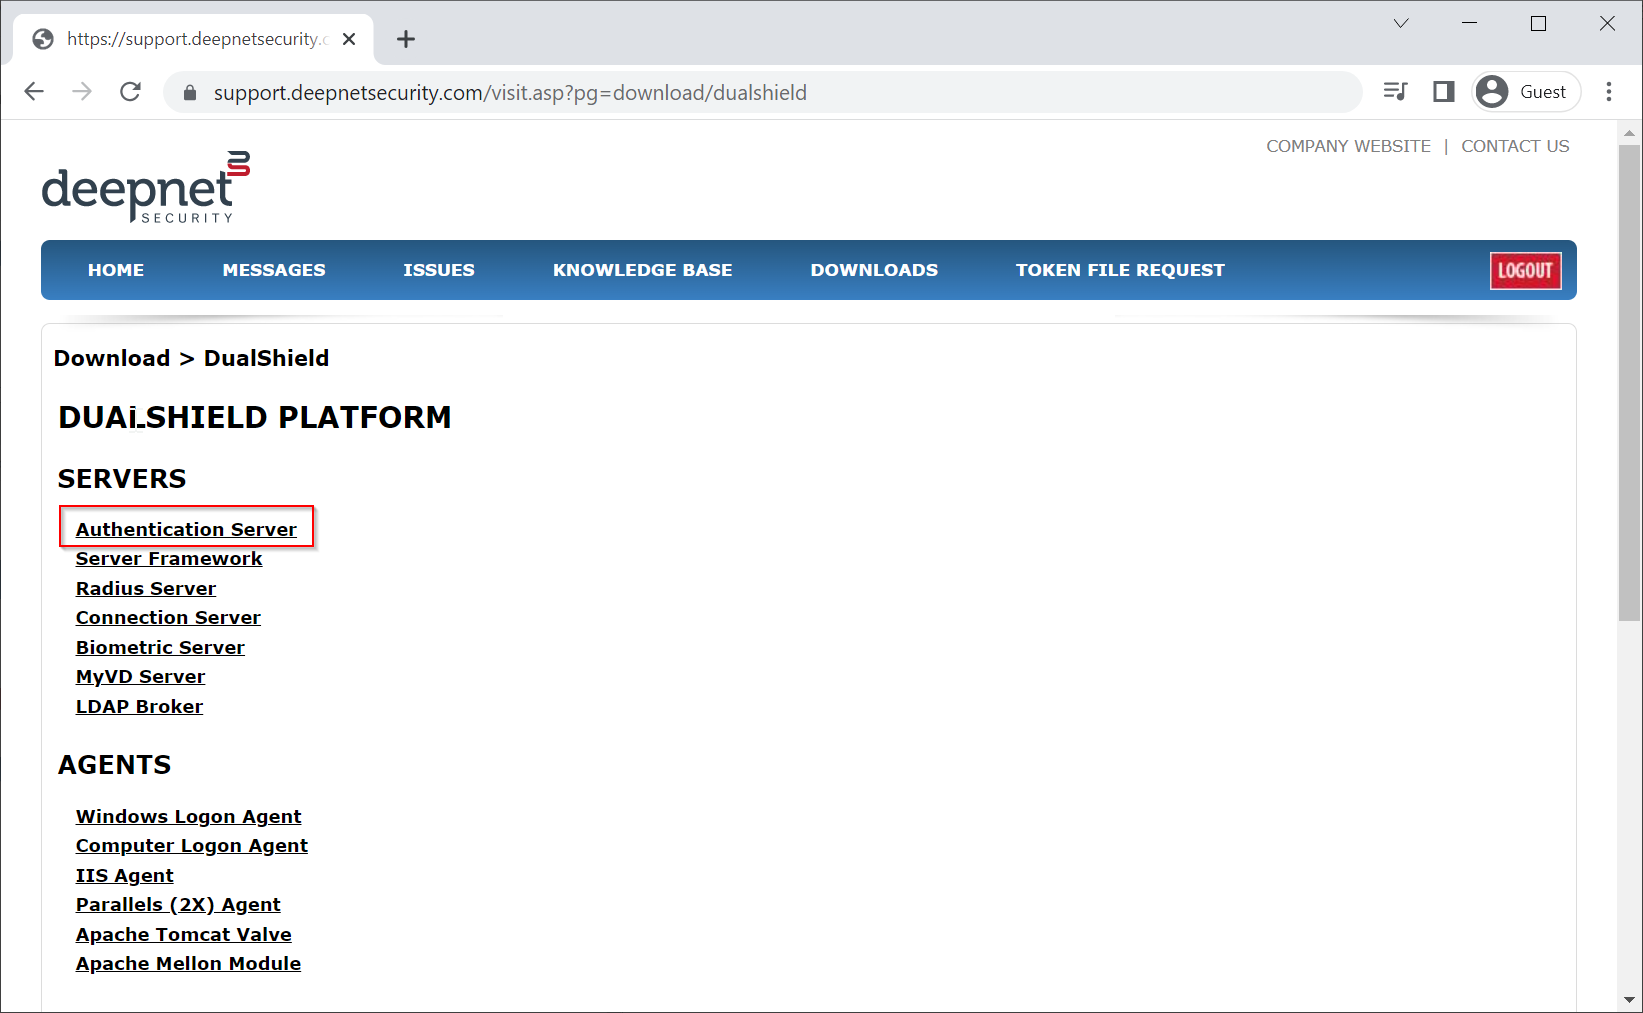
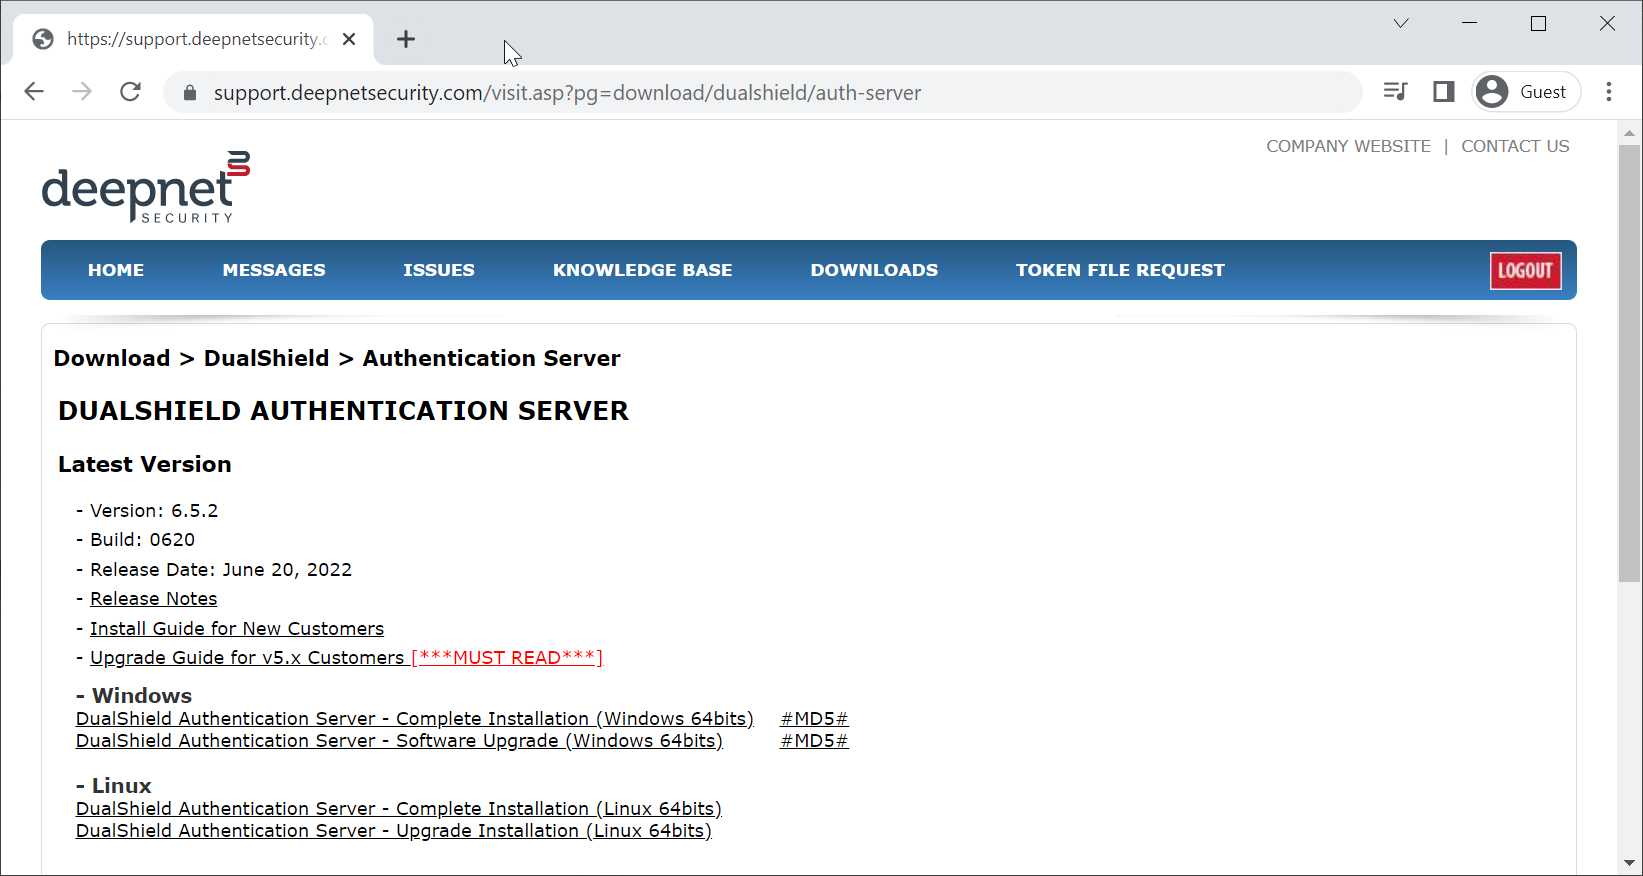
8. Download the DualShield server software, and save it on your DualShield MFA server machine
Depending on the MFA solution that you plan to implement, you need to download the following software components:
DualShield Authentication Server
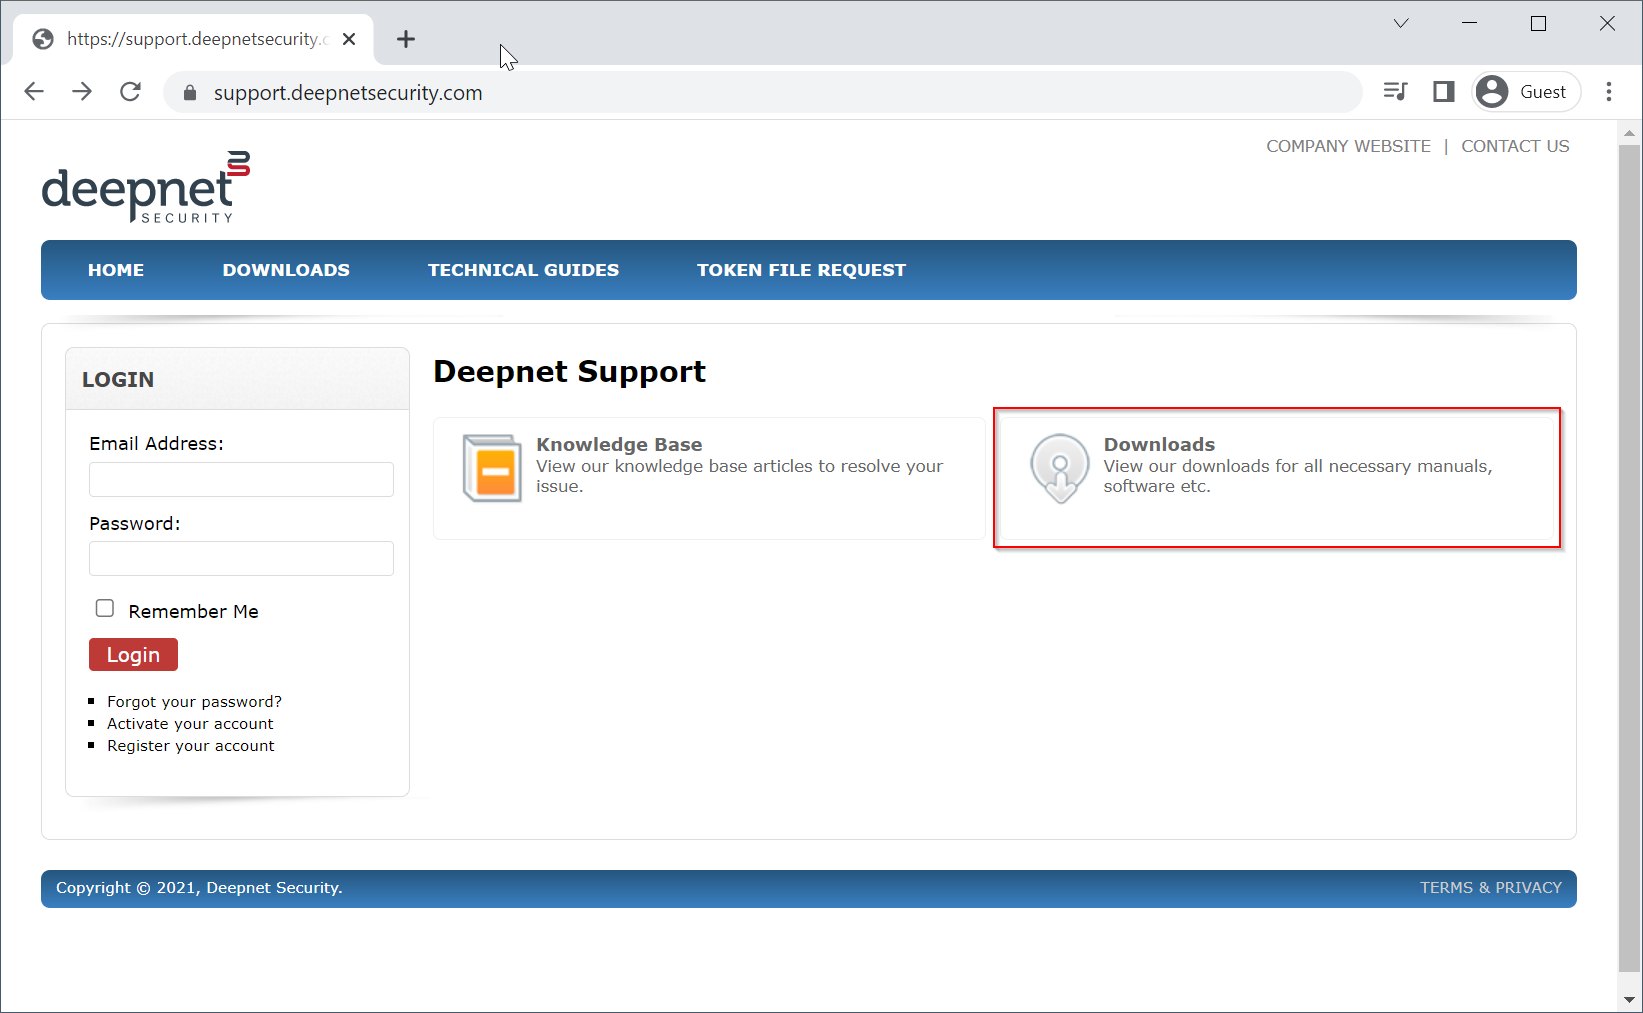
Regardless of the MFA solution that you plan to implement, you always need the DualShield Authentication Server (DAS). DAS is the core of the entire DualShield MFA platform and is the first software component to be downloaded and installed.
DualShield Authentication Agent
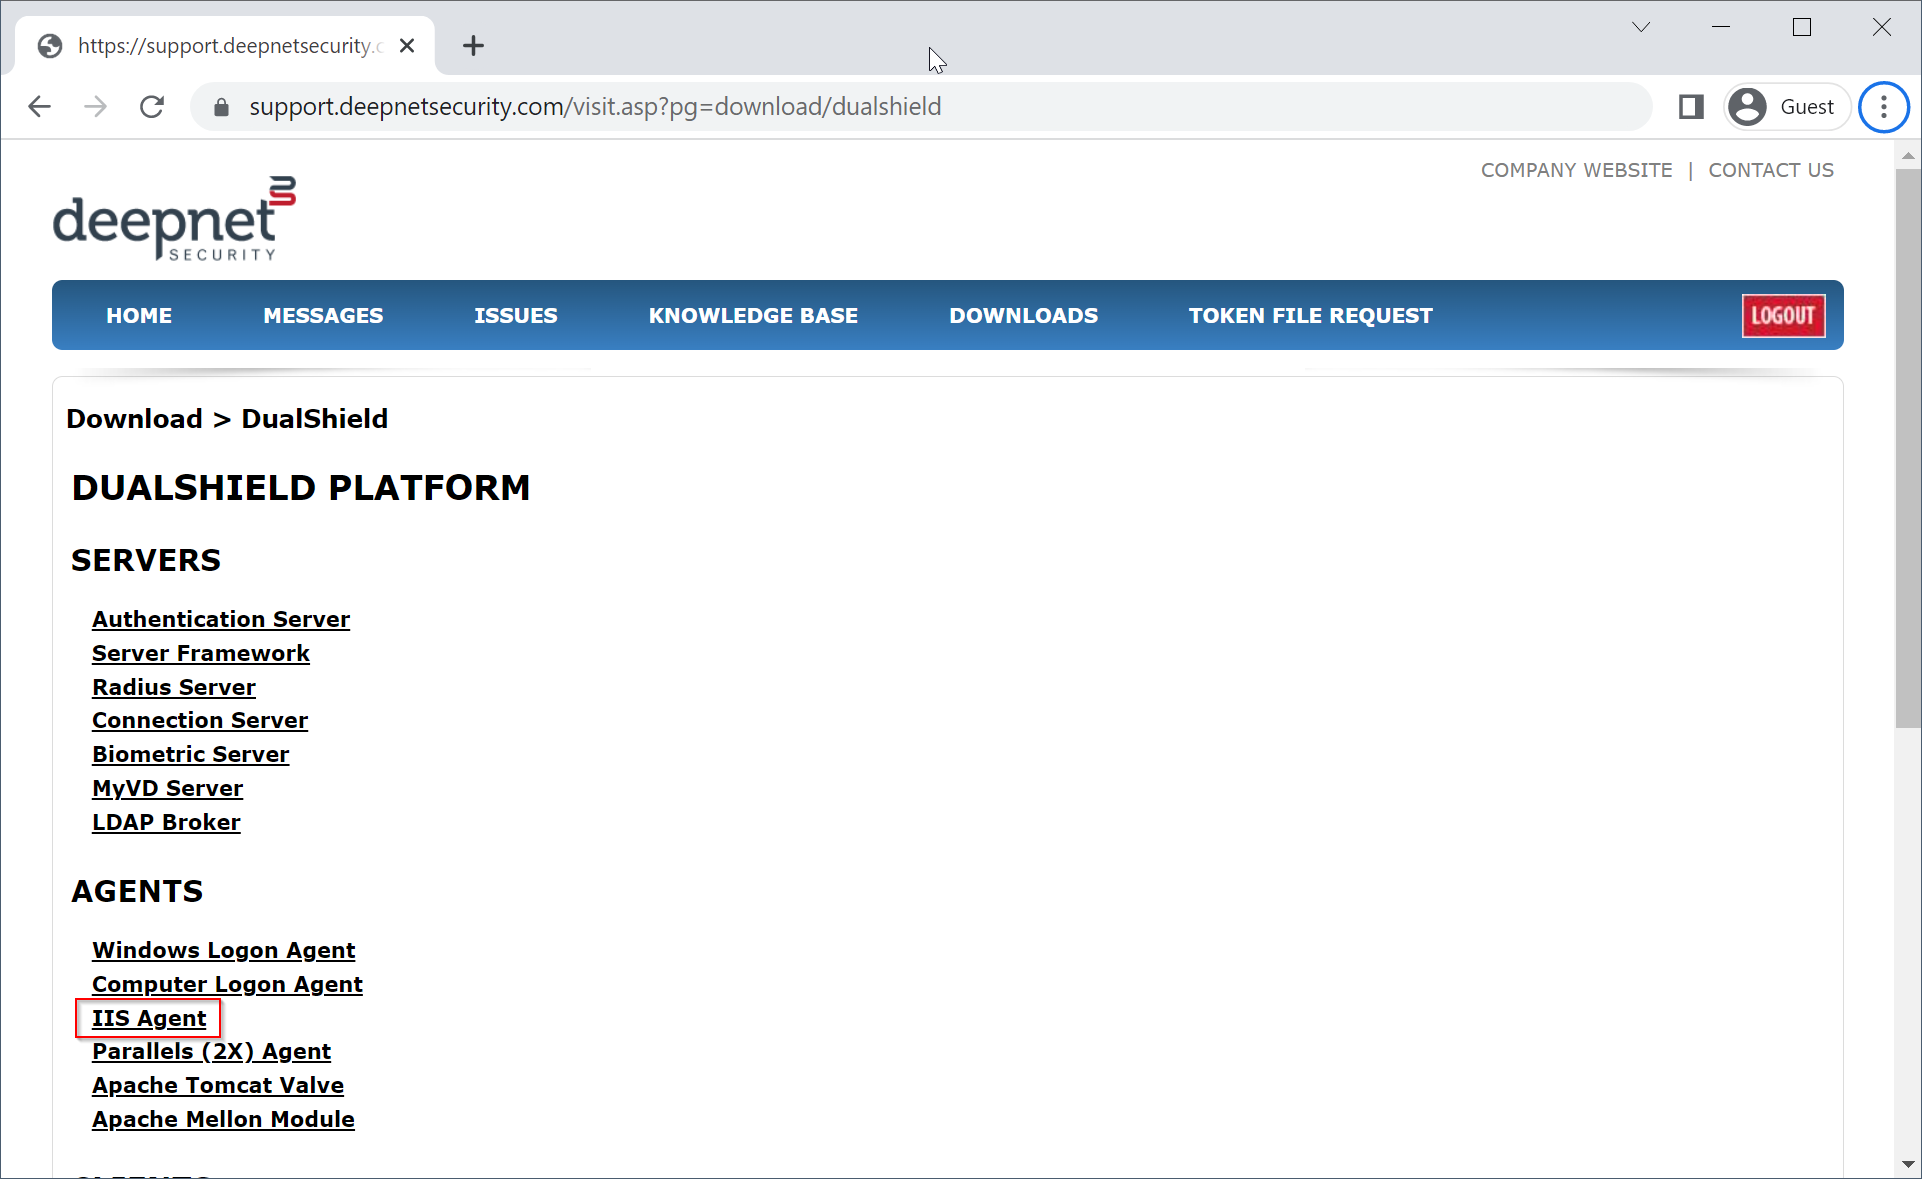
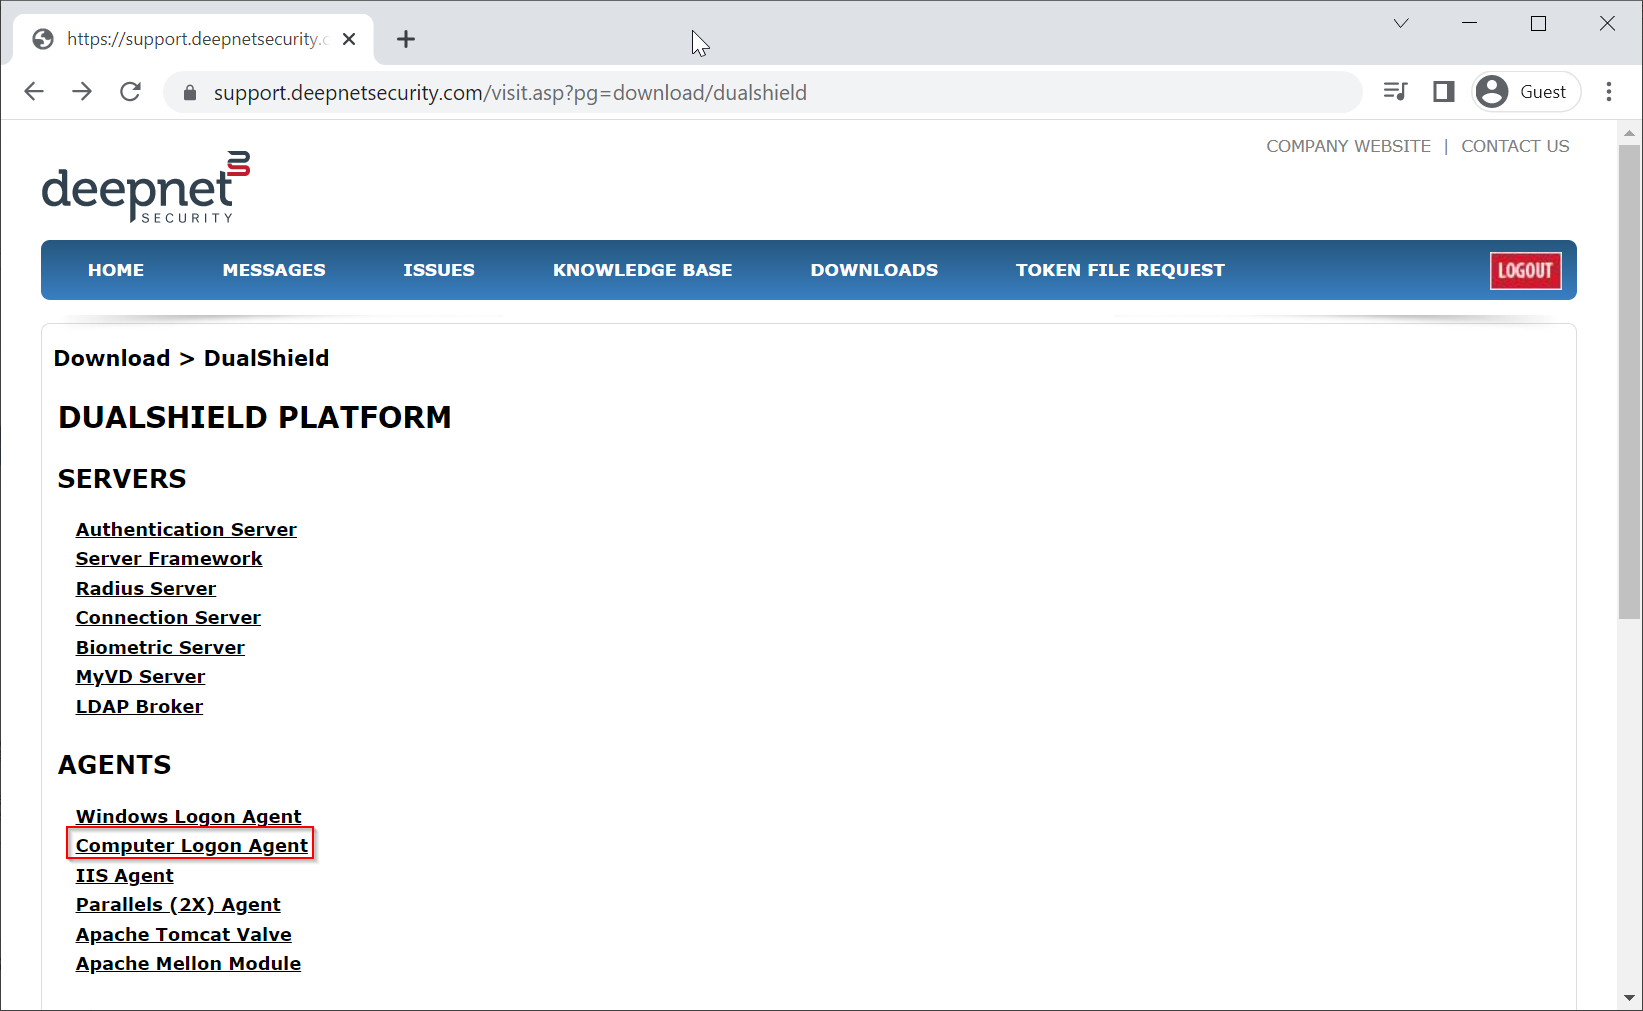
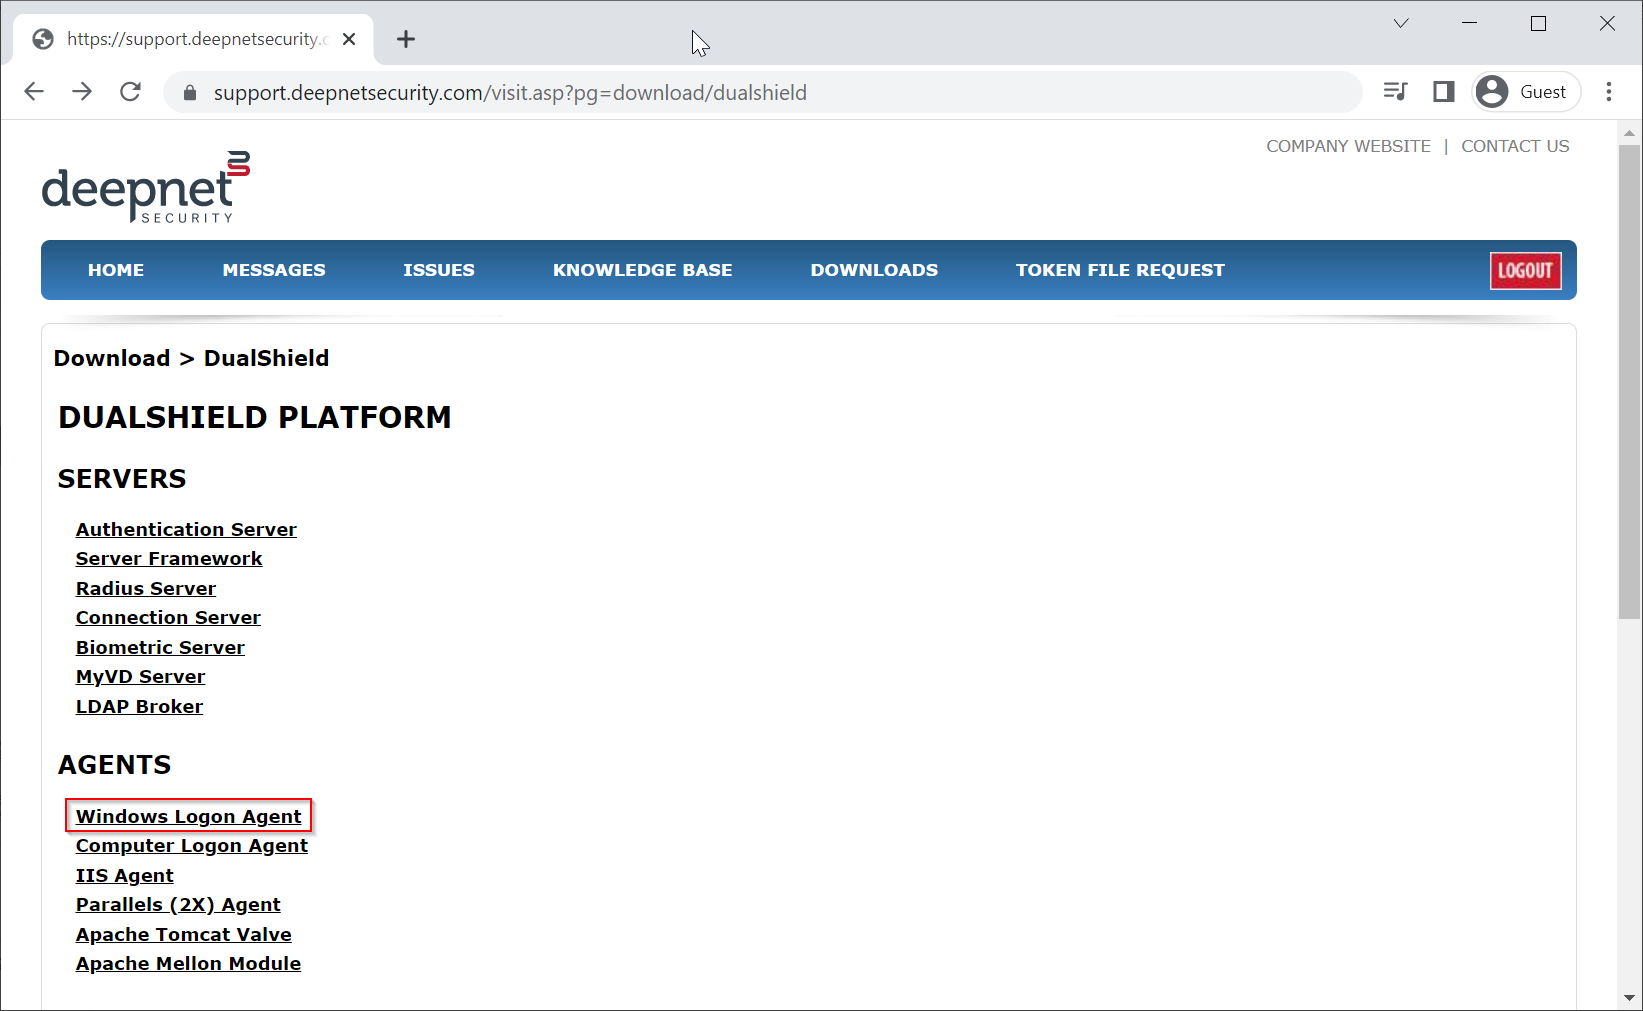
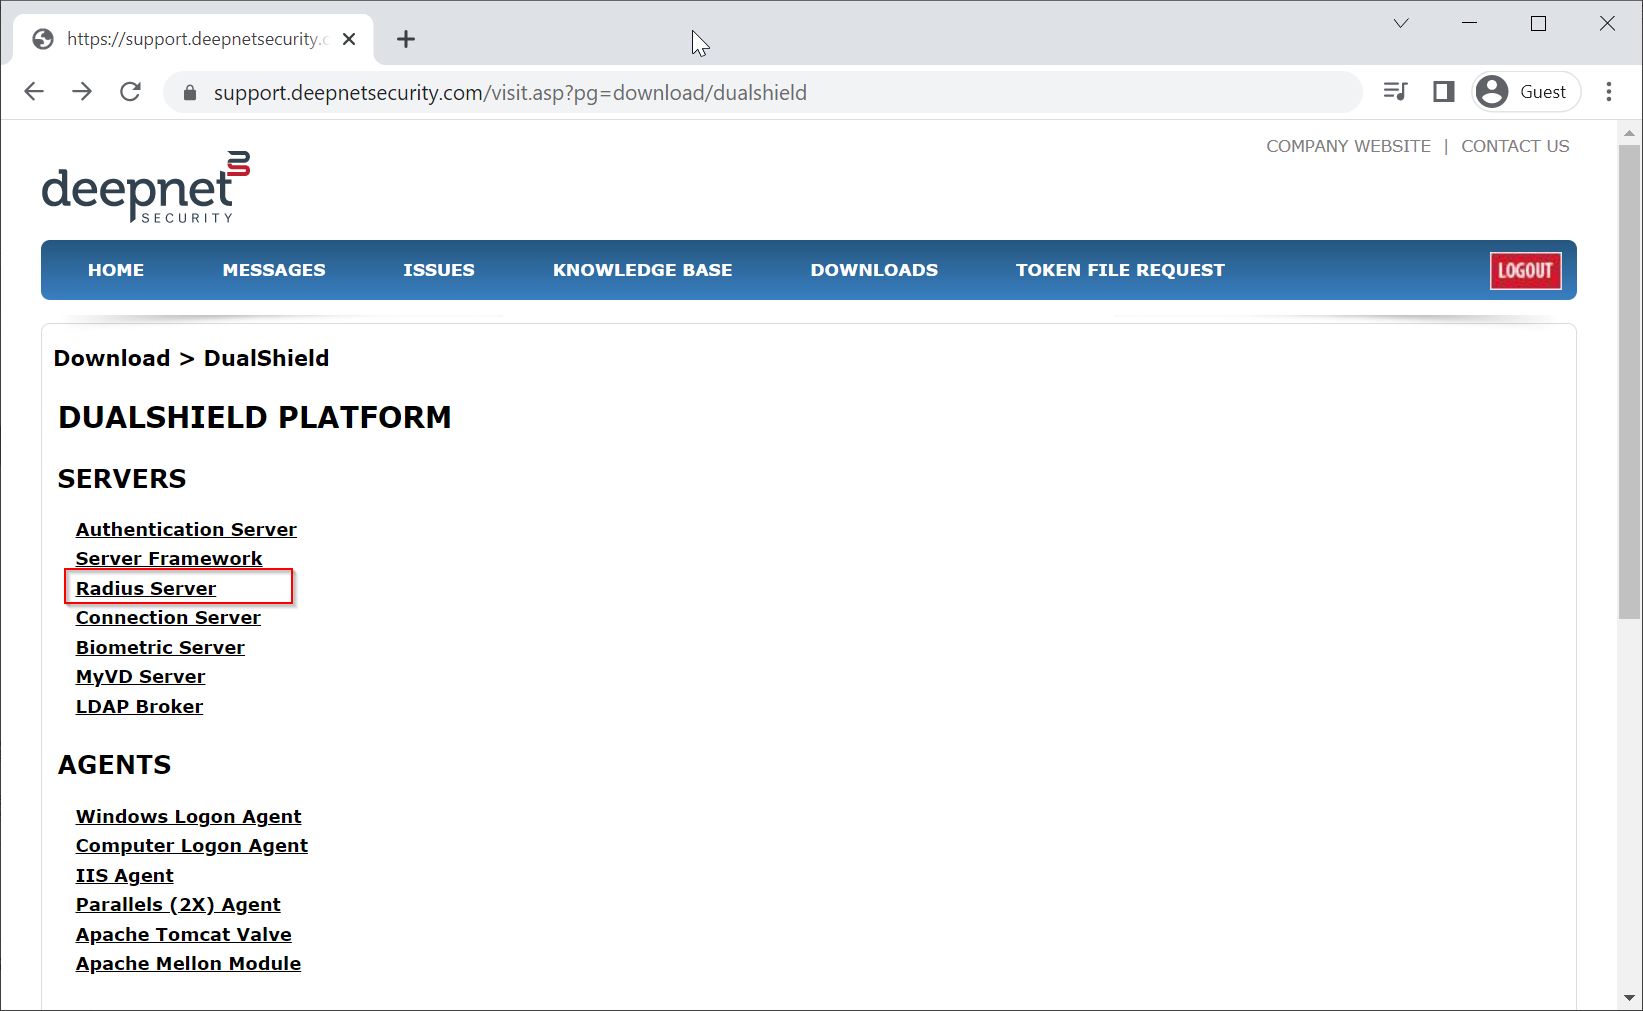
Depending on the MFA solution that you plan to implement, you need to download the appropriate authentication agent
| MFA Solution | MFA Agent Software | |
|---|---|---|
| MFA for Exchange Emails | DualShield IIS Agent |
|
| MFA for Computer Domain Logon | DualShield Computer Logon Agent |
|
| MFA for Windows Domain Logon | DualShield Windows Logon Agent |
|
MFA for VPN & Network Appliances - RADIUS Enabled | DualShield RADIUS Server |
|
MFA for VPN & Network Appliances - LDAP Enabled | DualShield LDAP Broker |
|
| MFA for RDWeb | DualShield IIS Agent |
|
MFA for Cloud Services - SAML Enabled | DualShield SSO | DualShield SSO is a part of the Dualshield Authentication Server.
|
| MFA for Parallels Remote Access Server | Parallels (2X) Agent |
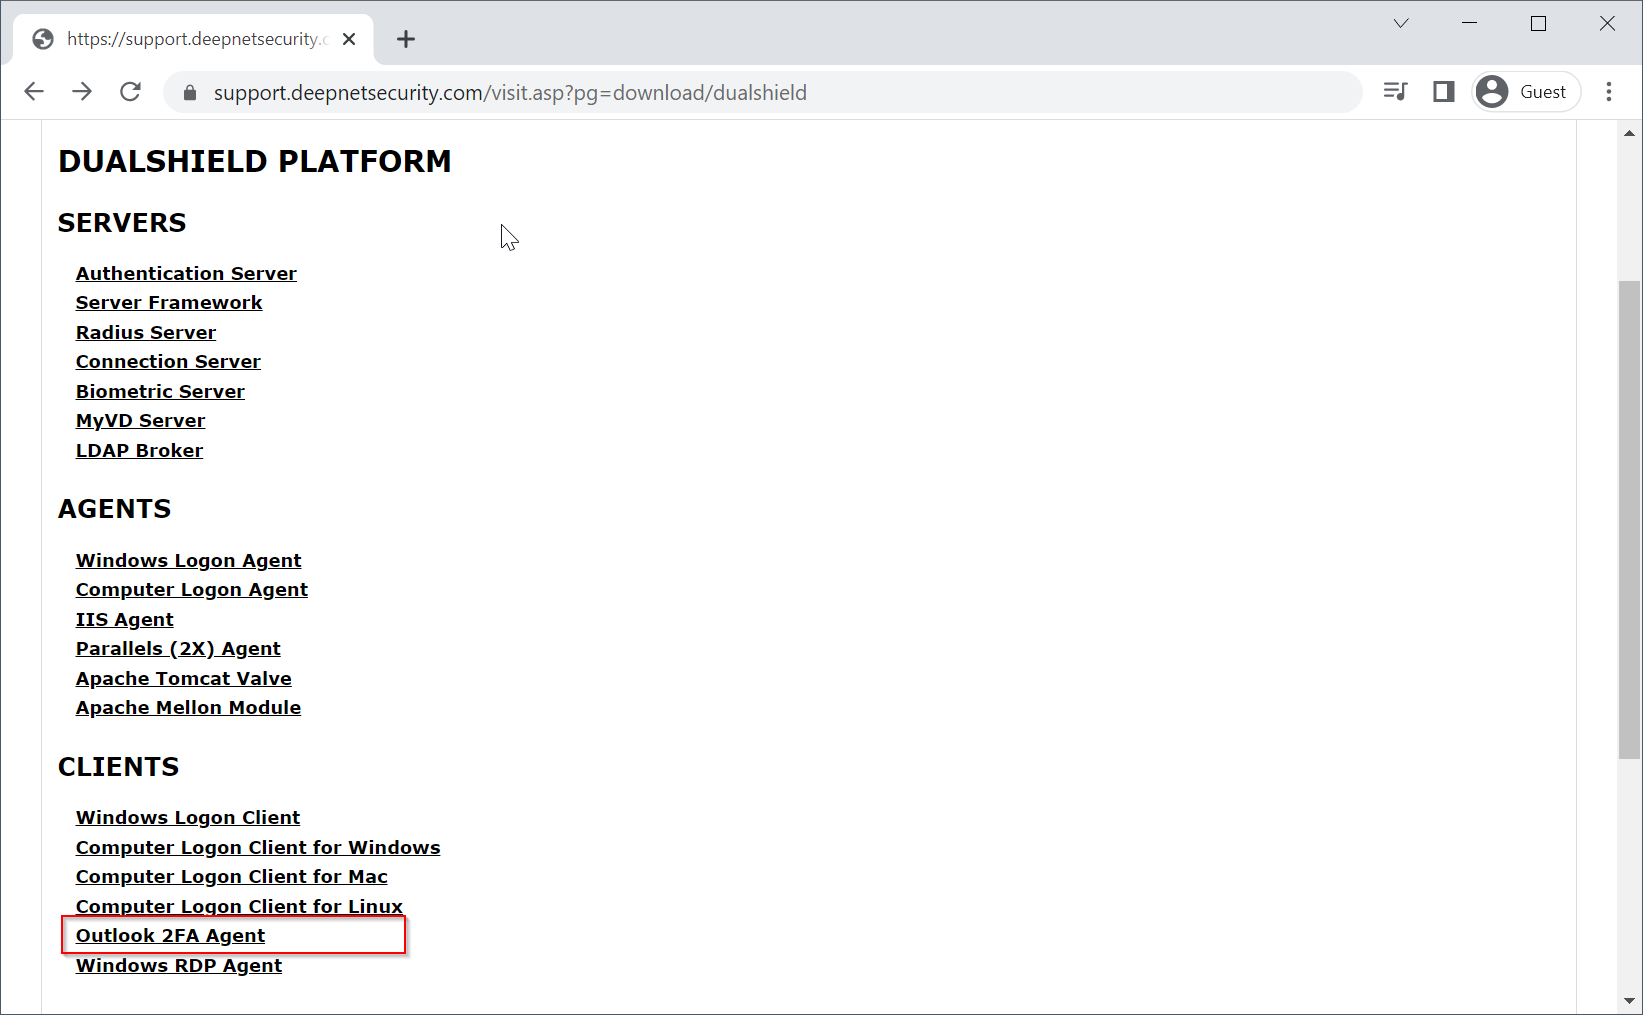
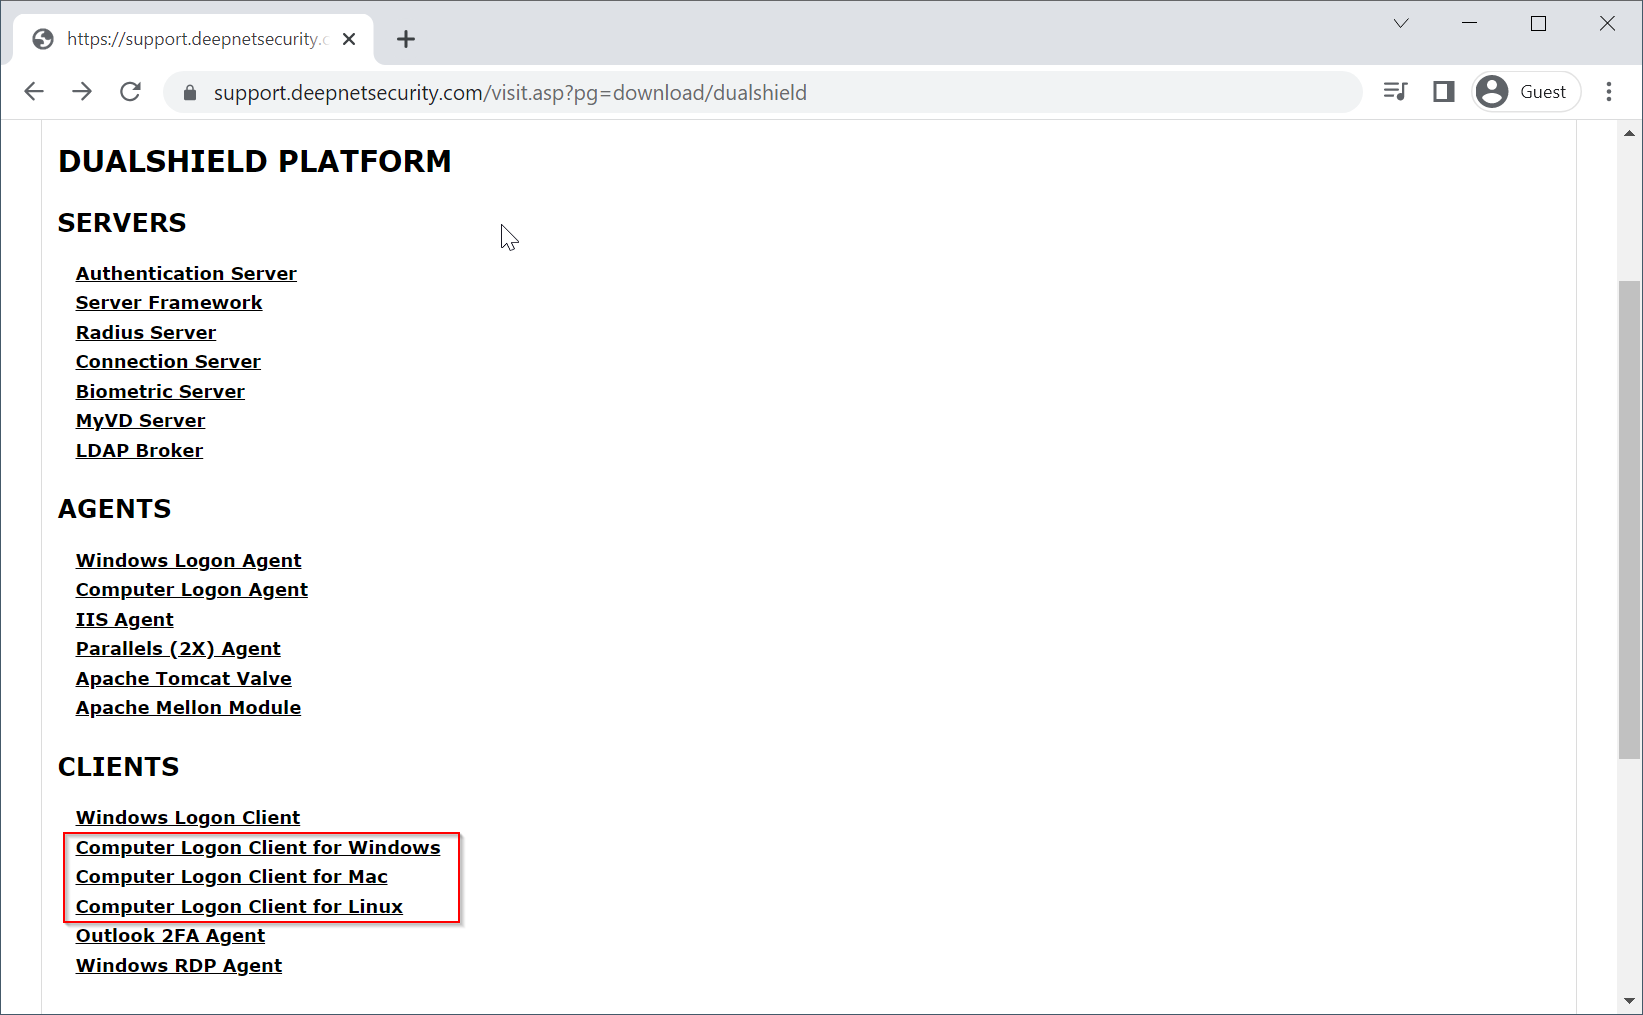
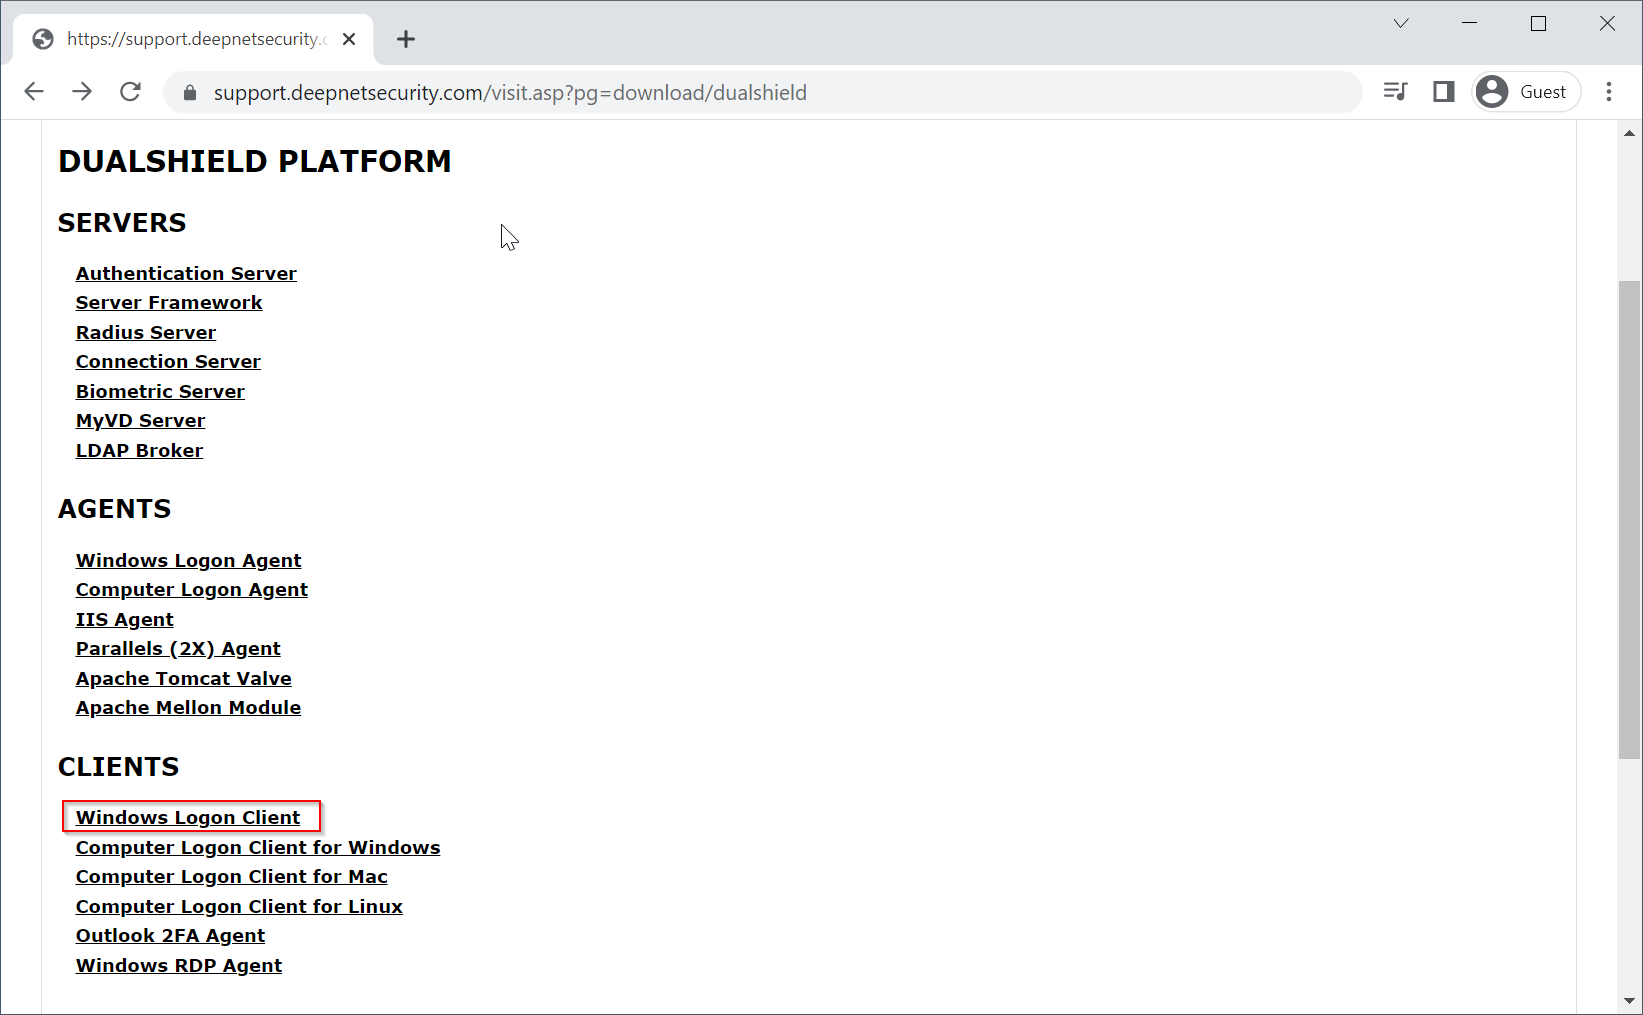
DualShield Authentication Client
Depending on the MFA solution that you plan to implement, you might also need to download the appropriate authentication client
| MFA Solution | MFA Client Software | |
|---|---|---|
MFA for Outlook Anywhere - Agent-Based | Outlook 2FA Agent |
|
| MFA for Computer Domain Logon | DualShield Computer Logon Client |
|
| MFA for Windows Domain Logon | DualShield Windows Logon Agent |
|
| MFA for Remote Desktop Connection | DualShield Windows RDP Agent |
|
Install DualShield Server
To start the installation, execute "DualShieldSetup64-xxx.yyyy-signed.exe", where xxx is the version number and yyyy is the build number, e.g. "DualShieldSetup64-6.0.0.0228-signed.exe"

Please select your preferred language.


You may install DualShield on a different drive, in a different folder. However, it is recommended to use the default drive and folder as suggested, for the sake of simplicity and transparency in future communications.

Click OK
| Option 1: All-in-One Server | Option 2: Slim Backend Server |
|---|---|
If you want to install a DualShield server that is to be used as both the backend and frontend, then you need to install all of its components. Select "All Components" |
If you want to install a DualShield server as a pure backend server without the end-user services, then you can keep it slim. Select "Back-end Components" |
For DualShield Version 6 and 7 you might want to include the legacy Management Console so that you can refer to the old documentation if necessary. This is no longer an option on Version 8+ If you do select the legacy management server and/or self-service server, then you must also select the legacy SSO server.
|
For DualShield Version 6 and 7 you might want to include the legacy Management Console so that you can refer to the old documentation if necessary. This is no longer an option on Version 8+ If you do select the legacy management server, then you must also select the legacy SSO server.
|
The default ports for the DualShield Consoles range from 8070 - 8076, however on DualShield vesion 8+you get the option to change this to port 443 or specify a custom port number here.
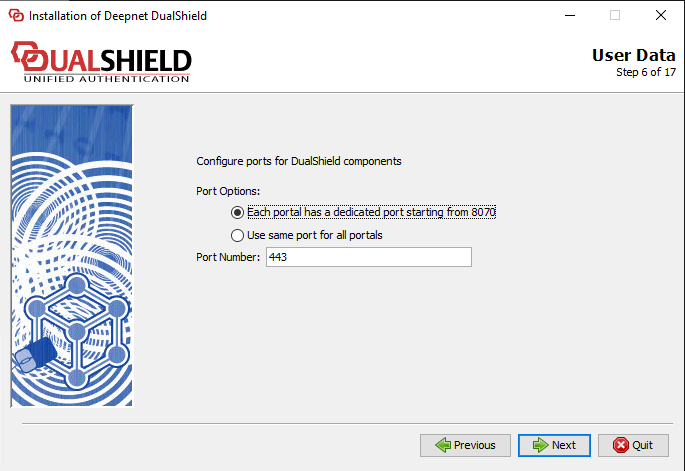
Click Next

| Option | Value |
|---|---|
Server FQDN | Enter here the FQDN to be used for this DualShield server. Please choose the FQDN wisely and correctly, as it would be difficult to change after the installation. A DualShield server must be given a unique Fully Qualified Domain Name (FQDN) which is provided in the installation process. The DualShield server includes several web consoles, including
DualShield consoles are all web-based portals that can be accessed with a web browser. The FQDN is the web address of the DualShield consoles. If the DualShield server is a backend server located in the internal network and to be accessed from internal PCs and workstations, then the DualShield's FQDN must be added into the internal DNS server. If the DualShield server is a frontend server located in the DMZ and to be accessed from external PCs and workstations, then the DualShield's FQDN must be added into the external DNS server. If the DualShield server is an all-in-one server that is accessed from both internal & external PCs and workstations, then its FQDN must be added into both the internal & external DNS servers. |
Use SSL to access DualShield | You can install a DualShield without SSL. However, it is highly recommended that you select "Use SSL to access DualShield", particularly if this is going to be used as a production server. |
Create a self-signed certificate | A certificate is to be used for DualShield web consoles and portals. You may use a self-signed certificate, however, it is highly recommended that you should provide a commercial SSL certificate, particularly if this is going to be used as a production server. |

DualShield server is a JAVA application server. It runs in a Java Virtual Machine (JVM).
You can set the maximum memory size (JvmMx) and the minimum memory size (JvmMs) to be used by JVM. If you have a large active user base, then increase both of these values. It is not recommended to reduce them.
Those values can be changed after installation.

Please select "Software Encryption".
| Option 1: Local/Internal Database | Option 2: Remote/External Database |
|---|---|
DualShield uses a standard SQL database as its data store. If you select "Install a copy of MySQL server", then it will install an instance of MySQL server on the local machine.
| If your organisation has a SQL server, then it is recommended that you use your own SQL server, so that your DBA can manage all databases in one server.
|
| Option | Value |
|---|---|
| Server Address | The address of the SQL server. You can enter its IP address or hostname. If it is a local SQL server, then keep it as is "localhost". |
| Server Port | The TCP port number of the SQL server. Keep the default value unless you have reasons to change it to a different value. |
| User Name | This is the account name to be used to access & manage the SQL database. |
| Password | This is the account password to be used to access & manage the SQL database. |
| Database Name | This is the name of the database to be used by DualShield. Keep the default name "DualShield" for simplicity and transparency in future communications. |


Wait for the DualShield server to be fully loaded
To wait for the DualShield server to be fully loaded and monitor the its initialisation progress, launch the Windows Task Manager and check the process called DualShield Server which is often a sub-process of Commons Daemon Service Runner, as shown below:
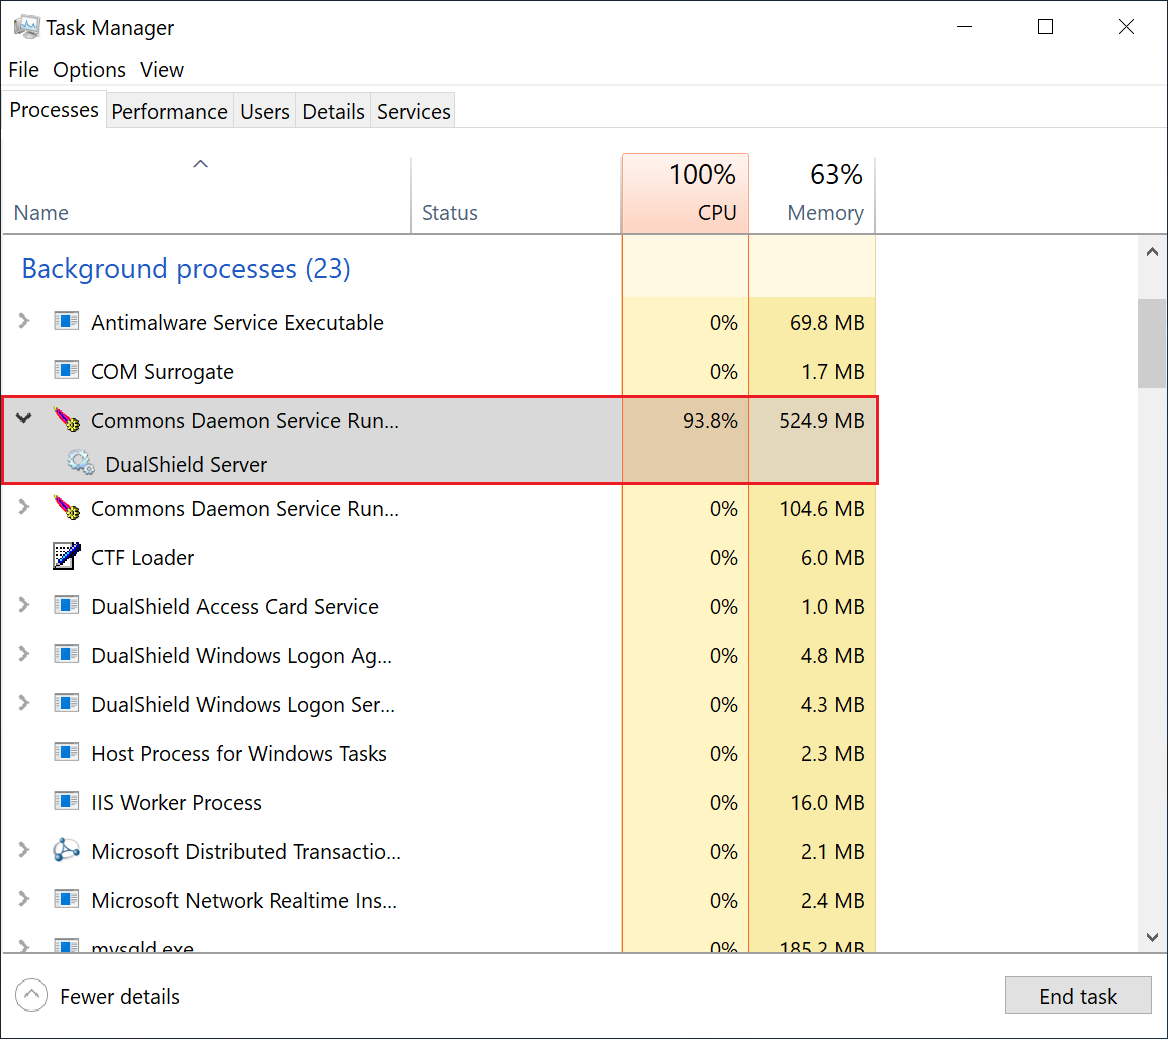
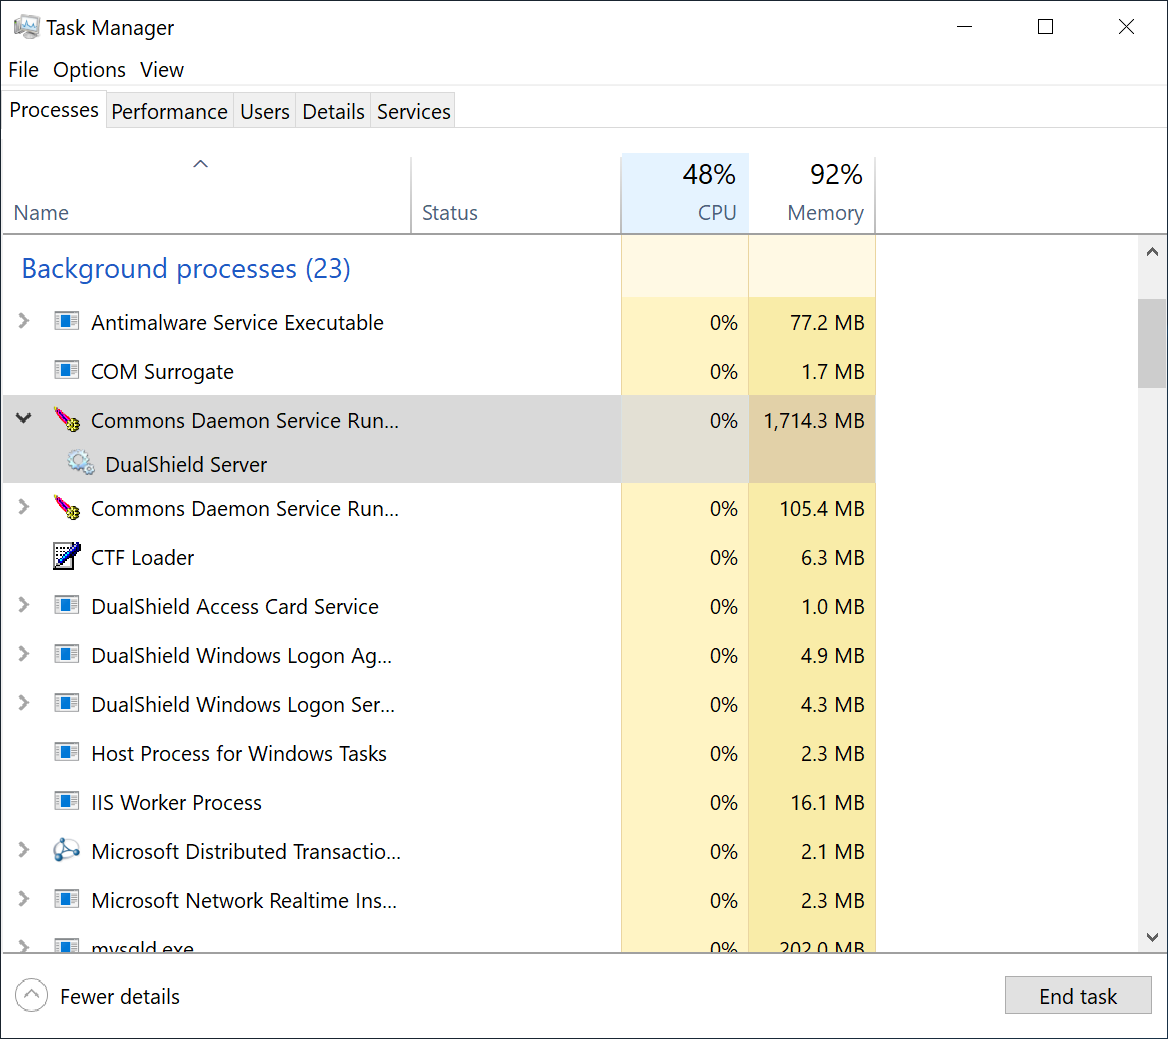
During the initialisation process, the CPU usage of the DualShield Server process will go up and down, and the Memory consumption will continue to increase.
When the CPU usage drops to zero or slightly above zero, and the memory consumption reaches close to 1.8GB for the backend or 550MB for the frontend, that's the indication that DualShield is fully loaded and ready for operation.
- No labels
