New roles can be added using the following procedure;
In order to create a role we will first need to navigate to "Administrator | Roles", then click on the  button;

A new window will open titled "Role - New" that will be used to name our new role, and specify the domains;

Fill in the required fields prompted "Name:" and "Domains:" with the role name, and the domains the role applies to.
You can select the managing domains for this role, or you can leave the field empty. If you do select managing domains, then this role can only be managed by administrative users in the selected domains who have the right to manage roles.
If you do not select managing domains, then this role can be managed by all administrative users who have the right to manage roles.
The "Domain" field is the so-called Managing Domain. If a role has managing domains, then the role can only be managed by administrative users in the managing domains who have the right to manage roles. If a role does not have managing domains, then the role can be managed by all administrative users who have the right to manage roles.
When you have completed entry of the role details click  to add the new role, and you will be ready to add permissions to this newly created role.
Creating permissions for the newly created role
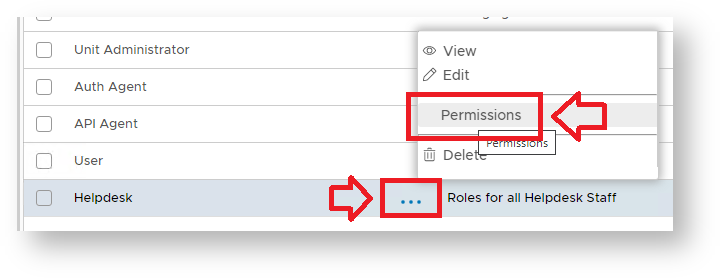
To create permissions for this role, left click on the context menu of the role for which the permits are to be edited, then select "Permissions";
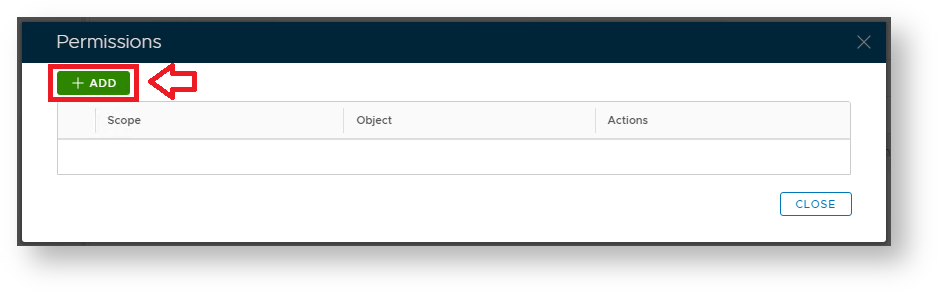
A new window will now open titled "Permissions", to create a new permission for the role click on the  button;
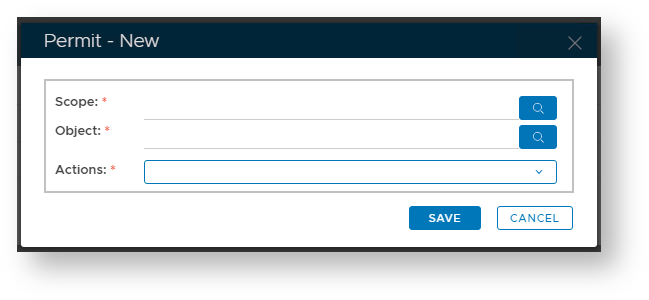
A new window will now open titled "Permit – New";
The scope of an administrative role determines in what scope administrator may manage objects.
The role's scope can be selected by clicking on the magnifying glass icon ![]()
Specify which objects that may be managed by users with this administrative role.
Role objects can be selected by clicking on the magnifying glass icon ![]()
Select which actions may be performed from the following list.
Role actions can be selected by clicking on the dropdown icon ![]()
You then need to set the scope, object and actions parameters for the new permission.
Repeat this process for all permissions needed for the newly created role, and after each permission has been added click  .
.
When all necessary permissions have been added to the role click  and the new role will be ready to be assigned to users.