Before an application can be created, a logon procedure must be created first.
Click the "CREATE" button on the toolbar
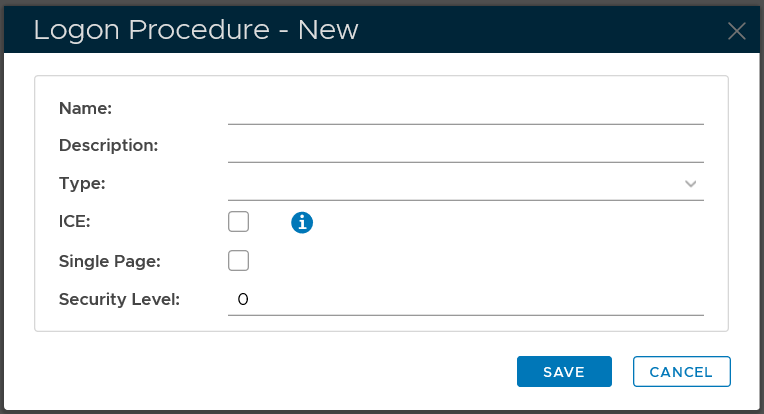
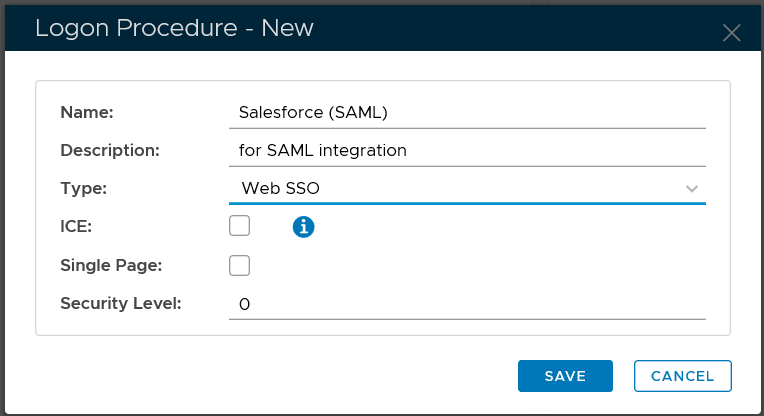
In the "Name" field, enter a name for this new logon procedure, e.g. "Office 365"
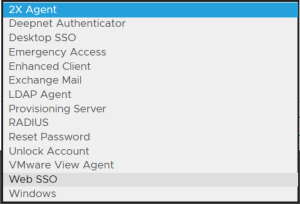
In the "Type" field, select the type of the logon procedure from the drop list, e.g. "Web SSO"

Click the "SAVE" button to save it.
Now that a new logon procedure is created, you want to add logon steps.
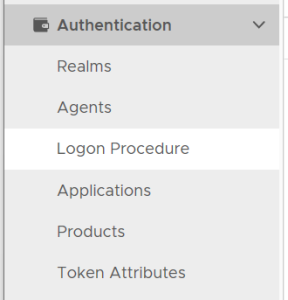
Navigate to Authentication | Logon Procedures
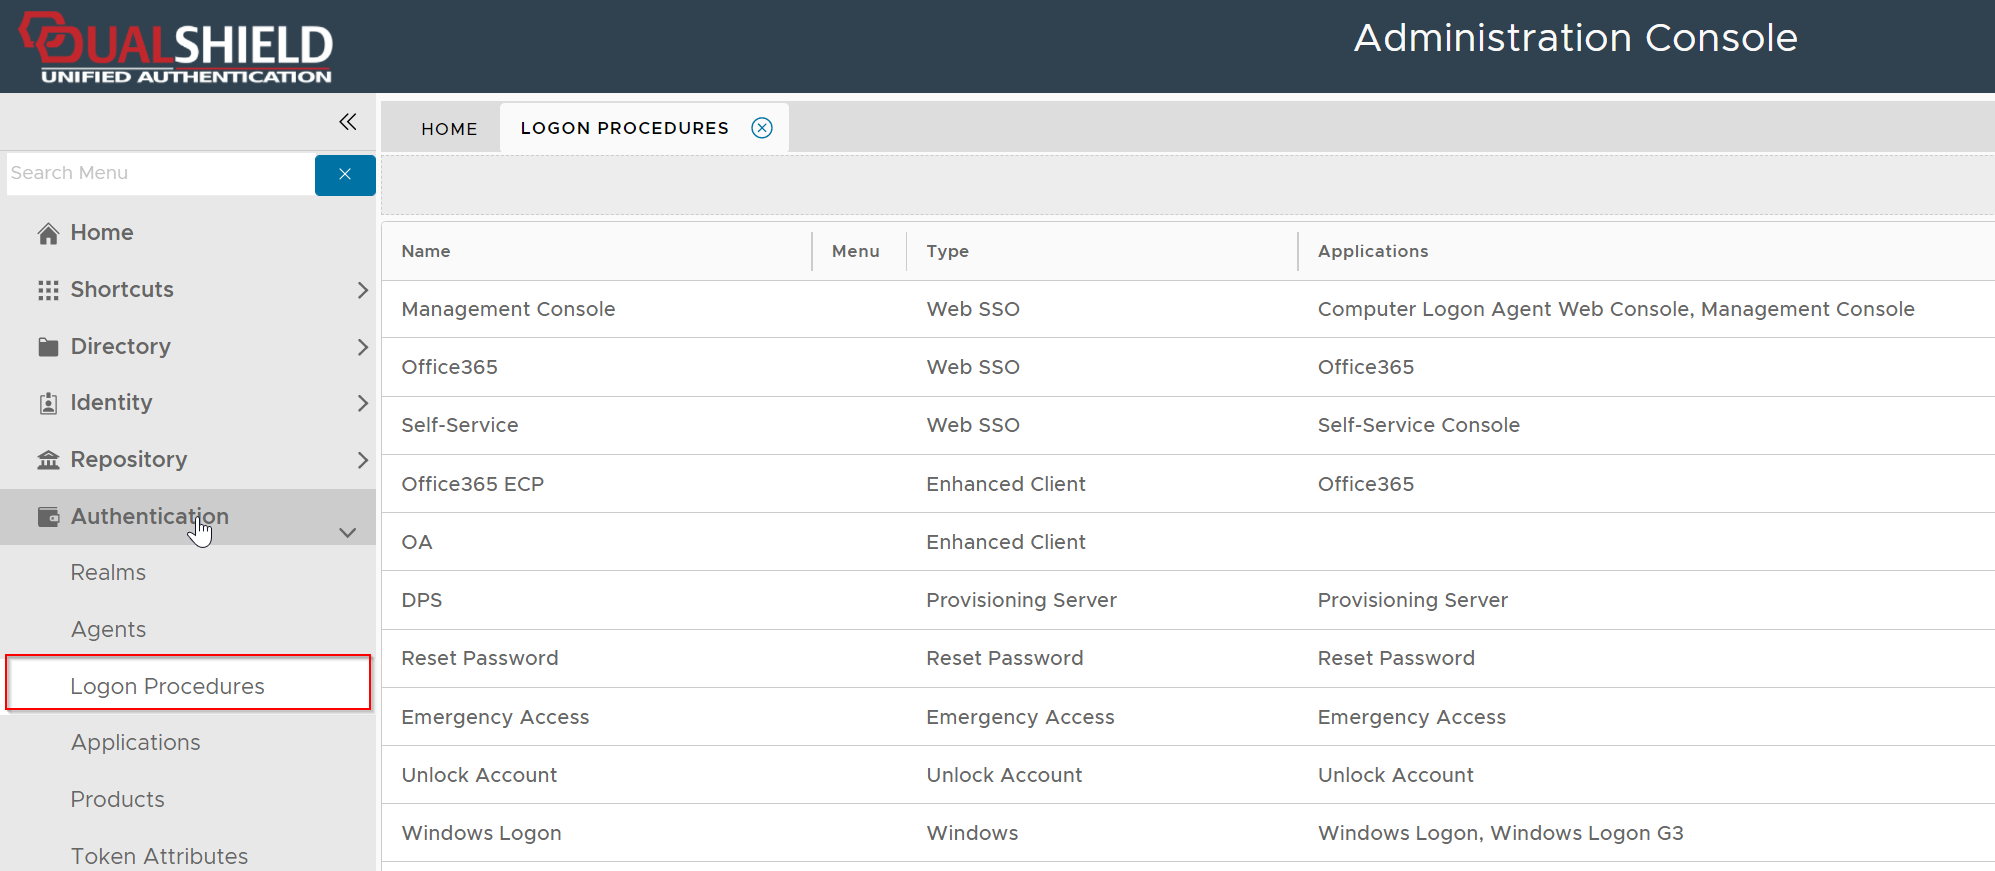
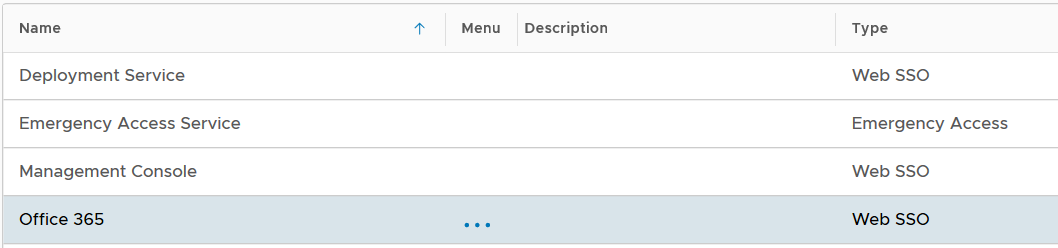
Click the context menu icon "..." of the application to be edited, e.g. "Office 365"
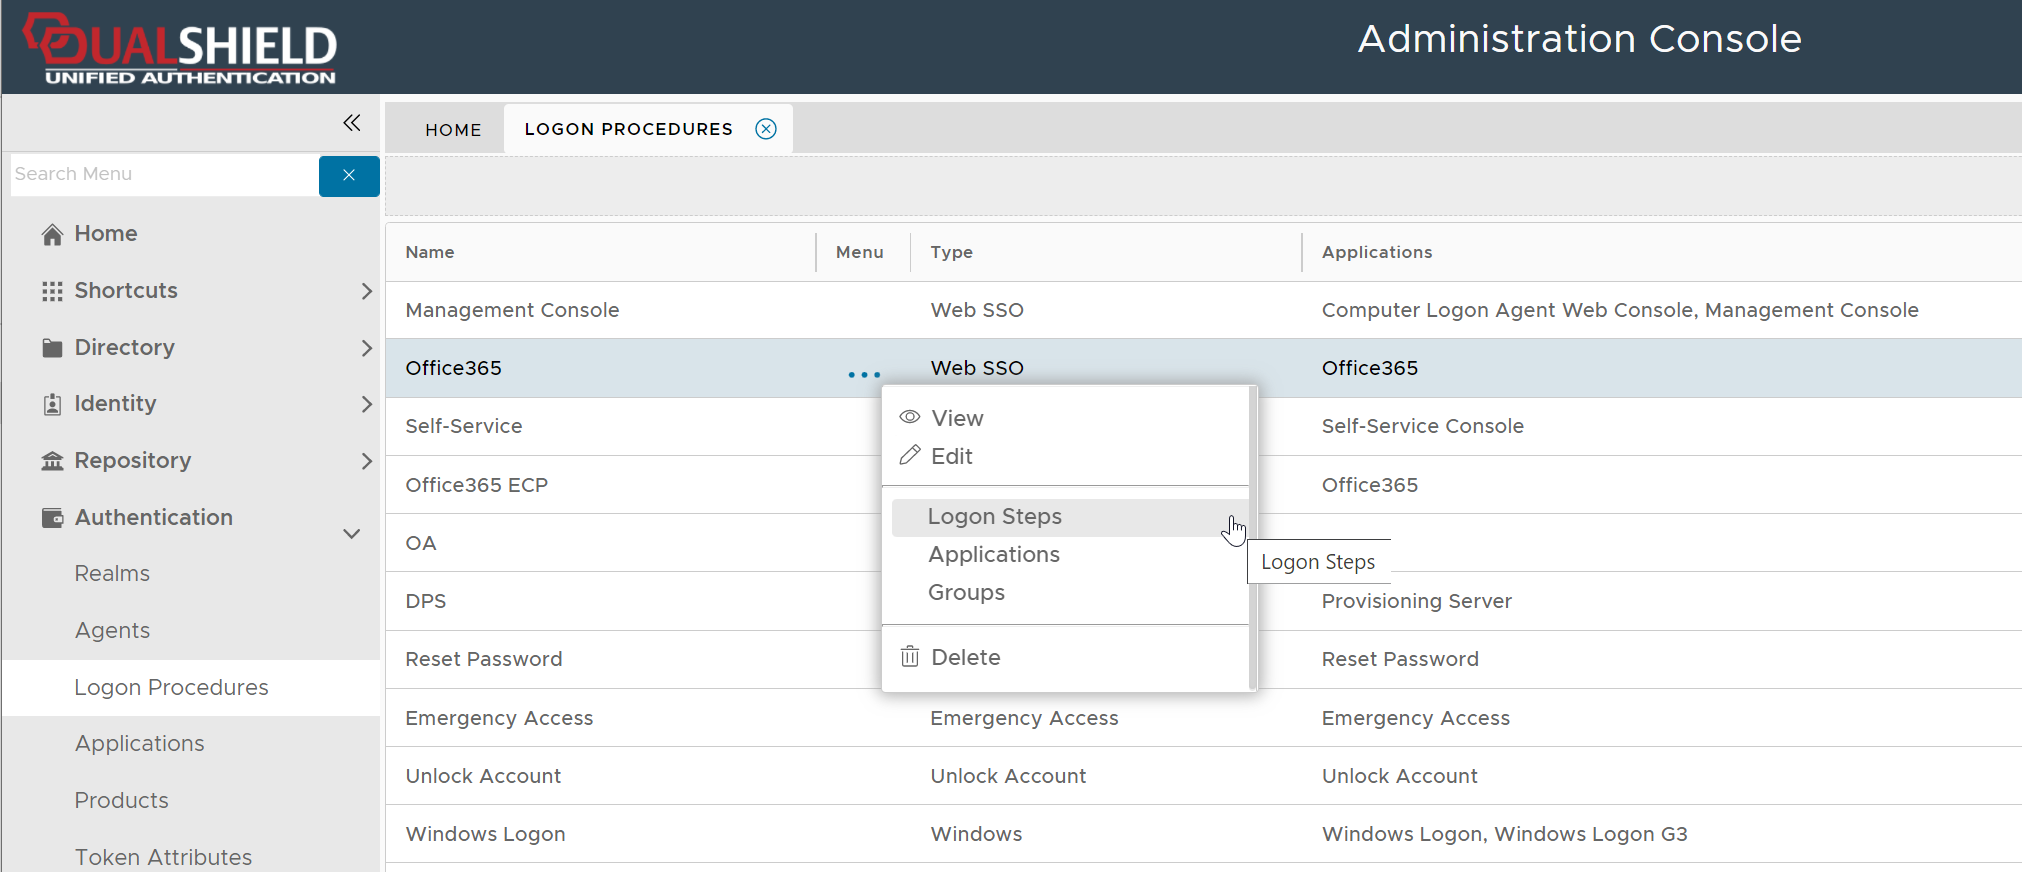
select "Logon Steps" to bring up the logon steps editor

To add a logon step, click the "ADD" button
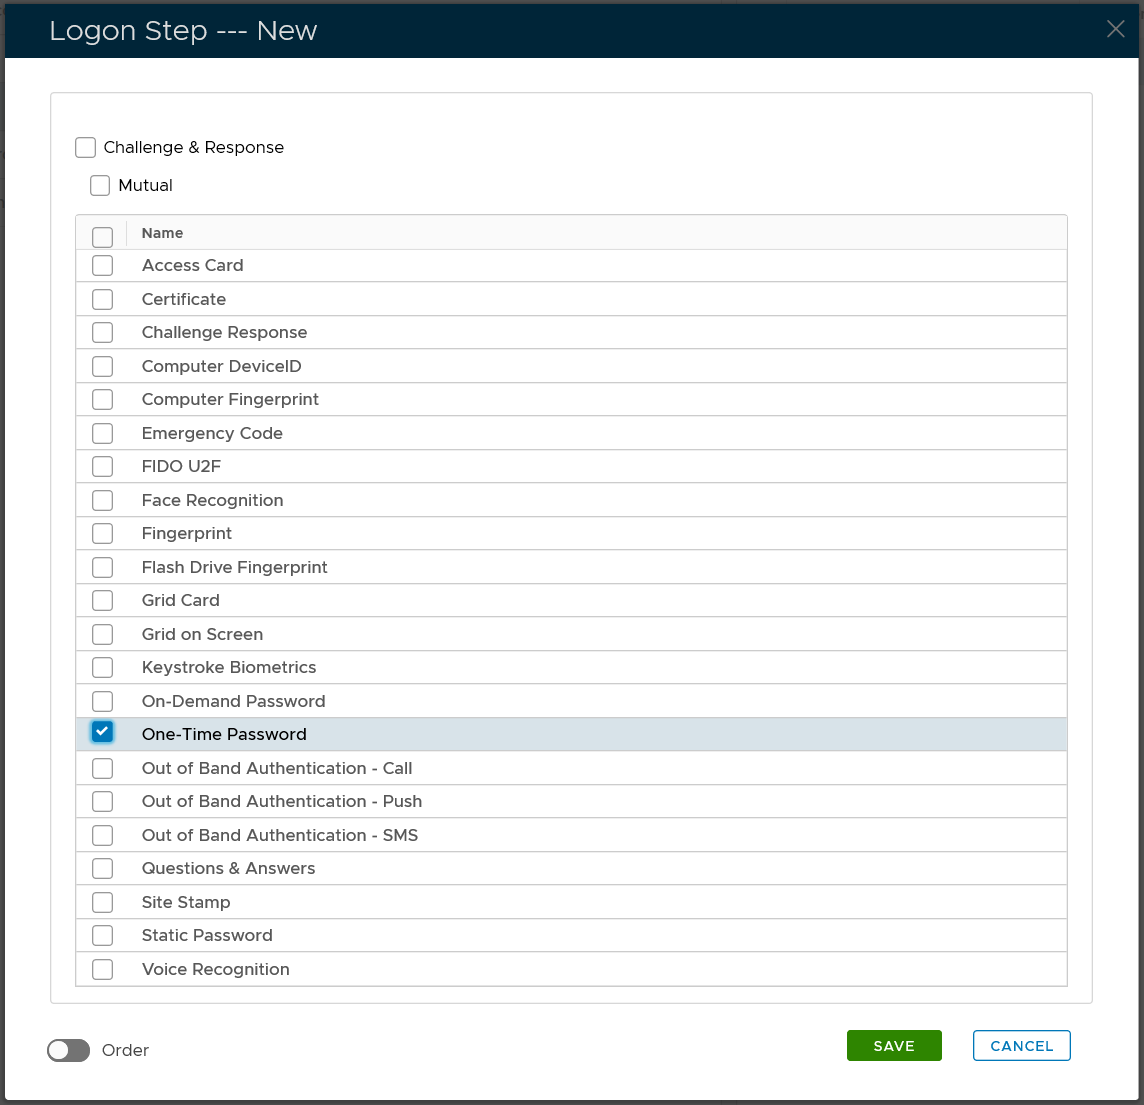
Select the one or multiple authentication methods that you want to add to this step, e.g. "One-Time Password"
Click the "SAVE" button to save it

You can change the order of the steps by clicking the "UP" and "DOWN" buttons.
The type of logon procedure for SAML integration must be Web SSO.
Once a logon procedure has been created, you need to add logon steps into the newly created logon procedure. Typically, you would create a two logon steps, as the example below.
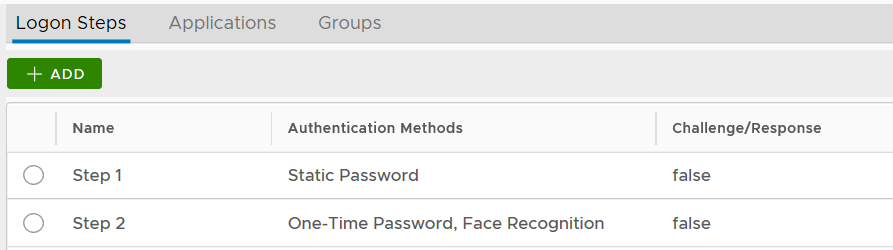
Of course, you can create as many steps as you like.