- Created by Adam Darwin, last modified on Mar 22, 2020
An application must be connected to a realm which defines who can access the application.
An application must have a logon procedure which defines how the users will be authenticated when they attempt to access the application.
An application must be published on an authentication agent, for it to be visible and accessible by the users.
Optionally, an application can have a logon policy which defines how 2FA/MFA should be enforced on users.

First, you need to build a realm
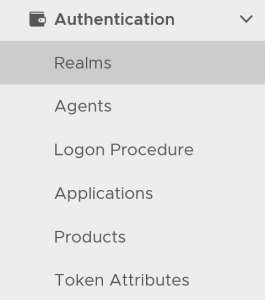
In the DualShield Admin Console, in the side panel, select "Authentication | Realms"
Click the "Create" button. This will bring up the new realm dialog window:
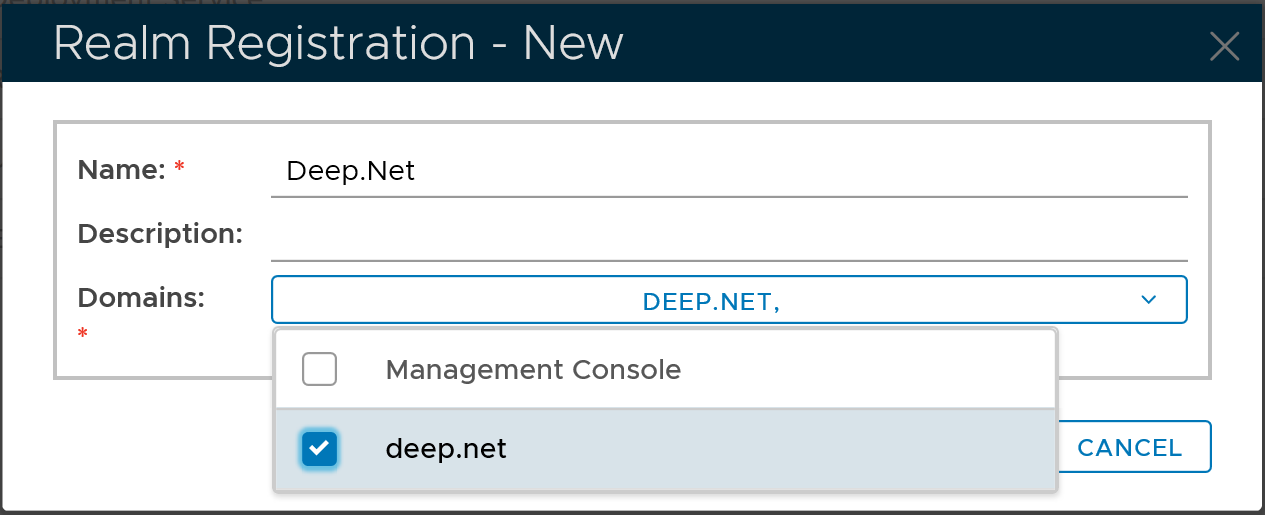
Select the domain to be included in the new realm, e.g. "deep.net"
Click the "Save" button to finish
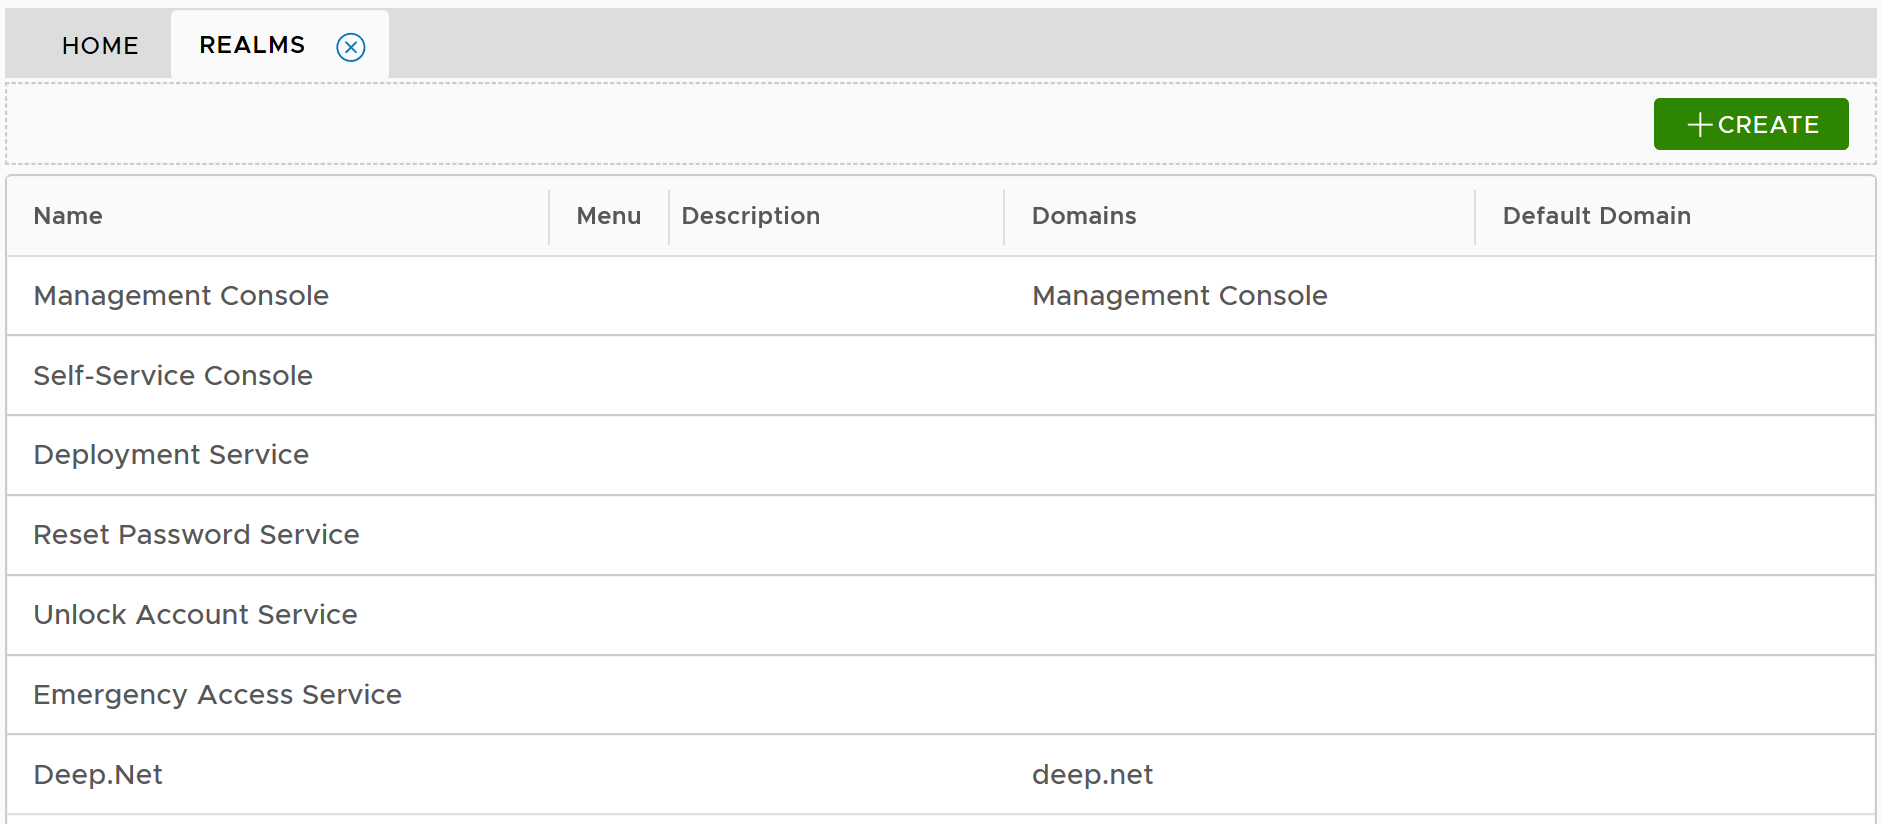
Then, you need to create a logon procedure for the application
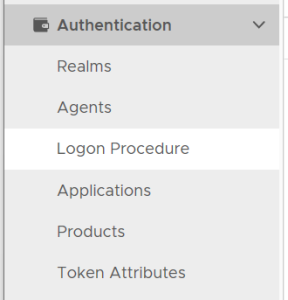
Click the "CREATE" button on the toolbar
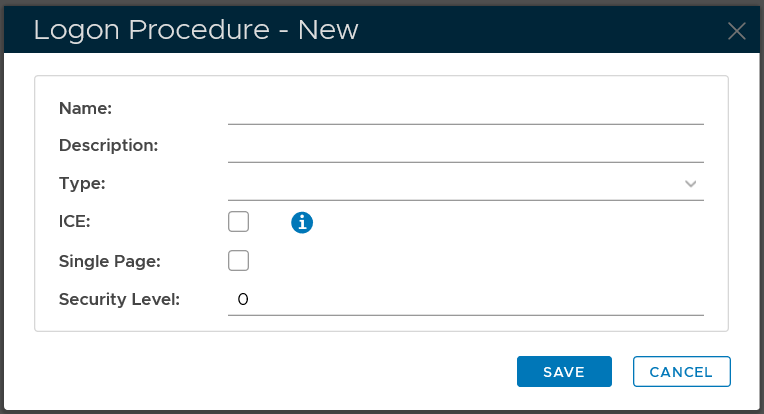
In the "Name" field, enter a name for this new logon procedure, e.g. "Office 365"
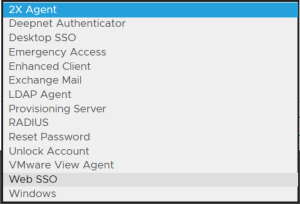
In the "Type" field, select the type of the logon procedure from the drop list, e.g. "Web SSO"
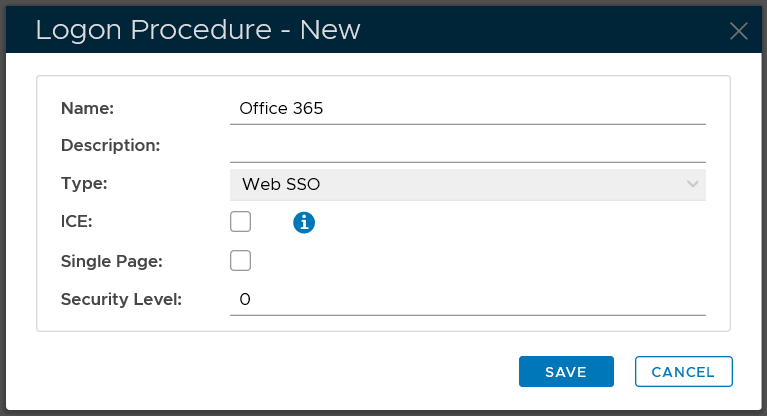
Click the "SAVE" button to save it.

Now that a new logon procedure is created, you want to add logon steps.
Navigate to Authentication | Logon Procedures
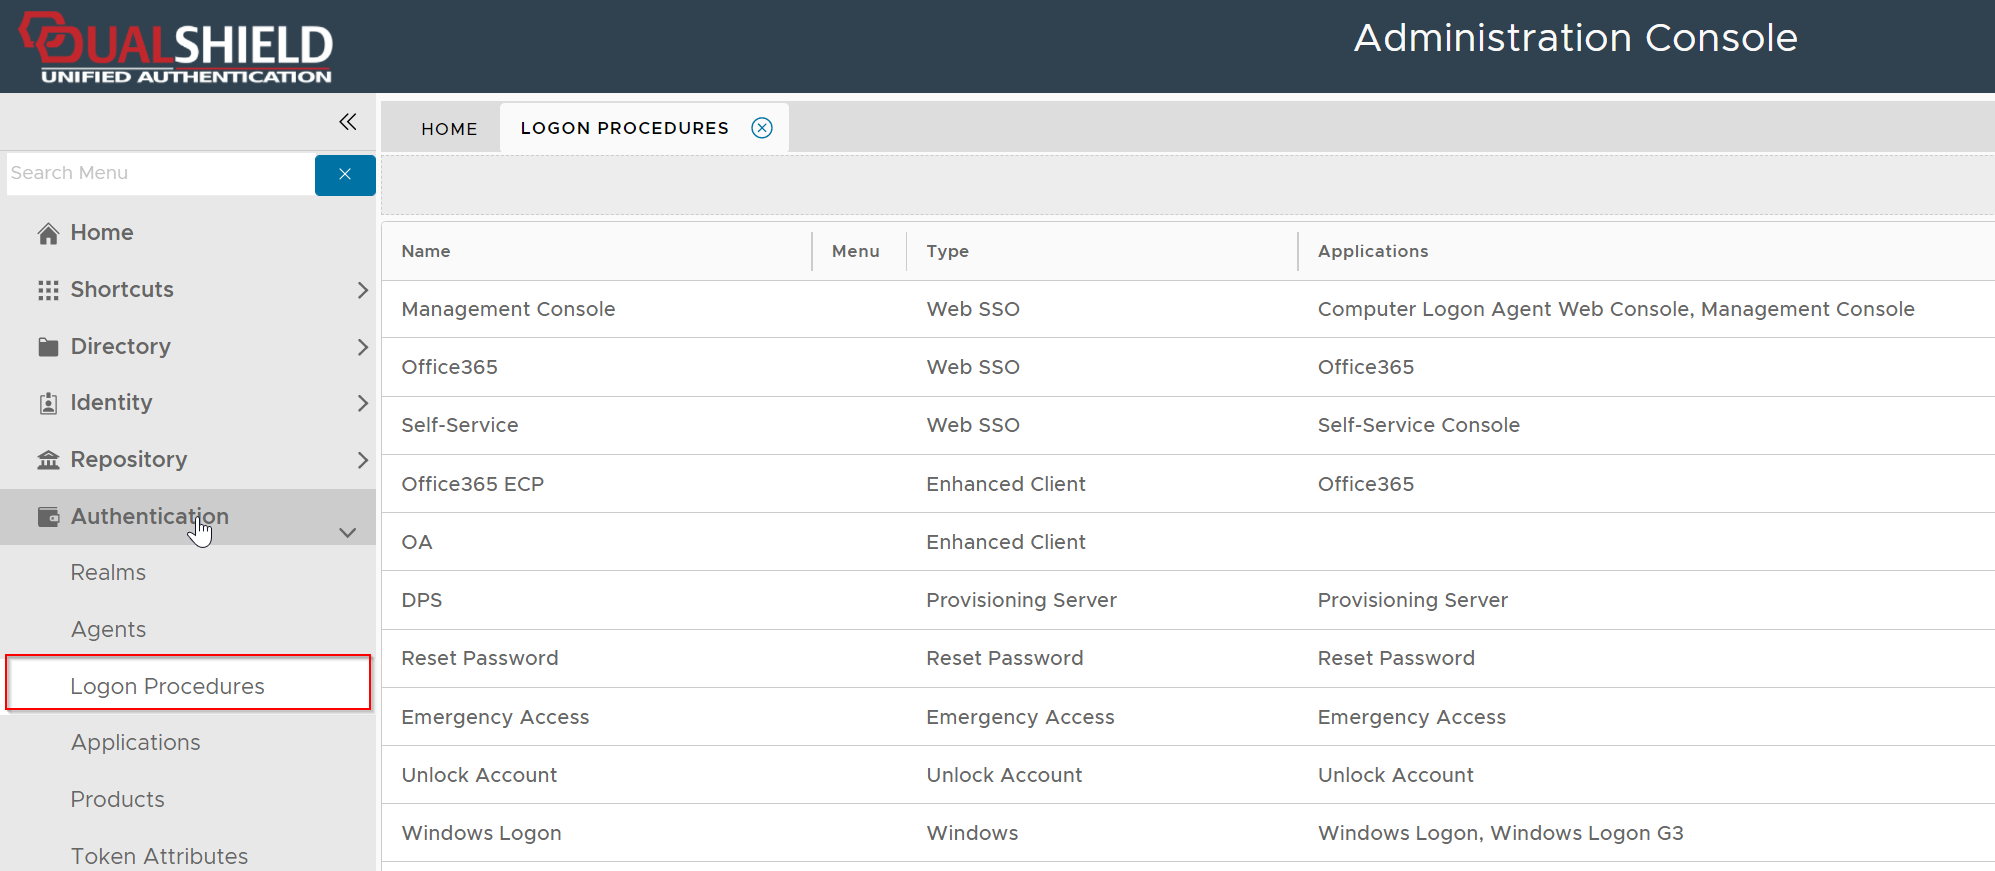
Click the context menu icon "..." of the application to be edited, e.g. "Office 365"
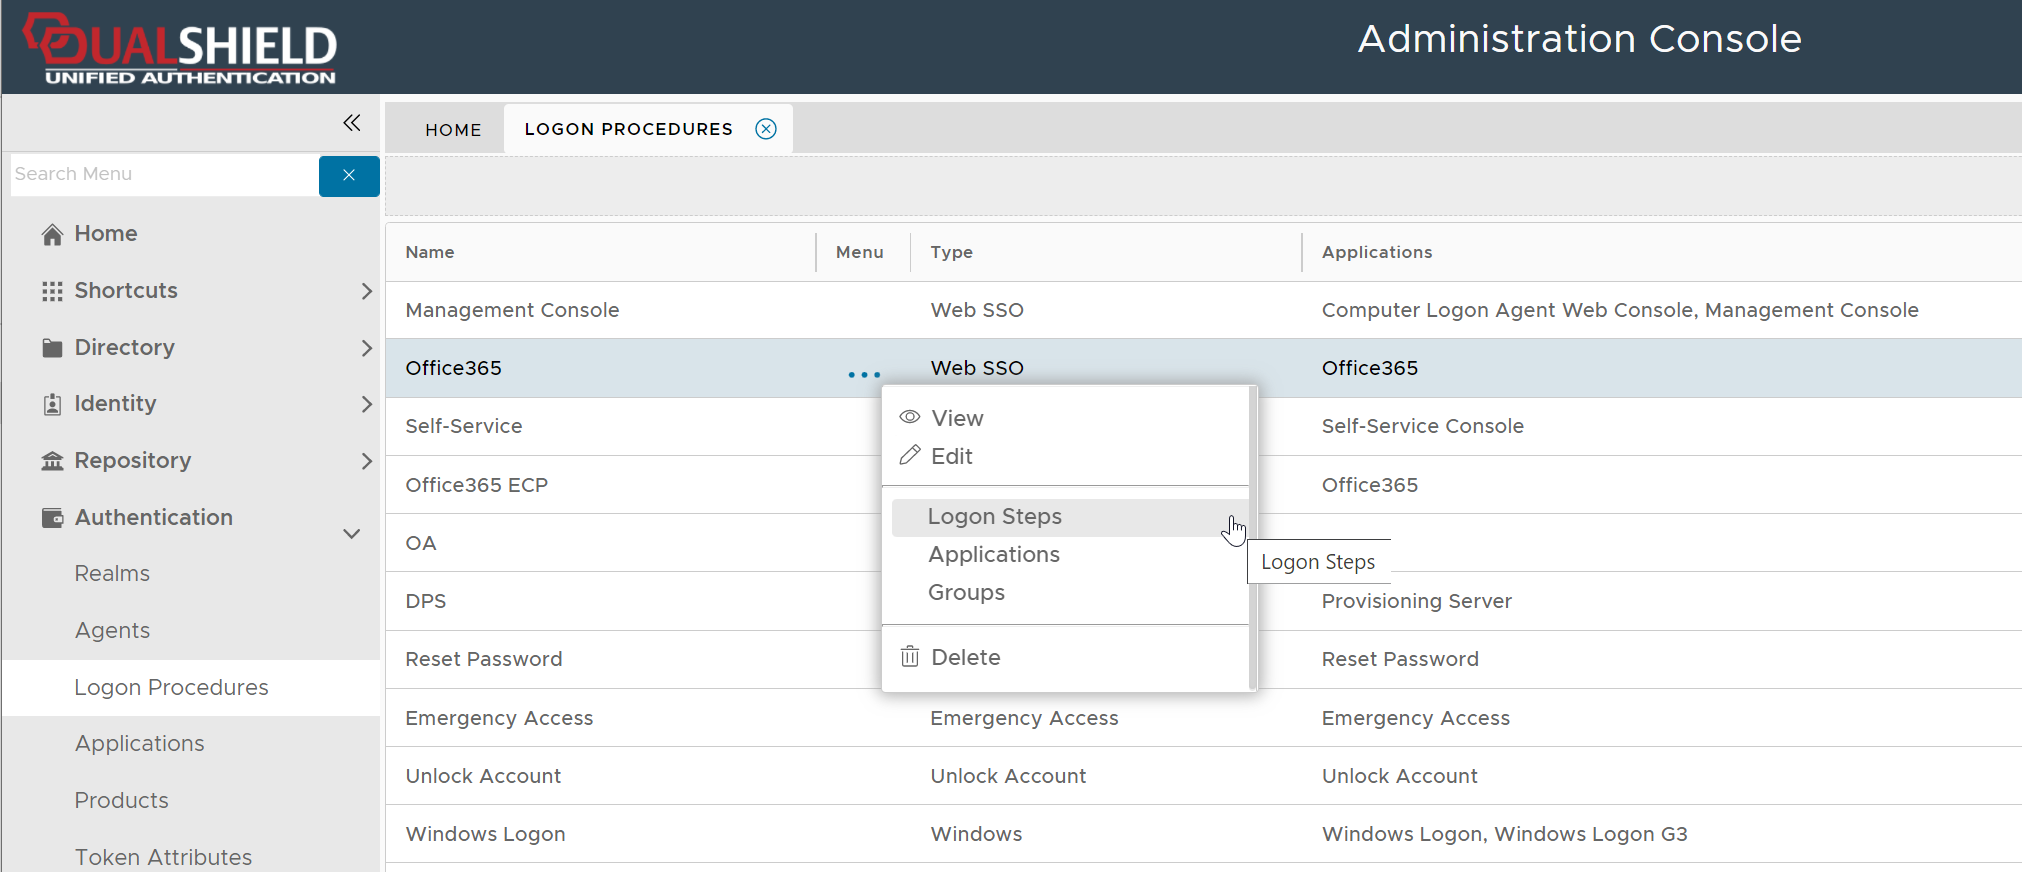
select "Logon Steps" to bring up the logon steps editor

To add a logon step, click the "ADD" button
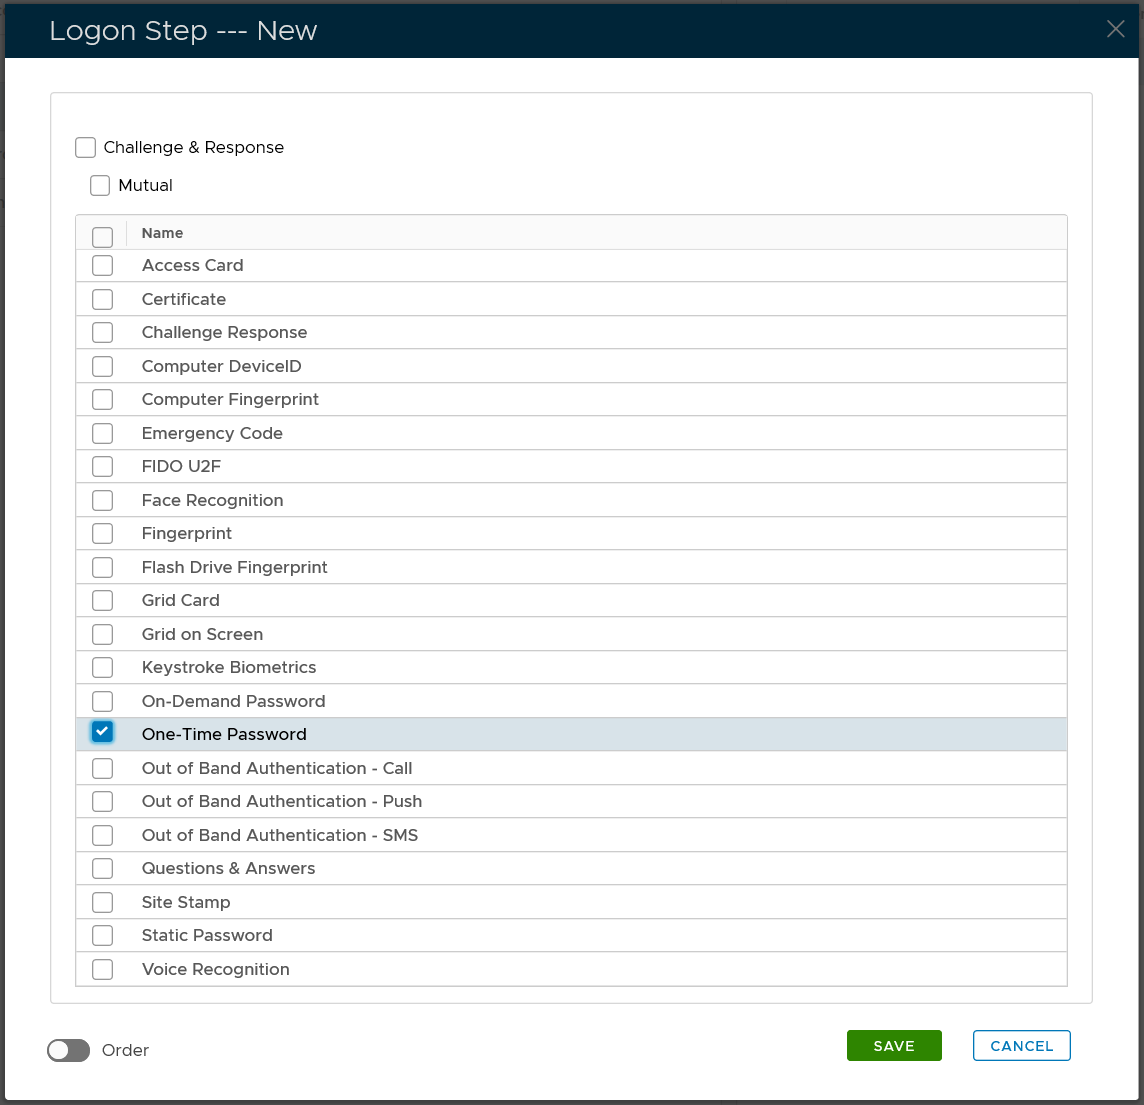
Select the one or multiple authentication methods that you want to add to this step, e.g. "One-Time Password"
Click the "SAVE" button to save it

You can change the order of the steps by clicking the "UP" and "DOWN" buttons.
Navigate to Authentication | Logon Procedures

Click the context menu icon "..." of the application to be edited, e.g. "Office 365"

select "Logon Steps" to bring up the logon steps editor

To add a logon step, click the "ADD" button

Select the one or multiple authentication methods that you want to add to this step, e.g. "One-Time Password"
Click the "SAVE" button to save it

You can change the order of the steps by clicking the "UP" and "DOWN" buttons.
Next, you need to create an application

Select "CREATE" on the toolbar

Select the Realm to be linked to this application, e.g. Deep.Net
Select the Logon Procedure to be used by this application, e.g.. Office 365
Click "SAVE" to save the application.

Finally, you need to publish the application on an authentication agent so that the application will be visible to users and accessible by the users.

Click the context menu icon "..." of the application, e.g. "Office 365" to access its context menu

select "Agents" in the context menu
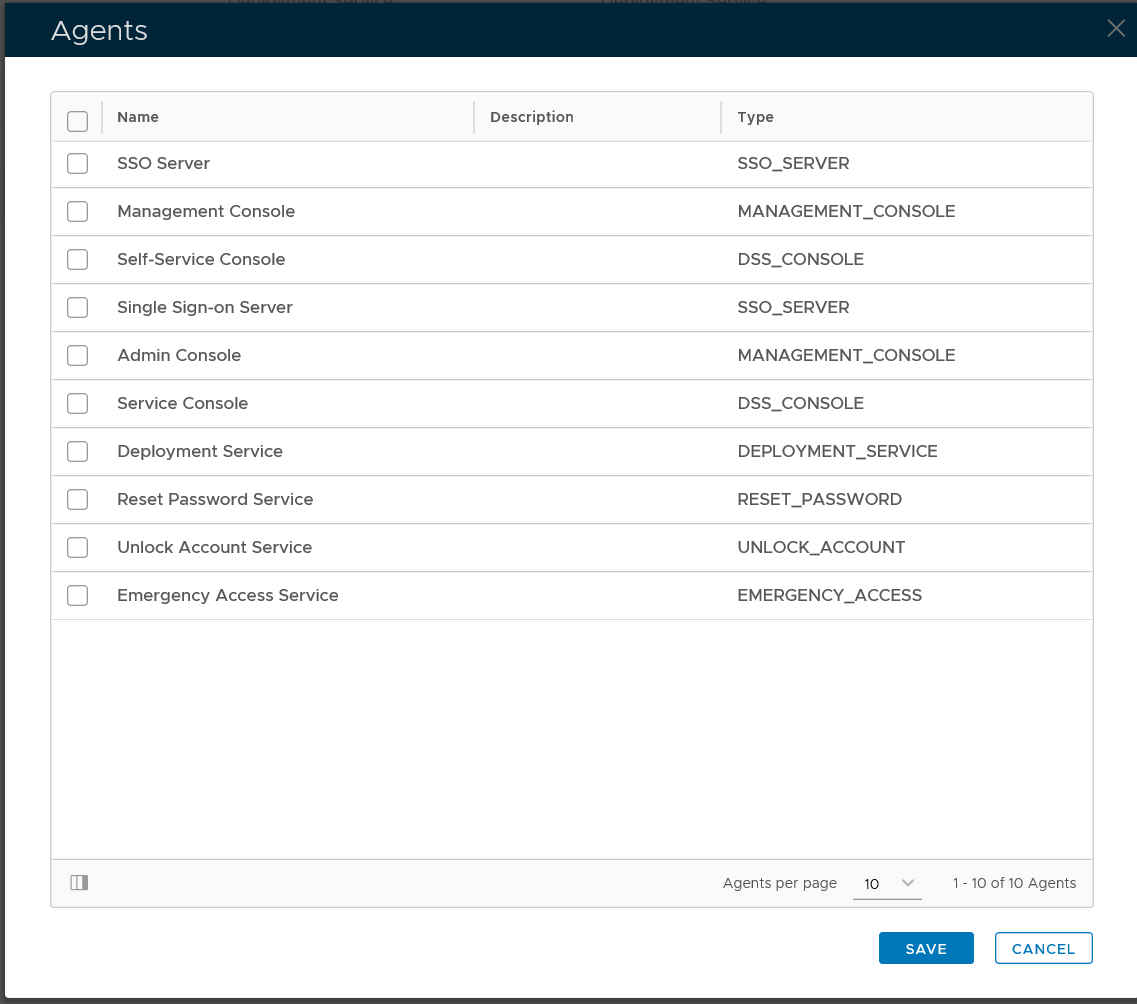
select the authentication agent on which the application is to be published, e.g. "Single-Sign-on Server"

Click "SAVE" button to save the settings

By default, a newly created application inherits its logon policy from the default system logon policy. It is optional but recommended that you should create a dedicated logon policy for the application so that you can have a clear and granular control on how 2FA or MFA should be enforced on users who are allowed to access the application.
Select "Administration | Policies" on the side panel,

To create a new policy, click the "CREATE" button on the toolbar to open the policy editor window.
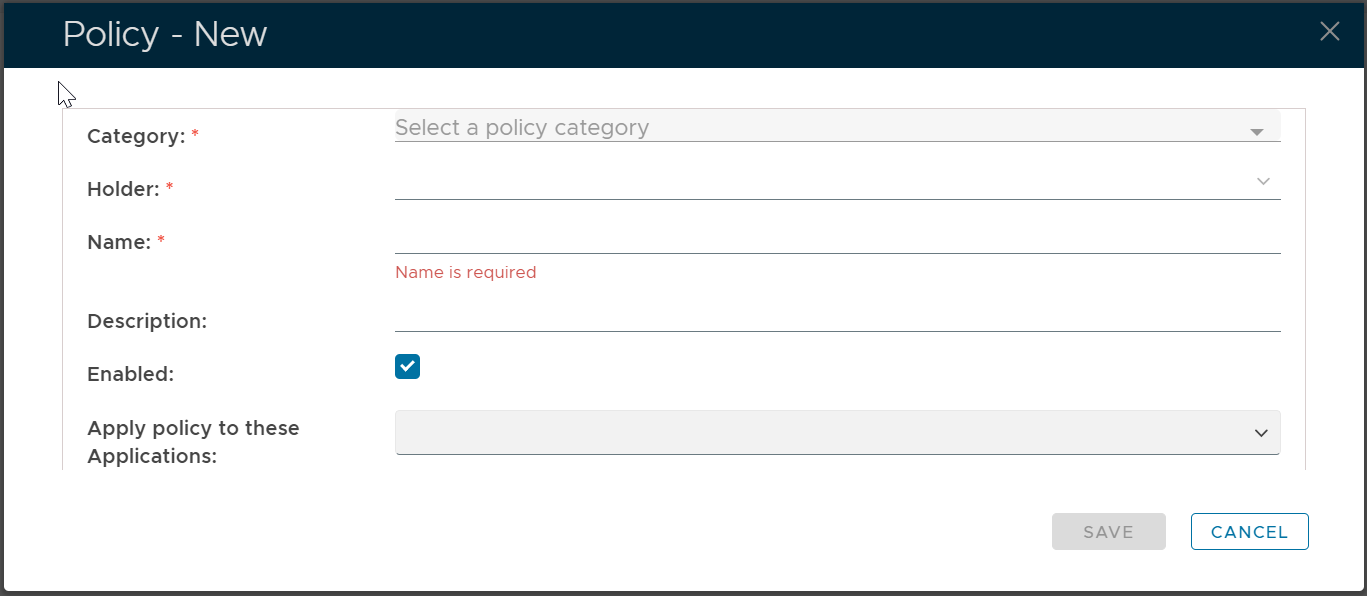
In the policy editor, firstly select Logon from the Category drop-down list
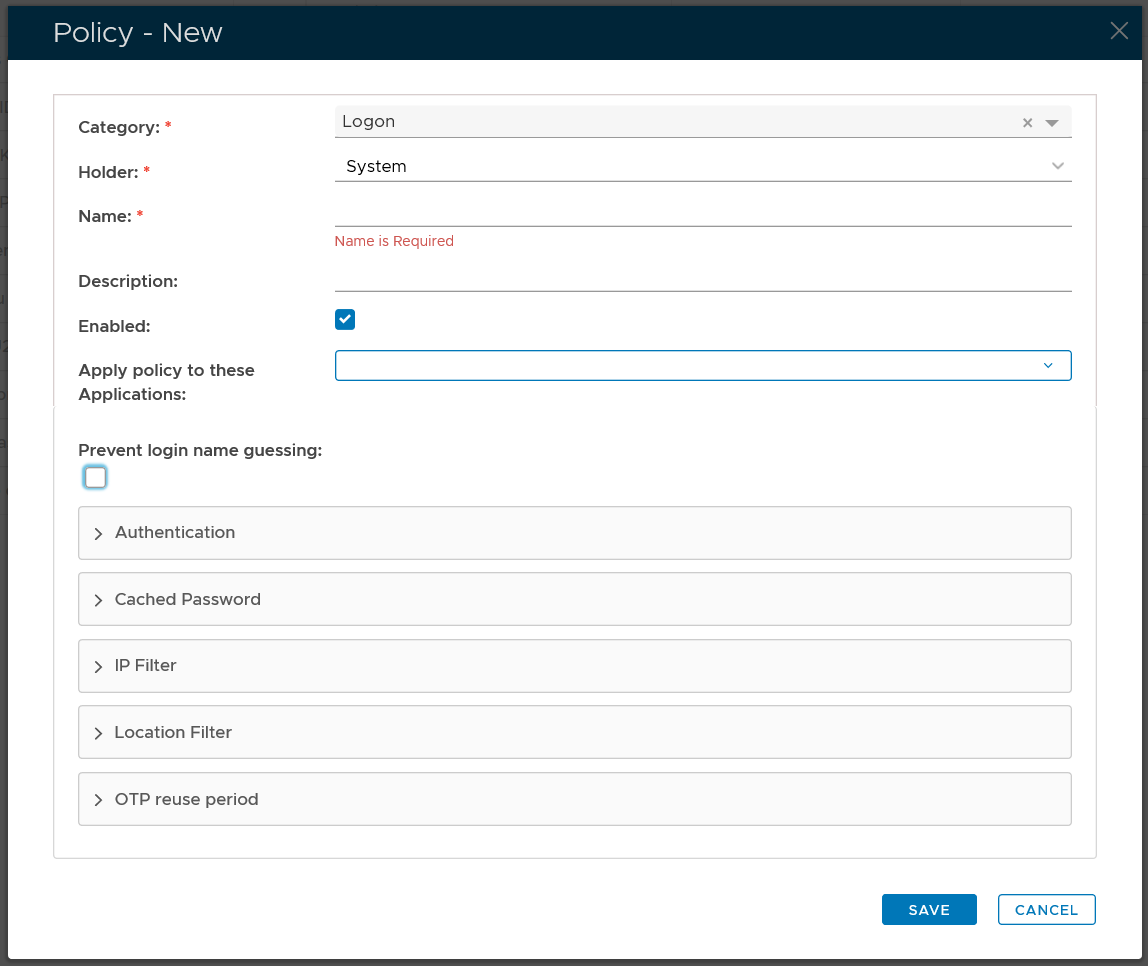
Policy Bindings
| Holder: | The policyholder defines the scope of the policy.
|
| Name: | A unique name that describes this policy |
| Applications: | Optionally, you can bind the policy to a specific application or a list of applications. To specify the application(s), select the field: Apply policy to these applications If the field Apply policy to these applications is left empty, then the policy will be applied to all applications. |
Policy Options
Editing the Logon Policy
Logon policy settings can be edited using the following procedure;
- From the Home page of the Management Console, left click on the menu item "Administration", select "Policies", then in the new tab "POLICIES", select the category "Logon", then click the
 button;.
The Logon policy settings can now be viewed (or edited) by left clicking on the context menu of the Logon policy, then selecting either "View" or "Edit";

After editing the policy setting, a new window titled "Policy - Edit" will open that can be used to edit the policy settings;

The category for this policy is "Logon" (this property cannot be edited).
The holder of this policy is "System" (this property cannot be edited).
The name assigned to identify the Logon policy by the System Administrator.
The System Administrator may use this field to annotate this policy.
This option allows the System Administrator to enable or disable this policy.
Expandable Sections
The remaining policy settings are grouped into the following expandable sections;
- The purpose of the section "Authentication" is to provide the system administrator with with policy settings that determine when multi-factor authentication is required.


This setting determines if user authentication is required when logging in;
- Multi-factor authentication is not required for all users
This option means that all users will be exempted from 2FA or MFA. This option is typically used to exempt a group of users from 2FA or MFA. - Multi-factor authentication is required for users with tokens only
This option means that users who have a 2FA/MFA token in their account will be enforced to login with 2FA/MFA, while those users who do not have a token 2FA/MFA token will be exempted from 2FA/MFA in the logon process. .
- Multi-factor authentication is required for all users
This option means that all users will be enforced to login with 2FA/MFA
Please note that users in the context of a policy include users in the scope of the policy only, i.e. the policy holder.
This option allows the administrator to specify if authentication can be skipped on subsequent logon attempts (for the specified length of time).
If this value is set to zero, then the feature is disabled, and authentication skipping does not take place.

If authentication skipping is enabled, this setting will determine if the password is kept (and the second factor skipped), or if all factors are skipped;
- Skip the second factor and keep the password
The second factor is skipped, but the password is kept. - Skip Al factors including the password
All factors are skipped.
If this checkbox is ticked, then name guessing will be prevented (the user will not be informed if the username he supplies is known).
if this checkbox is enabled then a CAPTCHA will be presented during logon (to ensure a human is supplying the authentication factors).
- Multi-factor authentication is not required for all users
- The purpose of the section "IP Filter" is to specify when to allow or deny logon based on the users' IP address.


This setting determines if user authentication is required when logon attempts are made from the specified IP address;
- required
If this option is selected, then the user will be asked to provide multi-factor authentication prior to logging on. - not required
f this option is selected, then the user will not be asked to provide multi-factor authentication prior to logging on..
This option is used to store the IP Address range that will be subject to the previous option.
Single IP address or IP ranges, e.g. 192.168.0.1; 192.168.0.10-192.168.0.20
- IP with proxy: 1.2.3.4[192.168.0.254],
- IP range with proxy: (1.2.3.0-1.2.3.255)[192.168.0.254],
Note: 192.168.0.254 is the proxy server
- required
- The purpose of the section "User Agent Filter" is to specify when to allow or deny logon based on the agent used by the user agent.


This setting determines if user authentication is required when logon attempts are made the matching agent;
- required
If this option is selected, then the user will be asked to provide multi-factor authentication prior to logging on. - not required
f this option is selected, then the user will not be asked to provide multi-factor authentication prior to logging on..
This setting allows you to list the agents that this policy will apply to;;

The user agent are listed ass a text string (regular expressions are supported).
e.g. (MacOutlook|Apple-iPhone6C) will match both "MacOutlook" and "Apple-iPhone6C"
- required
- Unable to render {include} The included page could not be found.
- The purpose of the section "Geo Location Filter" is to specify when to allow or deny logon based on the geographic location of the user.


This setting determines if user authentication is required when logon attempts are made from the specified IP address;
- required
If this option is selected, then the user will be asked to provide multi-factor authentication prior to logging on. - not required
f this option is selected, then the user will not be asked to provide multi-factor authentication prior to logging on..

After clicking on the
 icon the following window will open;
Location details are then supplied that identify the which geographic locations the policy will apply to during logon. (based up IP addresses).
- required
- The purpose of the section "Geo Location Filter" is to specify when to allow or deny logon based on the geographic location of the user.


This setting determines if user authentication is required when logon attempts are made from the specified IP address;
- required
If this option is selected, then the user will be asked to provide multi-factor authentication prior to logging on. - not required
f this option is selected, then the user will not be asked to provide multi-factor authentication prior to logging on..

After clicking on the
 icon the following window will open;
Location details are then supplied that identify the which geographic locations the policy will apply to during logon. (based up IP addresses).
- required
- The purpose of the section "Others" is to provide logon policy settings that don't fit into the other main sections.

This options determines if passwords can be cached in the browser.
When set to a non-zero value this policy setting will allow One-Time Passwords to be reused within the specified number of minutes.
If selected, this checkbox will ensure that the last used login name is remembered on the local client after the user has logged in.
If selected, this checkbox will ensure that the last used login method is remembered on the local client after the user has logged in.
- No labels
