The Deepnet Authentication Server has provided support for multiple SMS providers offering flexible customisation options together with the provision to support additional SMS providers (as an example, you might want to add a local SMS provider in order to reduce service charges). Whilst customisation requirements can vary between SMS providers, there are usually several aspects that they share in common, and adding new providers can often be as simple as adapting an existing SMS template from a similar provider.
In the following example, we will demonstrate one approach that may be used, but given the variety of solutions that may be required, it should be pointed out that configuring some providers may involve a lot more work and investigation, however we are on hand to assist if configuring the provider proves more challenging than expected.
The first step in setting up an SMS provider is usually to create an account with the provider, then obtain their SMS API documentation (please also ensure that you identify what protocol they are using, HTTP, SMTP, or SMPP etc.).
The next step would normally be to examine the built-in SMS provider templates that were installed into the folder "$INSTALL_PATH/Deepnet DualShield/smsproviders" :
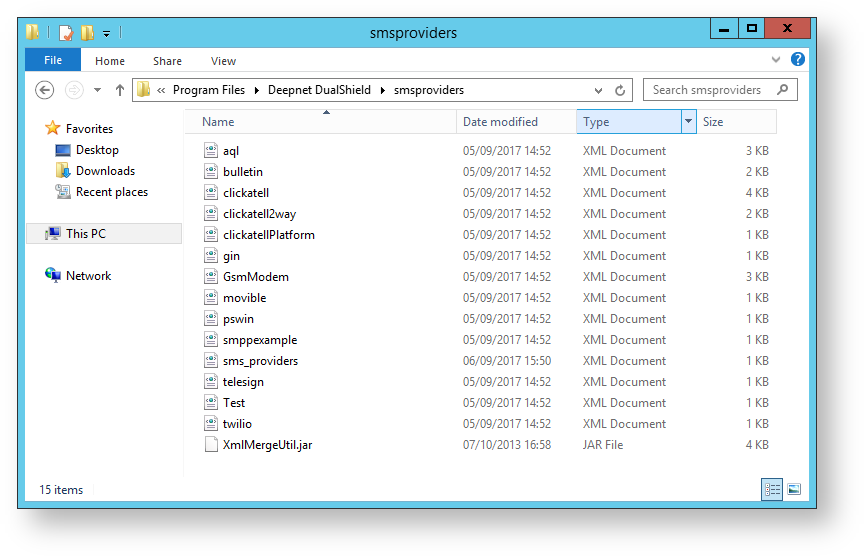
If you find a good match with the provided templates then configuring the new provider should be relatively straightforward.
As an example, let us assume that you are going to use "txtmail.co.nz" as your SMS provider in DualShield. This company provides SMTP protocol, so we copy the built-in provider "gin.xml" which uses SMTP as well, and save the new file as "txtmail.xml", open the file "txtmail.xml" and change the provider name etc. Once this is done, the file content should look like as the following;
<?xml version="1.0" encoding="UTF-8"?>
<provider name="txtmail">
 <sms>
 <smtp>
 <email>${to}@txtmail.co.nz</email>
 <format>text</format>
 <from>${from}</from>
 <subject>${subject}</subject>
 <body><![CDATA[${text}]]></body>
 </smtp>
 </sms>
</provider>
Finally, add an entry in the file "sms_providers.xml",
<provider name="TXTMail" file="txtmail.xml" />
Access the management console of DualShield, you should see the newly added provider in SMS Gateway Settings. You should now restart DualShield service for it to take effect.
The following example, "mollie.nl", will send SMS via HTTP.
Accrding to its API document, the syntax of sending the request is,
http://www.mollie.nl/xml/sms/?username=[username] &password=[password]&originator=[originator]&recipients=[recipient(s)]&message=[message]
And the response is something like
<?xml version="1.0" ?>
<response>
 <item type="sms">
 <recipients>1</recipients>
 <success>true</success>
 <resultcode>10</resultcode>
 <resultmessage>Message successfully sent.</resultmessage>
 </item>
</response>
As it is a HTTP protocol, you can refer to the built-in template ClickAtell. The response is XML format, so you can use xmlPath to extract the result, otherwise, you may need a regular expression which is complicated. However you can find the regular expression example in the built-in templates. The final mollie template would be
<provider name="Mollie">
 <sms>
 <http>
 <method>GET</method>
 <url>http://www.mollie.nl/xml/sms/</url>
 <query>username=${userName}&password=${password}&originator=${from}&recipients=${to}&message=${body}</query>
 <variables>
 <variable name="flash"/>
 <variable name="dlr_url"/>
 </variables>
 <mappings>
 <mapping name="replace_sms" type="boolean">
 <true>1</true>
 <false>0</false>
 </mapping>
 </mappings>
 <response type="http_body" regexp="true" format="xml">
 <pattern success="true" xmlPath="//response/item/success">true</pattern>
 </response>
 </http>
 <smtp>
 <email>${to}@mobiel.mollie.nl</email>
 <format>text</format>
 <from>${from}</from>
 <subject>username=${userName}&password=${password}&sender=${subject}</subject>
 <body><![CDATA[${text}]]></body>
 </smtp>
 </sms>
</provider>