Access control by IP is implemented by creating an "Access Control - IP" policy.
For instance, to protect against hacking attempts, you may wish to restrict access to Applications or resources for devices that are located on the internal network only.
Anybody attempting to access the Application with an IP Address on an external network / internet, will be denied.
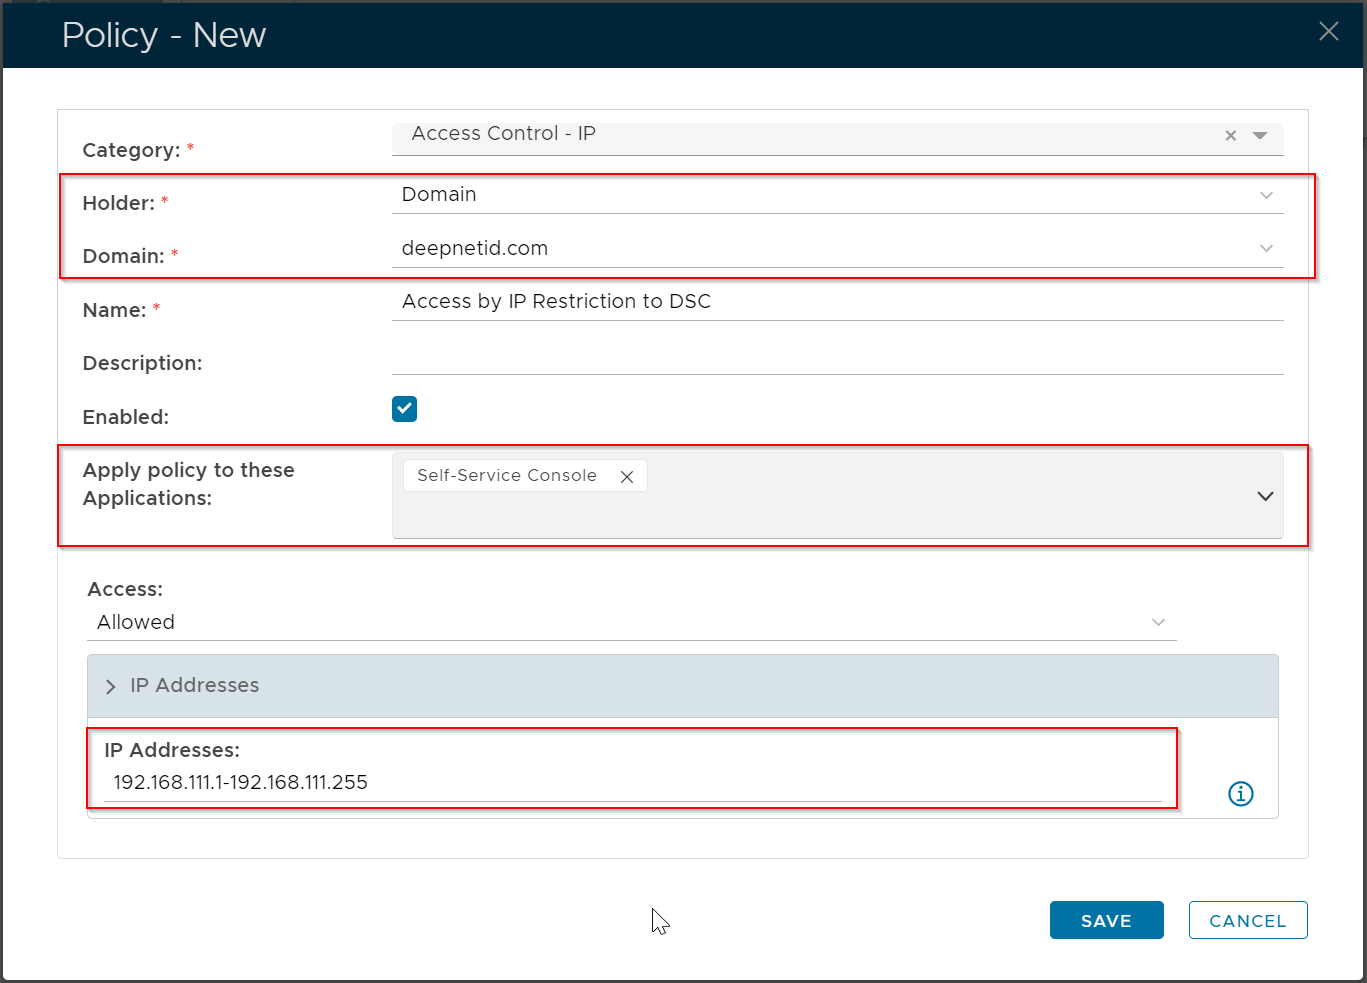
The example below creates an Access Control policy that grants all users in the domain "deepnetid.com" access to the Application "self-service console", if the IP address of the user's device is in the range of "192.168.111.1 - 192.168.111.255".
With this policy in place, if the user's device is not in the specified IP range, then the user will be denied access to the Application.
There might be scenarios where Proxy IP Addresses are also included (Proxy chain) in addition to the Client IP Address. Such as the example below:
In this case, to successfully capture the Client IP Address, you must also include the Proxy chain as part of the IP Filter. Proxy address(es) must be defined inside square brackets.
Taking the example above, the correct IP Filter would be entered as follows: 192.168.23.102 [192.168.2.200, 192.168.2.235]
Note: Port numbers might appear after the Proxy IP Address(es), like in the screenshot above. Do NOT include these in the IP Filter.
(it is possible to have Port numbers omitted from this Client IP data, updating a setting in IIS Server).
It is possible to use a wildcard for any Proxy IP addresses appearing in this list, so each Proxy address does not need to be referenced individually.
In this case enter the IP Filter using the following syntax: 192.168.23.102 [**]
There is a context Help information box available to the right of the "IP Addresses" text box, that provides additional context on IP Filter syntax.
This can be observed below, for reference: