DualShield platform includes several web consoles, namely
- DualShield Single Sign-On Portal (SSO)
- DualShield Admin Console (DAC)
- DualShield User Service Console (DSC)
- DualShield Deployment Service Console (DDS)
- DualShield Password Reset Portal (DRP)
- DualShield Account Unlock Portal (DUA)
- DualShield Emergency Access Service Portal (DEA)
All of those portals share one SSL certificate. Colloquially, it is often called "all-in-one" certificate.
If you want to renew this certificate from the step of generating CSR, then follow the guide below
Navigate to "SSO | SSO Servers".
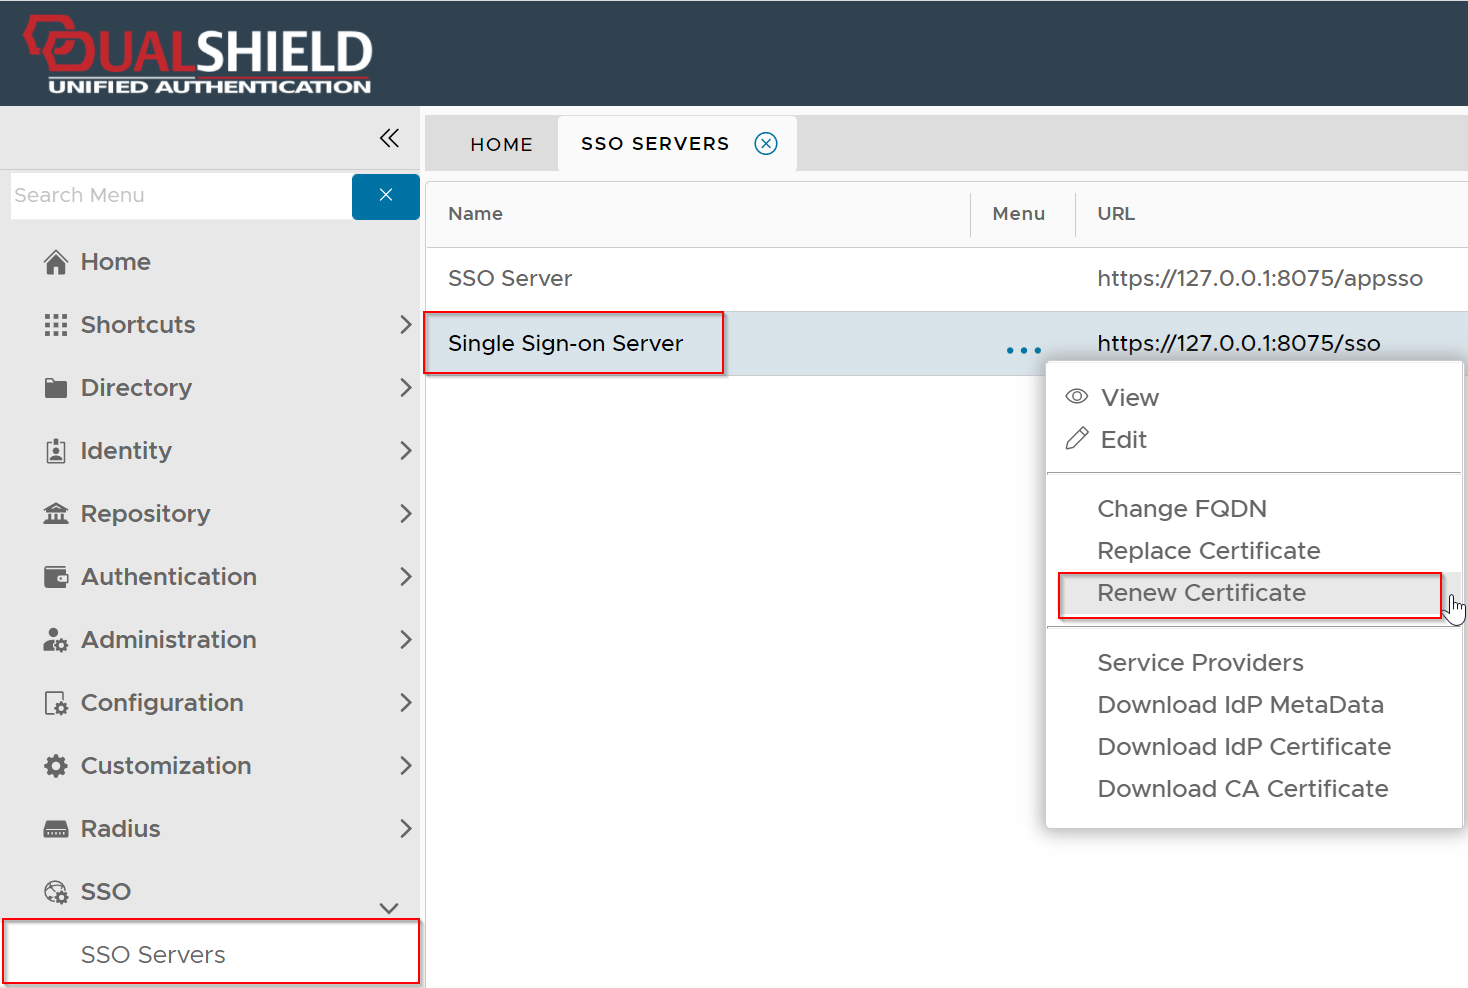
Click the context menu of "Single Sign-on Server", then select "Renew Certificate"
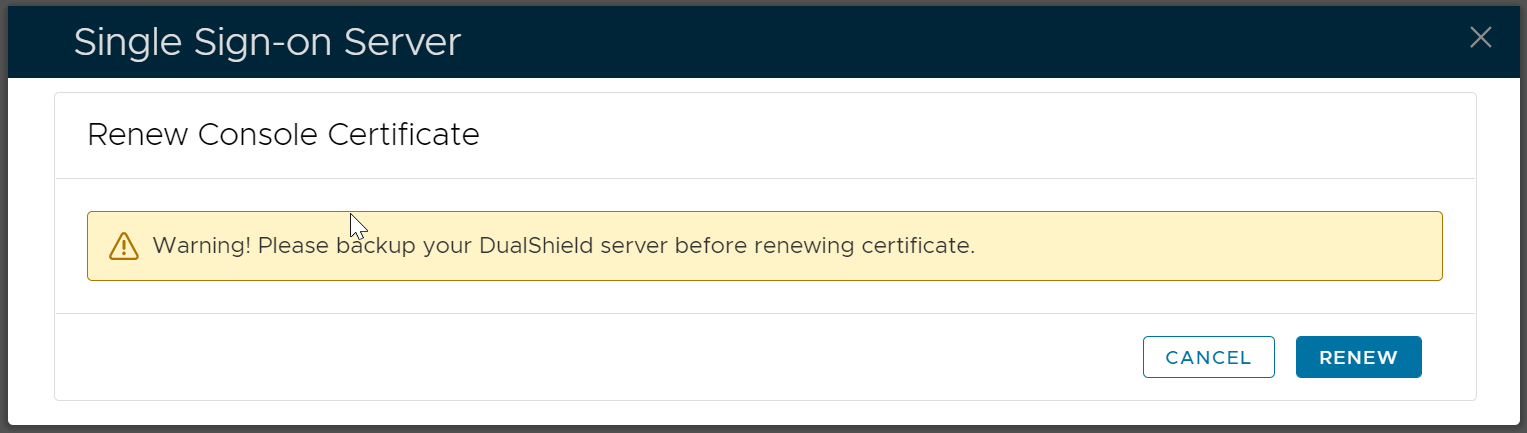
To be cautious, you might want to back up your DualShield server or take a snapshot of your DualShield VM.
Click "Renew" to start the renewal process
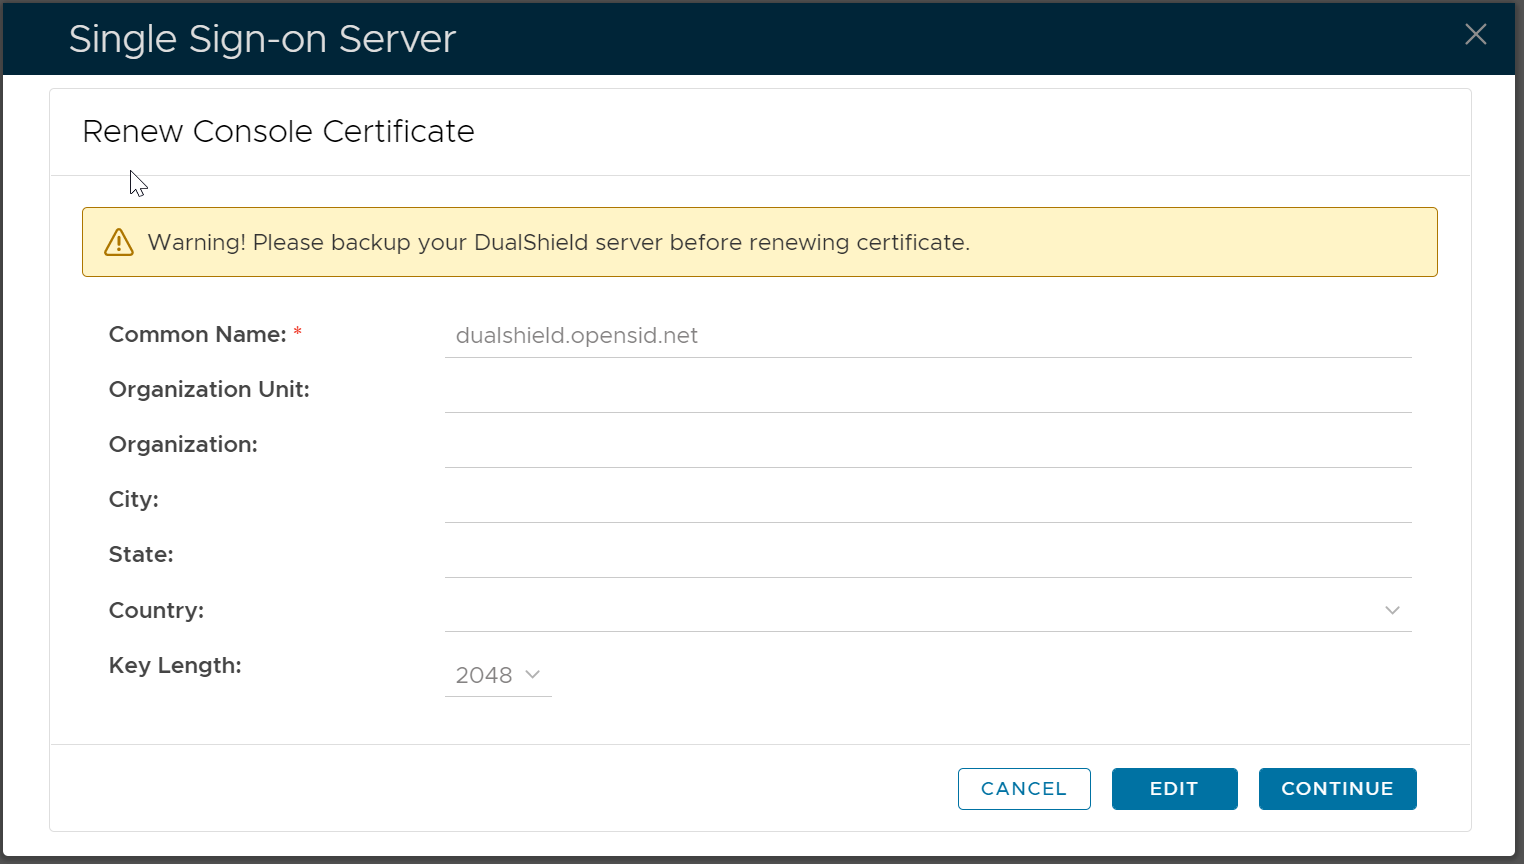
Click "Edit"
Fill out the certificate application form
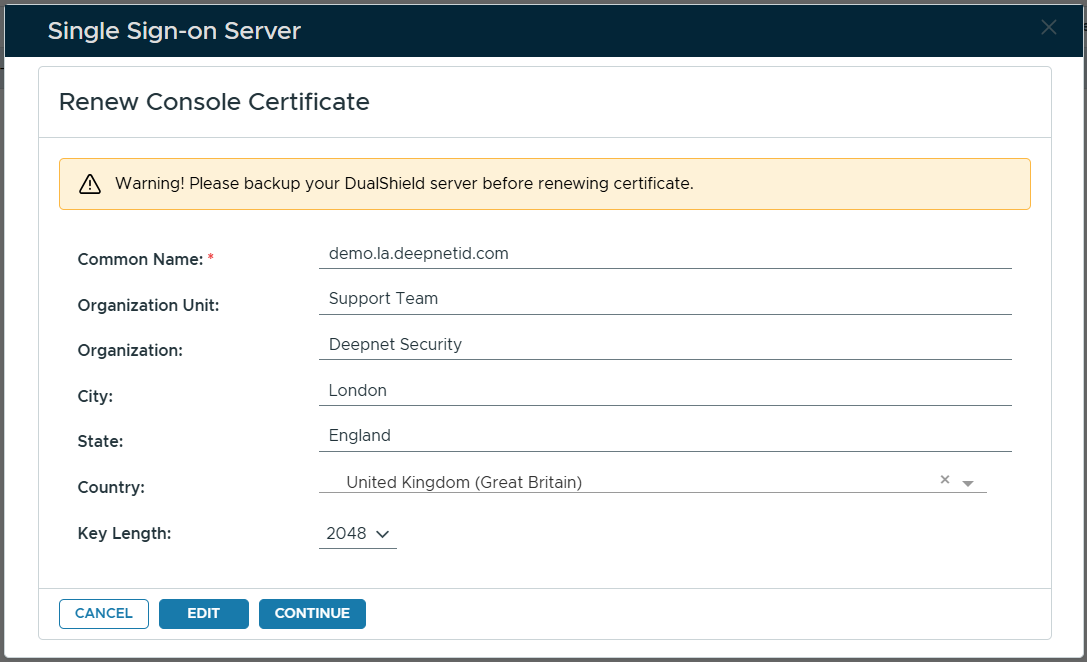
Click "Continue"
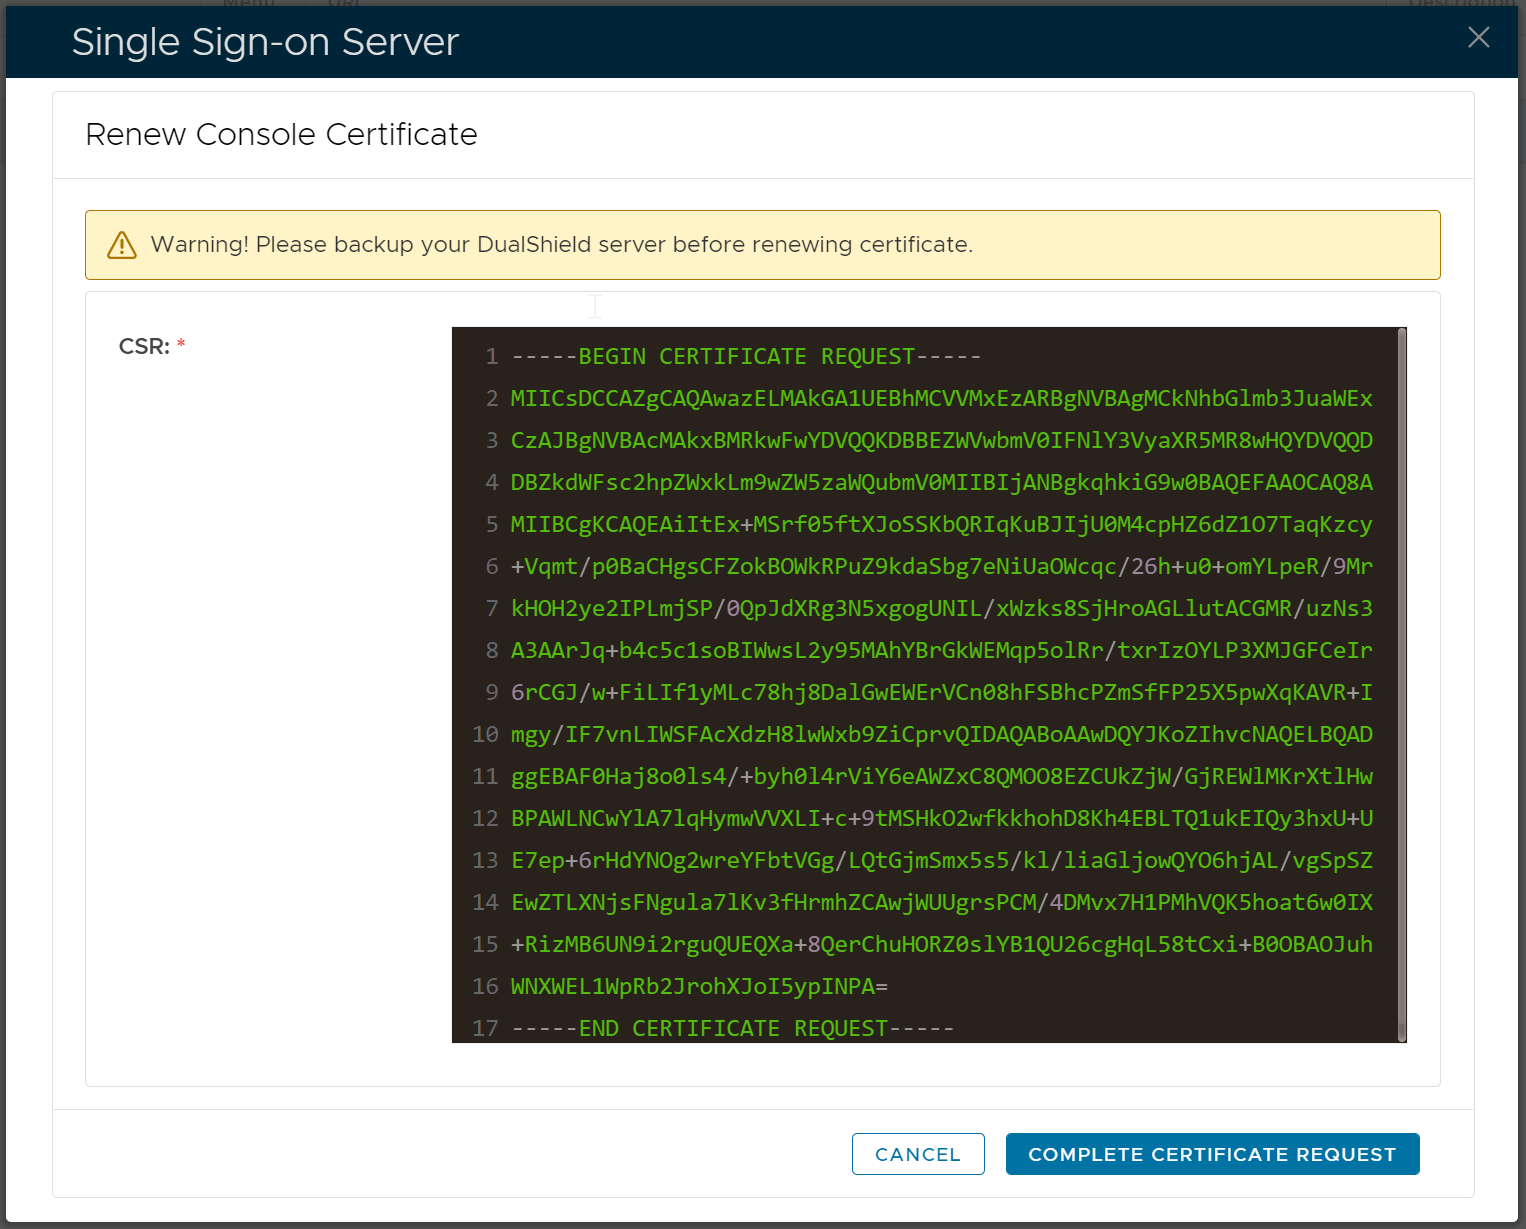
Do not click the "Complete Certificate Request" button yet.
Instead, copy the entire CSR text, and submit it to your certificate authority (CA) to apply for a SSL certificate.
If you did not copy the CSR text and clicked the "Complete Certificate Request" button, you can either cancel the process and start again, or you can retrieve the CSR text using the steps below:
Click the context menu of the newly created Certificate Signing Request
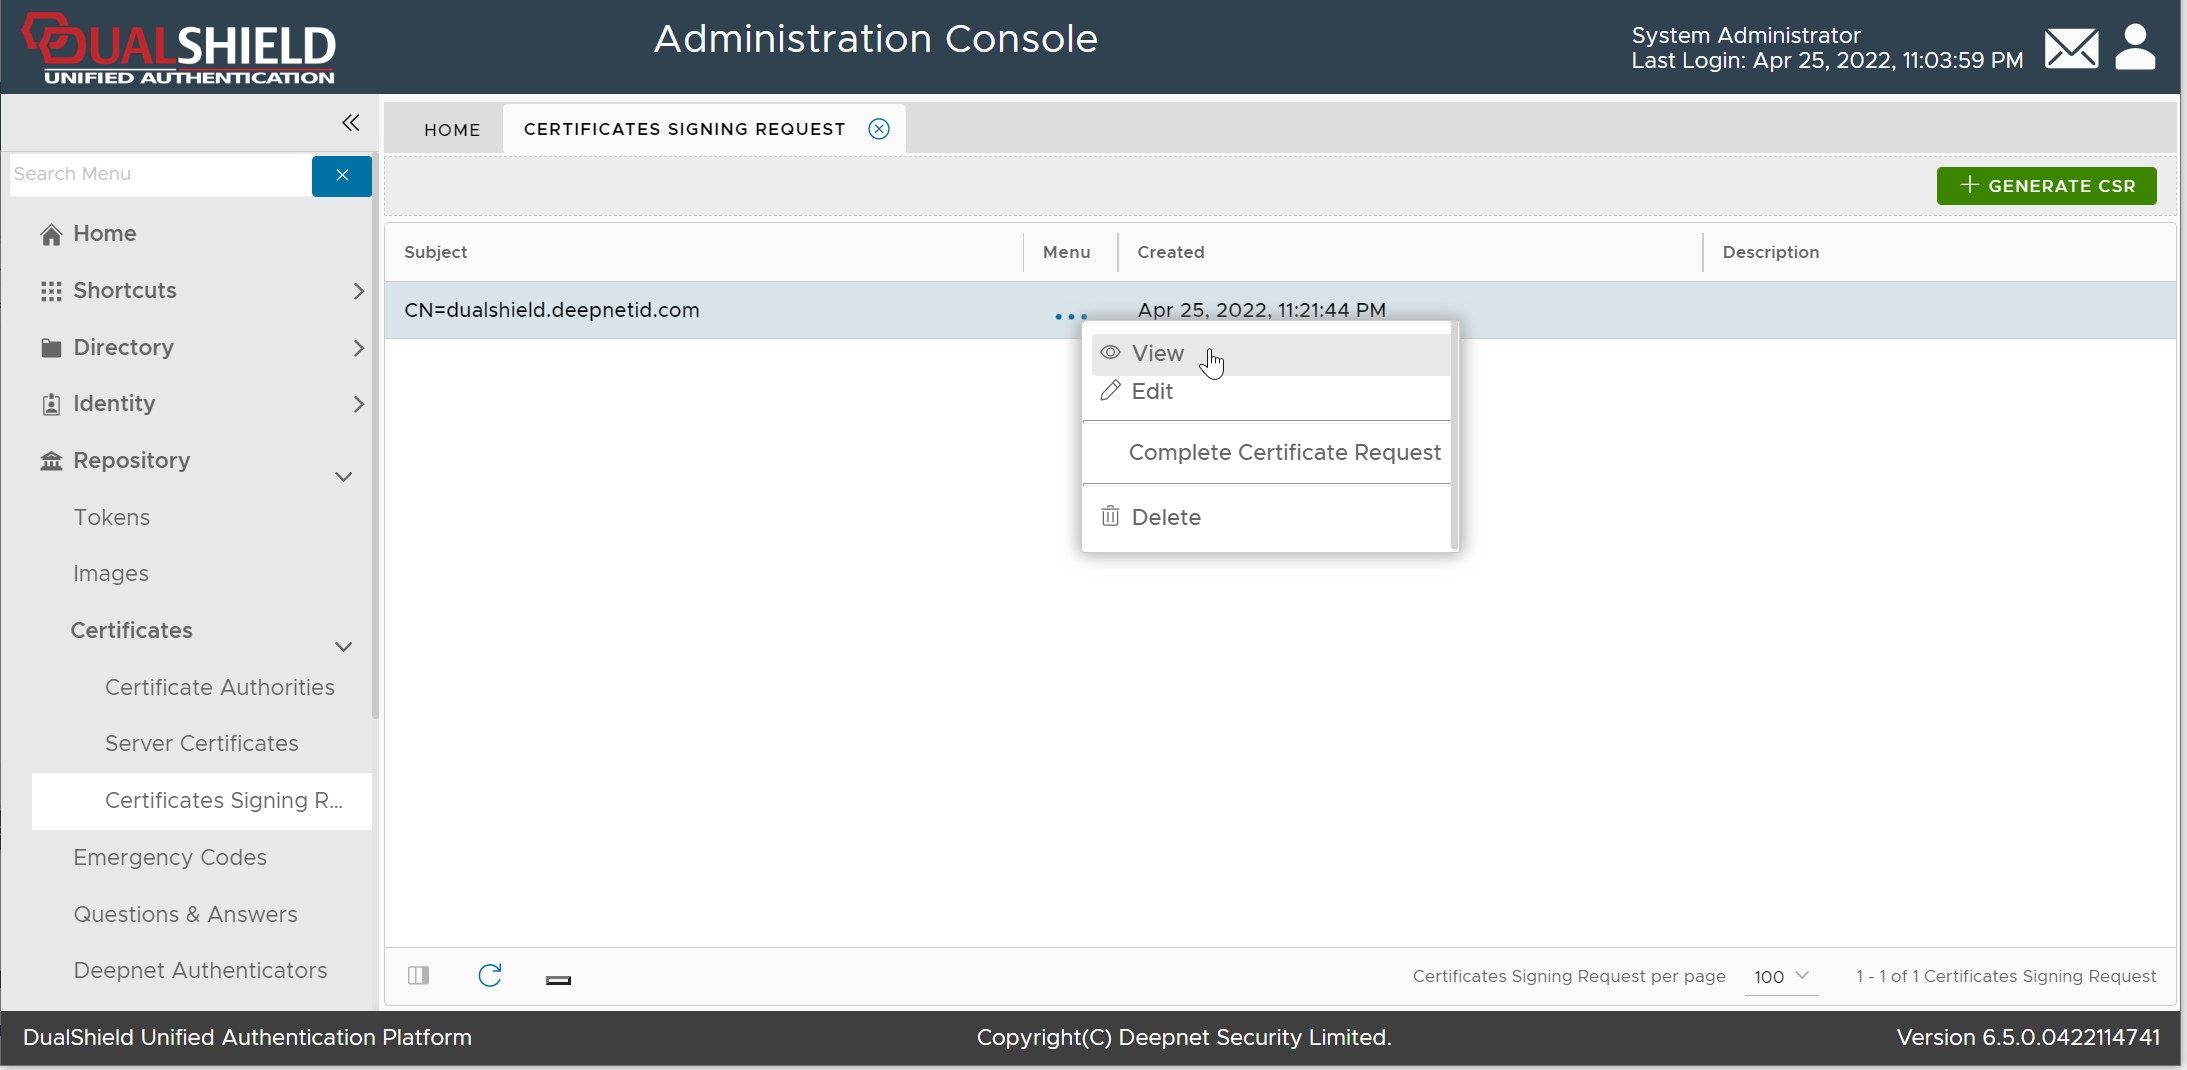
Select "View" from the context menu
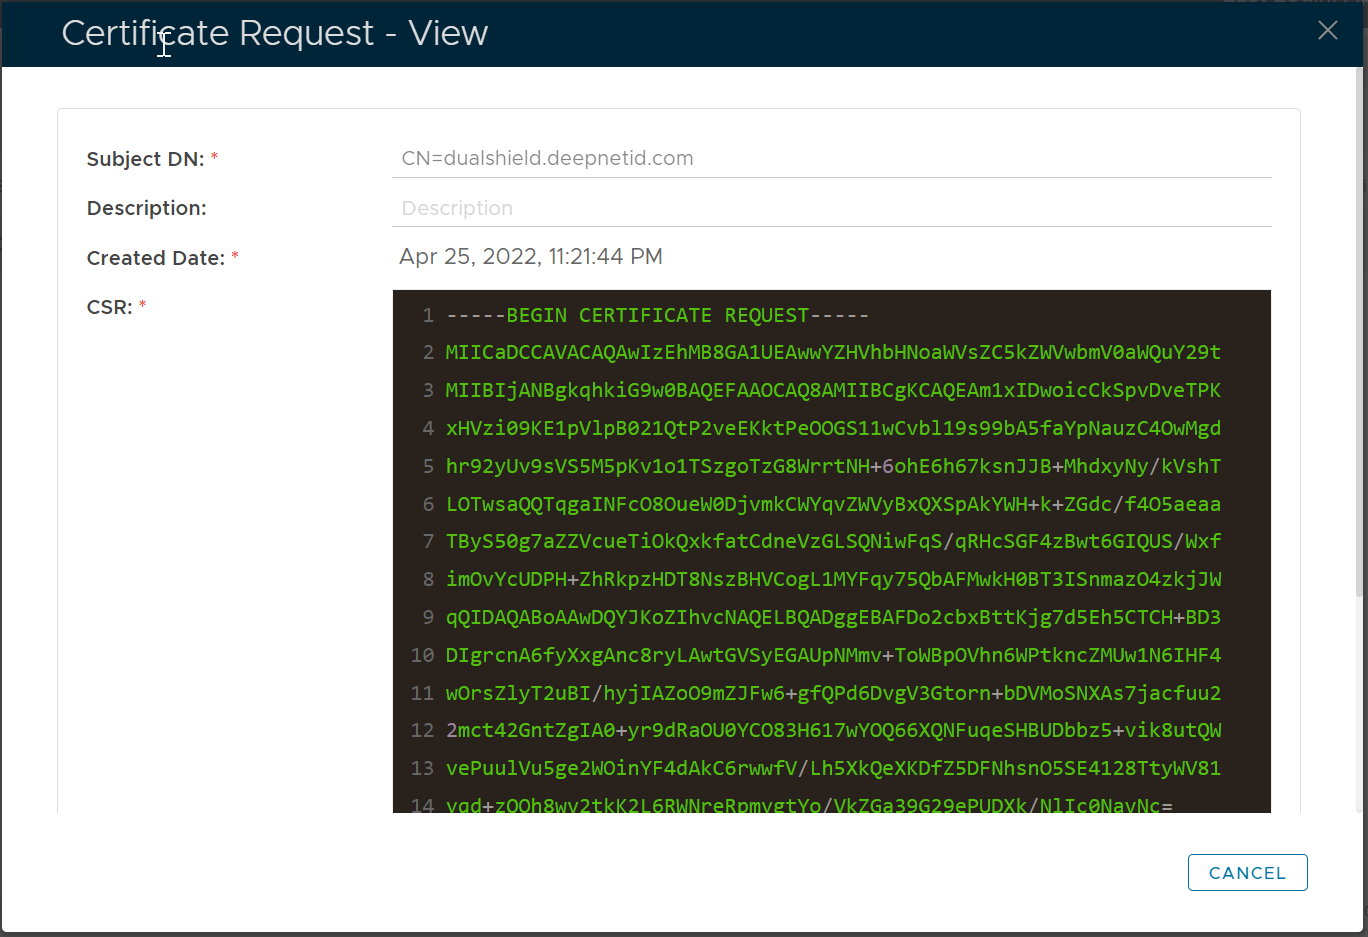
Copy the CSR text and submit it to your CA
If your CA, such as GoDaddy, has already automatically renewed your certificate, then you have to first re-key your certificate.

Once your certificate is ready, you will be able to download it.
Important!: Before downloading please check the creation date or for best results go click on 'My Certificates' on the top left then click on the newly created certificate, check the creation date, and if correct download from there.
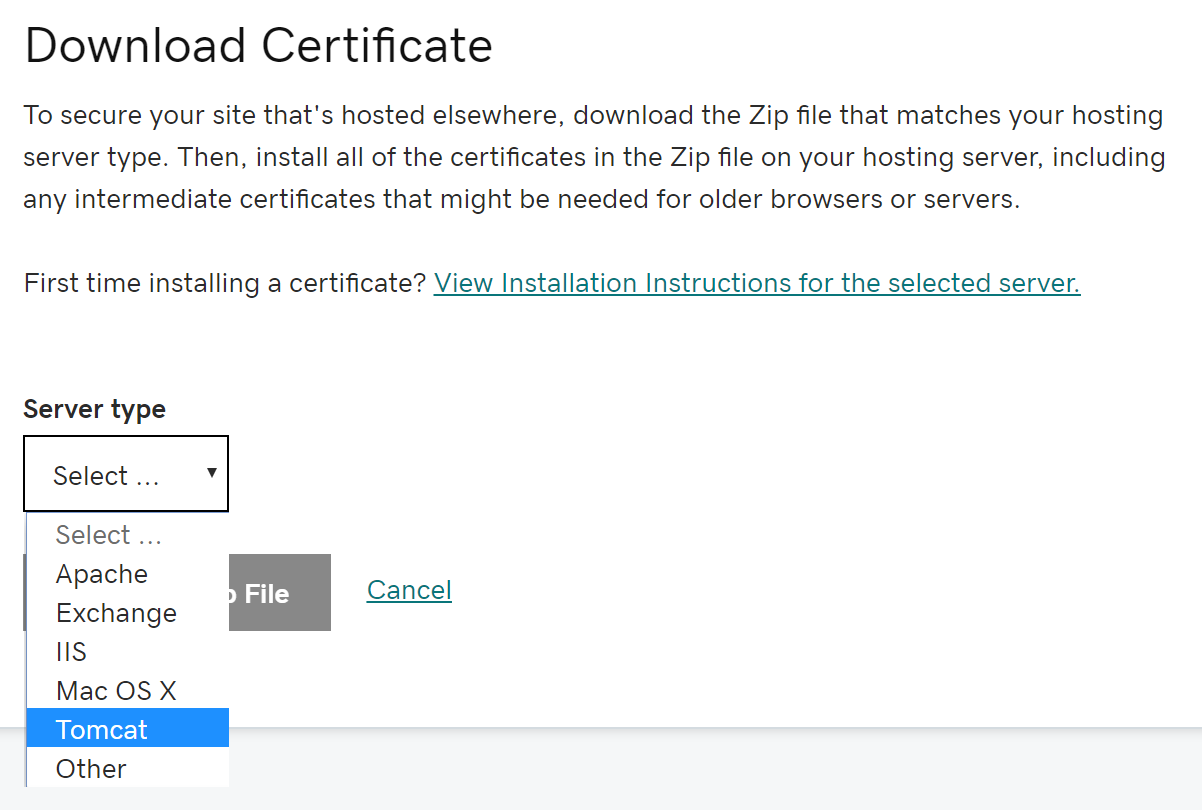
Select "Tomcat" as the Server type

Downlolad the certificate zip file, and unzip it to a folder in your hard drive:
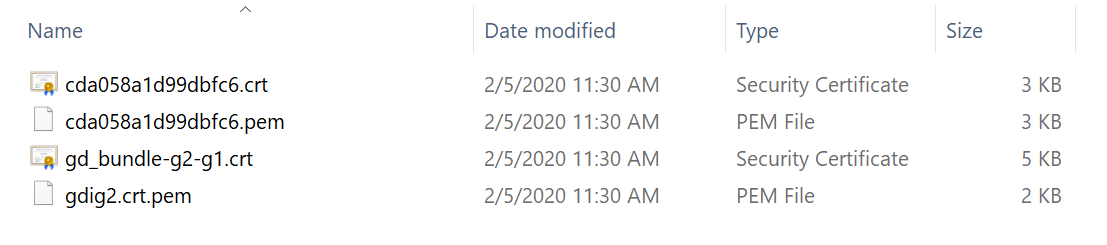
The file with the name "gd-bundle-g2-g1.crt" is the certificate of GoDaddy's intermediate CA. You can double click the file to check its content.
As soon as you have received the certificate from your CA, click the "Complete Certificate Request" button

Upload your SSL certificate file and the CA certificate if provided, then click "Save" to complete the process.
If it takes a long time to receive your SSL certificate from your CA, your DualShield console session may expire by the time you receive it. In this case, follow the steps below to complete the renewal process.
Login to your DualShield admin console
Navigate to "Repository | Certificates | Certificate Signing Requests"
Select the pending Certificate Signing Request, e.g. "dualshield.opensid.net"
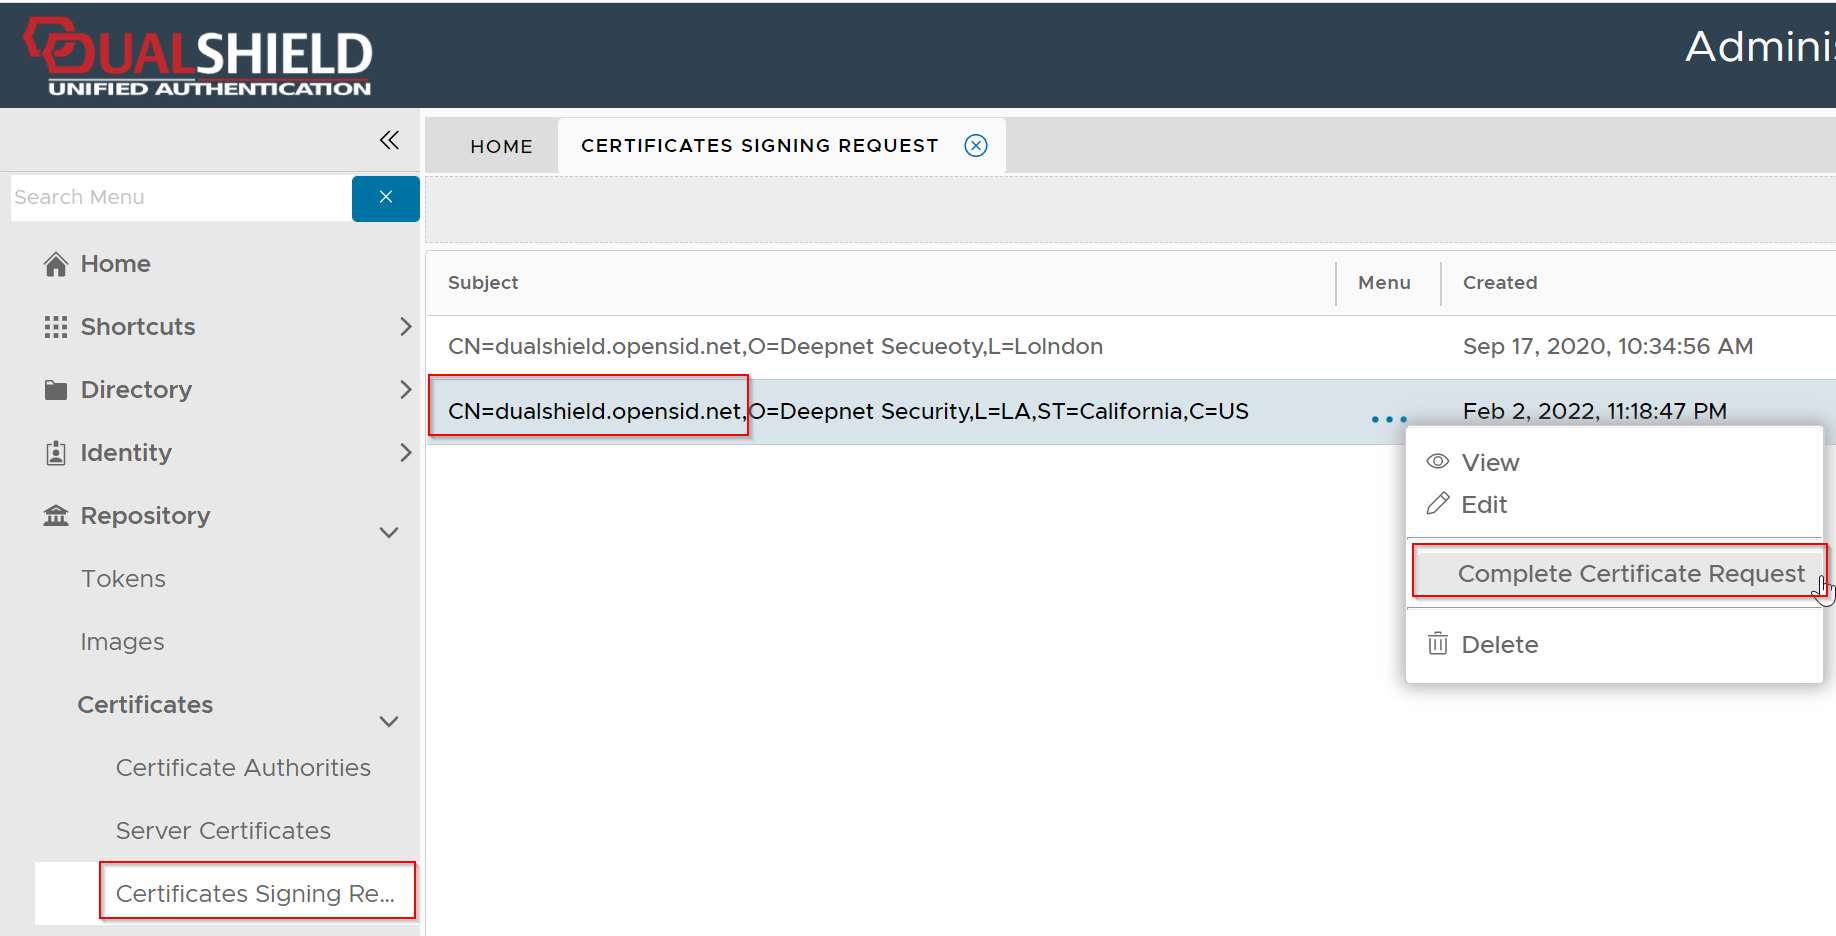
Click its context menu, then select "Complete Certificate Request"
Upload your SSL certificate file and the CA certificate if provided, then click "Save" to complete the request.
Please note that a renewed SSL certificate is usually added as a new certificate in the Server Certificates repository. Therefore, you need to apply the new SSL certificate to the SSO server
Click on the context menu icon of the server certificate that you want to apply to an SSO server.
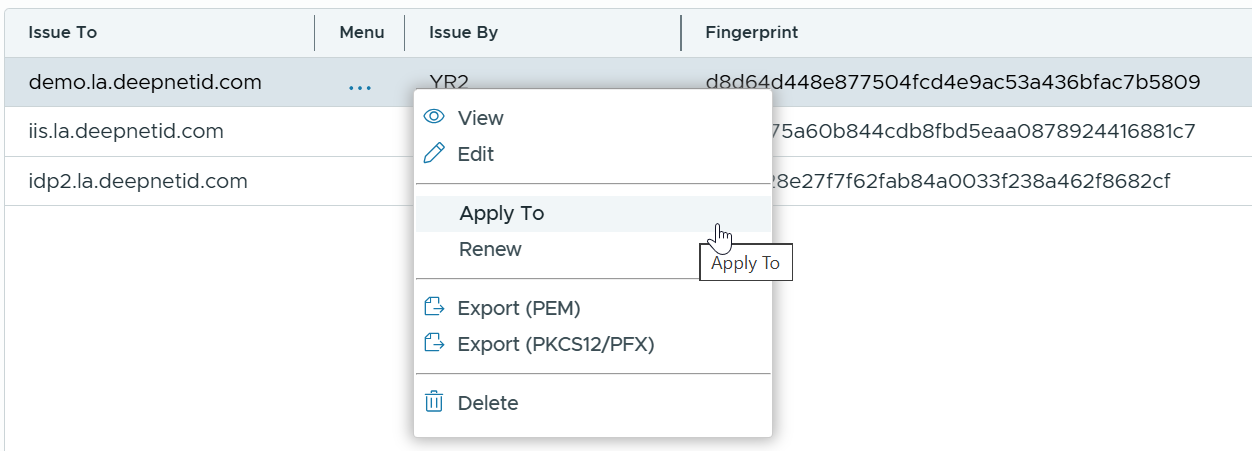
Select Apply To from the menu
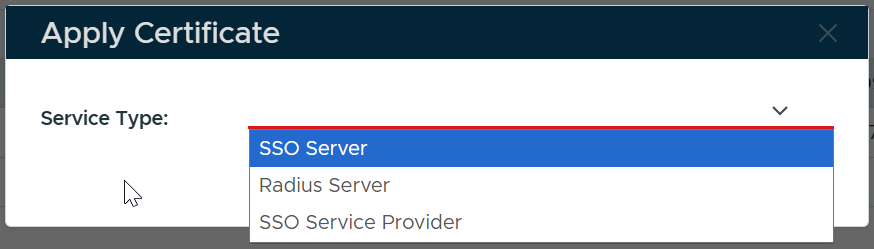
In the Service Type box, select SSO Server
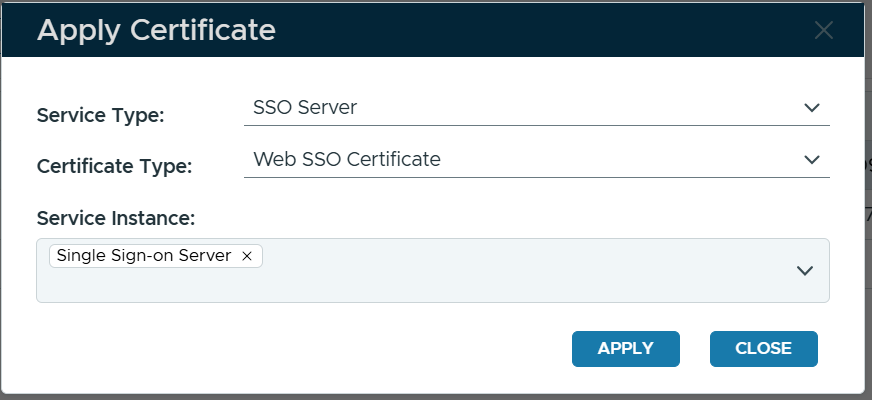
In the Certificate Type box, select Web SSO Certificate
In the Service Instance box, select the instance(s) of the SSO server(s) to which you want to apply this certificate
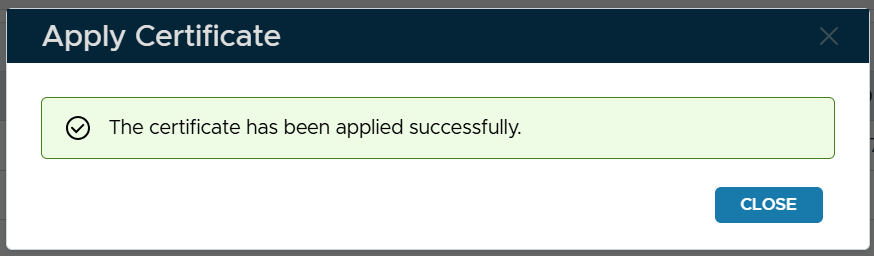
Click Apply
If you already have the PFX file of the new certificate generated from a 3rd-party tool, then please follow the guide below
Navigate to "SSO | SSO Servers", click the context menu of "Single Sign-On Server"
Select "Replace Certificate" from the context menu

The "Replace Console Certificate" window will pop up:
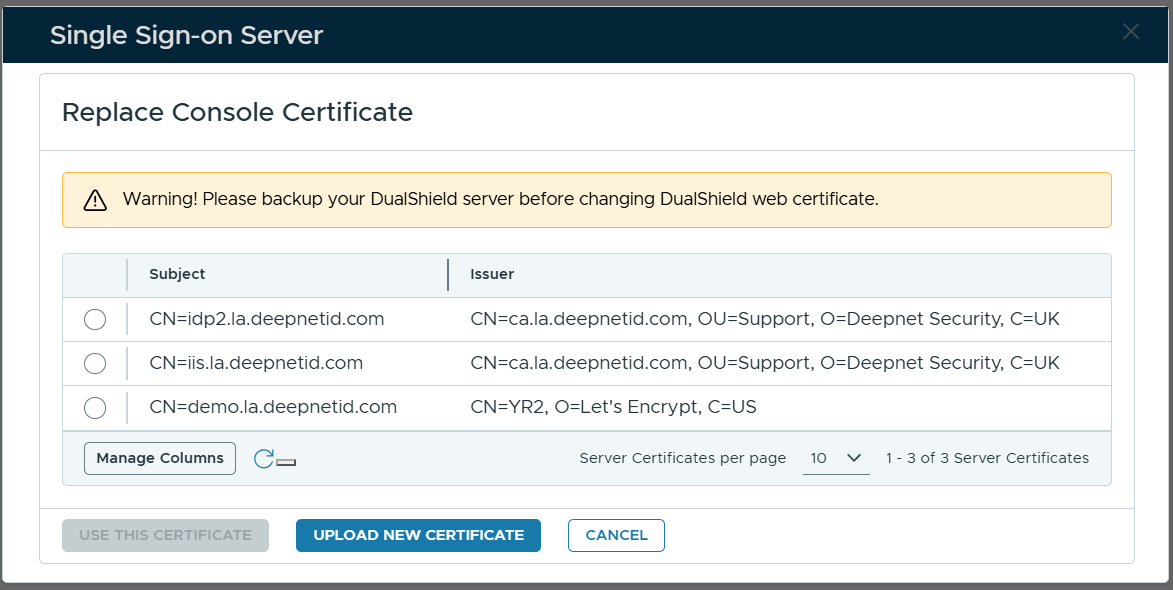
Select the certificate to be used
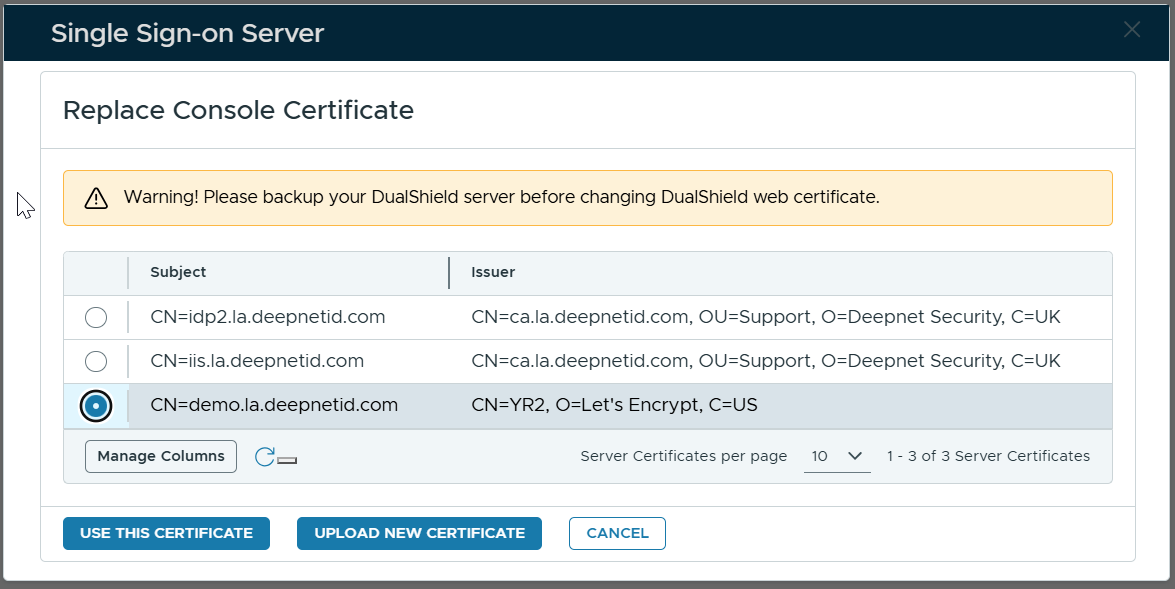
Click "Use This Certificate"