Sign into Azure AD portal at https://portal.azure.com/
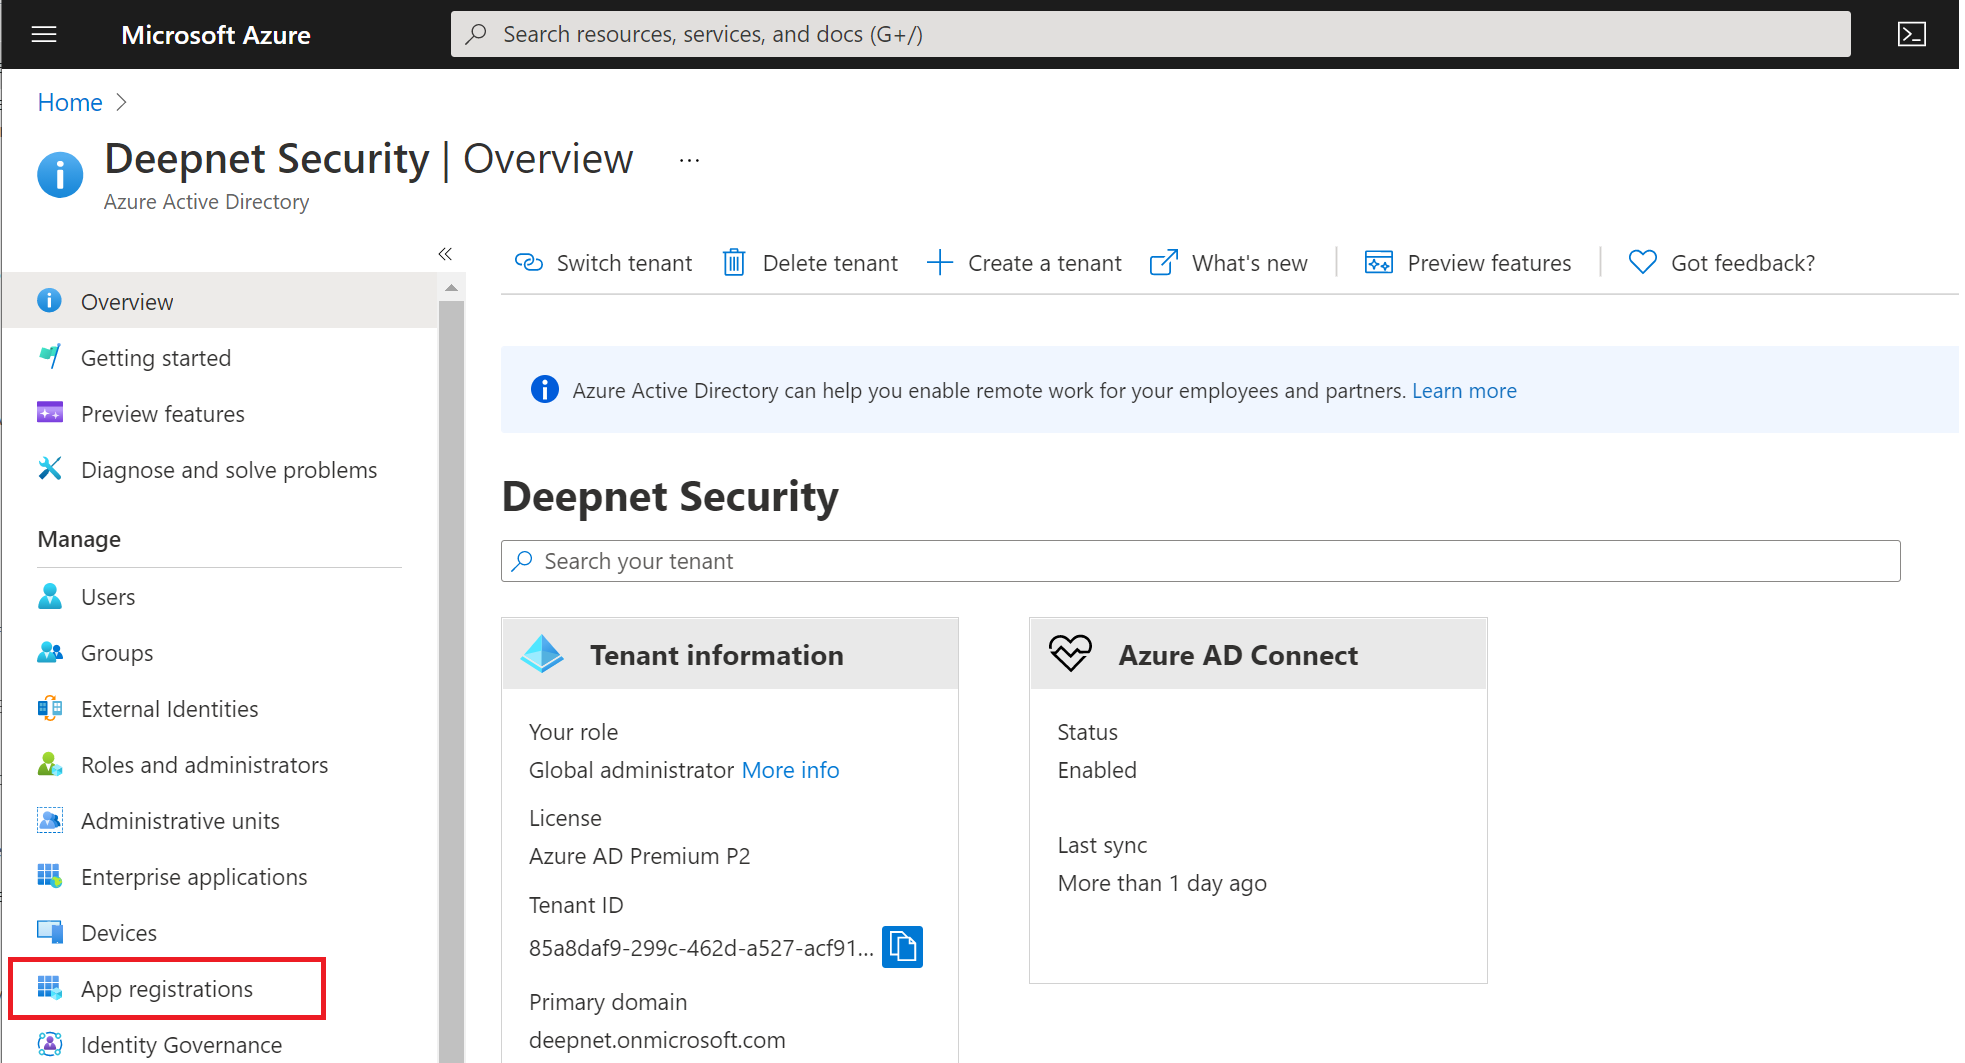
Click "App registration"
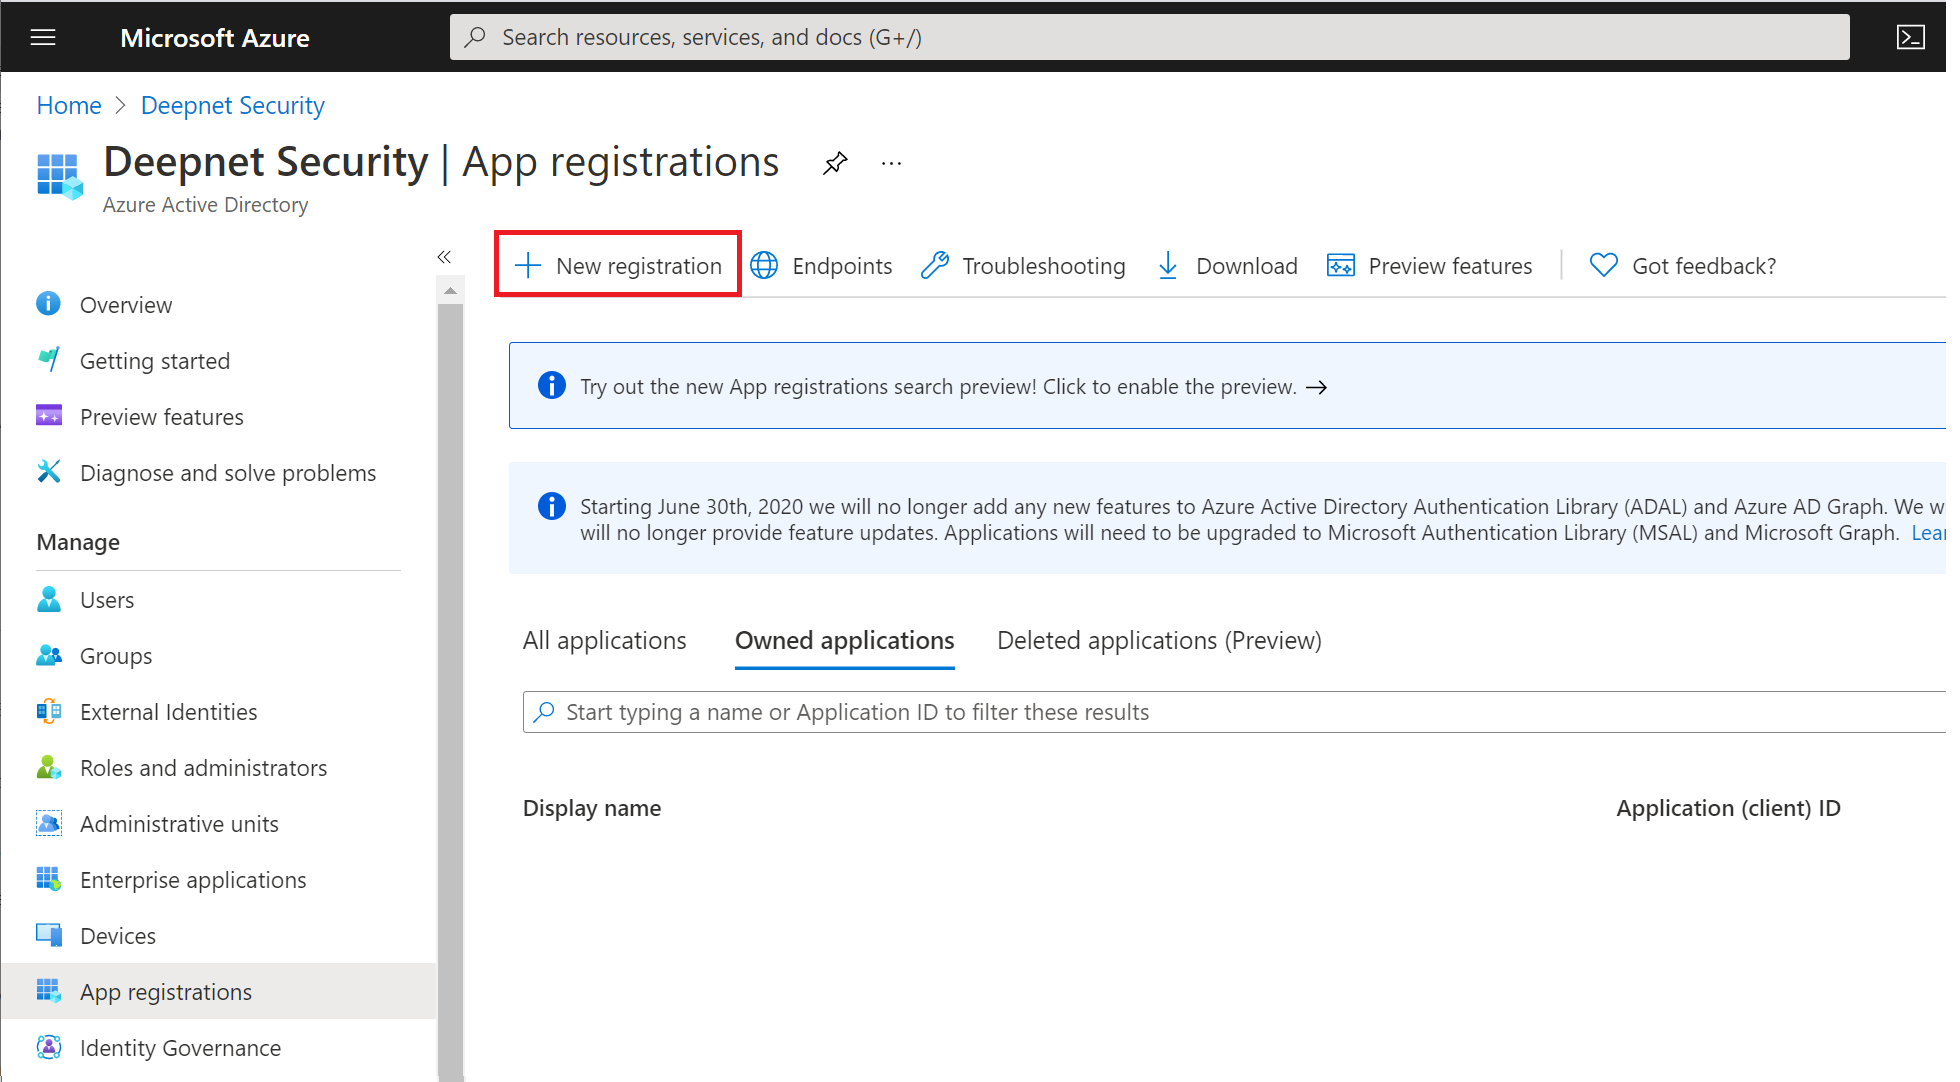
Click "New registration"
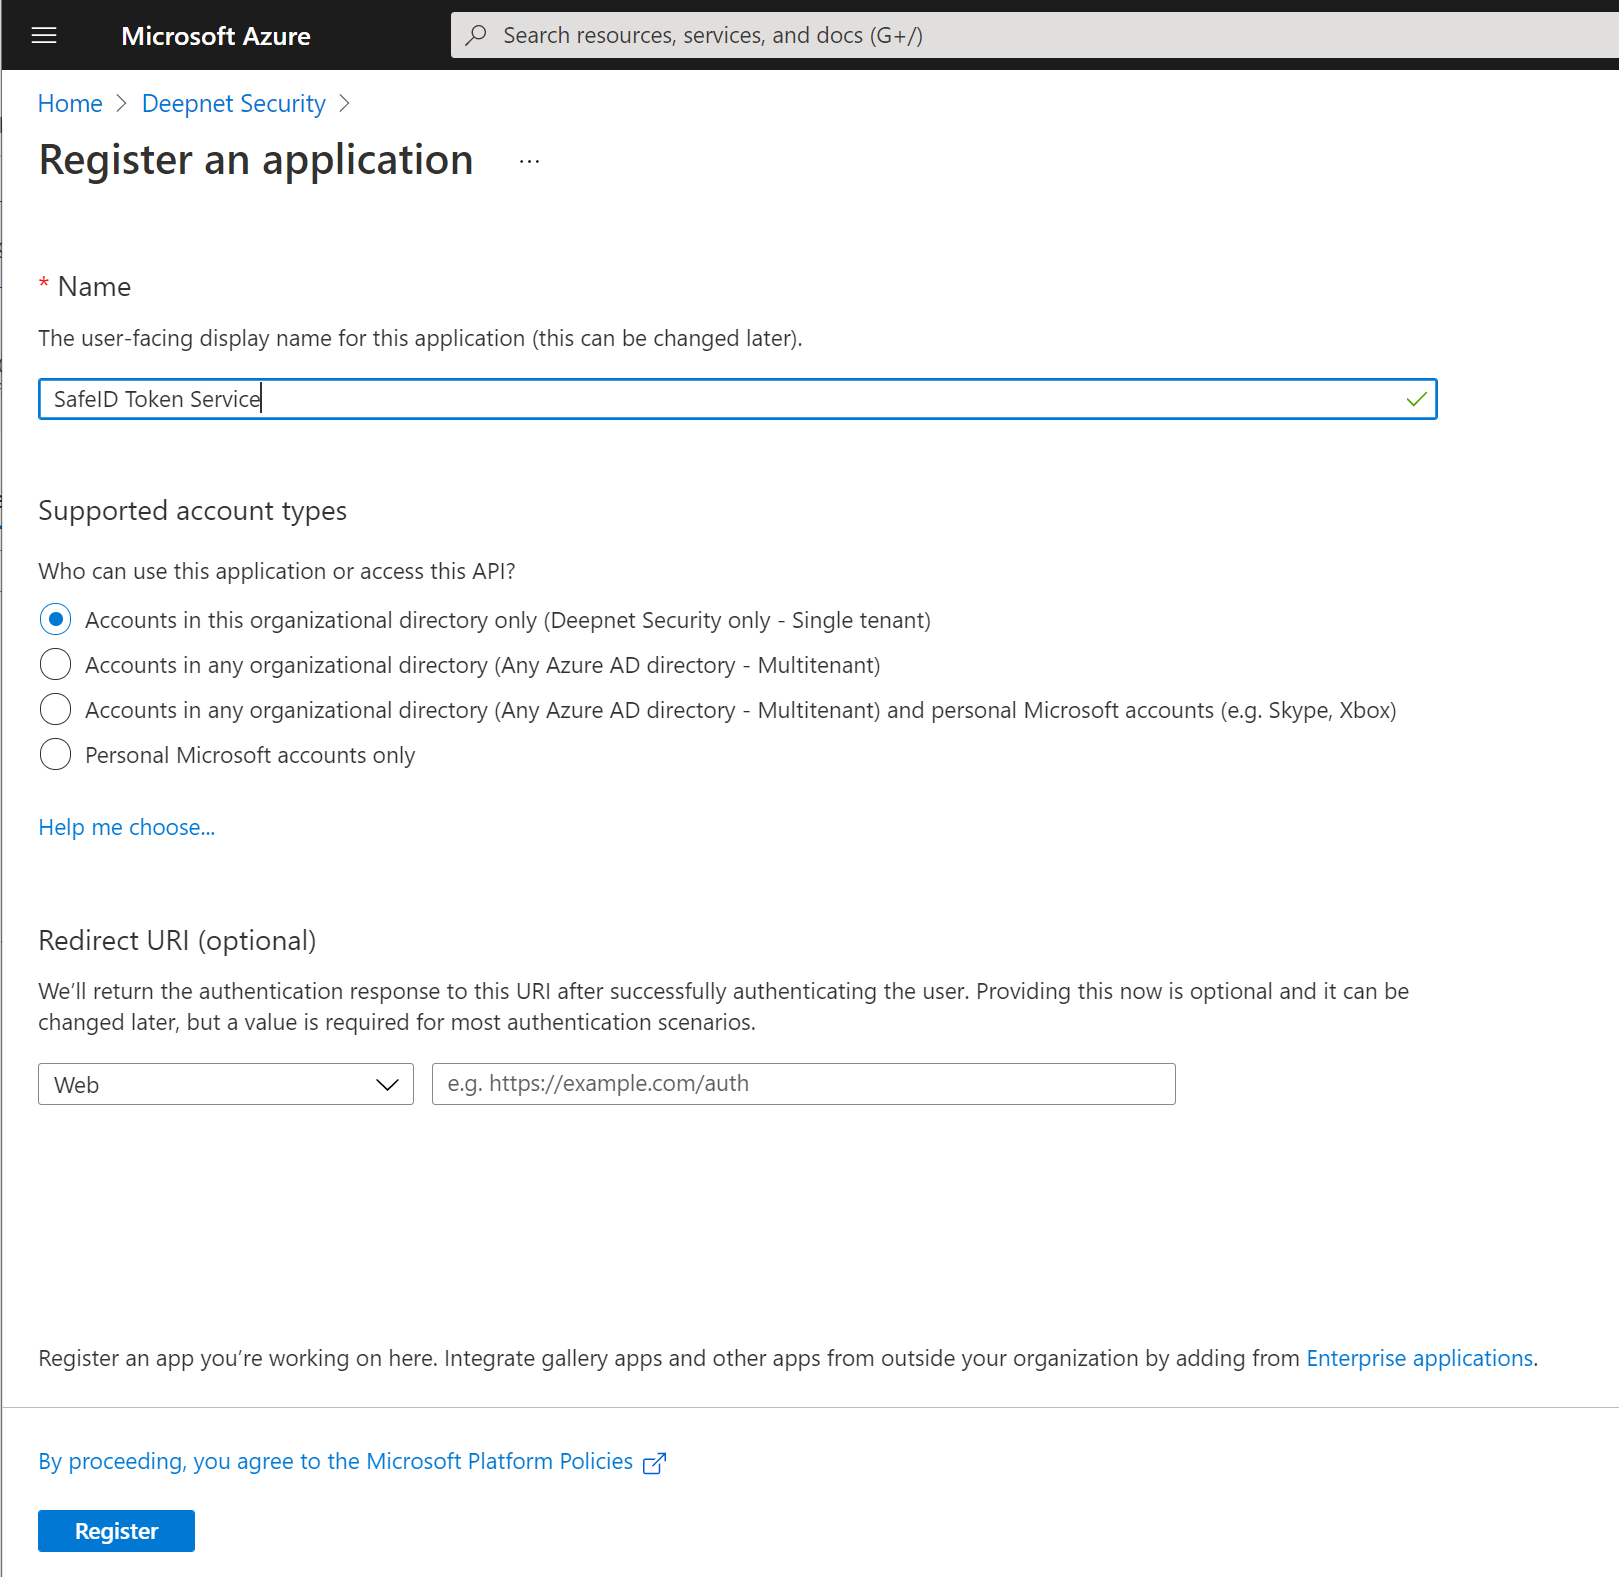
Enter a name for the new application, e.g. SafeID Token Service, then click "Register"
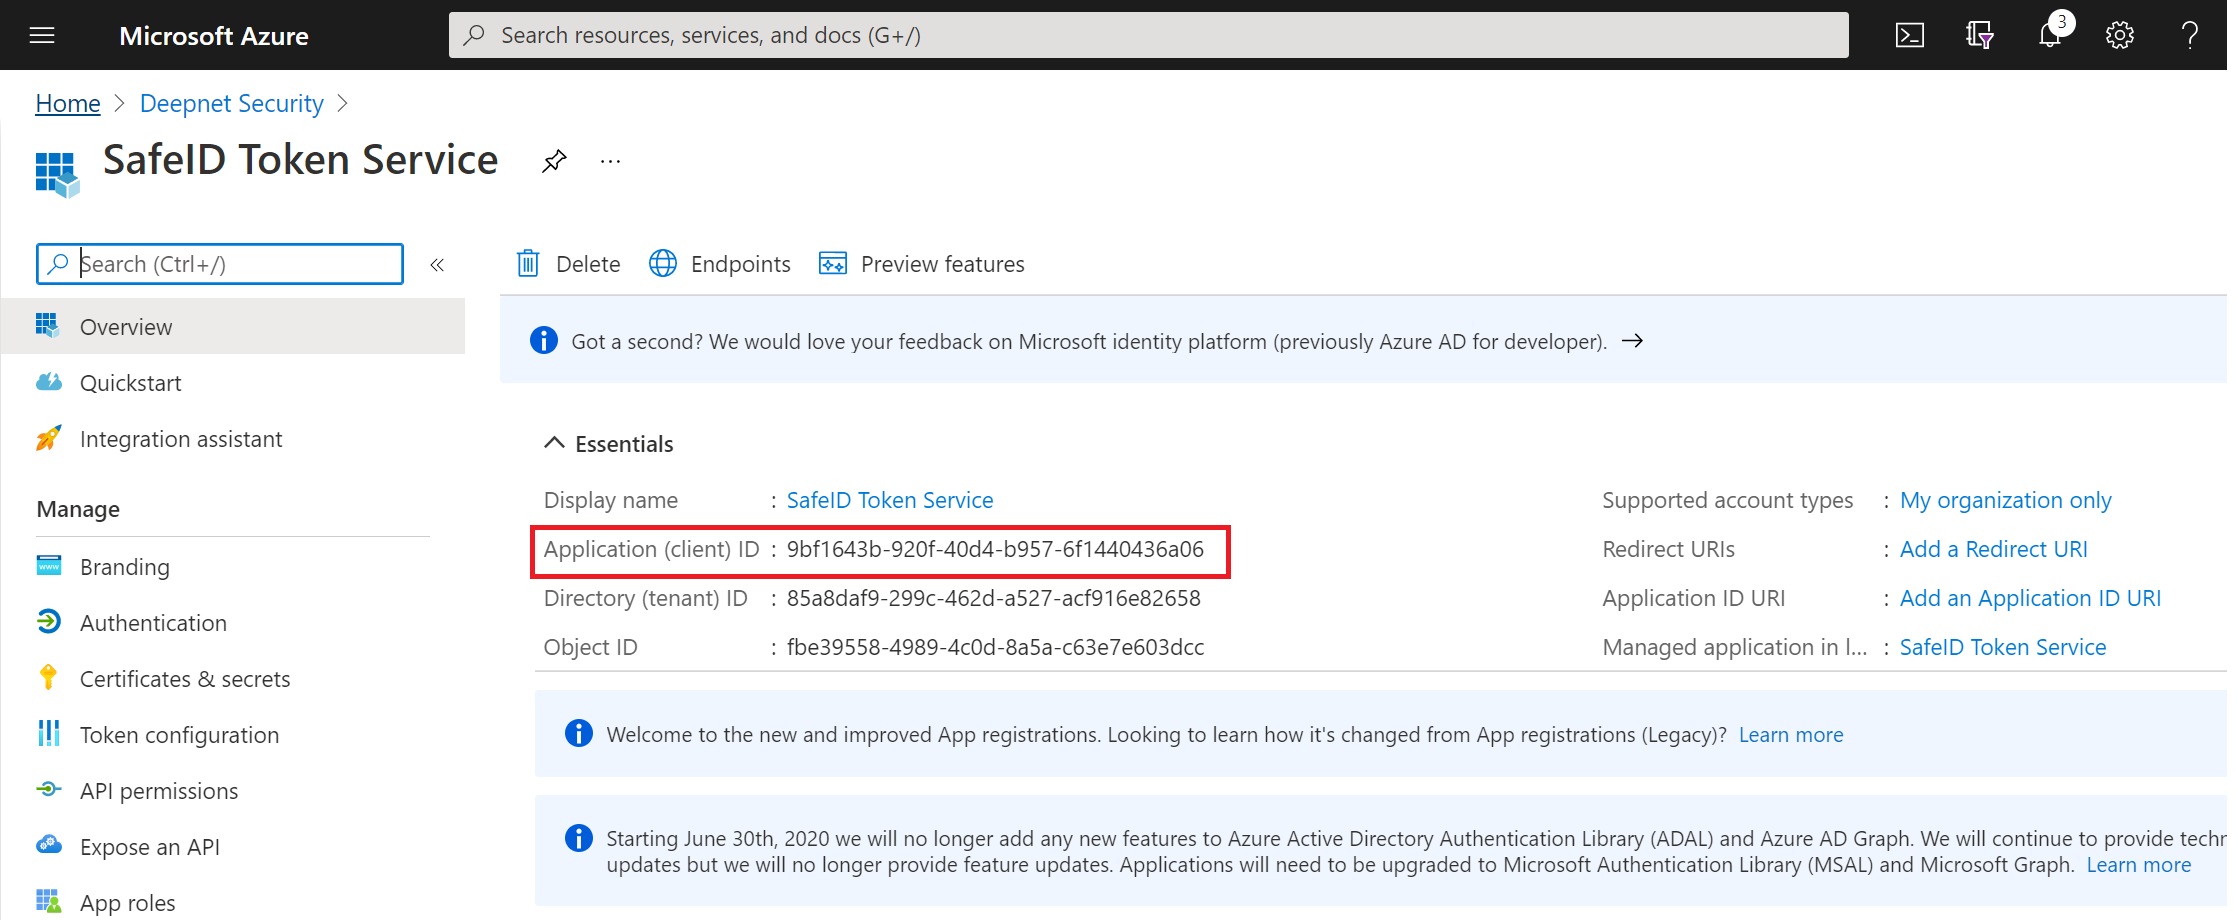
Take a note of the "Application (client) ID"
Now, click "Endpoints" in the toolbar on the top

Take a note of the following settings:
- OAuth 2.0 authorization endpoint (v2)
- OpenID Connect metadata document
Now, click "Authentication" in the left panel
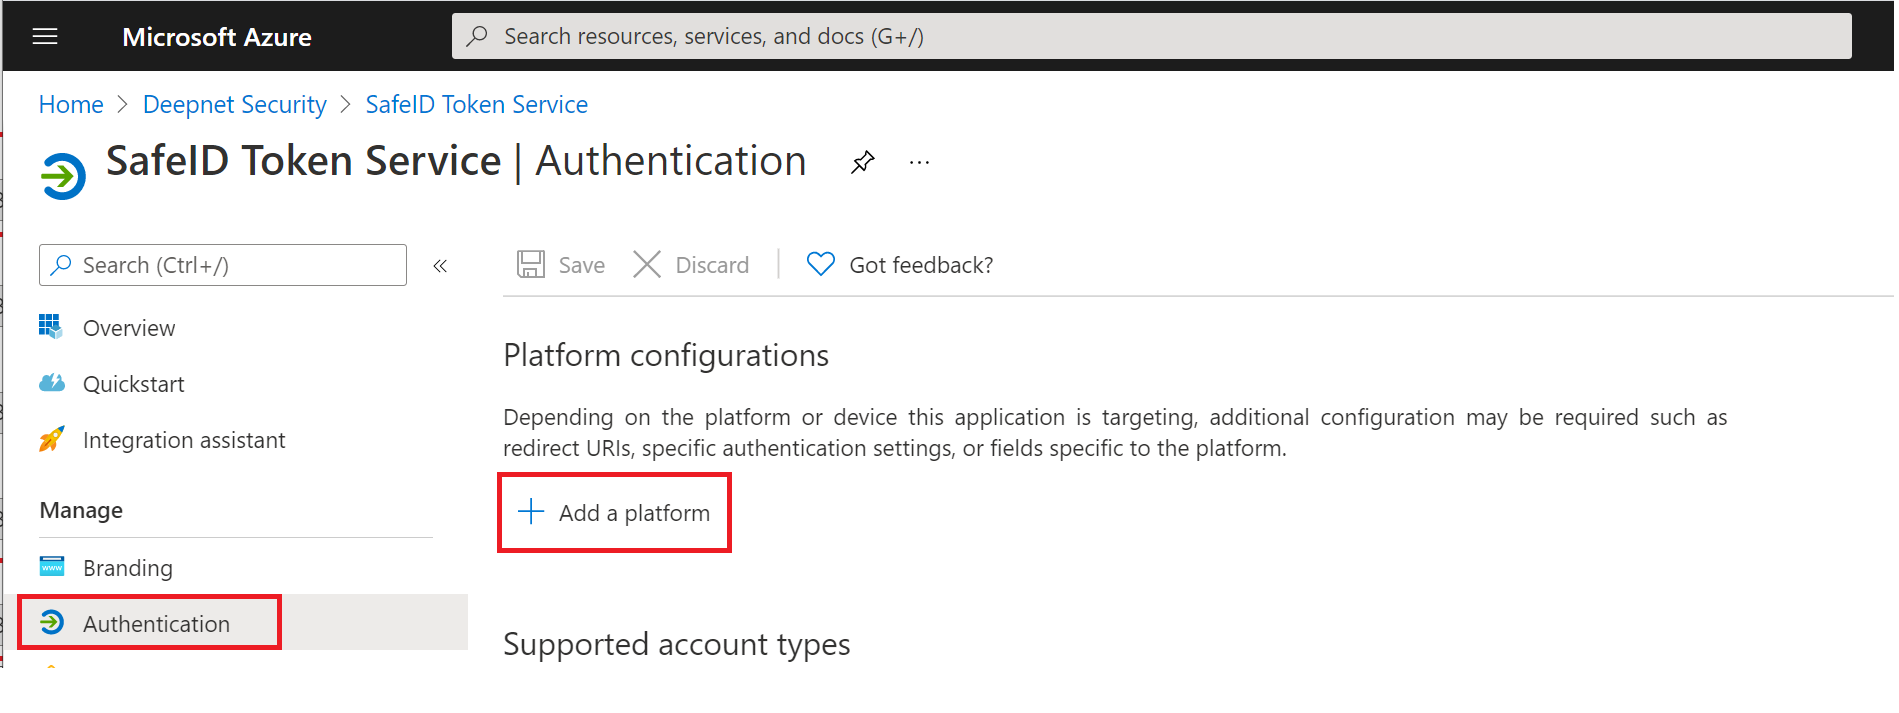
Click "Add a platform"
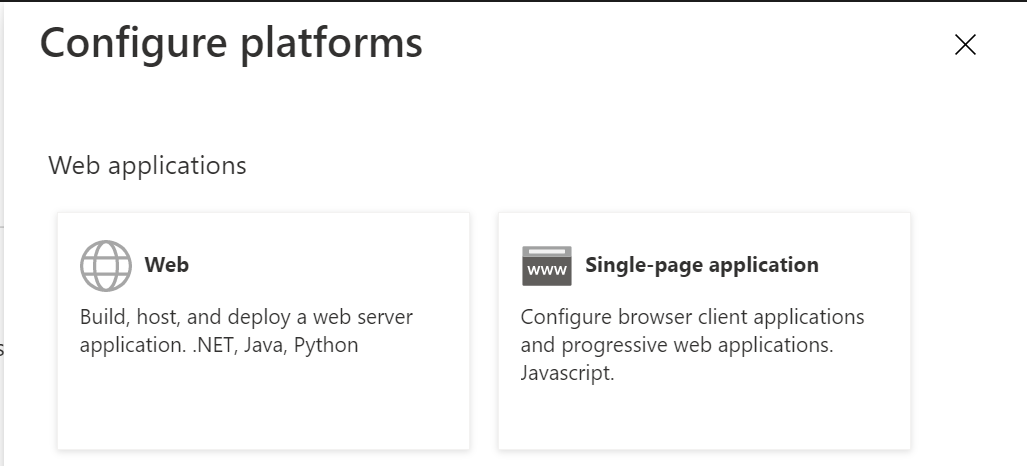
Click the "Web" tile
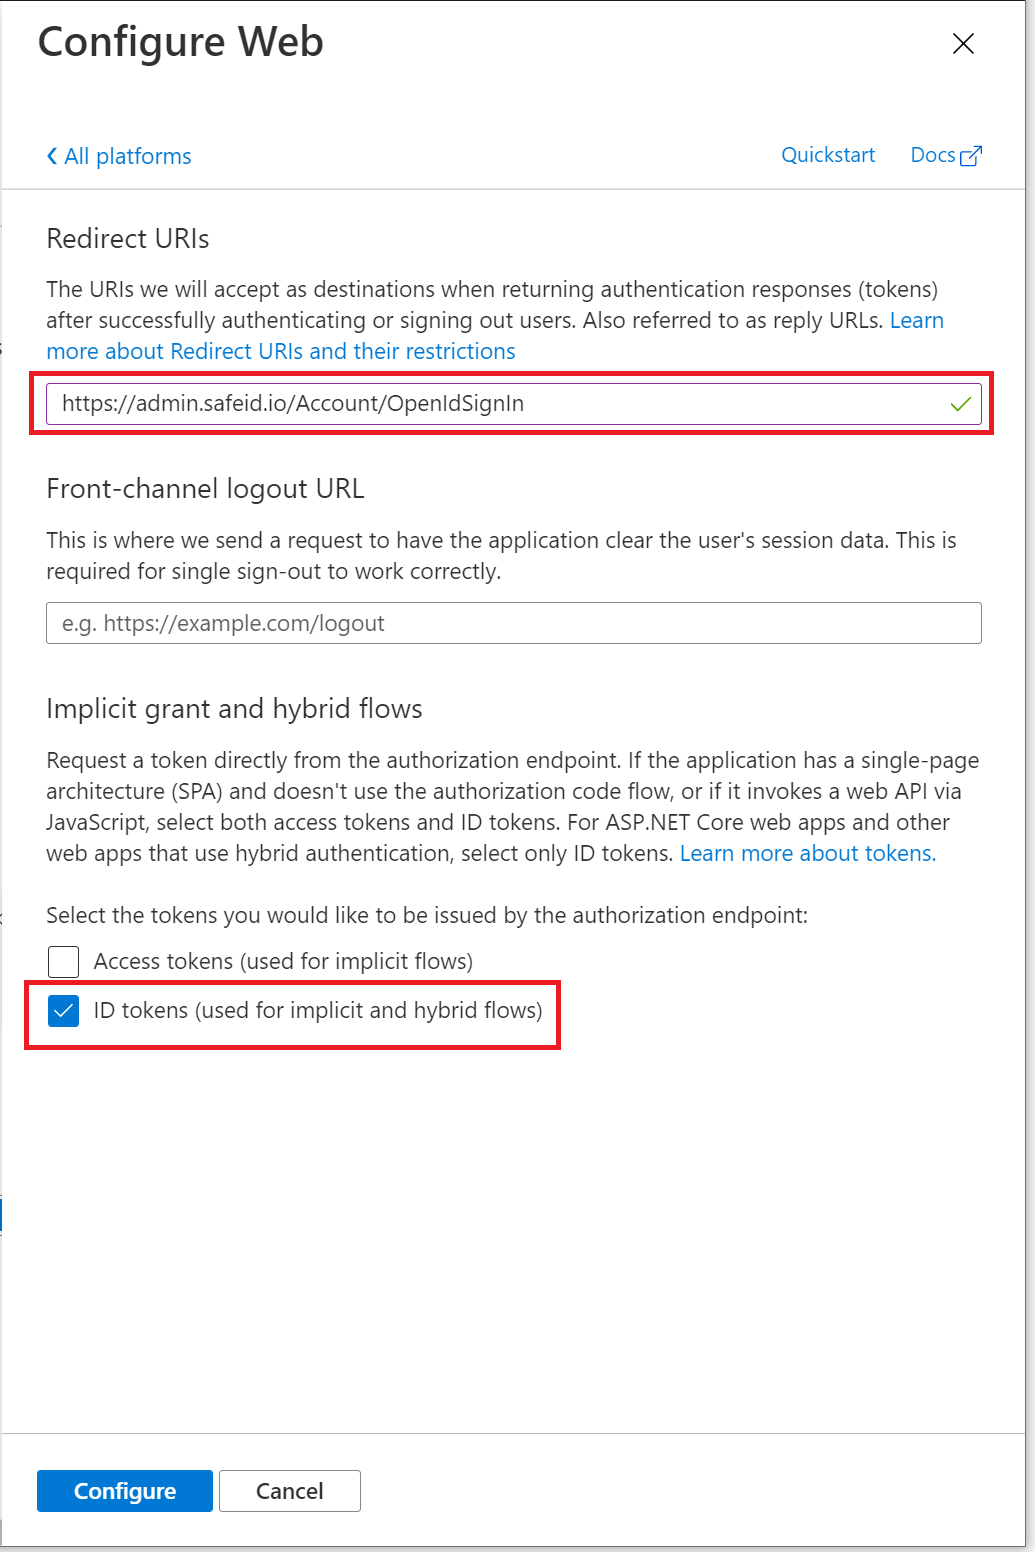
In "Redirect URIs" enter "https://admin.safeid.io/Account/OpenIdSignIn"
And, tick the option "ID tokens (used for implicit and hybrid flows)"
Then click the "Configure" button
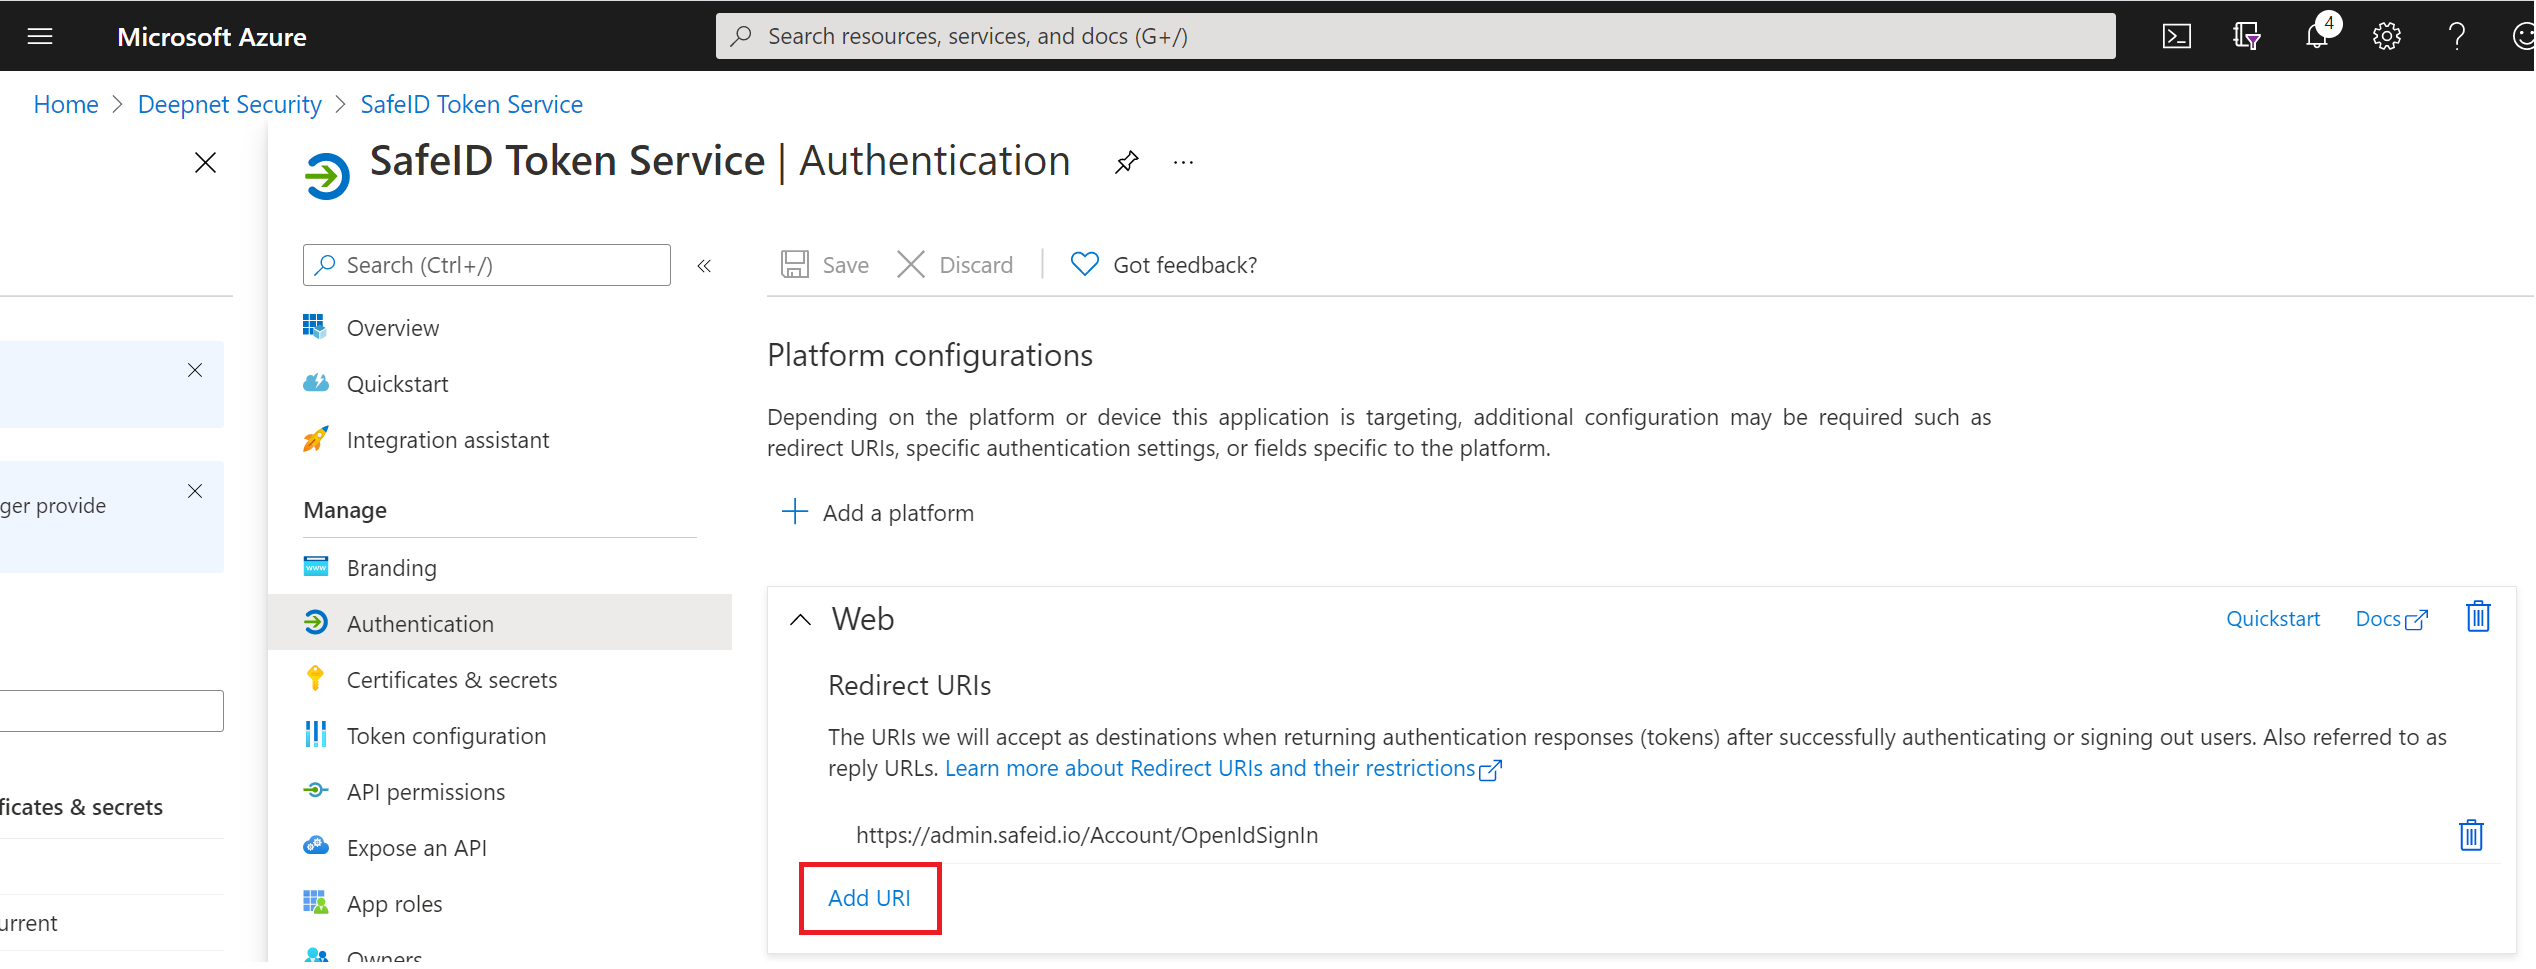
Click "Add URI"
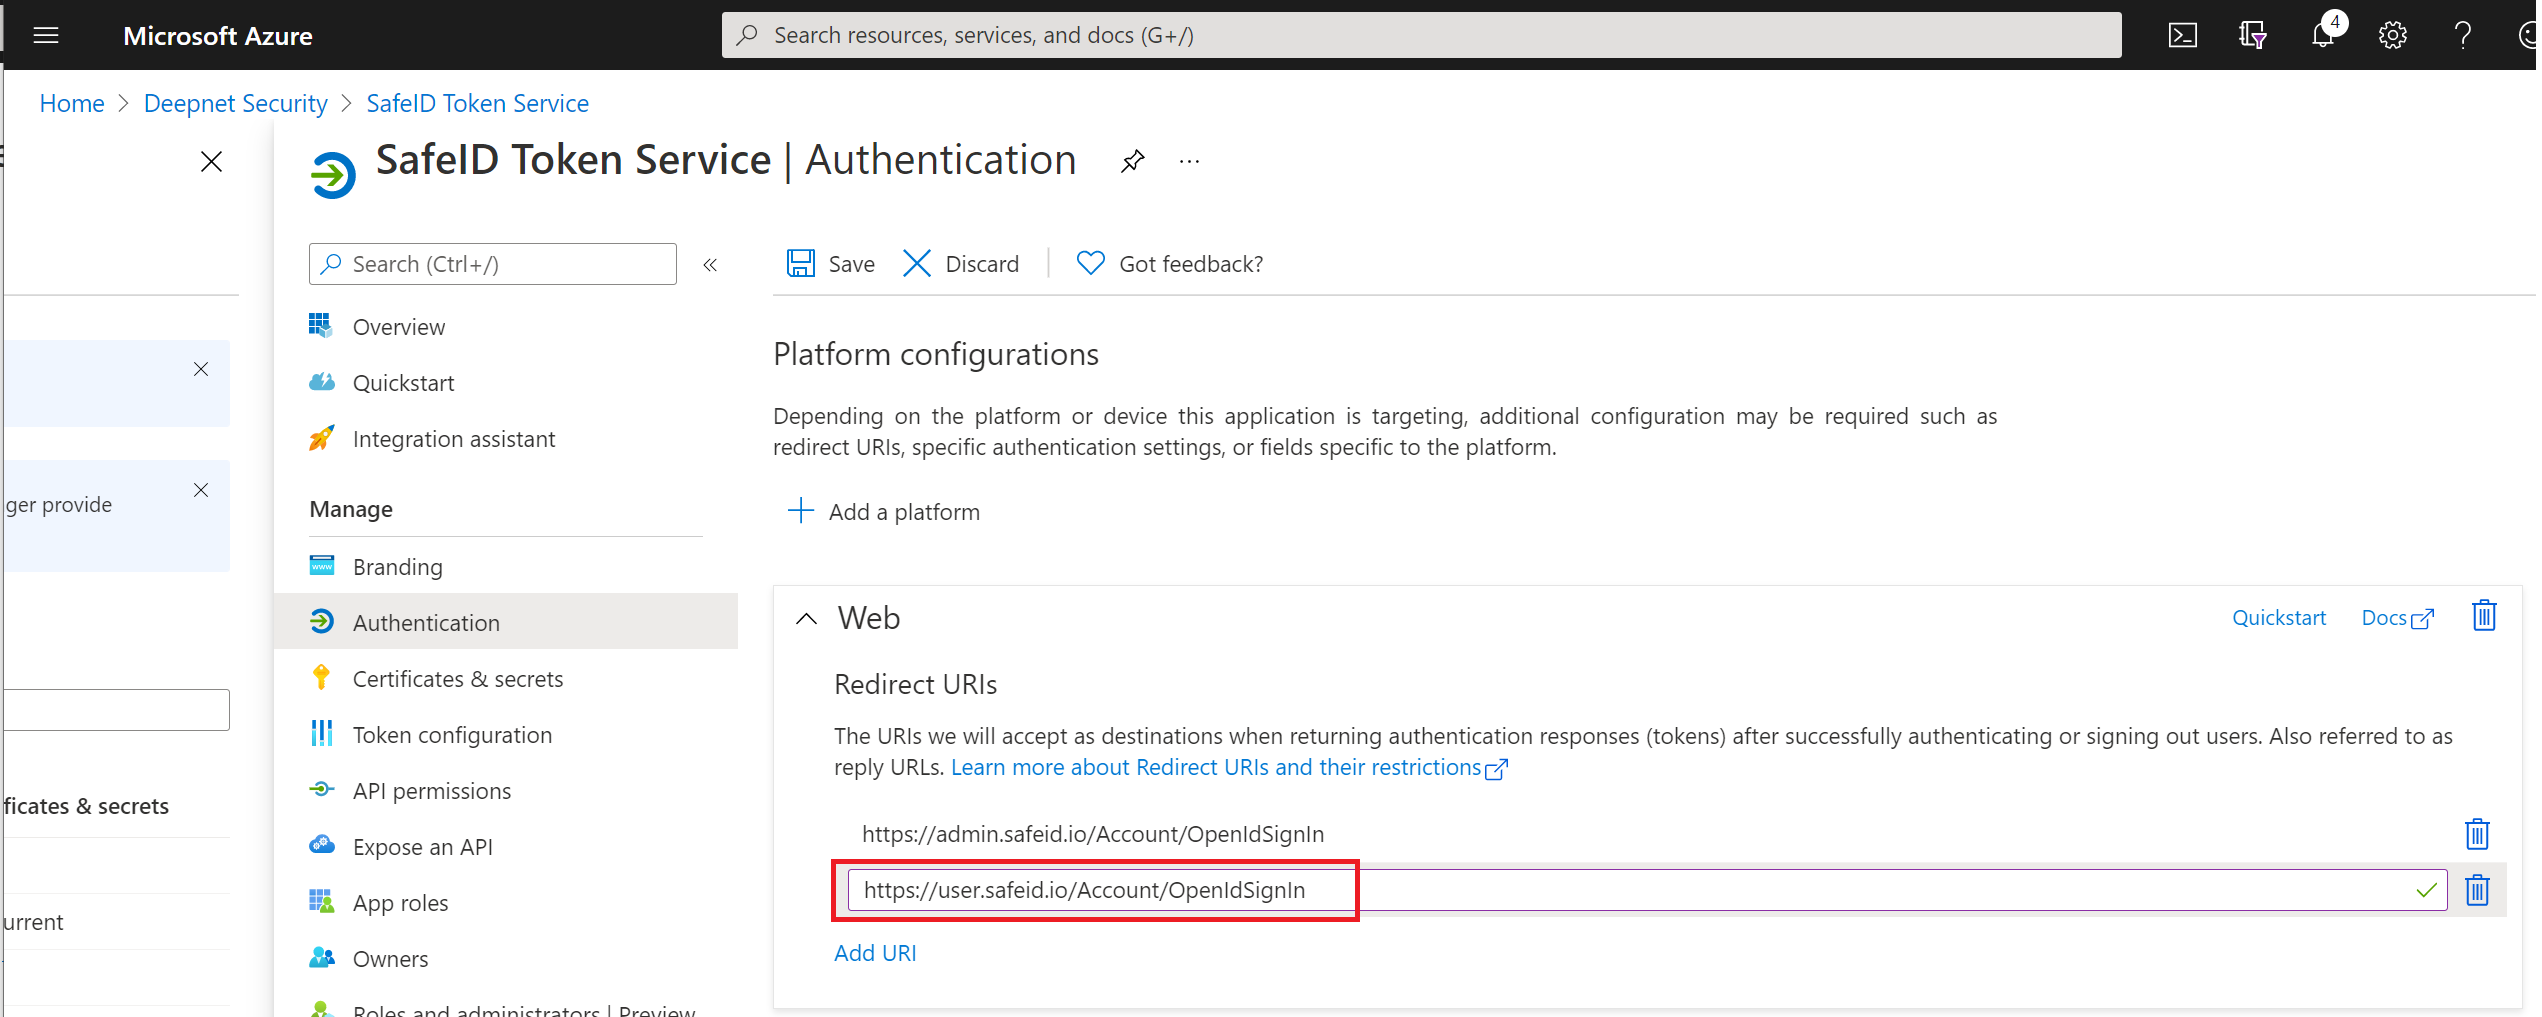
Enter "https://user.safeid.io/Account/OpenIdSignIn"
Click "Save" in the toolbar on the top
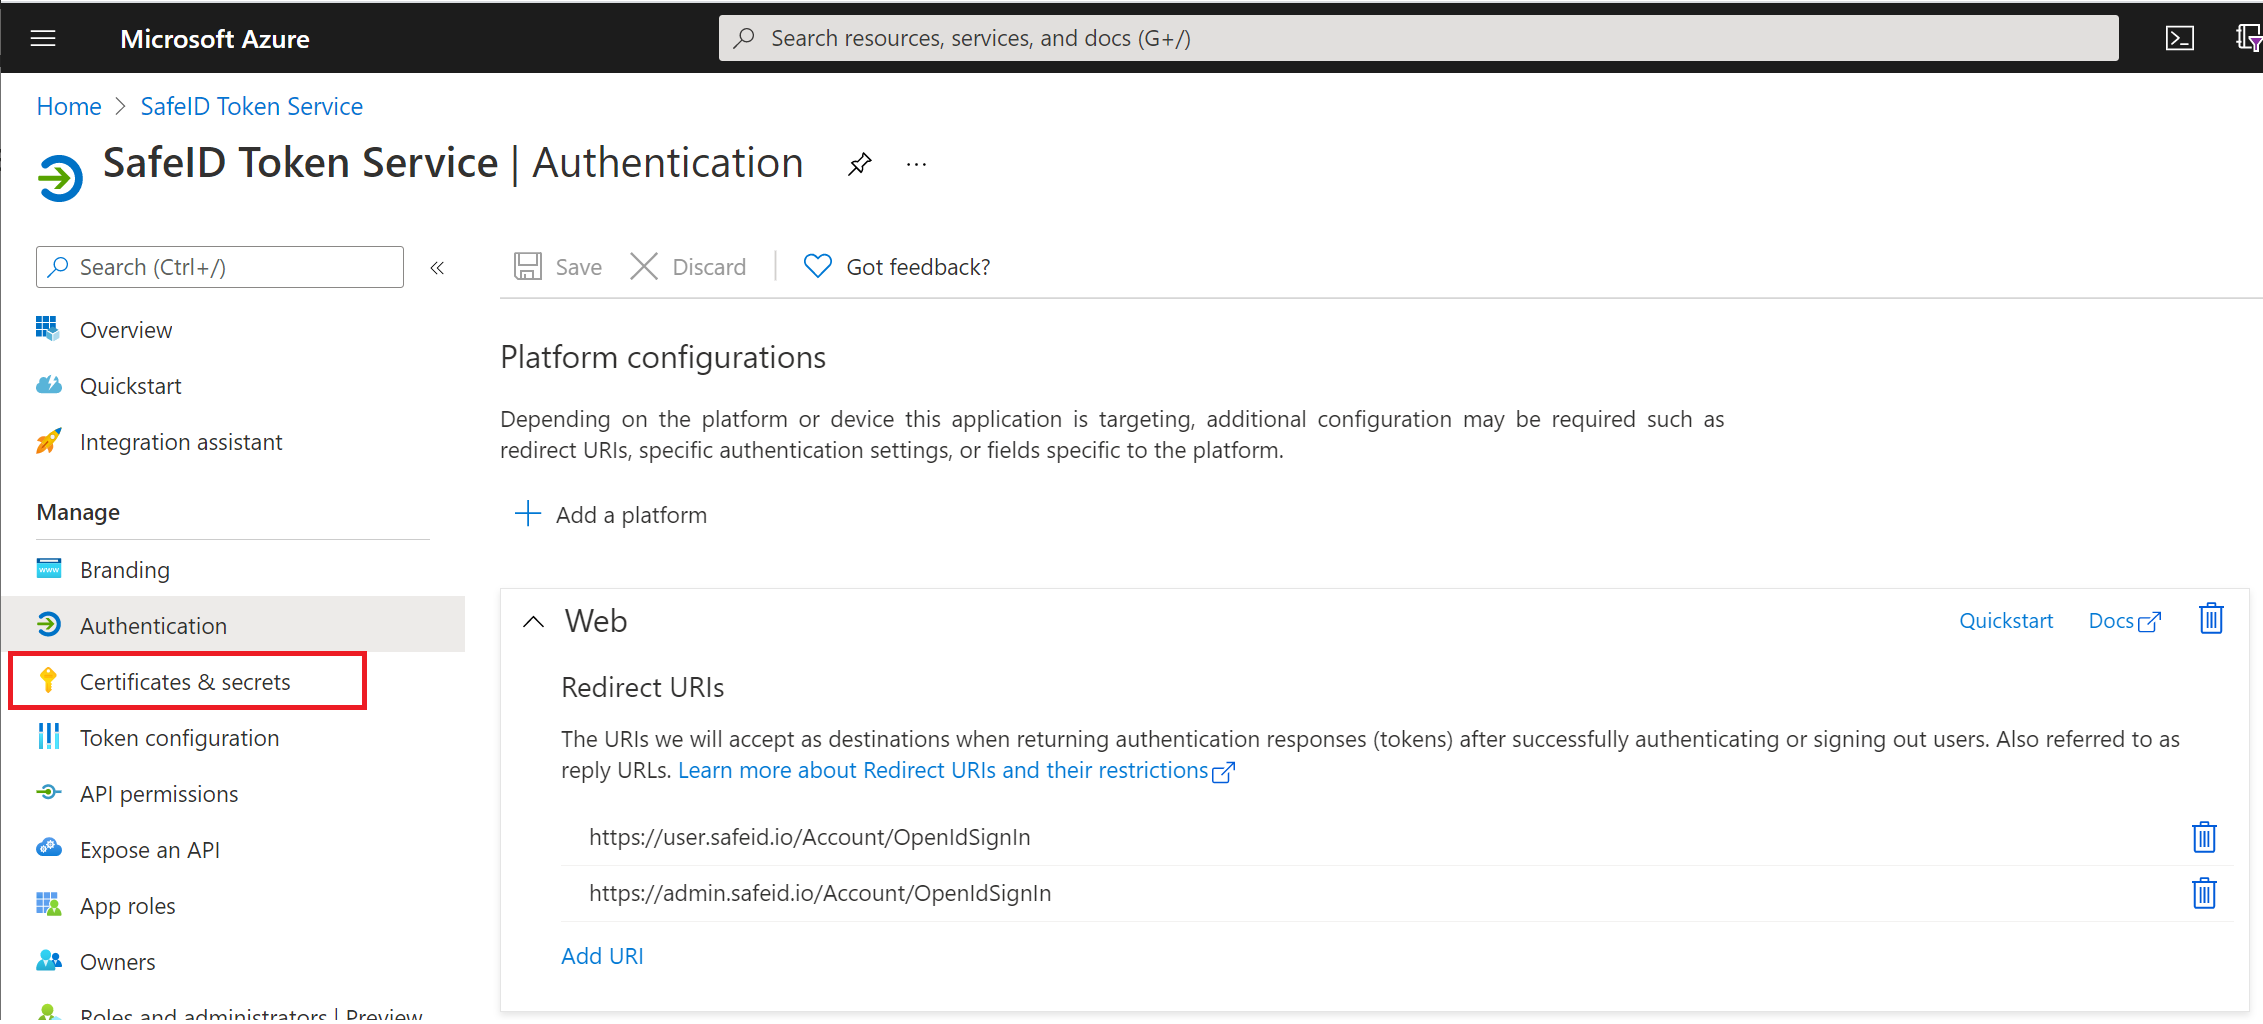
Click "Certificates & secrets" in the panel on the left
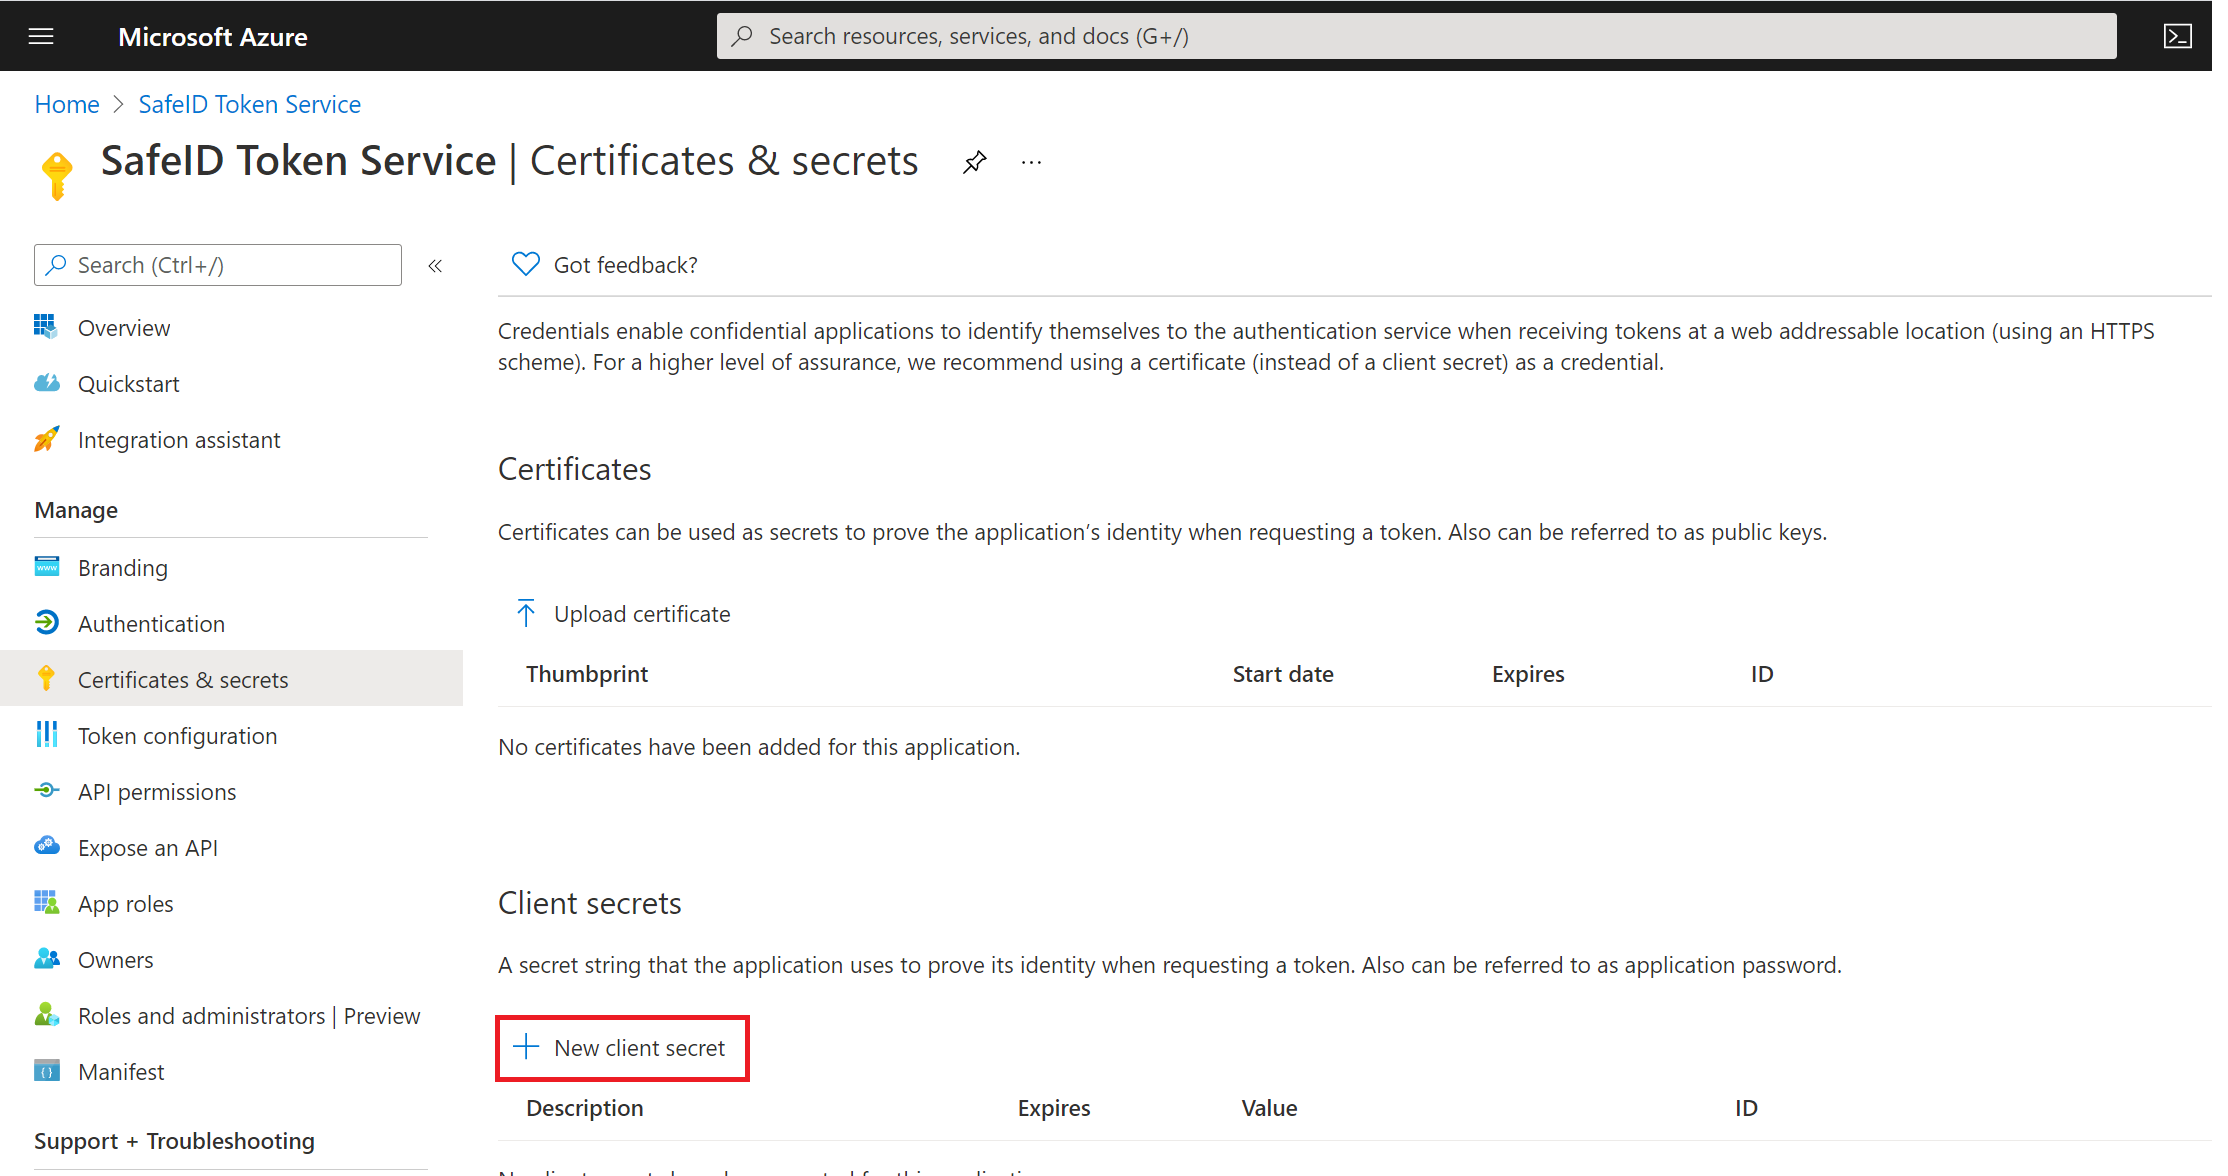
Click "New client secret"
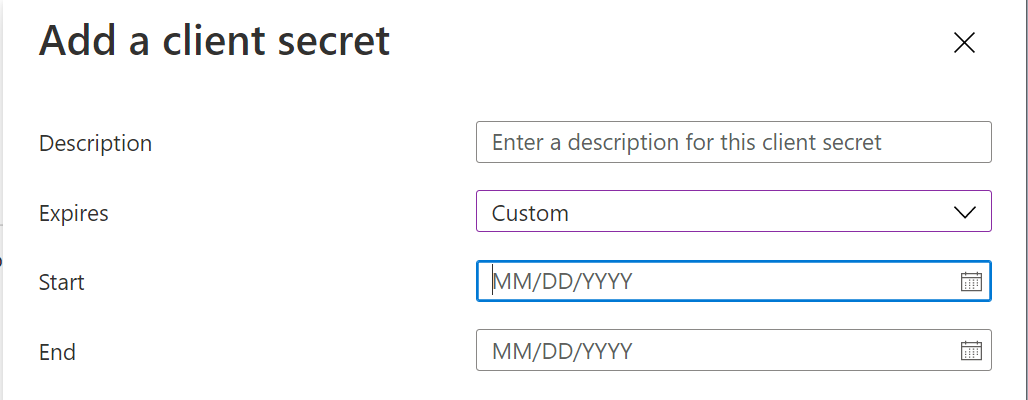
Enter a descrption and select the expiration start and end date
Then, click the "Add" button to save
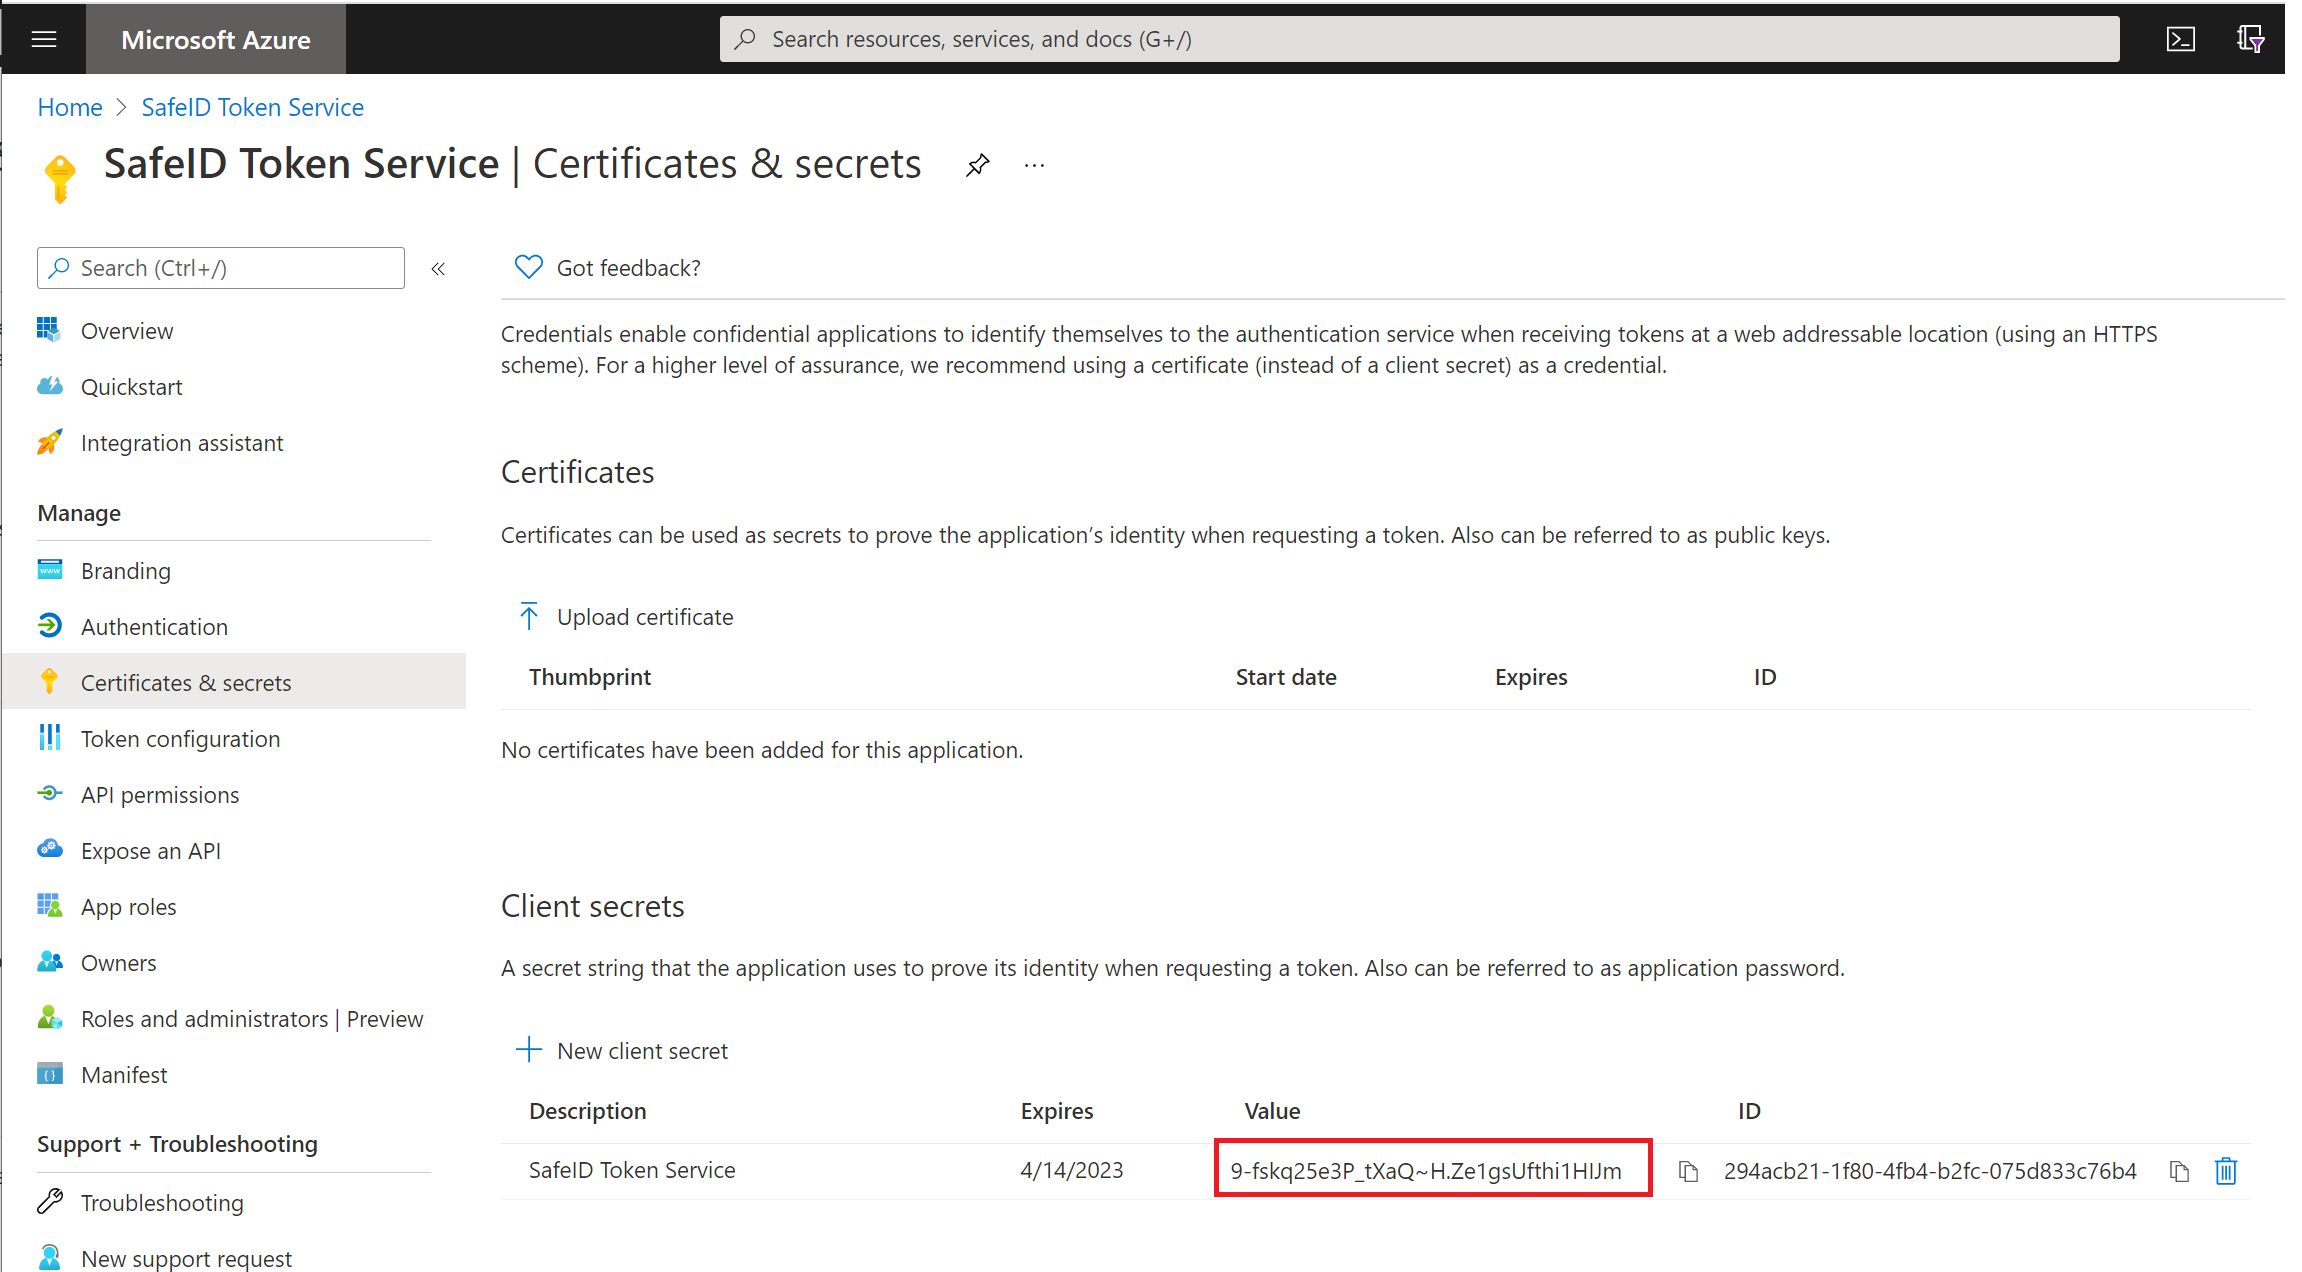
Now, you must take a note of the "Value" in the "Client secret" section. This value will be used later as the "Application Secret".
Next, click "Token configuration" in the panel on the left
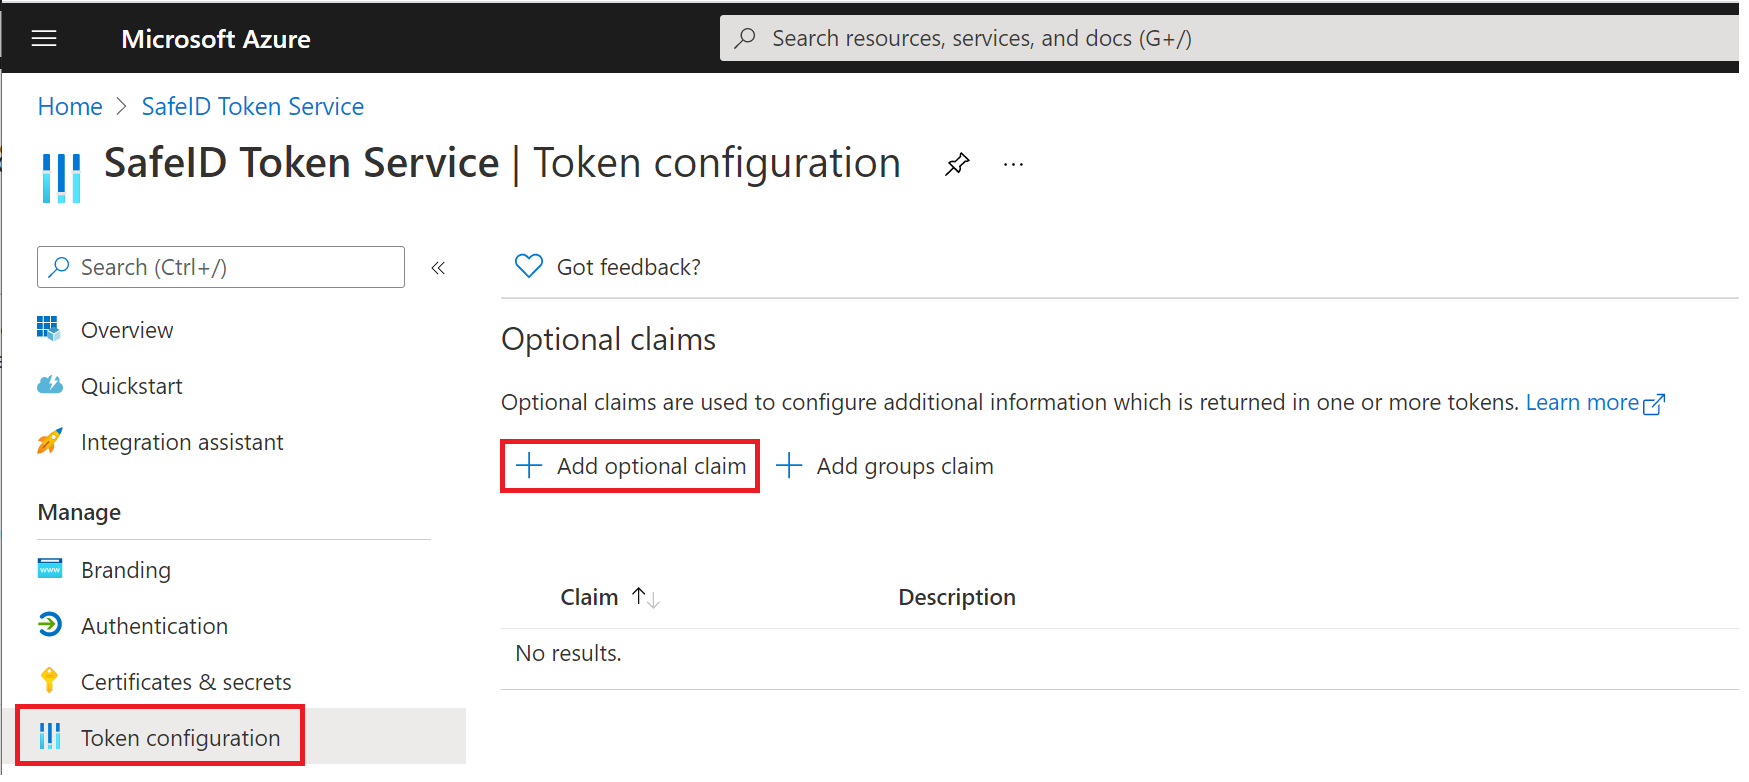
click "Add optional claim"
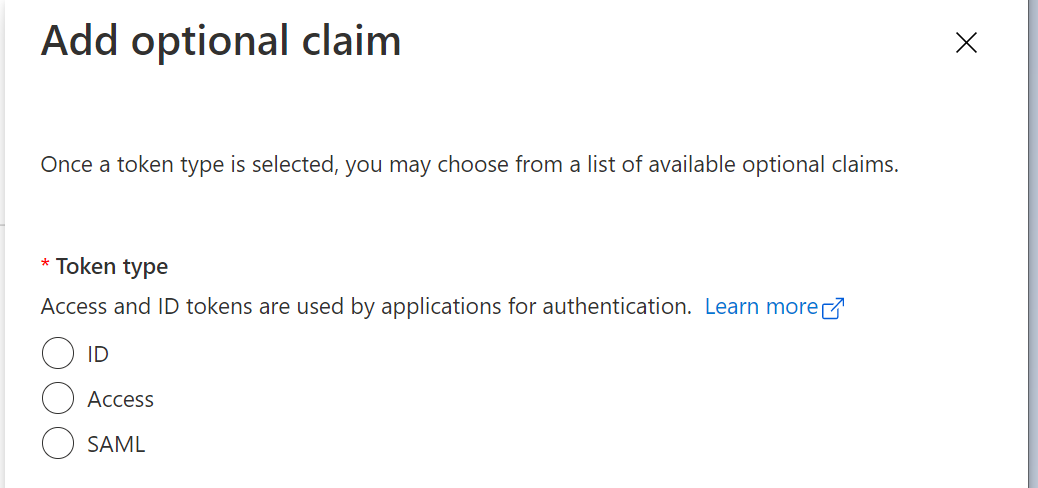
select "ID"
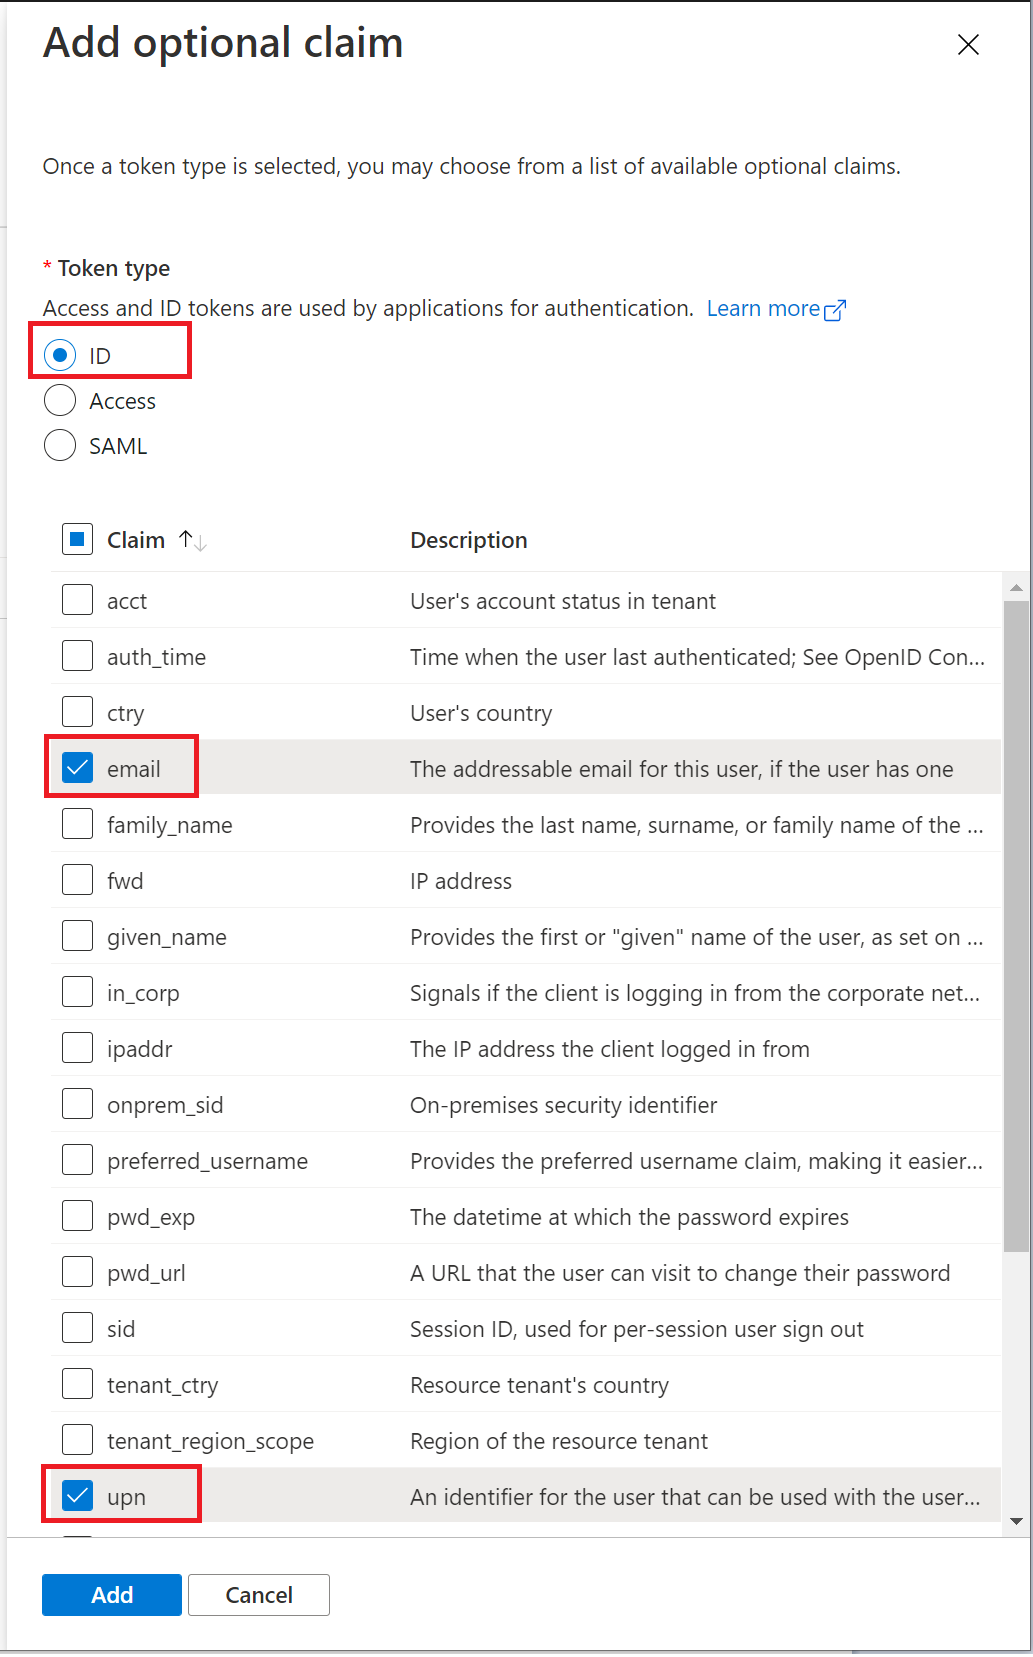
select "email" and "upn" in the claim list
click the "Add" button to save
A confirmation window will popup
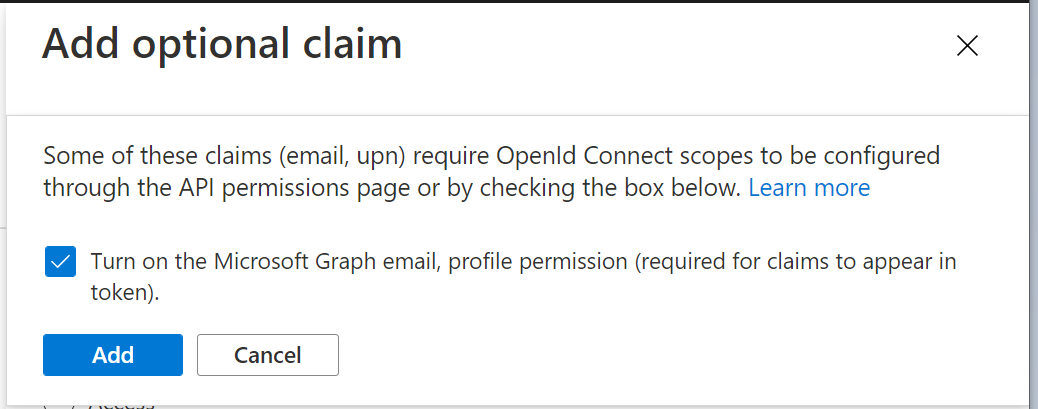
select the option "Turn on the Microsoft Graph email, profile permission (required for claims to appear in token)"
click "Add" to save
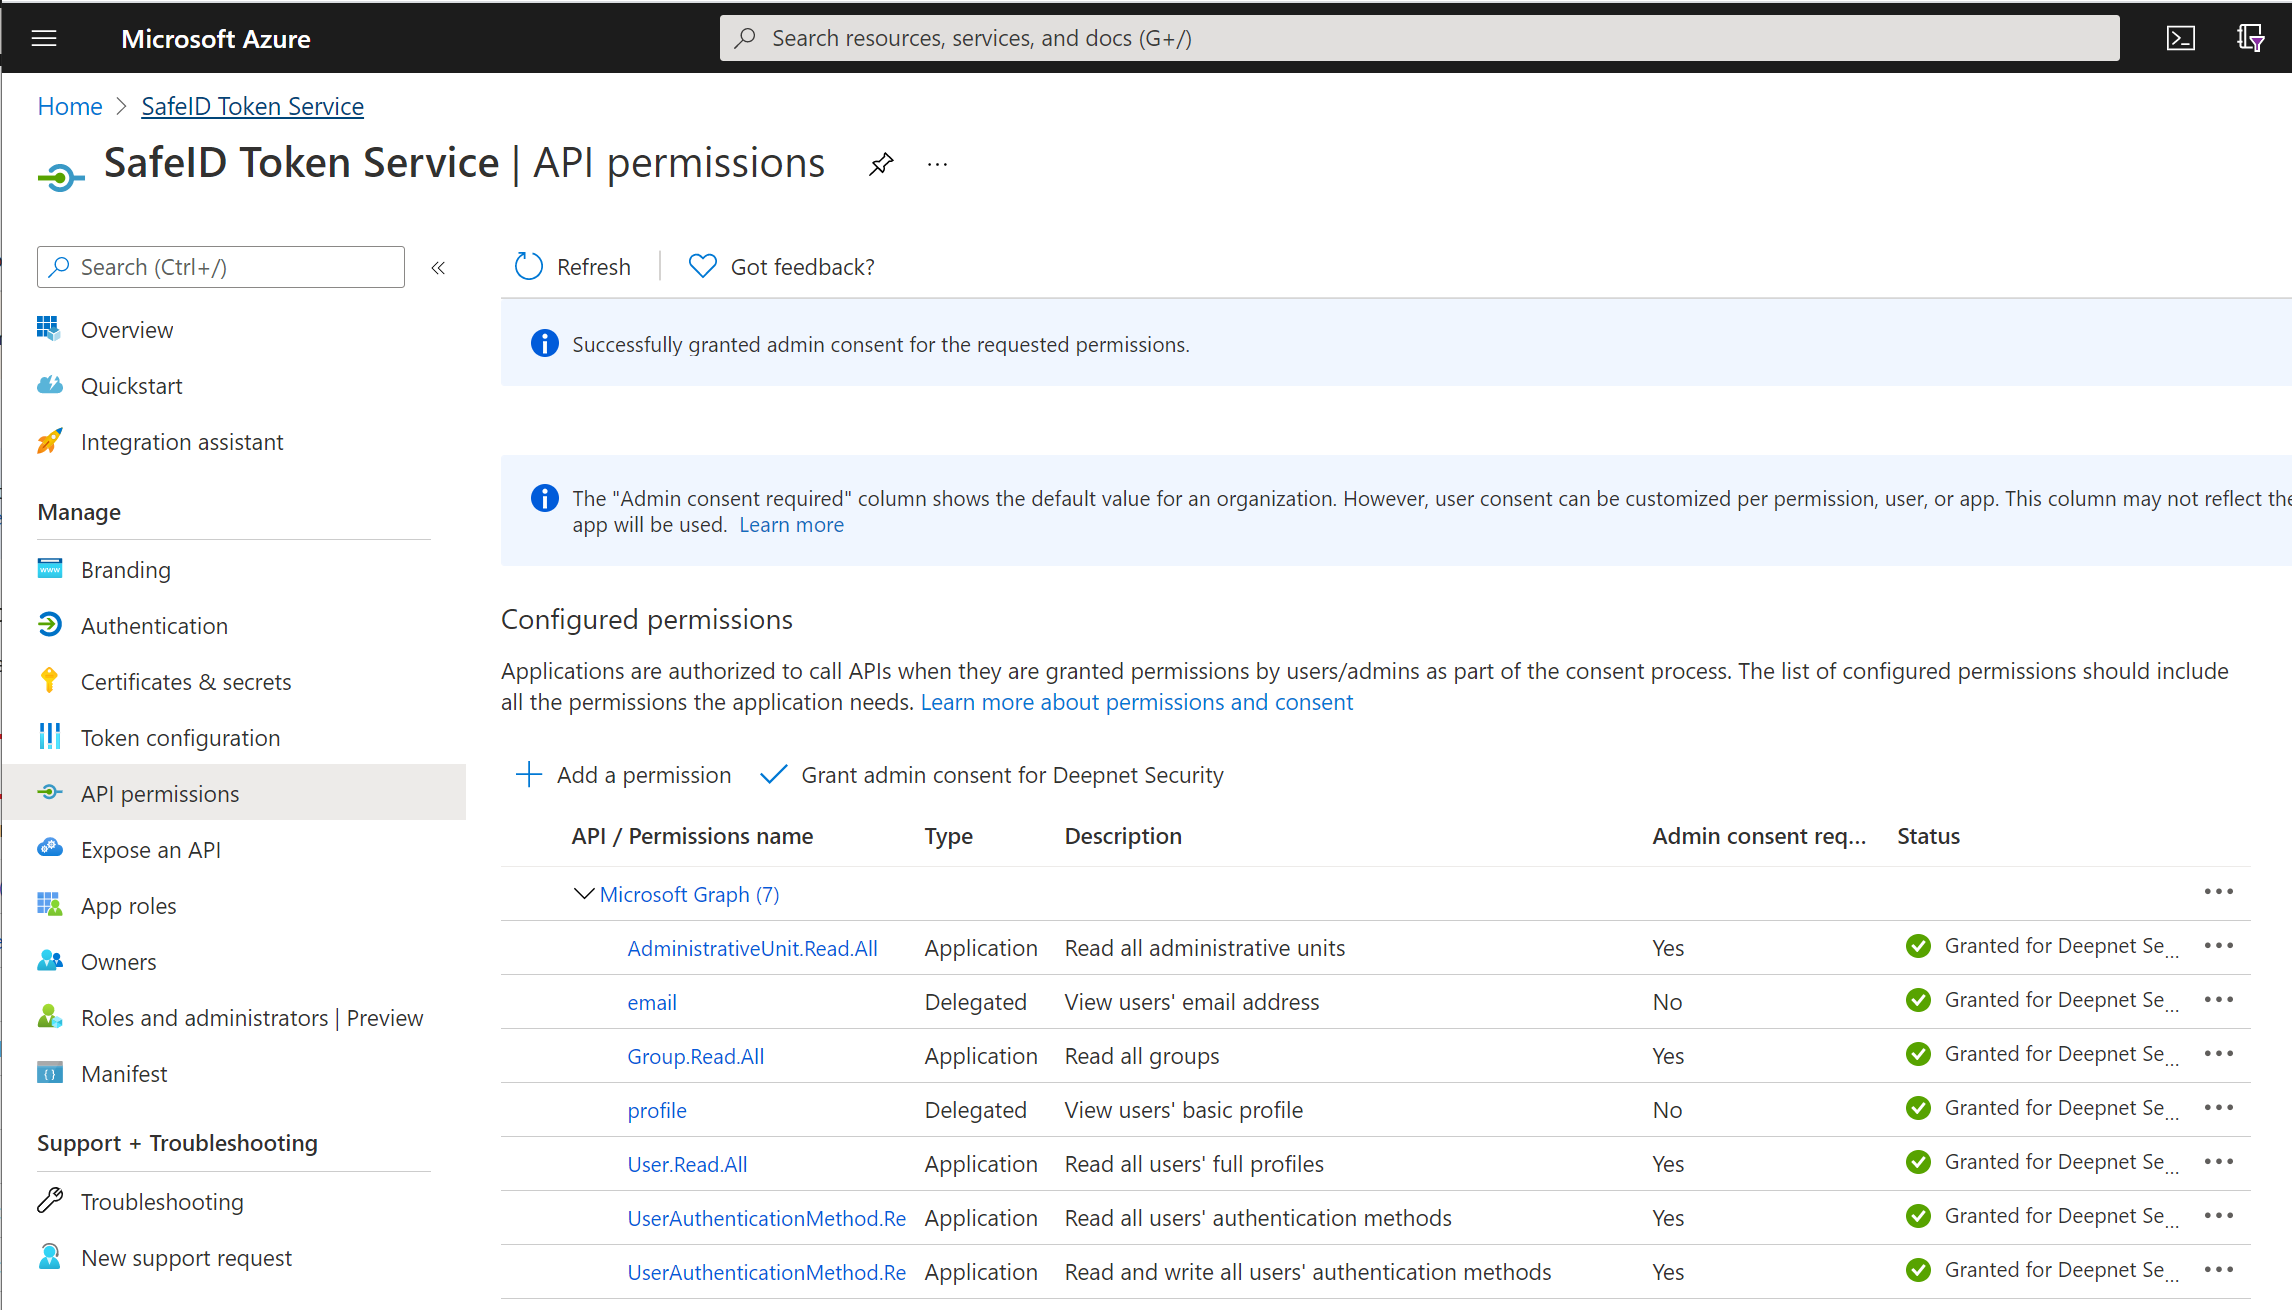
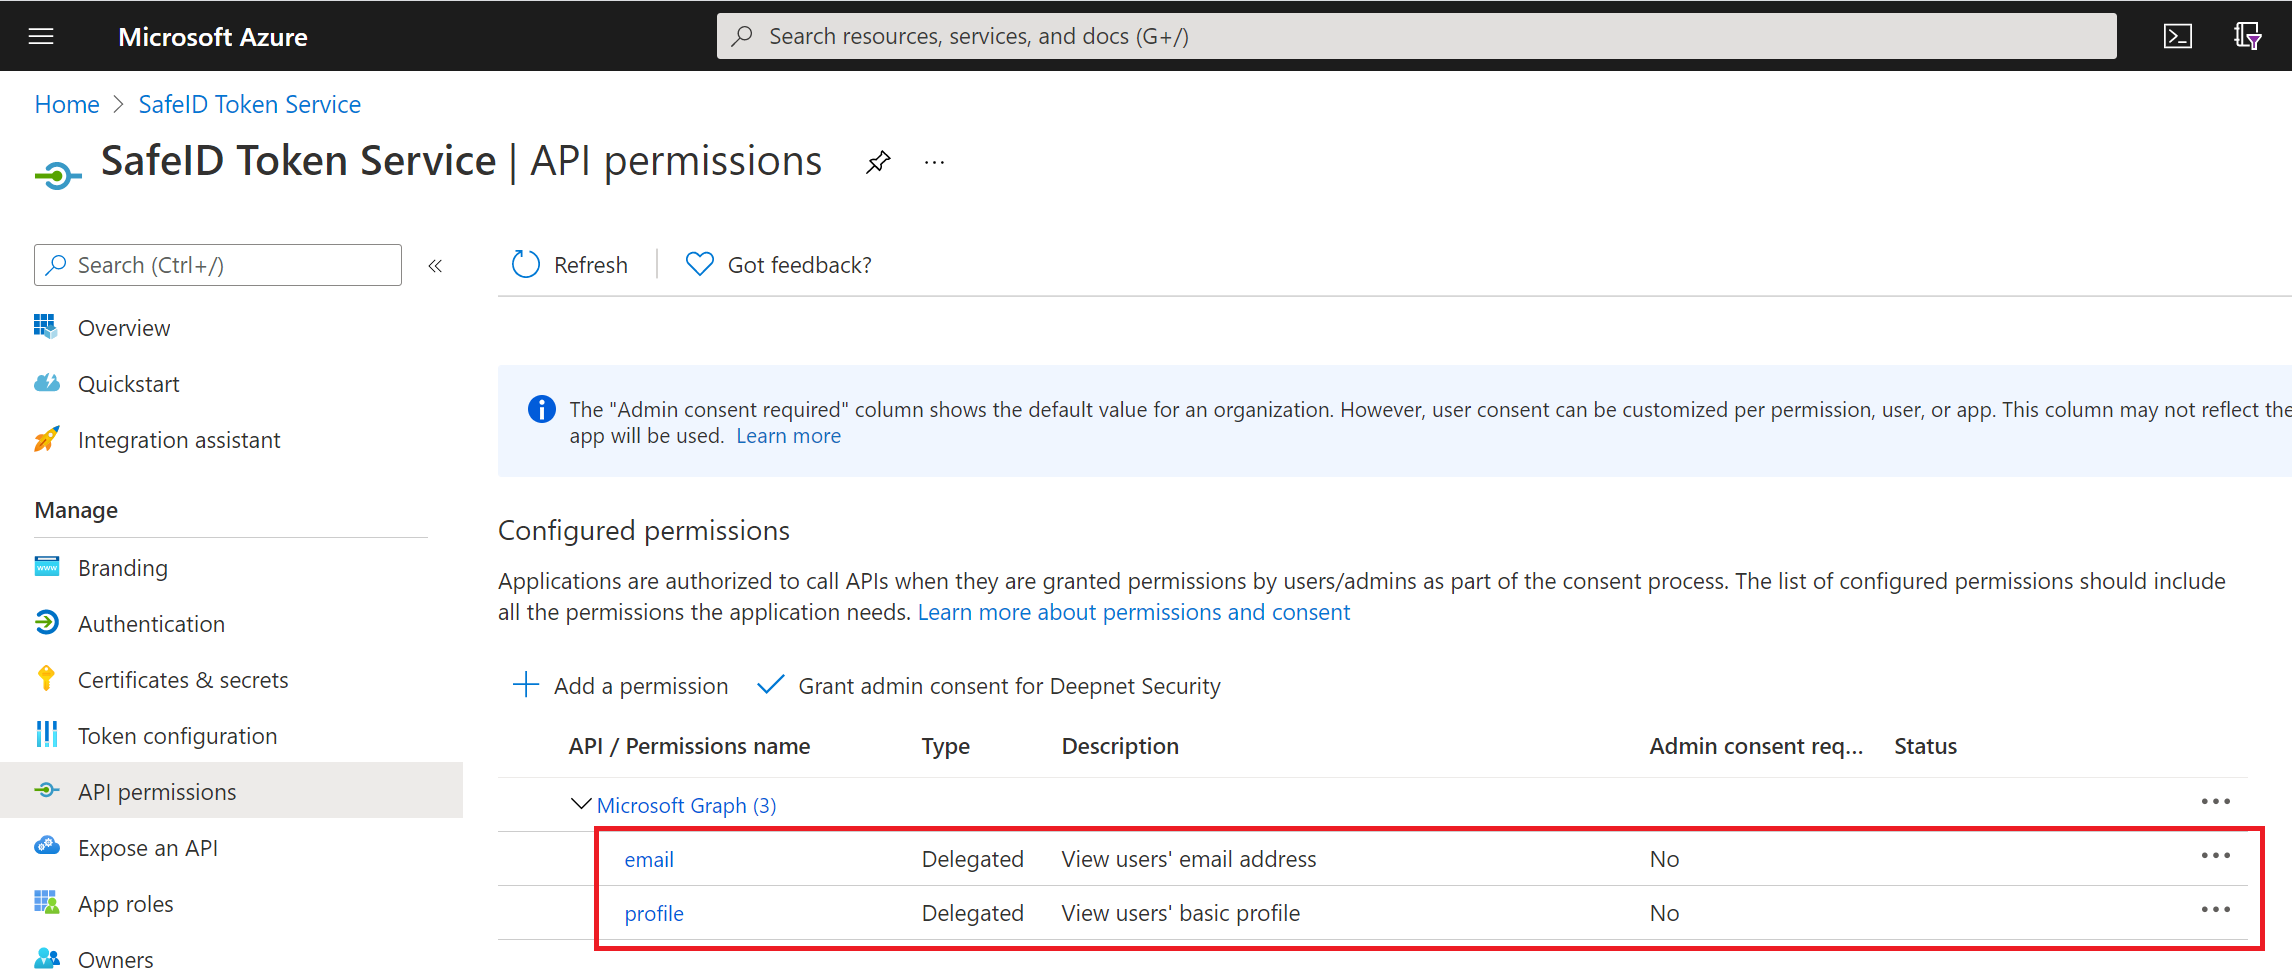
click "API permissions" in the panel on the left
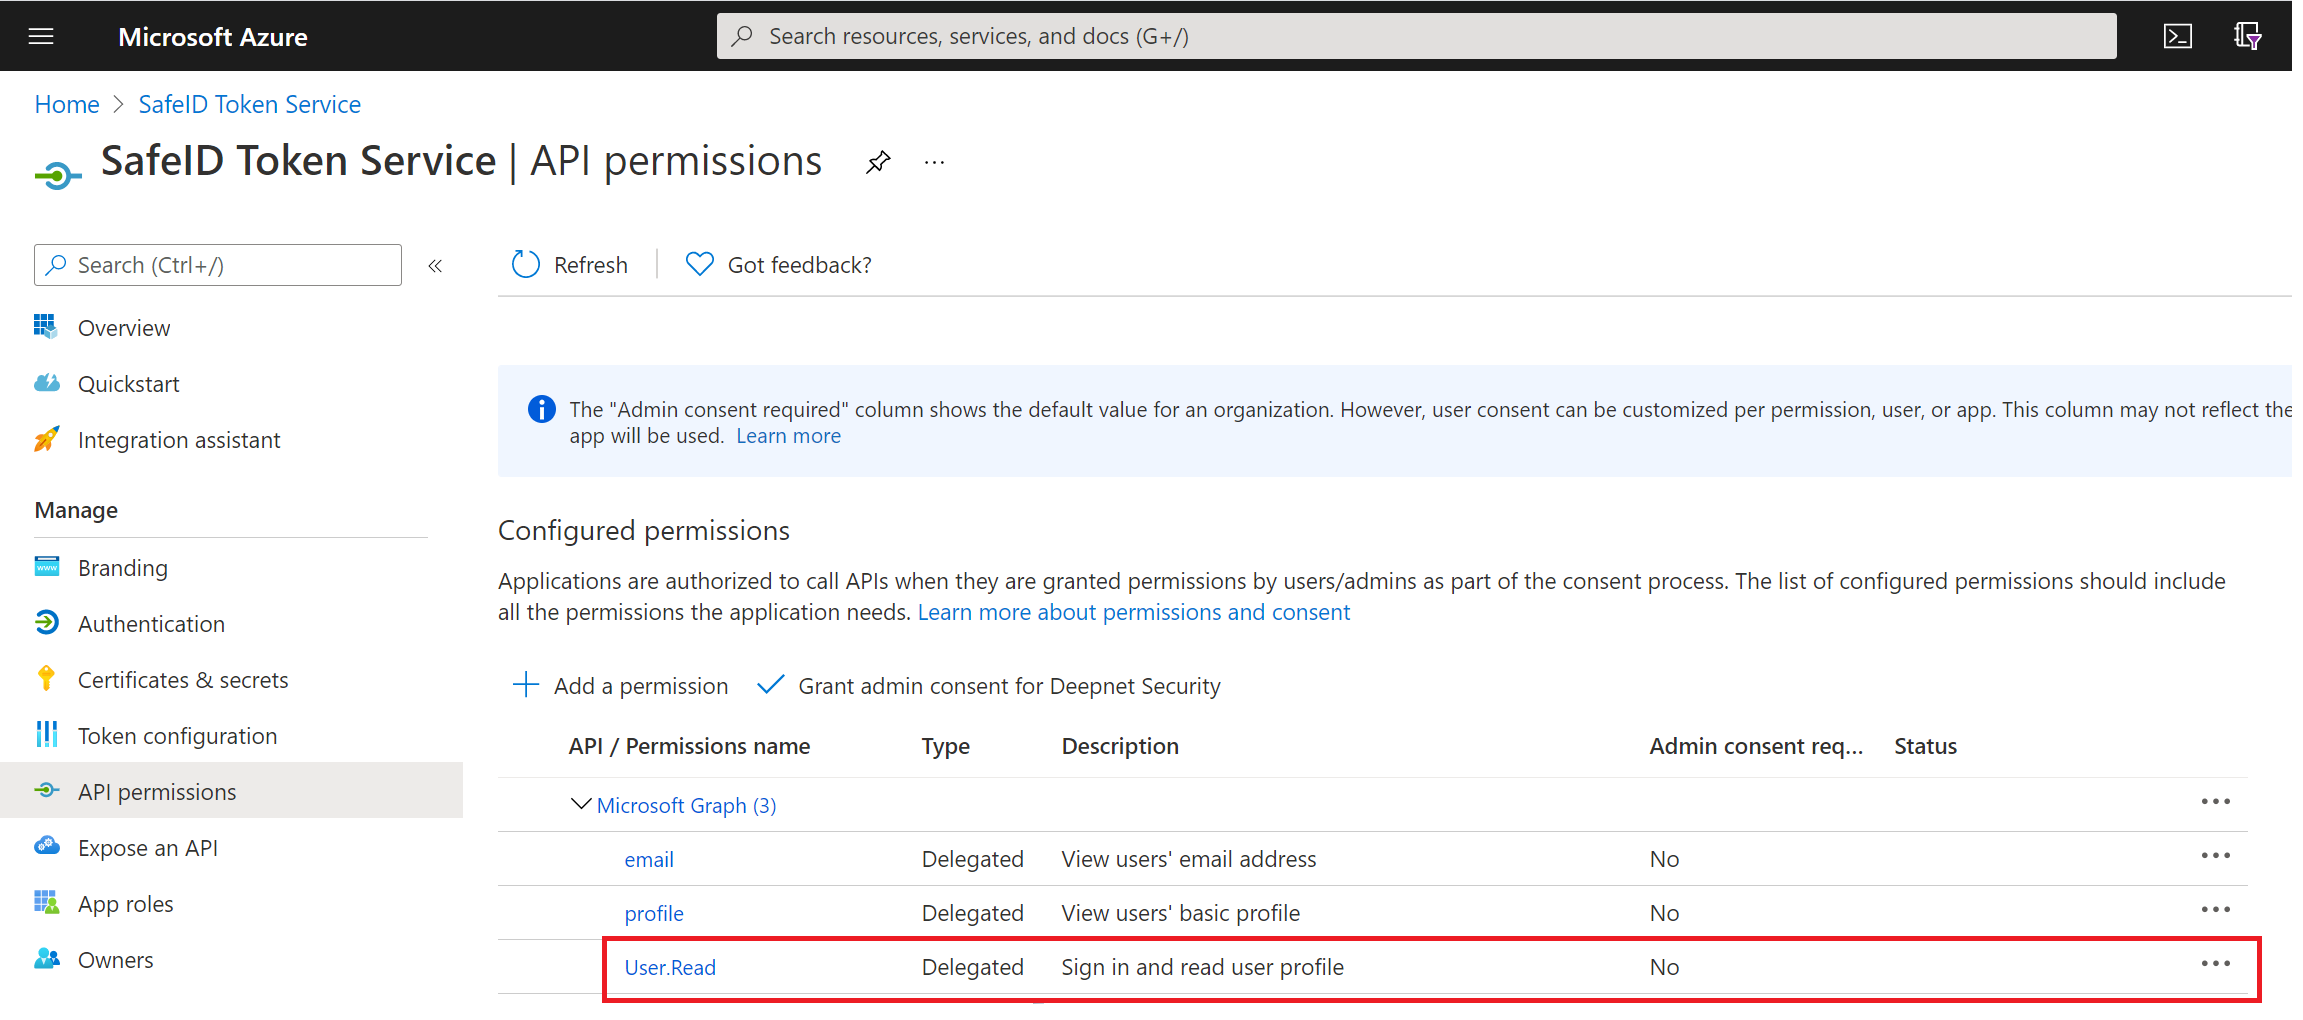
Keep "email" and "profile" permissions, and remove any other permissions.
Now, click "+ Add a permission"
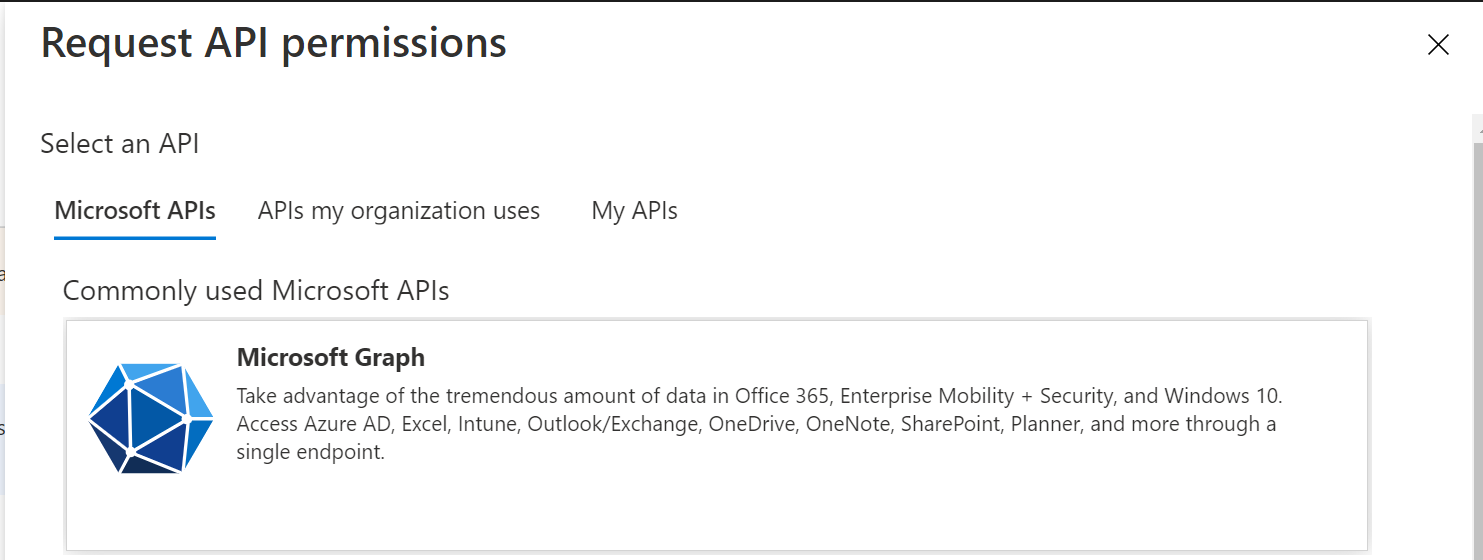
select "Microsoft Graph" tile
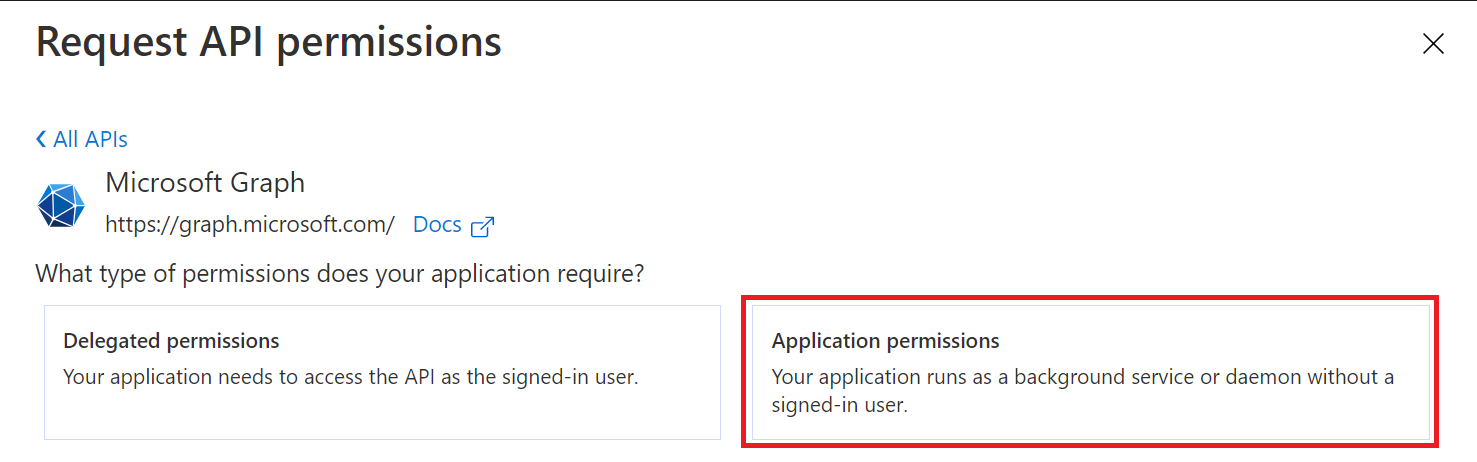
select "Application permissions"
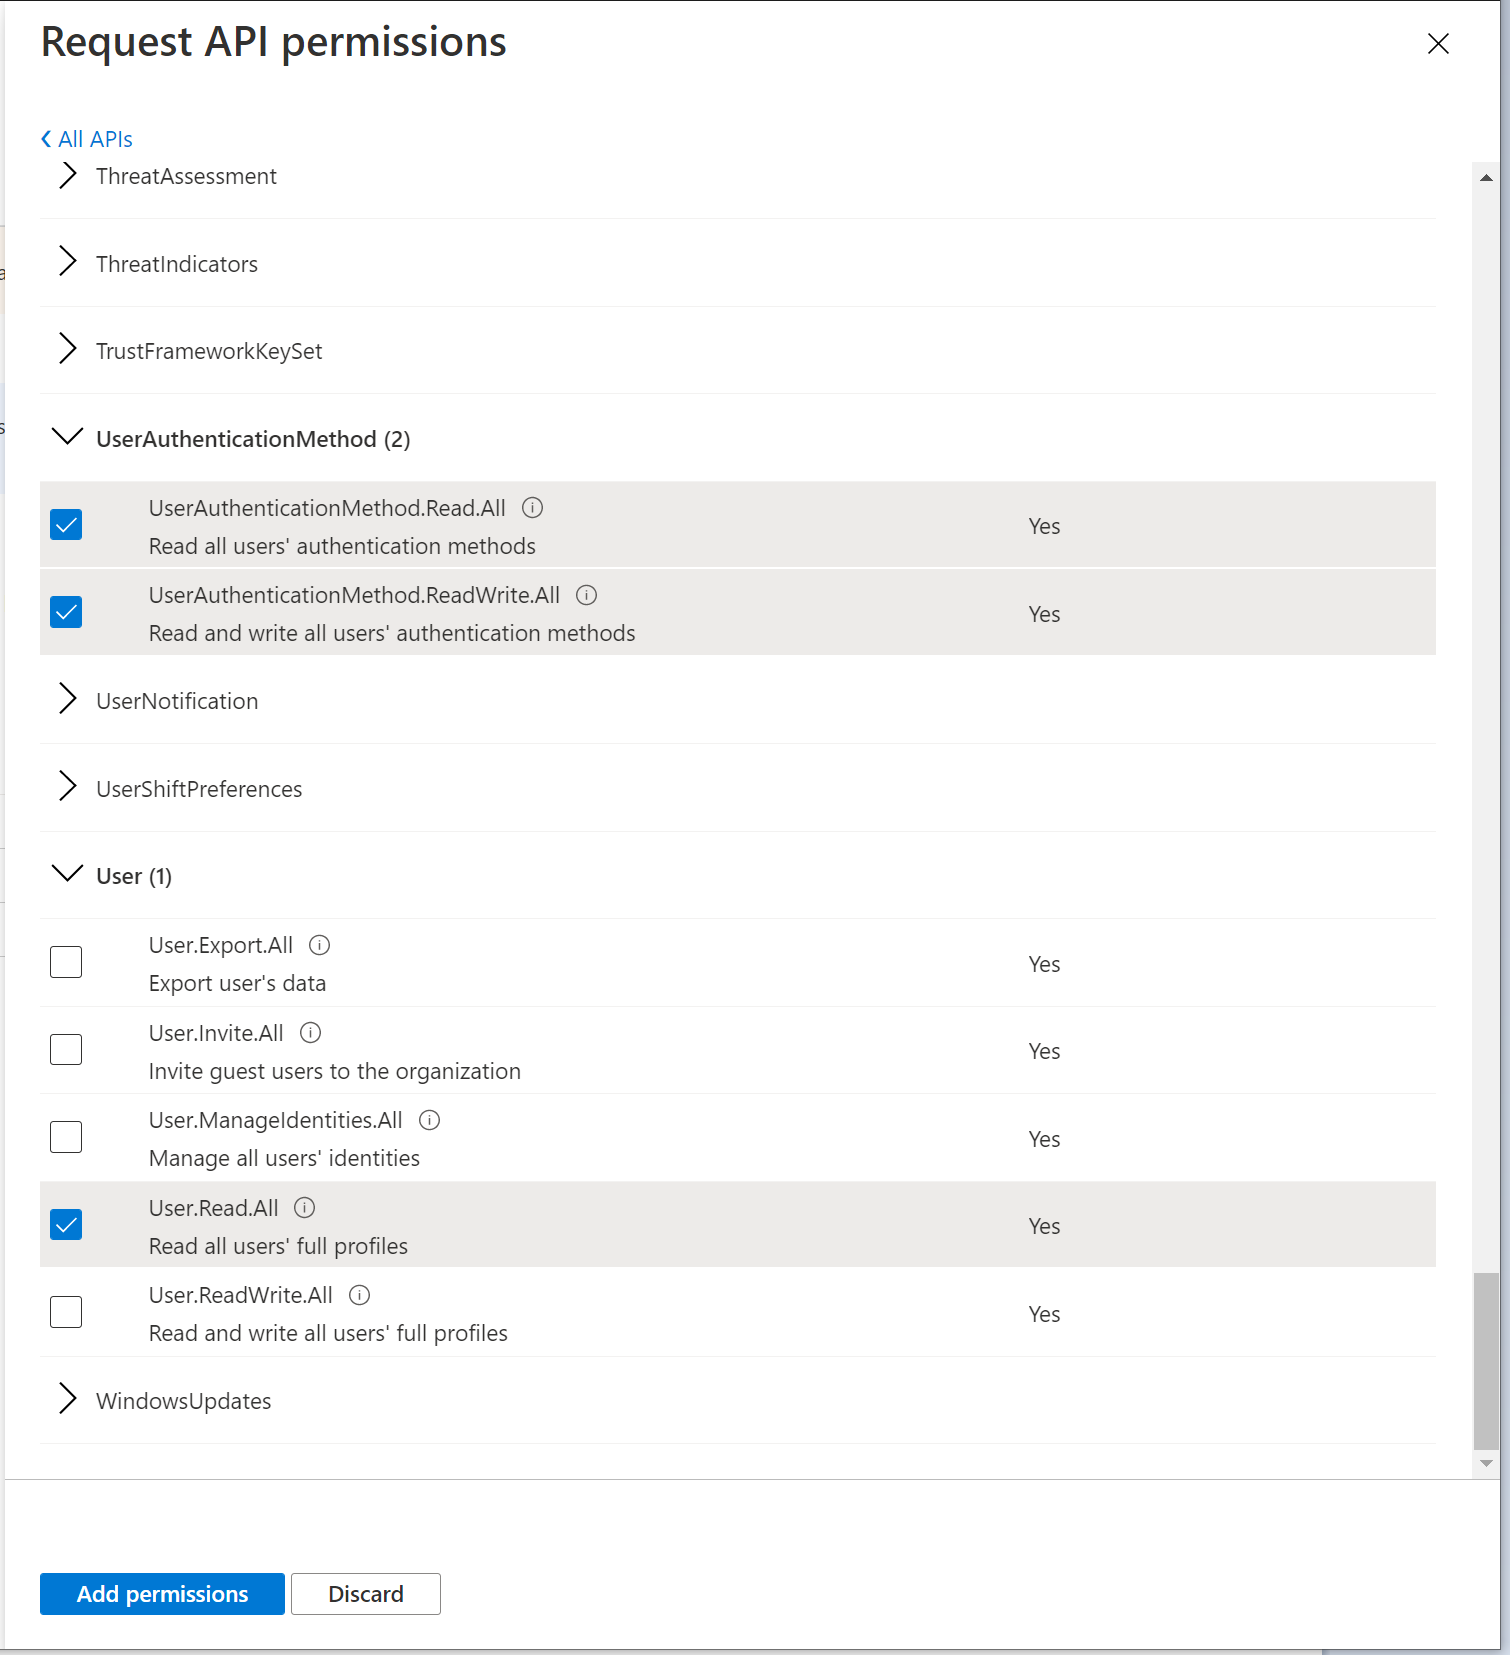
add the following permissions
a. User.Read.All
b. UserAuthenticationMethod.Read.All
c. UserAuthenticationMethod.ReadWrite.All
d. AdministrativeUnit.Read.All
e. Group.Read.All


click the "Add permissions" button to save
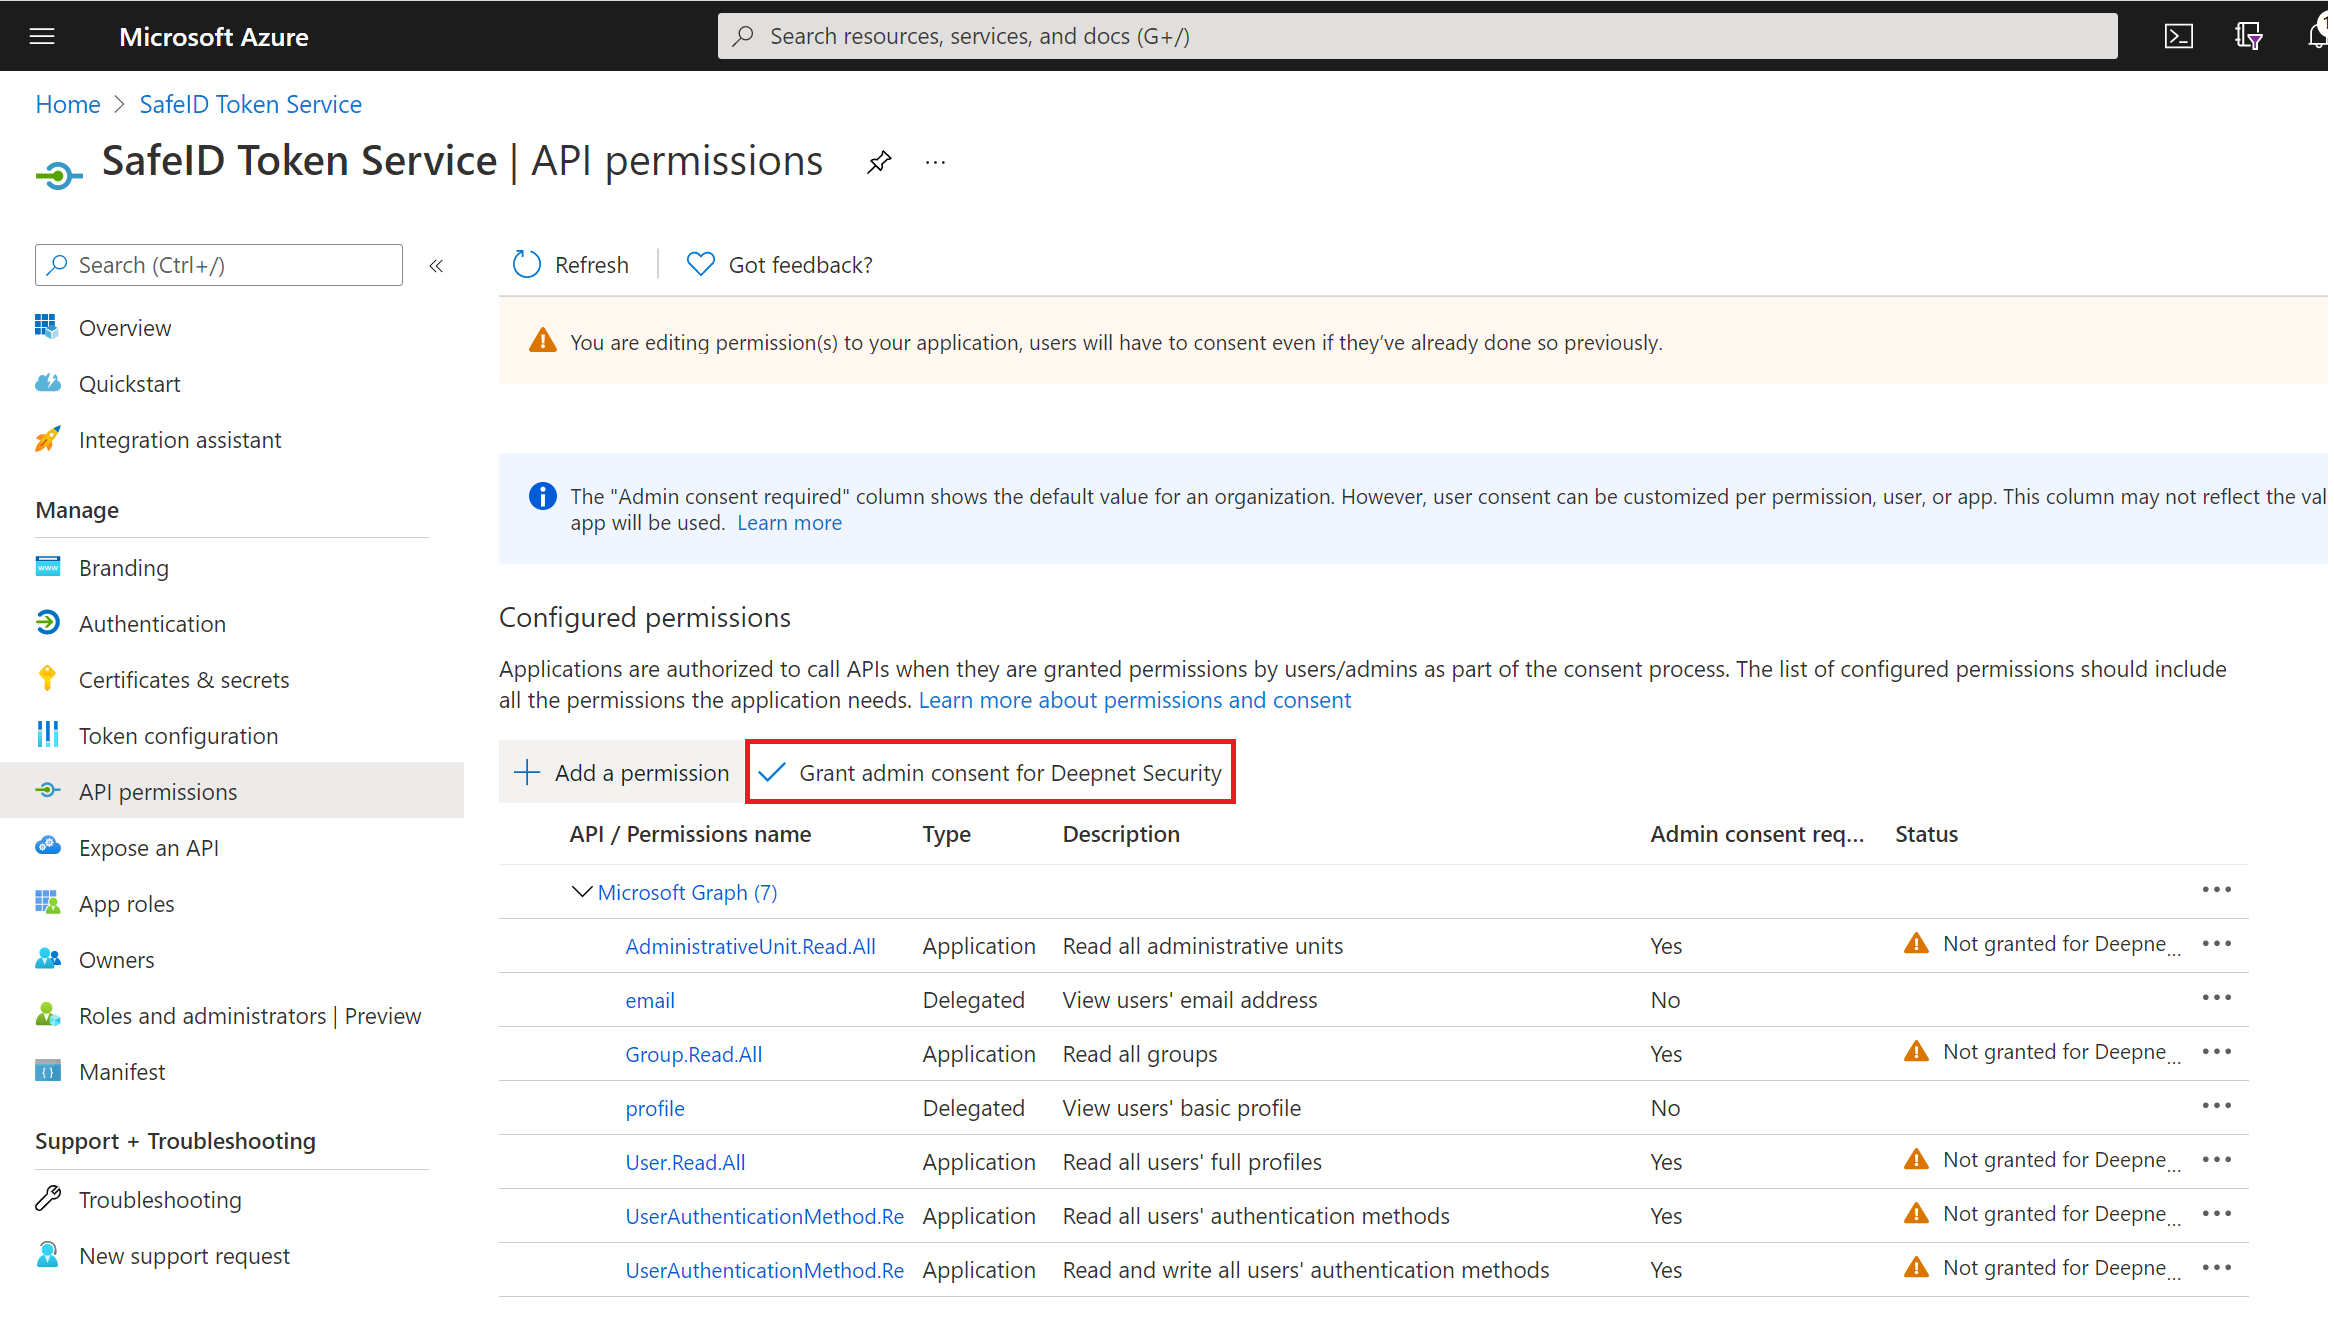
Now, click "Grant admin consent for ..."
A confirmation window will pop up

Click "Yes"