Enable security keys for Windows sign-in
(1) for all users - a tenant wide Windows Hello for Business setting for all users
(2) for a group of users - an Identity Protection configuration policy for a group of users
Option 1: Tenant wide for all Users
Open a browser and sign-in to the Microsoft Intune portal.
- Sign-in to the Device Management Portal
- Browse to Devices – Windows – Windows Enrollment
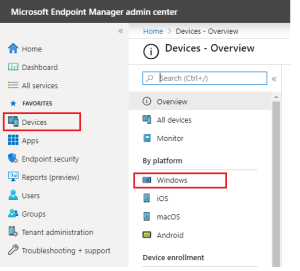

- Click Windows Hello for Business
- Set Configre Windows Hello for Business to Enabled
- Set Use Security keys for sign-in to Enabled
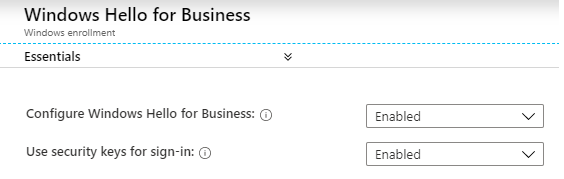
- Click Save
Option 2: Identity Protection configuration policy
The advantage of using a configuration policy is that you can assign it to a group of users instead of all users.
- Browse to Devices – Windows – Configuration profiles
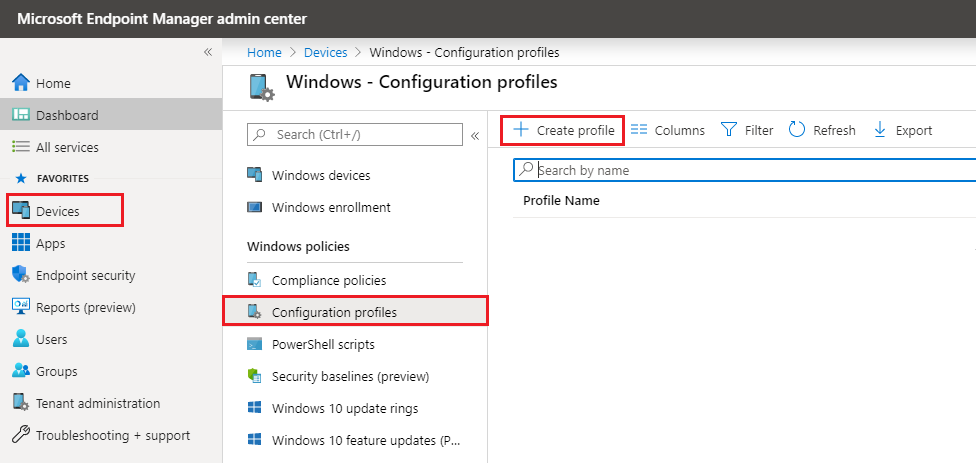
- Click Create profile
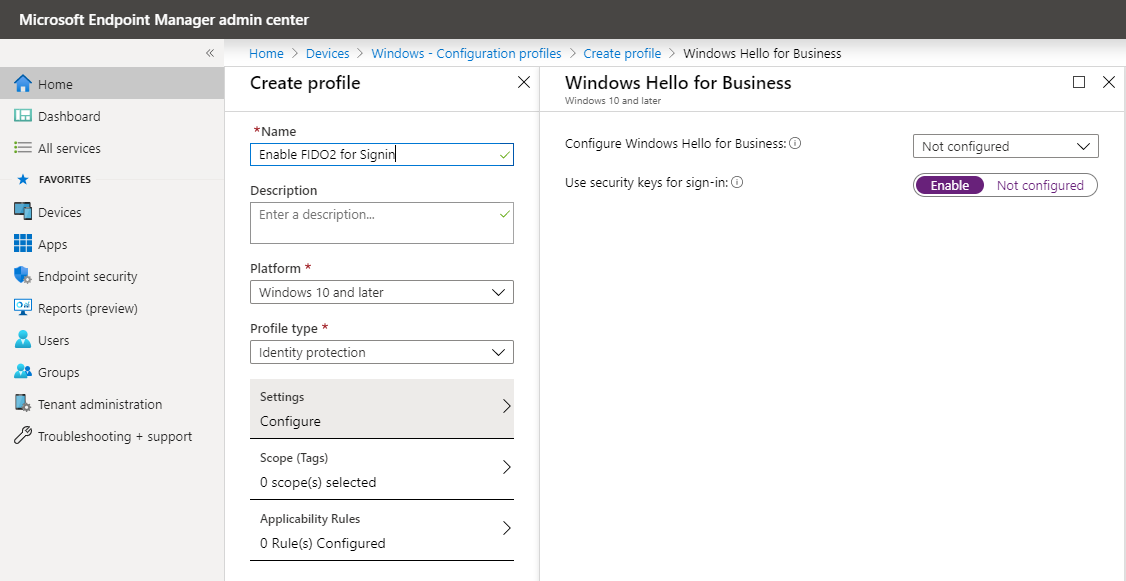
- Give the policy a Name, e.g. "Enable FIDO2 for Signin"
- Enter a Description for the policy (optional)
- Choose Windows 10 and later as the Platform
- Choose Identity protection as the Profile type
- On the Settings tab set Use security keys for sign-in to Enable
- Click OK
- Click Create
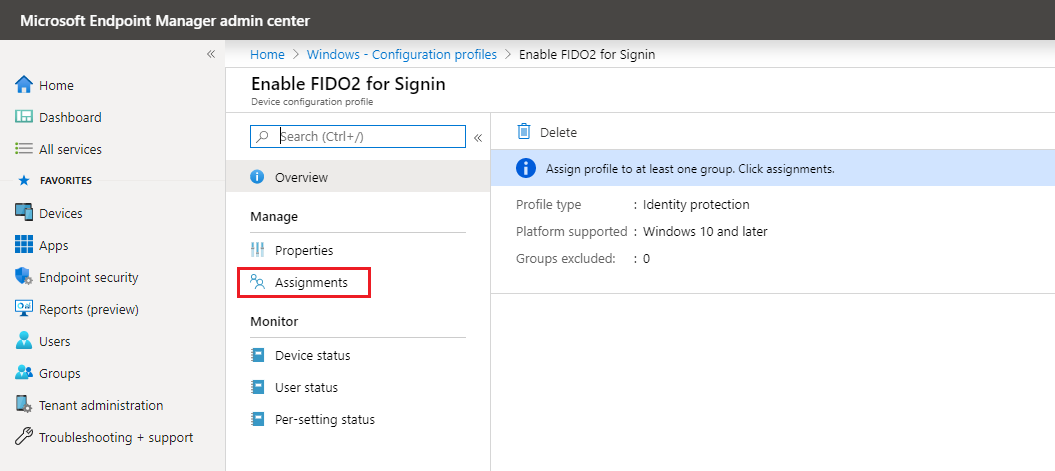
A new policy Enable FIDO2 for Signin has been successfully created. The next step is to assign the policy to the security group of choice
- Click Assignments
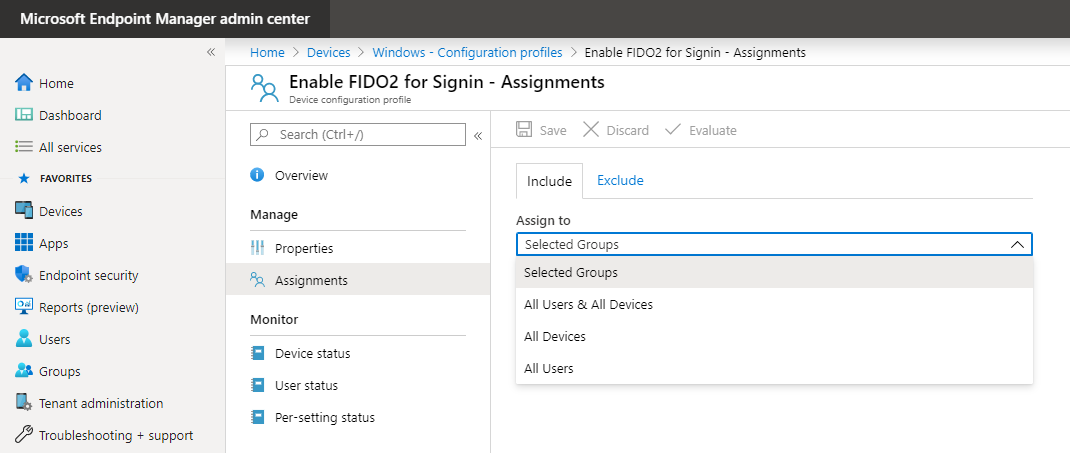
- In Assign to choose the group, then click Save.
Enable combined security information registration
The second step is to enable combined security information registration. The feature needs to be enabled from the Azure (AD) Portal.
- Sign-in to the Azure AD portal
- Browse to Azure Active Directory – User settings
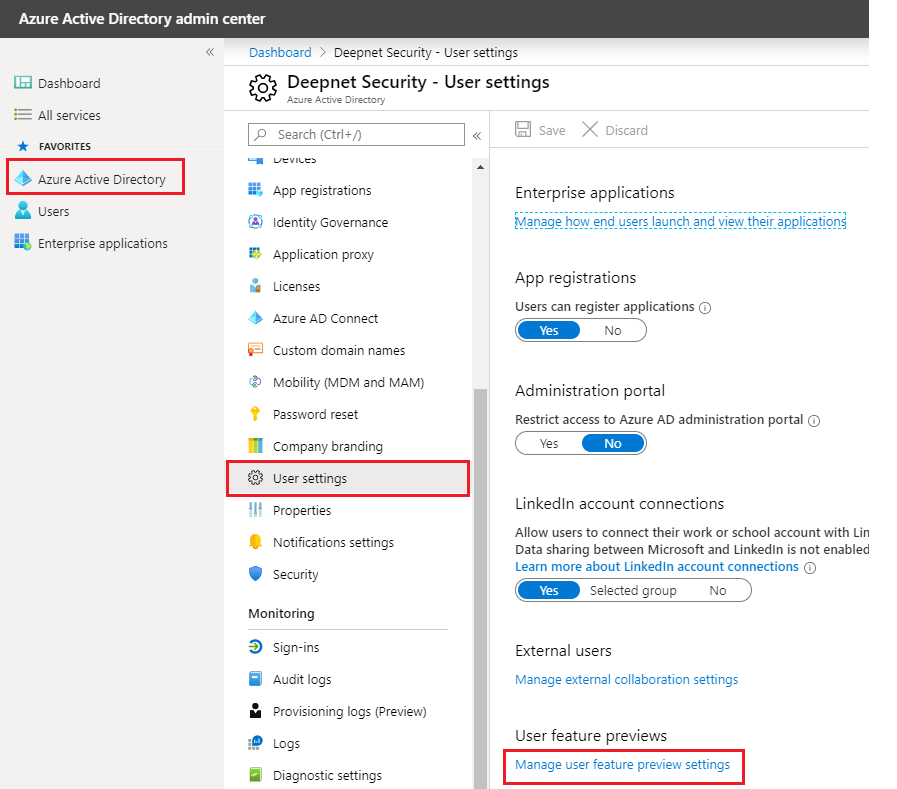
- Click Manage user feature preview settings
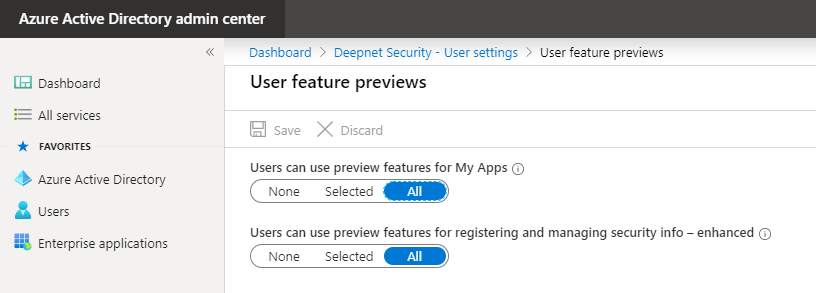
- Select All to switch on the features for all users
- Click Save
Enable FIDO2 security keys as Authentication method
The third step is to enable FIDO2 security keys as Authentication method in Azure Active Directory.
- In the Azure AD Portal browse to Azure Active Directory
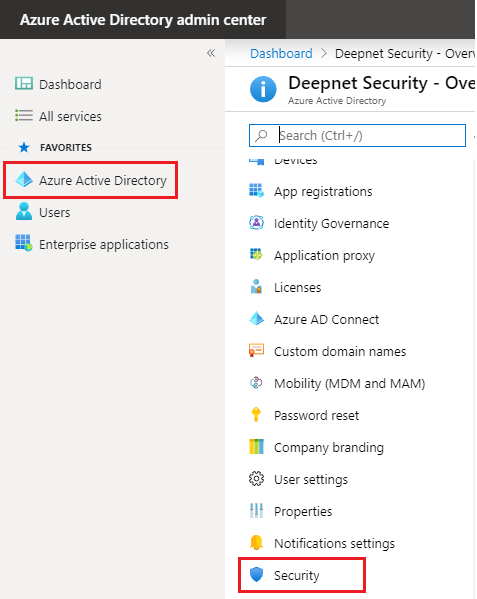
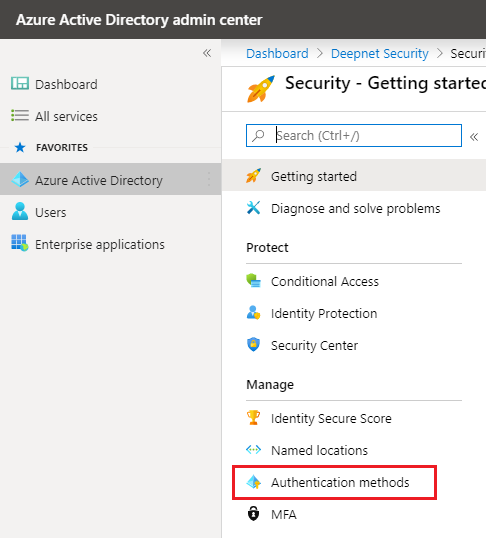
- Browse to Security – Authentication methods
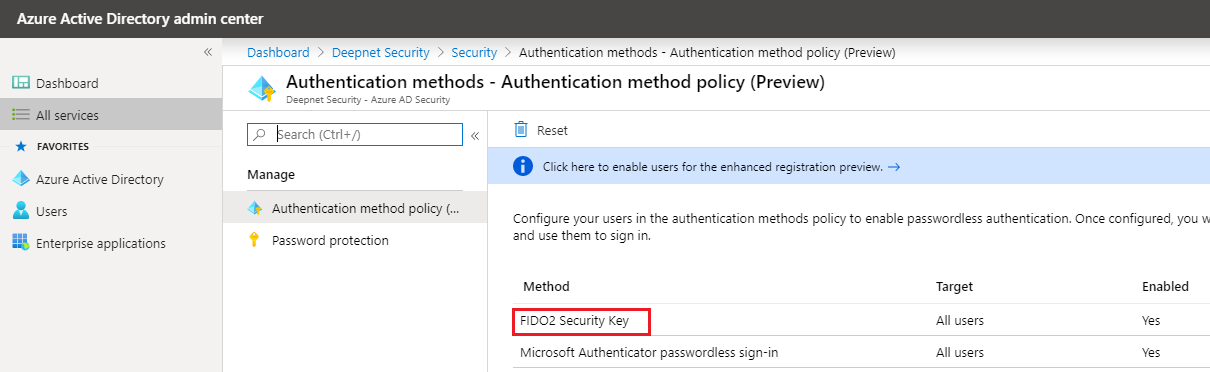
- Click FIDO2 Security Keys
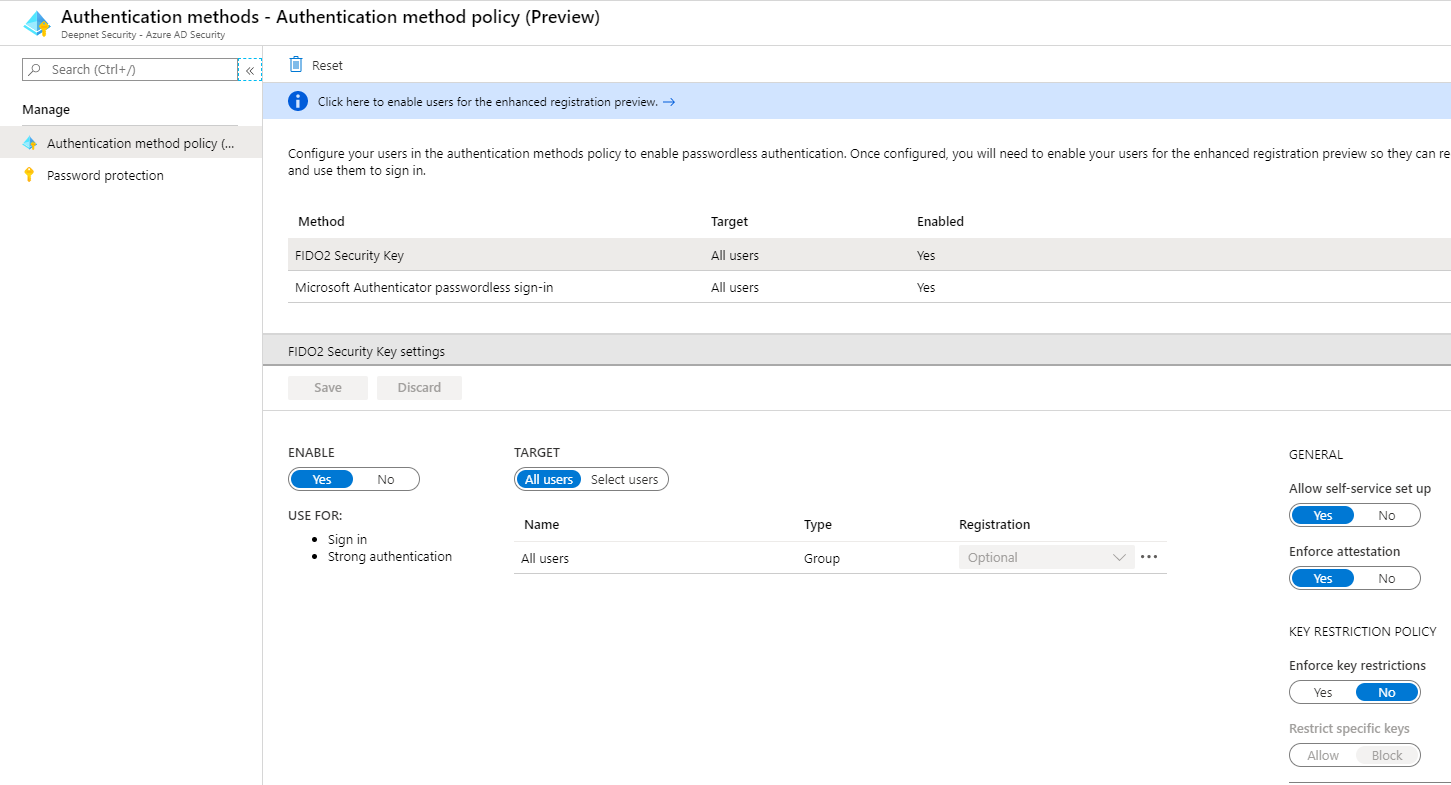
- Set ENABLE to Yes
- Leave TARGET set to All or switch to Select users and select a security group
- Click Save
Register FIDO2 key in Azure AD account
First, make sure your browser (like Edge, Chrome, Firefox) supports WebAuthn.
Then, navigate to the following link, and sign in.
https://mysignins.microsoft.com/security-info
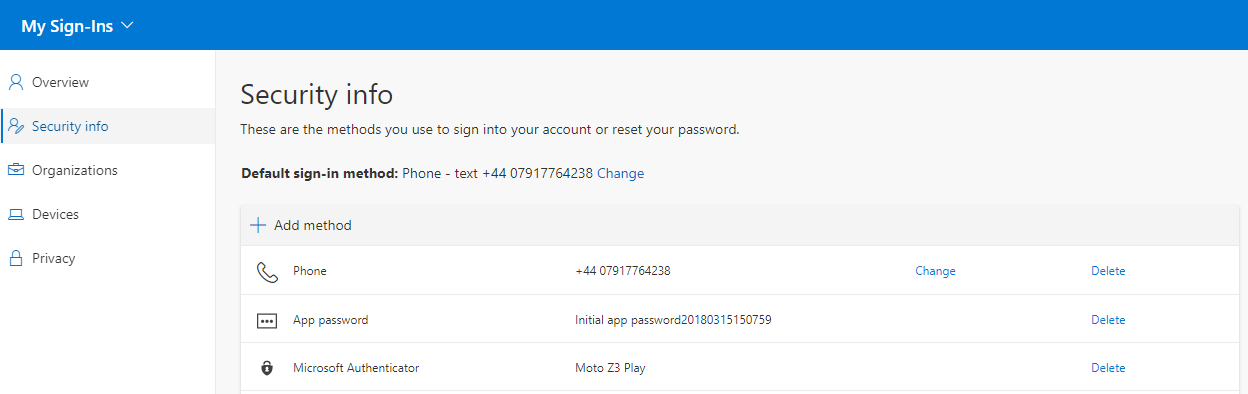
Under Security info click Add method.
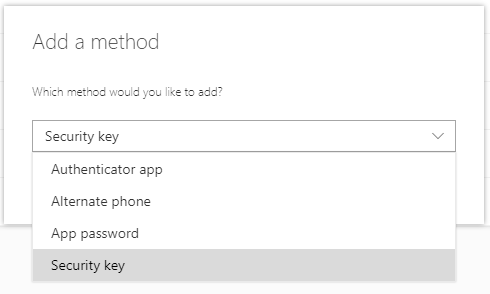
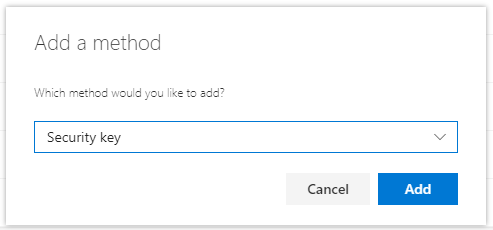
Pick Security key from the drop-down list and click Add.
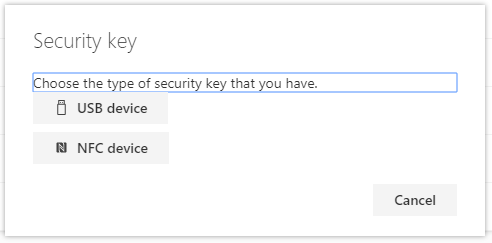
Select USB Device.
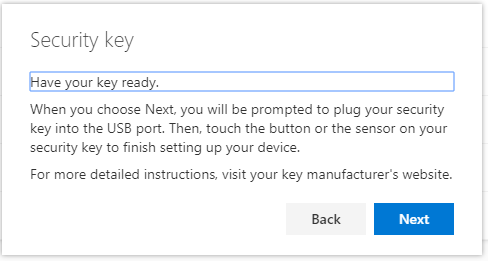
Click Next.
Insert the FIDO2 security key.
Your PC will redirect you to a new window to finish setup.
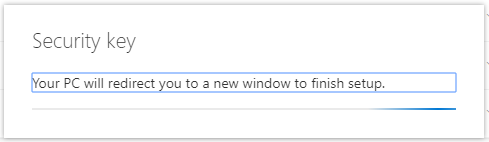
Follow the instructions described in the new window.
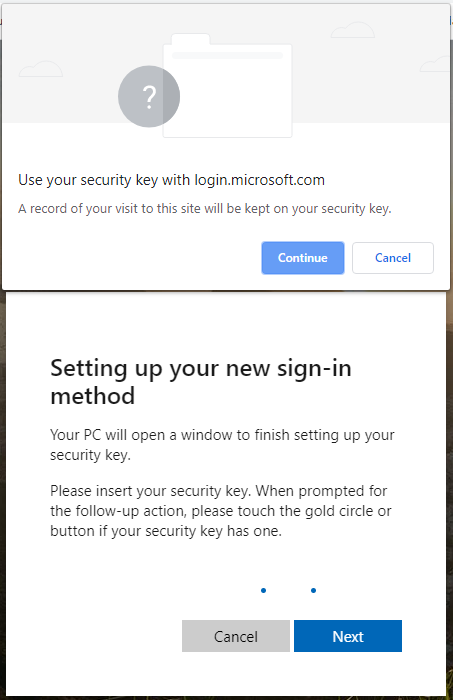
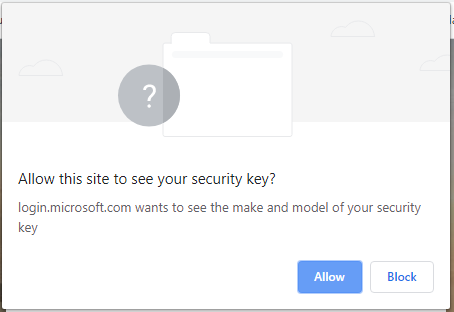
Click Continue in the pop-up screen.

Create a PIN for this security key and enter the PIN a second time. Click OK.

Touch the Security key.
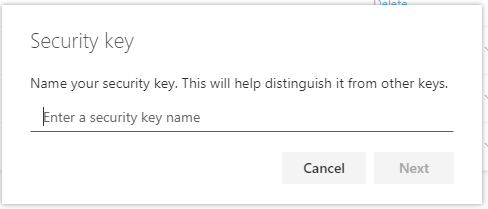
Give your security key a Name, so you can identify your key, and click Next.
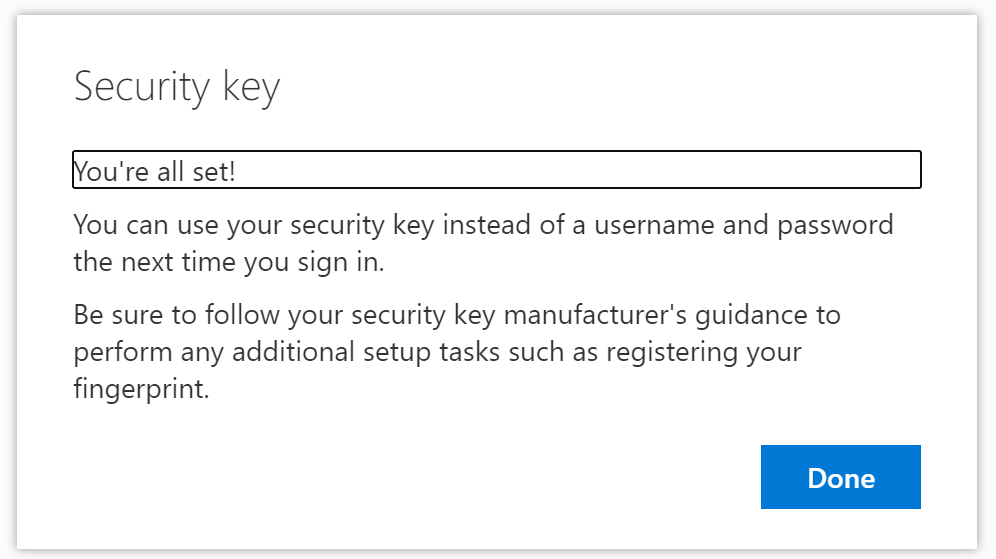
You`re all Set! Registration of the security key is finished.
Click Done.
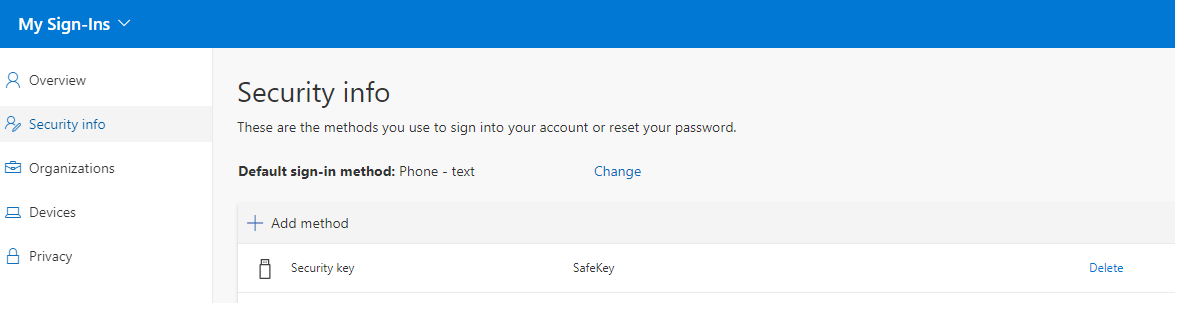
The security key is listed as one of the sign-in methods.
Join Windows 10 computer to Azure AD
Open Settings
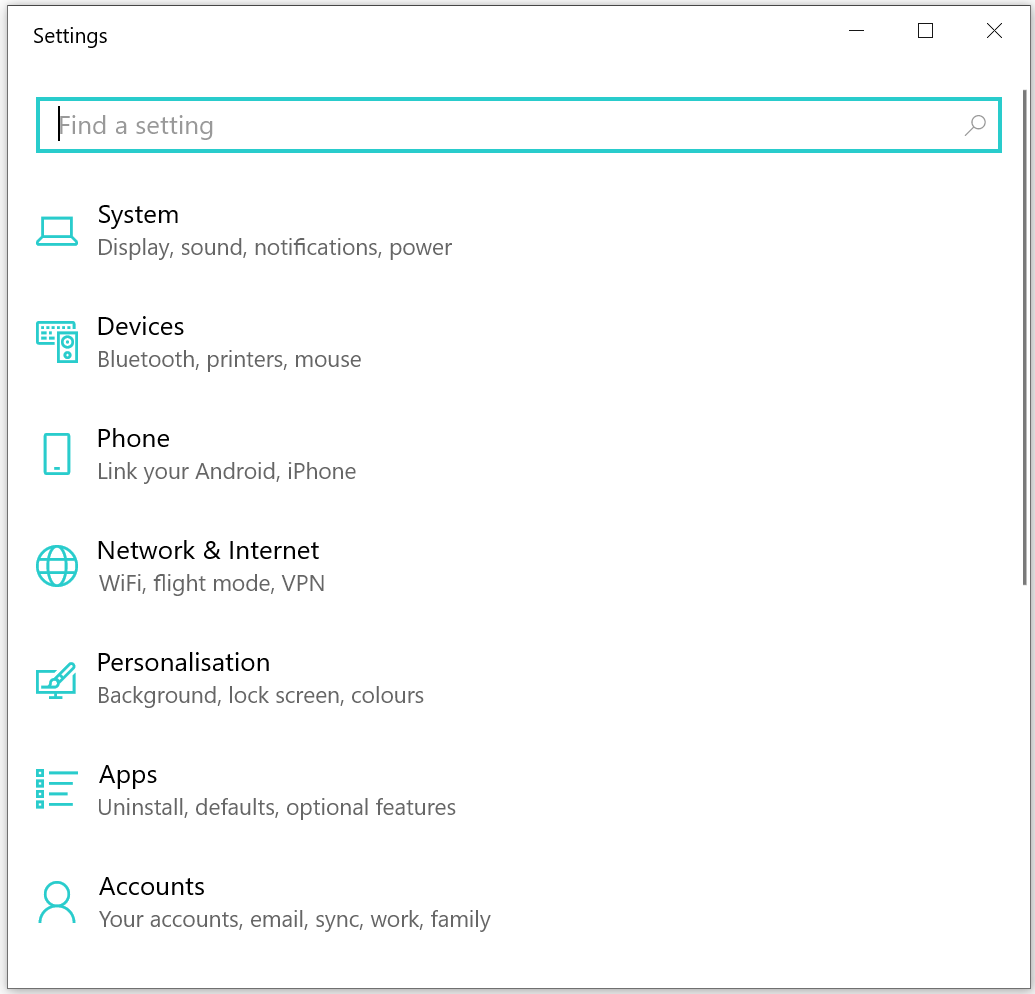
Click Accounts
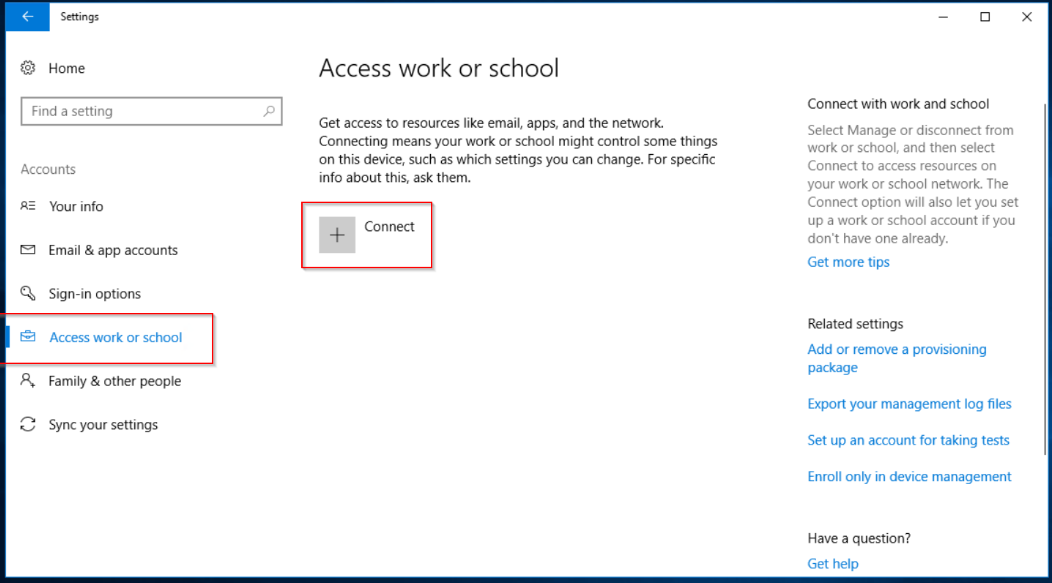
Click Access work or school and press Connect.
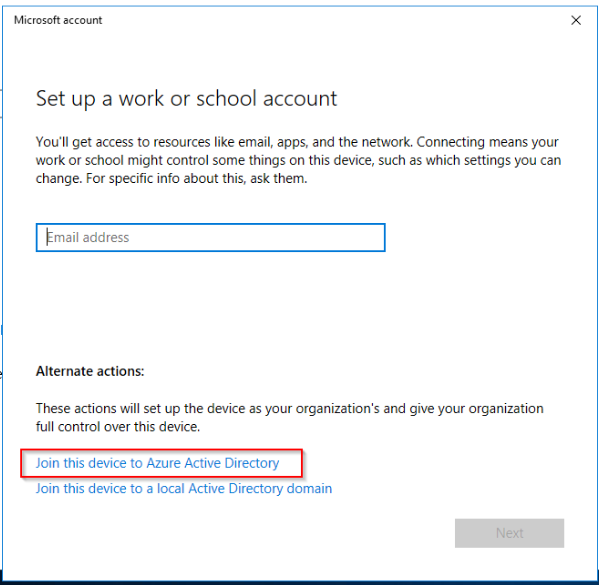
Click Join this device to Azure Active Directory
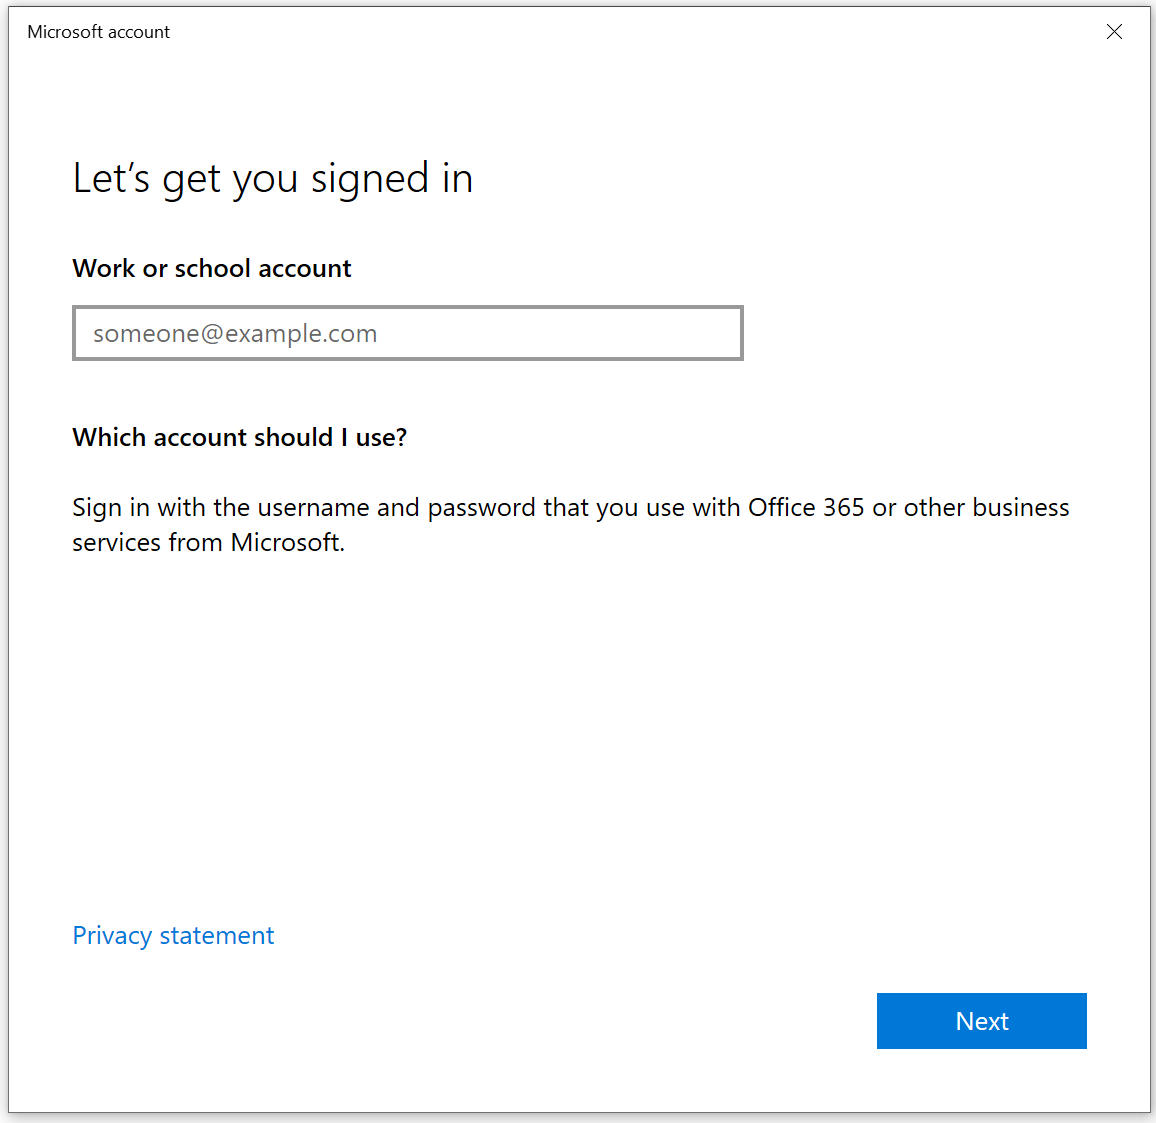
Enter your email address and press Next
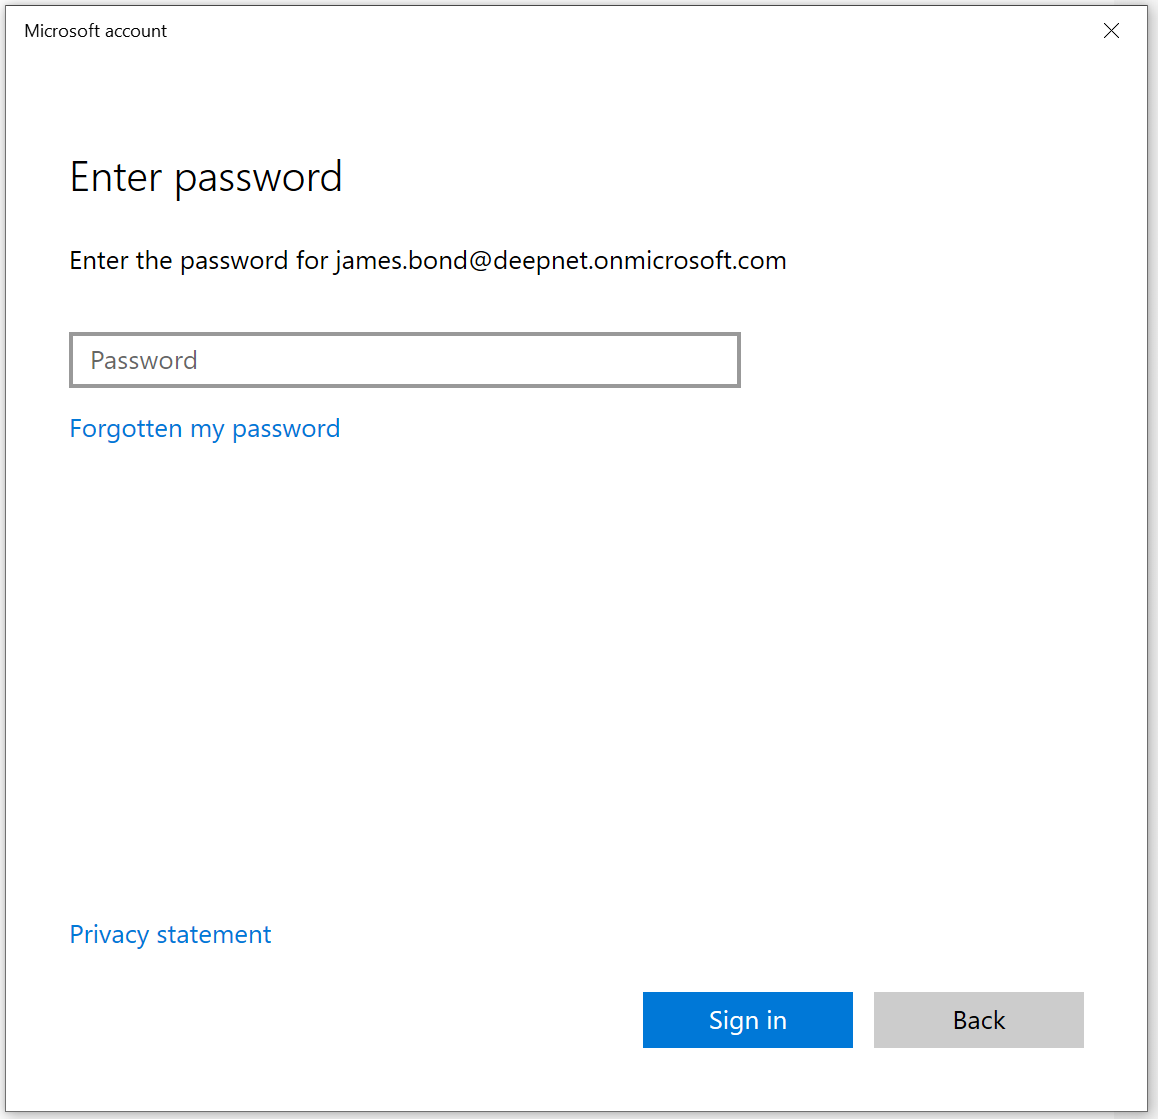
Enter your password, press Sign in
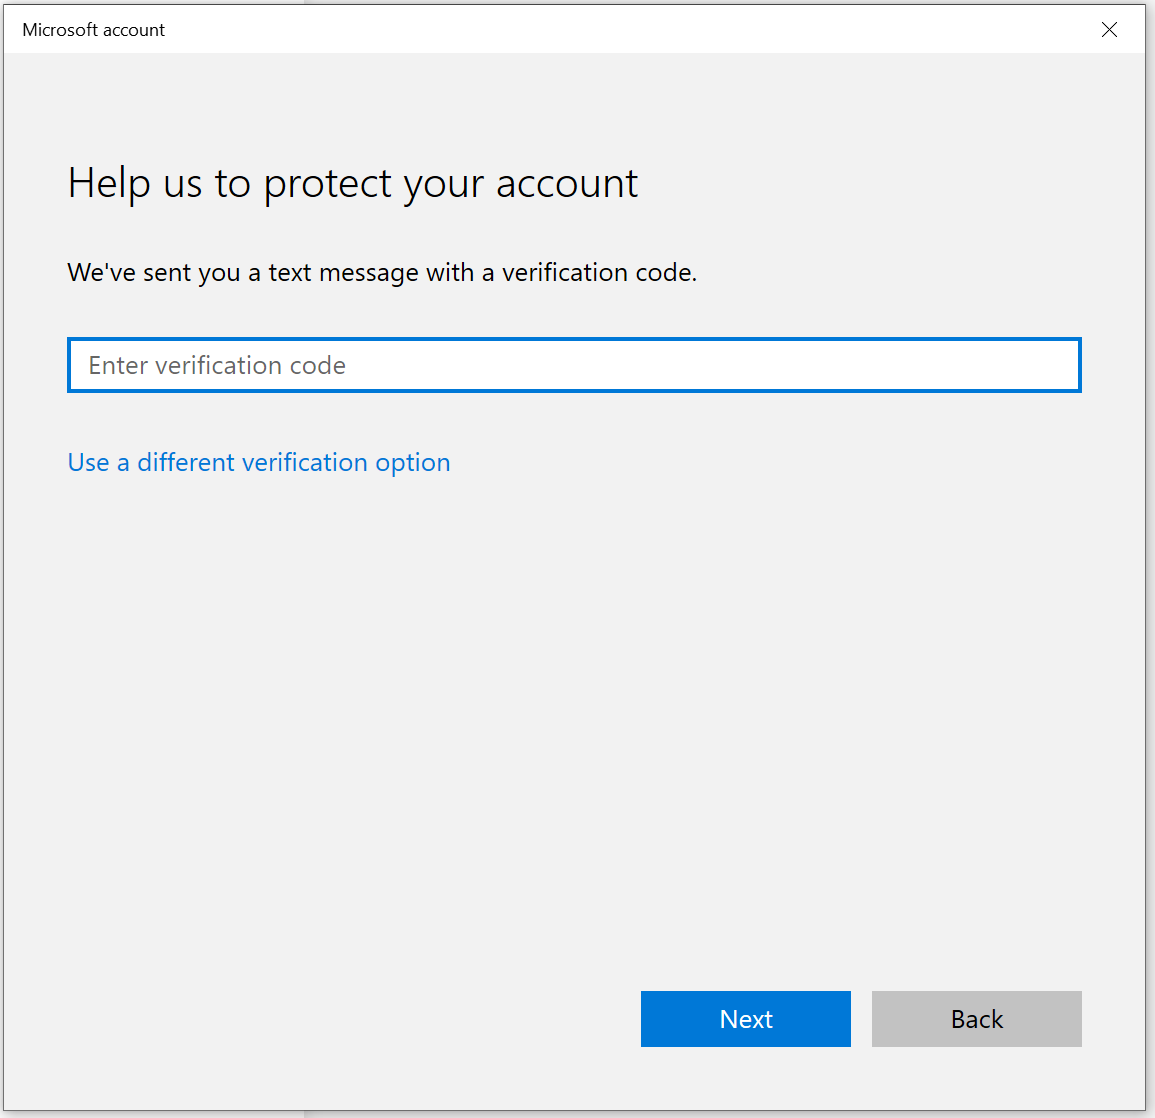
Enter the verification code

Click Join
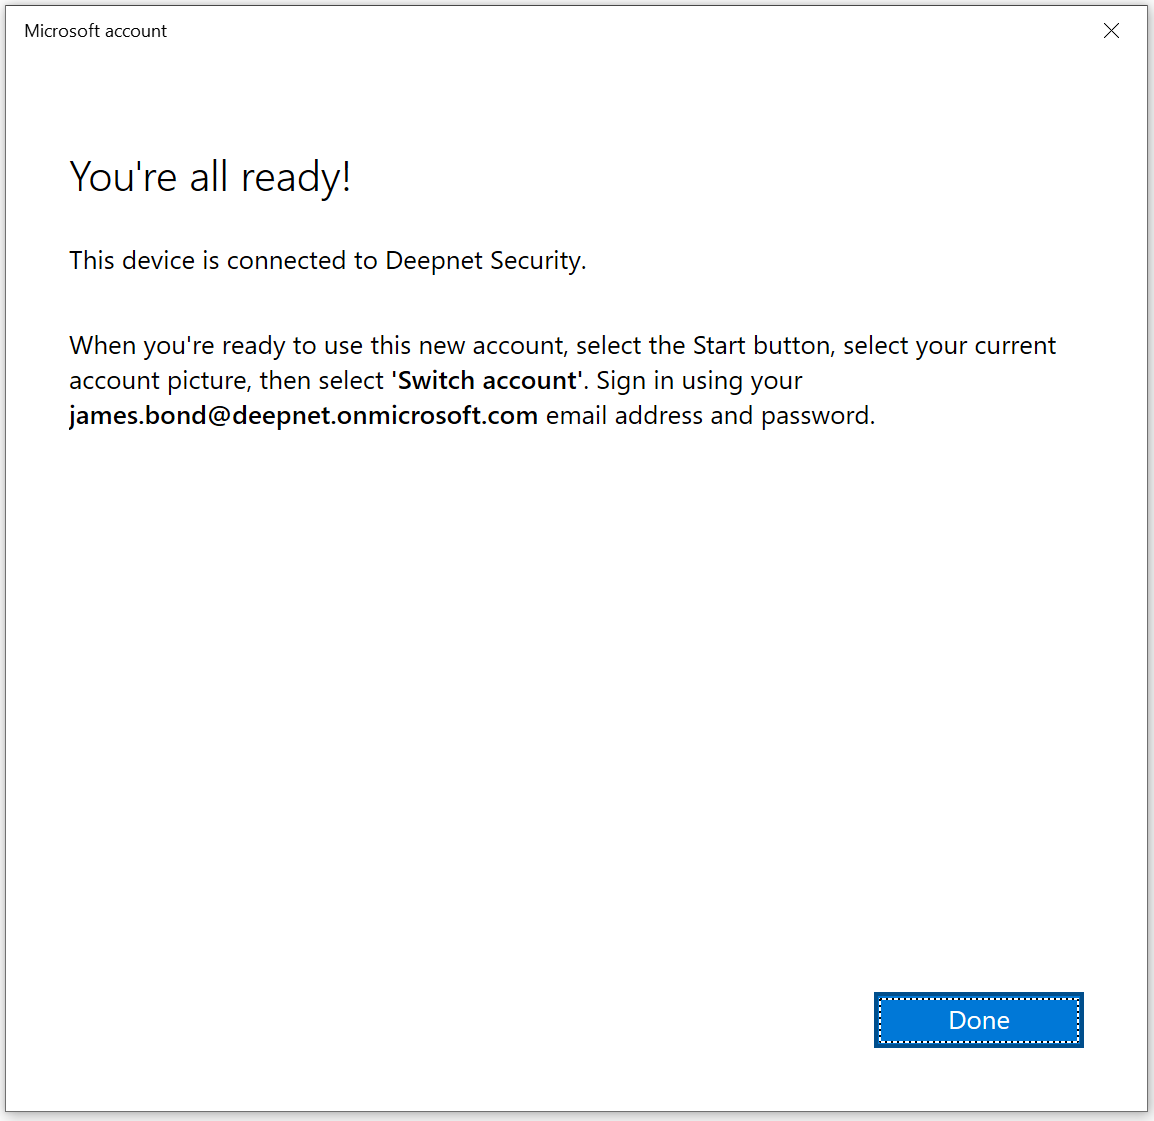
Click Done, and your computer is now joined to Azure AD.
Sign in Windows 10 computer with FIDO2 key
When you click on Sign-in options on the login Window, the new option is shown. In the middle we now have the security key icon.
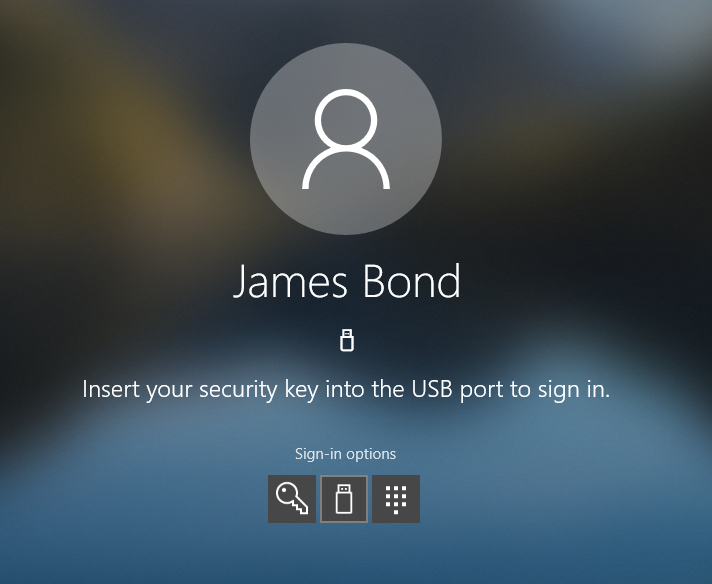
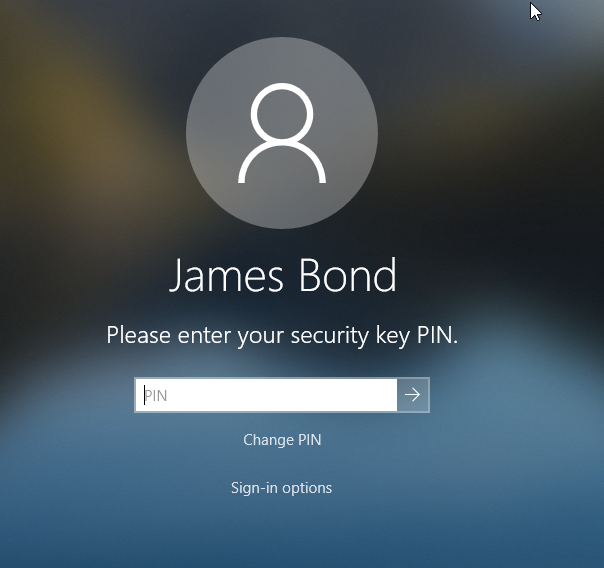
When you click on the security key icon, you are asked to insert the key.
When you insert your FIDO2 security key, you are prompted to enter your PIN code.
After entering your PIN, you are asked to touch your key.
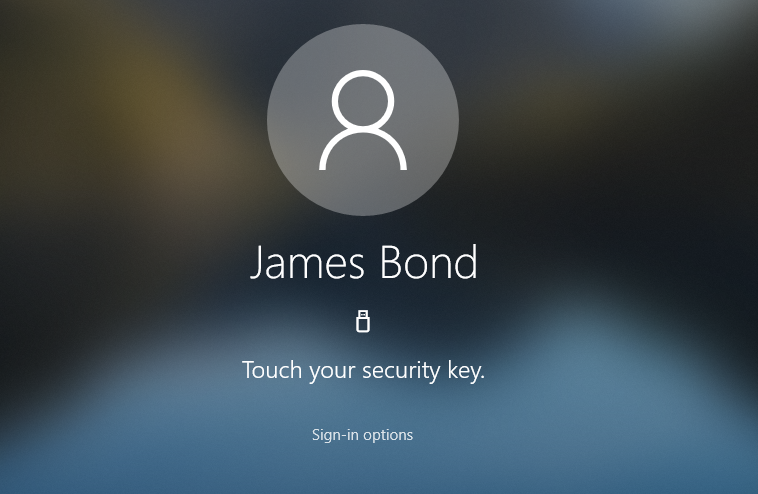
Touch the key, and you are signed-in to your computer without providing your username and password!