During a device's lifetime, for extra security, you can set the policy so that the token will need to be periodically reactivated by the user.
Set Reactivate in the DeviceID Policy

| Option | Value | Explanation |
|---|---|---|
| Token must be reactivated every N hours: | Any number | This option specifies the time period (in hours) that a token should be reactivated (0 = reactivation is not required) |
| Send notification N hours before a token is due for reactivation | A number lower than the value above | The end user will receive a notification at the number of hours specified, before the DeviceID token is due to expire |
| Reactivation notification | Select an option via the dropdown arrow | The methods of how the DeviceID reactivation notification will be delivered to the user |
Set up Token Reactivate Notification Service
If you have enabled the token reactivation option in the DeviceID policy, then you must also set up the task called "Token Reactivate Notification Service"
Introduction
The "Token Reactivate Notification Service" task periodically checks if DeviceID tokens are about to need reactivation will send out notification messages to the users if required.
The notifications that are sent are based on the parameters specified in the DeviceID policy setting parameters in the "Reactivate" section of the policy (see below);

The task can be found by navigating to "Administration | Tasks", then scrolling down to the task "Token Reactivate Notification Service";

Task Parameters
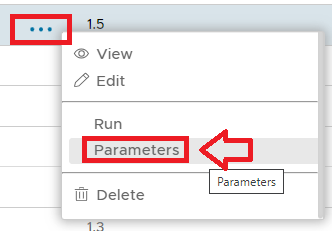
The task parameters are used by the task script to determine which tokens are to be deleted and are edited by left clicking on the context menu of the task and selecting "Parameters";

A new window titled "Task Parameters" will now open that lists the parameters making them available for editing, and the default parameters for this task are as follows;

Select the parameter "application" then click the  button, and a new window titled "Parameter - Edit" will open;
Specify the correct "application" that you are using for the Exchange ActiveSync by clicking on the down Arrow and selecting the correct Application from the list

Then click  to update the parameter.

- Before tasks are scheduled (or run manually), we should provide the task parameters that are used during processing of the task script.
To access the task parameters left click on the context menu of the task then select "Parameters";
A new window titled "Task Parameters" will now open that lists the parameters that have been created for this task (see example below);
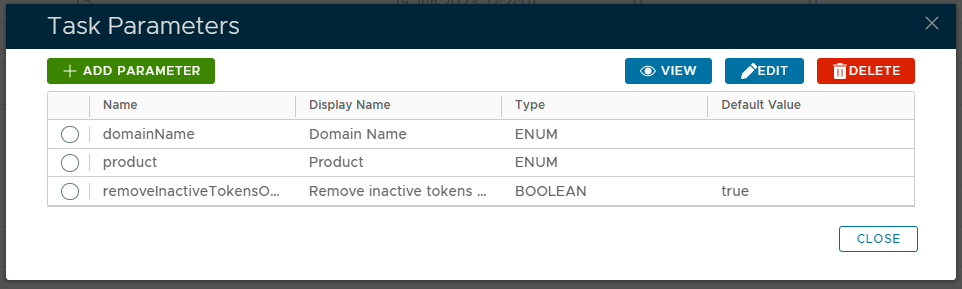
In the top right hand corner of this window are the buttons that all viewing, editing and deletion of task parameters;
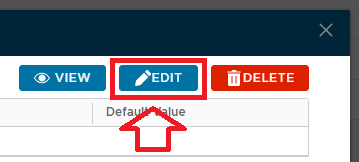
To edit one of the listed parameters first select the parameter to be edited then click on the
 button.
A new window will now open that will allow you to edit the parameter (example below);
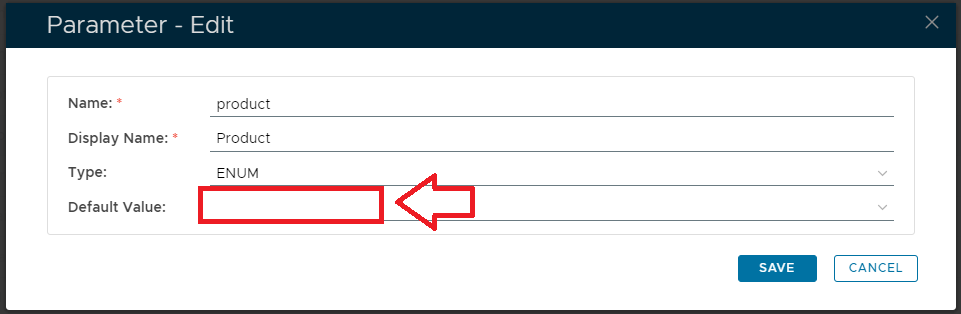
In most cases the only value that should be changed is the "Default Value" setting.
If the default value is updated, and the
 button is pressed, then this new value will be used by the task script next time the task is run.
Editing and Scheduling the Task
Viewing and Editing the task
By default, the task is not enabled, but may be enabled by left clicking on the context menu of the task and selecting "Edit";

A new window will now open titled "Task - Edit";

Scheduling the Task
Select the "Enable Schedule" checkbox to ensure the task schedule is activated, then use the pencil icon ("![]() ") to specify the time and frequency settings for automated task execution.
") to specify the time and frequency settings for automated task execution.

- Tasks can be scheduled for automatic execution by selecting the "Schedule Enable" option then clicking on the
 icon;
icon;
When the
is pressed a window will open titled "Schedule" that can be used to specify the when the report is scheduled to run; 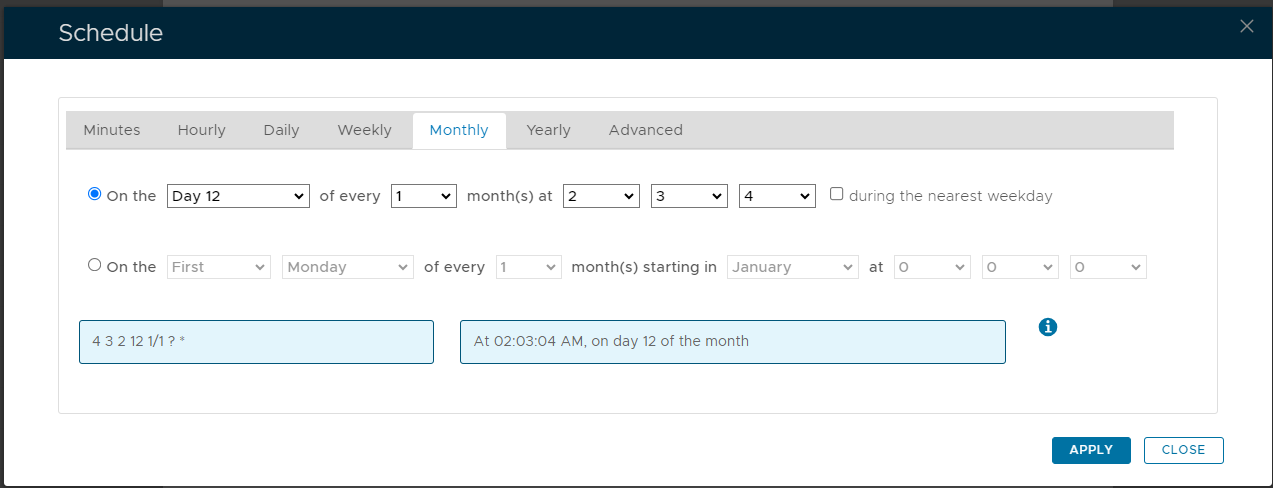
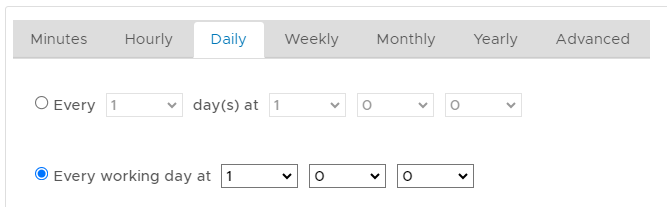
As an example, we can schedule the report to run at 1am every weekday using the following settings;
After clicking on
 the schedule details will be converted into text form and added against the report parameter "Schedule";
Manual Task Execution
The task can be run manually from the management console by left click on the context menu of the task, then selecting "Run";

A new window will open titled "Execute Task" will then open (the window will be populated with the default task property settings);

Ensure the parameter "Application" contains the correct name of the Application, and the name of the correct application that you are using for Excahange ActiveSync, then click the  button.