Assigning Applications to the SSO Agent
In order for you to customise the screen that is shown when users authenticate (the SSO logon screen) you will first need to ensure that the SSO agent has been assigned to the applications that will be customised.
...
A new window will open titled "Applications" that will list all application assigned to the agent "Single Sign-On Server";
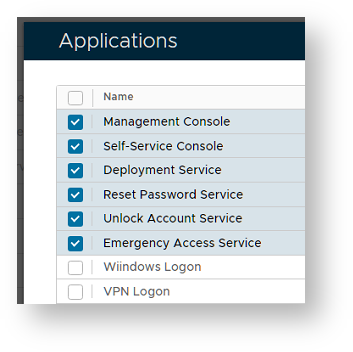
You will need to ensure that all applications that you intend to have customised user interfaces are selected here.
Creating a Customisation for the SSO Logon Screen
Before the UI of an application can be customised you will need to ensure that the application has been selected in this list. In the example above the selected applications will all be available for customisation.
...
You will now need to supply the actual customisations that are to be applied to the logon screen then enable the customisation by clicking on the "Enabled" checkbox, then clicking on the "SAVE" button.
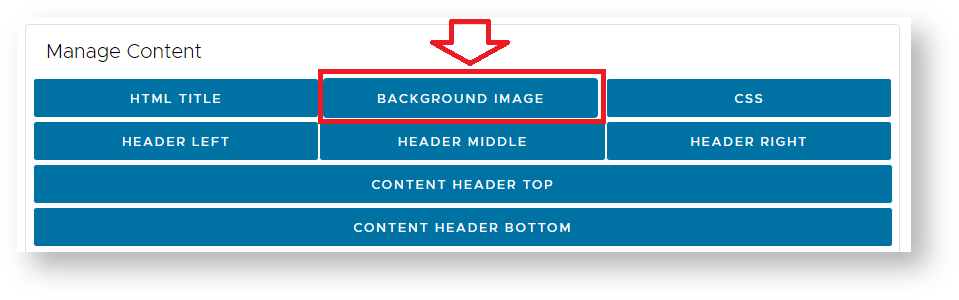
Background Image Customisation
It is possible to replace the default background image used by the SSO Logon to one of your choice.
To replace the background image select the option "Background Image";
Before you replace the default background image you will need to de-select the checkbox "Keep this field empty";
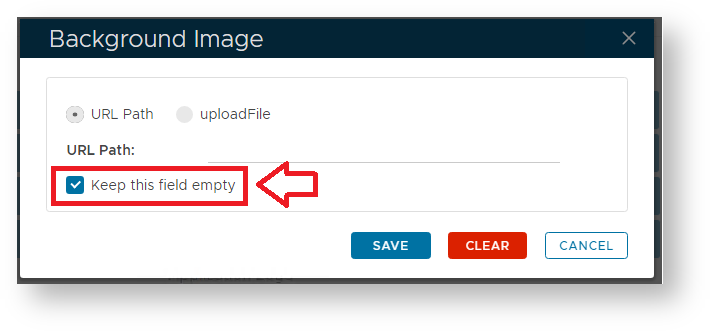
Once deselected you can then either supply a URL Path to where the background image is stored online, or select the "upload file" option, then use the Select file to point to a locally stored image that will be uploaded;
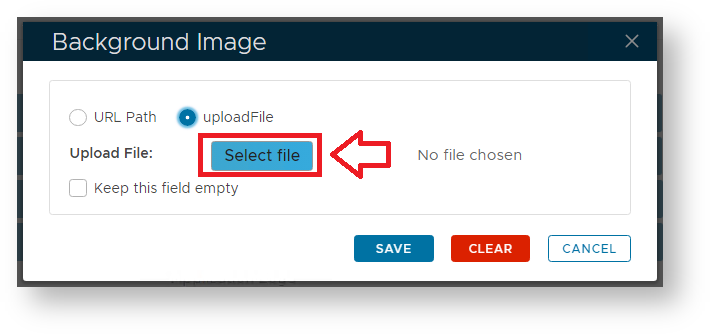
Once you have indicated the image that is to be used as a replacement background click on "SAVE".
Logo Customisation
It is possible to replace the banner logo and background colour that are displayed at the top of the single sign-on screen (see example below);
...