Create a Web Logon Procedure
- Login to the DualShield Management Administration Console
- In the main menu, select navigate to “Authentication | Logon Procedure”Procedures”
- Click the “Create” “+Create” button on the toolbar
- Enter a suitable “Name” and select “Web SSO” as the type
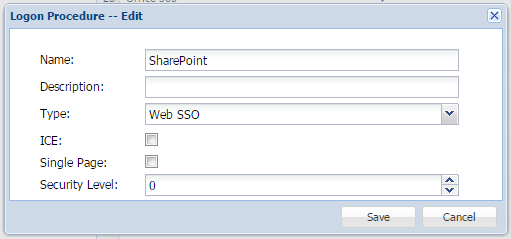 , then select 'Type' from the drop-down as "Web SSO".
- Click “Save” to confirm creation.
- Click the Context Menu icon back on the context "..." menu of the newly created logon procedureLogon Procedure, then select “Logon Steps”
- In the popup windows, click the “Create” button on the toolbarwindow on the right, select "+ ADD" button, to add a new authentication method.
- Select from the list the required Select the authentication method, i.e. “Static Password” (AD Password)
- Click "Save" to add the Step.
- Repeat from 7 ,8 & 9 to create the second logon step, i.e. "One-Time Password"
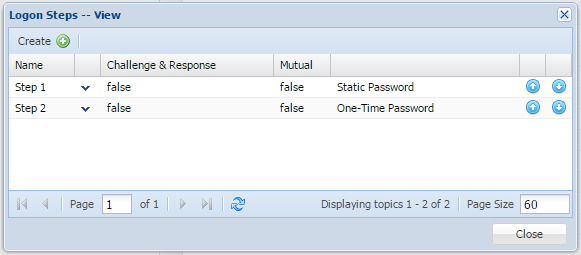 - 9 for any additional authentication steps you wish to use:
Create a Web
...
Application
- In the main menu, select navigate to “Authentication | Application”Applications”
- Click the “Create” “+ CREATE” button on in the toolbar
- Enter an appropriate “Name”
- Select the internal “Realm”
- Select the newly created logon procedure
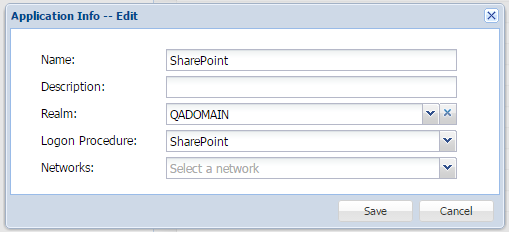 Logon Procedure created previously.
- Click "Save"SAVE" to complete the Application creation.
- Click the context "..." menu of the newly created application, select then "AgentAgents"
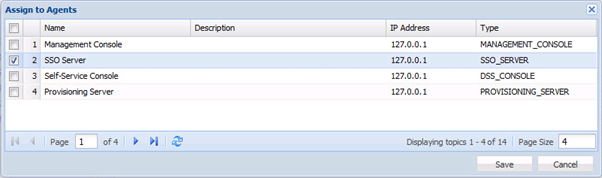

- Select the "Single Sign-on Server | SSO Server"
- Click "SaveSAVE" button to confirm.
- Click the context "..." menu of the newly created applicationApplication, select then "Self Test"
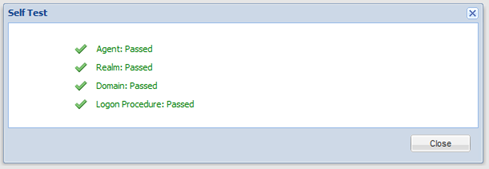 to confirm all components are correctly associated.
Create a new Service Provider
- In the main menu, select navigate to "SSO | Service Providers", click "Create"
- Click the "+ CREATE" button
- Select the "SSO Server", and enter Single Sign-on Server"
- Select the Sharepoint "Application" created previously
- Enter a suitable "Name"
- Select "'Type" ' as "WS-Federation"
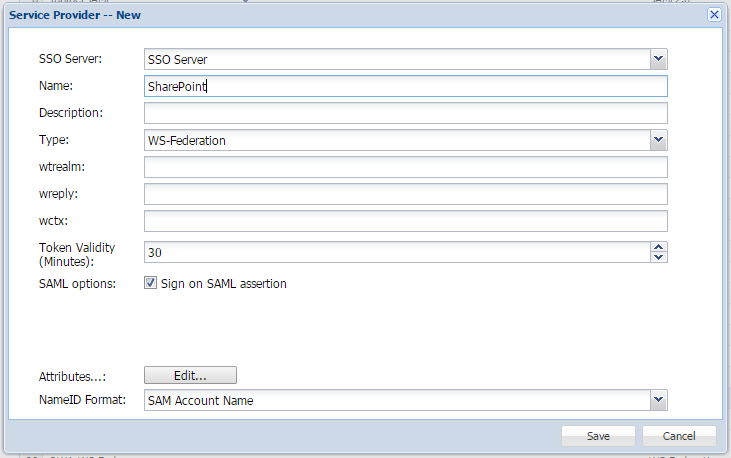

- Click on the 2nd tab named "Attributes"
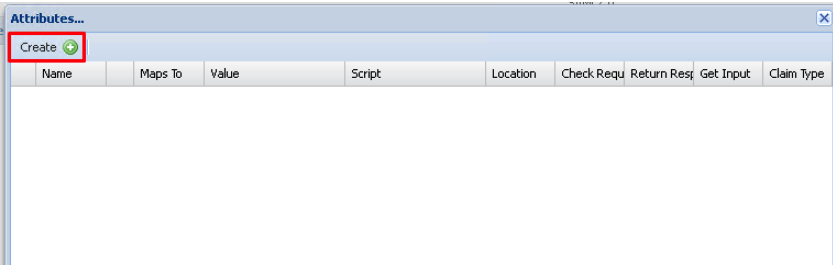
- Select the "Edit+ CREATE" button to add Attributes

You
...
- need to
...
- create an Attribute that matches "RoleClaims" and "Identity Claims", as specified in the
...
- PowerShell scripts that will be
...
- created in the
...
...
- section.
...
- Select '
...
- Location'
...
6. Create an attribute for the 'RoleClaims'. This will have a fixed value which will contain the name of the role you have setup in the Link Groups script
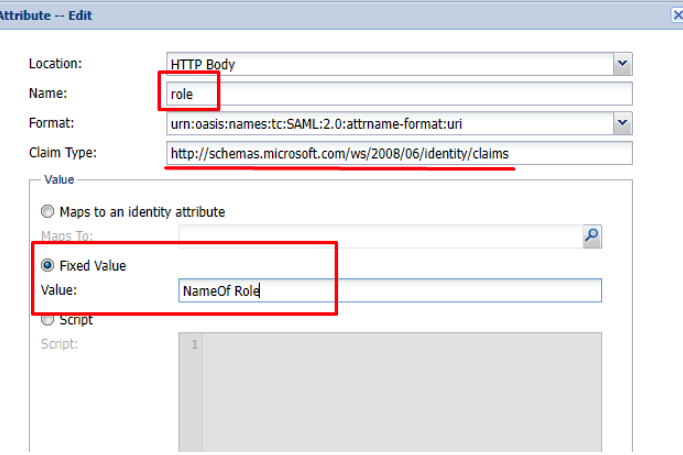
- as "HTTP Body"
- Enter an appropriate "Name"
- The 'Format' select from the drop-down "attrname-format:url"
- Within 'Value' select "Fixed Value" and set the Value as the
...
- actual name specified in the RoleClaims
...
- (replacing "NameOfRole" in this field). As per the following article: Link Groups Script
- From the drop-down, set the 'Claim Type' as setting "http://schemas.microsoft.com/ws/2008/06/identity/claims"

14. Click "SAVE" button to confirm creation of new Attribute.
Next create 'Identity Claims attributes' that will be mapped to AD
...
- Attributes.
...
- There
...
- would usually
...
- be 3 attributes, containing emailaddress,
...
- givenName and
...
- Surname (
...
- see SSO
...
- Script article)
You
...
- are able to map AD Attributes as follows
...
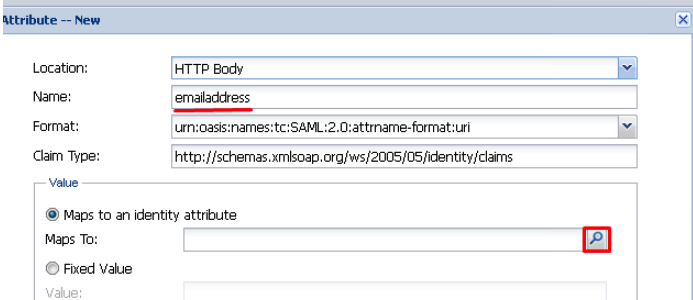
In the "Maps To" section click on the corresponding search button
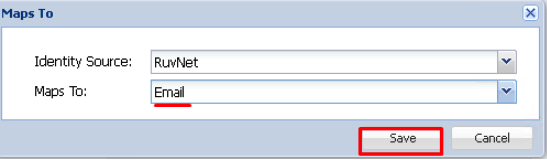
Here you will select the Identity Source corresponding with your domain and choose the Email identity attribute from the drop down list.
...
- .
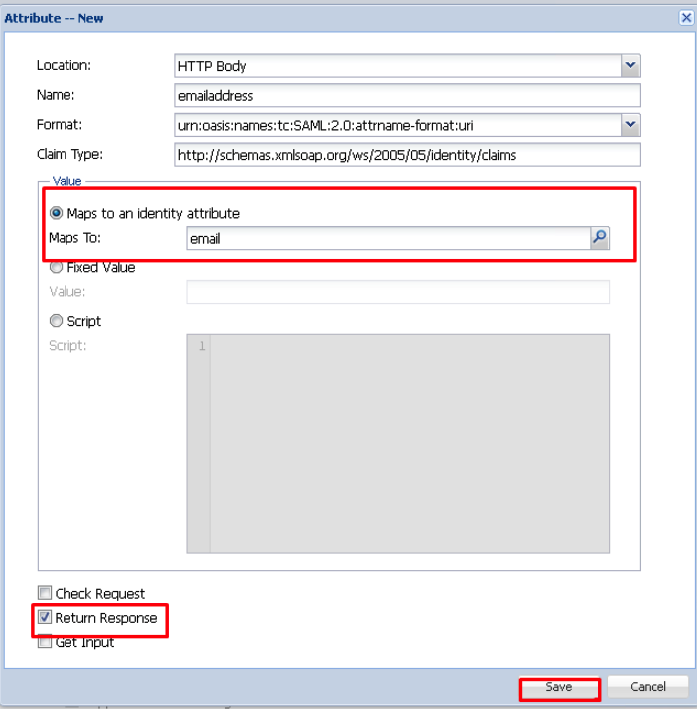
16. Selecting 'Value' as "Maps to an identity attribute"
17. Then click the magnifying glass, to the right of the field....
18. Here you can change "Identity Source" to your internal AD Domain
19. Then "Maps To" you can select a specific Attribute from Active Directory. ie: "Email"....


Ensure checkbox "Return in Response" is enabled on all your
...
- Attributes.
Click Save
...
- 20. Click "SAVE" to create the new Attribute.
21. Repeat
...
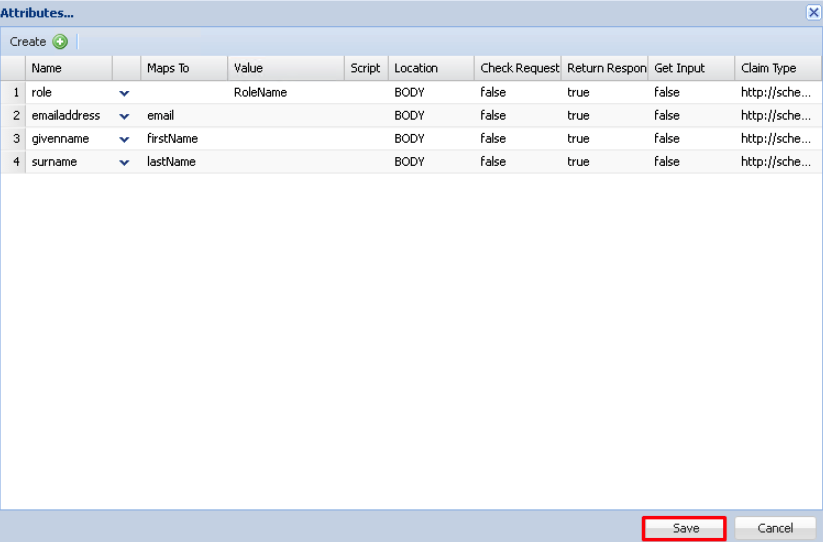
9. Click "Save"
...
- for the other Attributes. Then you should have all 3 setup, like follows:

22. Finally click "SAVE" to confirm creation of these new Attributes.