An Email email gateway can be added to a selected domain by using the following procedure;
Using the Management Console, Navigate to "Configuration | Gateways", then click on the button "CREATE";
...
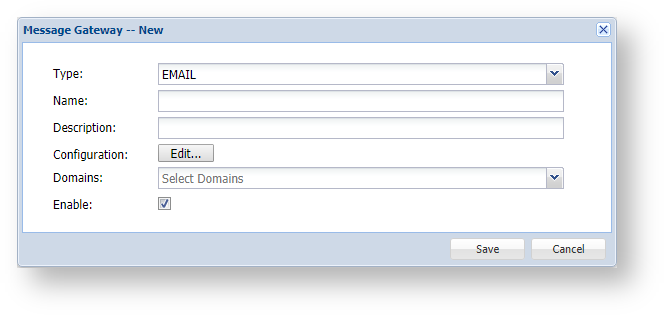
A new window will now open titled "Message Gateway – New";
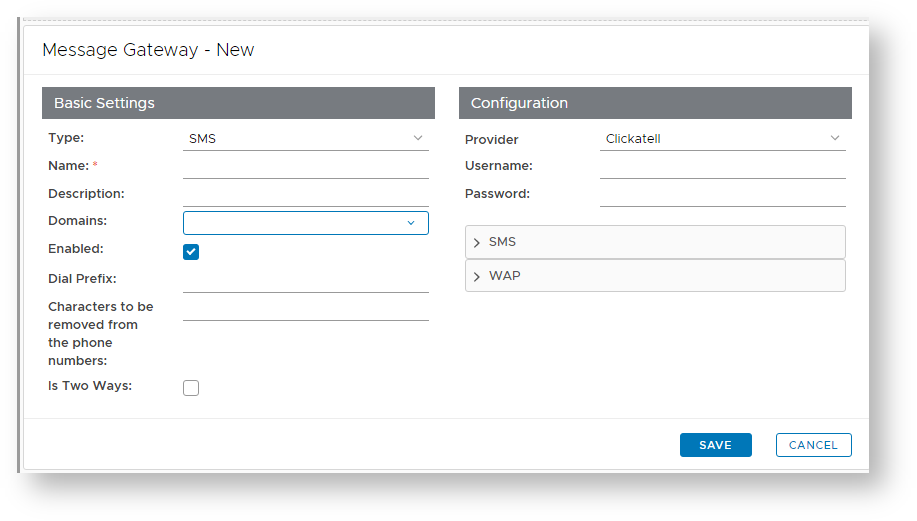
At the prompt "Type:", select "EMAIL", and the window will be updated as follows;
...
| Column | ||
|---|---|---|
| ||
|
...
| width | 70% |
|---|
...
| title | Type |
|---|
| Panel | ||||||
|---|---|---|---|---|---|---|
| ||||||
For email gateways select "EMAIL". |
...
| title | Name |
|---|
| Panel | ||||||
|---|---|---|---|---|---|---|
| ||||||
Enter a suitable name for your email gateway (e.g. “Dualshield Email Gateway”). |
...
| title | Description |
|---|
| Panel | ||||||
|---|---|---|---|---|---|---|
| ||||||
Provide a brief description of email provider (e.g. "Company Email Server"). |
...
| title | Configuration |
|---|
connects to an email server, such as an Exchange server, via the SMTP protocol.
In the DualShield Admin Console, navigate to Configuration | Gateways

Click CREATE

Select EMAIL as the Type
Provide the following details
| Field | Value |
|---|---|
| Name | name of the email gateway |
| Domains | Select all domains |
| Enabled | √ |
| Server URI | IP address or FQDN of the email server |
| Port | Port number of the SMTP connection to the email server, e.g. 25 |
| Transport Layer Security (TLS) | Tick this box if the SMTP connection requires TCP |
| Panel | ||||||
|---|---|---|---|---|---|---|
| ||||||
The Edit button ( |
...
| title | Domains |
|---|
| Panel | ||||||
|---|---|---|---|---|---|---|
| ||||||
Select the Domains from which the user details can be obtained (e.g. "deepnetsupport.com"). |
...
| title | Enabled |
|---|
| Panel | ||||||
|---|---|---|---|---|---|---|
| ||||||
Select if the message gateway is enabled (or not). |
After you have completed entering the gateway details you will be ready to configure the gateway.
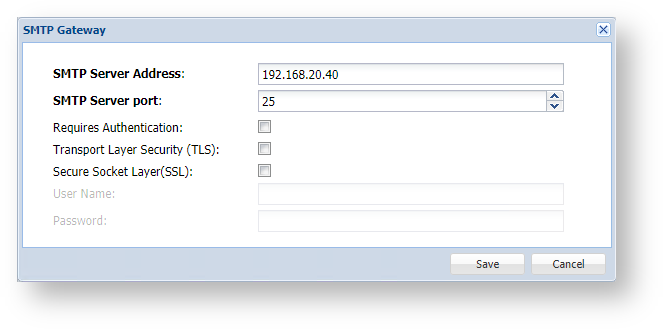
Click on the Edit button (![]() ) , and a new window titled "SMTP Gateway" will open;
) , and a new window titled "SMTP Gateway" will open;
...
| Column | ||
|---|---|---|
| ||
|
...
| width | 70% |
|---|
...
| title | SMTP Server Address |
|---|
| Panel | ||||||
|---|---|---|---|---|---|---|
| ||||||
Enter the address of your SMTP Server (in this example our mail server is at “mail.deepnetsecurity.com”), |
...
| title | SMTP Server Port |
|---|
| Panel | ||||||
|---|---|---|---|---|---|---|
| ||||||
Unless your provider requires a different setting, leave the setting unchanged with the default value of 25, |
...
| title | Transport Layer Security (TLS) |
|---|
| Panel | ||||||
|---|---|---|---|---|---|---|
| ||||||
Enter a TLS setting that matches the requirements of your SMTP mail server |
...
| Secure Socket Layer (SSL) |
| Panel | ||||||
|---|---|---|---|---|---|---|
| ||||||
Enter a SSL setting that matches the requirements of your SMTP mail server |
...
| title | User Name |
|---|
| Panel | ||||||
|---|---|---|---|---|---|---|
| ||||||
If your mail server requires a user name, then enter it here. |
...
| title | Password |
|---|
| Panel | ||||||
|---|---|---|---|---|---|---|
| ||||||
If your mail server requires a password, then enter it here. |
| Tick this box if the SMTP connection requires SSL | |
| Authentication Required | Tick this box if the SMTP connection requires authentication |

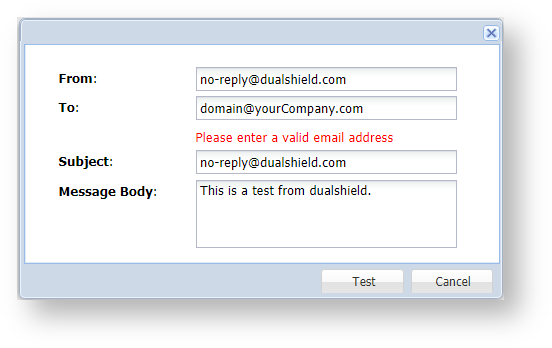
Click SAVE & TEST

Enter an email address in From and To
Click "TEST"

Click CANCEL to dismiss the test window

The email gateway has been created & tested successfully.
...
You will now return to the window titled "Message Gateway – New", supply any description you may required then click "Save" to create the email gateway.
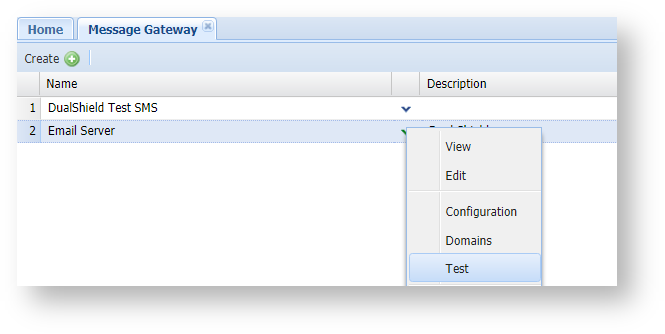
Once the email gateway has been configured it can be tested by using the context menu option "Test";
A new window will open that can be used to send a message through the newly created email gateway;