Configuring the Security Fabric with SAML:Here we assume you have already set the appropriate Fabric Connector configurations. This guide will only explain how to configure the SAML SP and IDP settings.
| Section |
|---|
|
| Column |
|---|
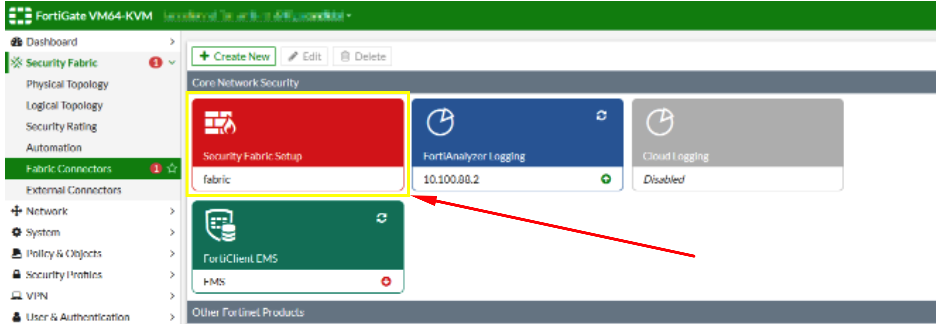
Log in to the root FortiGate.
Go to Security Fabric > Fabric Connectors and double-click the Security Fabric Setup card.
|
| Column |
|---|
|
| Panel |
|---|
| borderColor | #9EBEE5 |
|---|
| bgColor | #f0f0f0 |
|---|
| borderWidth | 1px |
|---|
| 
|
|
|
...
| Section |
|---|
|
| Column |
|---|
In the Topology tree, hover over a FortiGate and click Configure.Fabric Connector Edit screen go down to where it says SAML Single Sign-On and click Advance Options
|
| Column |
|---|
|
| Panel |
|---|
| borderColor | #9EBEE5 |
|---|
| bgColor | #f0f0f0 |
|---|
| borderWidth | 1px |
|---|
|  Image Removed Image Removed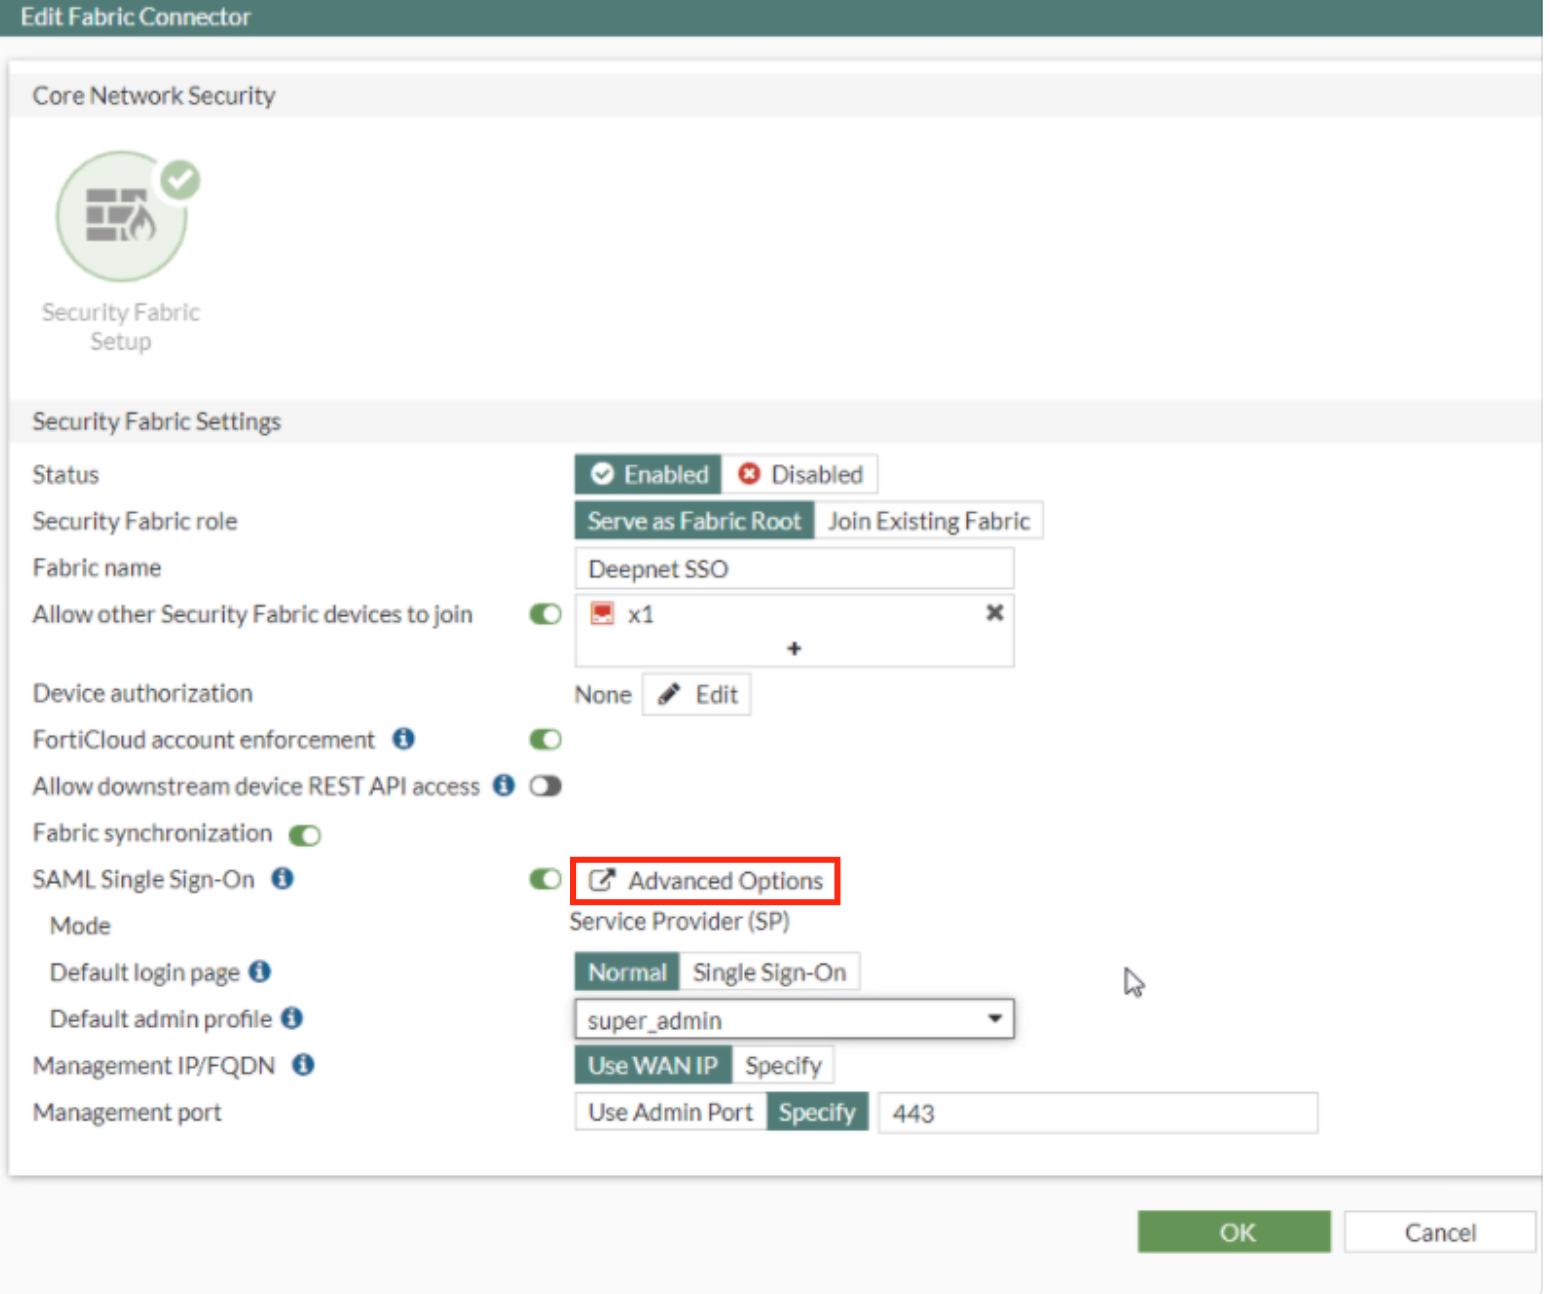 Image Added Image Added
|
|
|
| Section |
|---|
|
| Column |
|---|
Click Ok in the configure window | | Column |
|---|
| | Panel |
|---|
| borderColor | #9EBEE5 |
|---|
| bgColor | #f0f0f0 |
|---|
| borderWidth | 1px |
|---|
|  Image Removed Image Removed
|
|
| Section |
|---|
|
| Column |
|---|
Once installed the Certificate needs to be exported
Export it as a Base-64 encoded X.509 (.CER)
| Column |
|---|
|
| Panel |
|---|
| borderColor | #9EBEE5 |
|---|
| bgColor | #f0f0f0 |
|---|
| borderWidth | 1px |
|---|
|
 Image Removed Image Removed  Image Removed Image Removed
|
You will also need to download the IdP Certificate
In the SAML SSO Window Specify the SP address. This is essentially the URL or the IP address of the Fortinet UI you wish to log onto.
Expand SP details |
|
| Section |
|---|
|
| Column |
|---|
Upload the exported CER file. |
| Column |
|---|
|
| Panel |
|---|
| borderColor | #9EBEE5 |
|---|
| bgColor | #f0f0f0 |
|---|
| borderWidth | 1px |
|---|
|  Image Removed Image Removed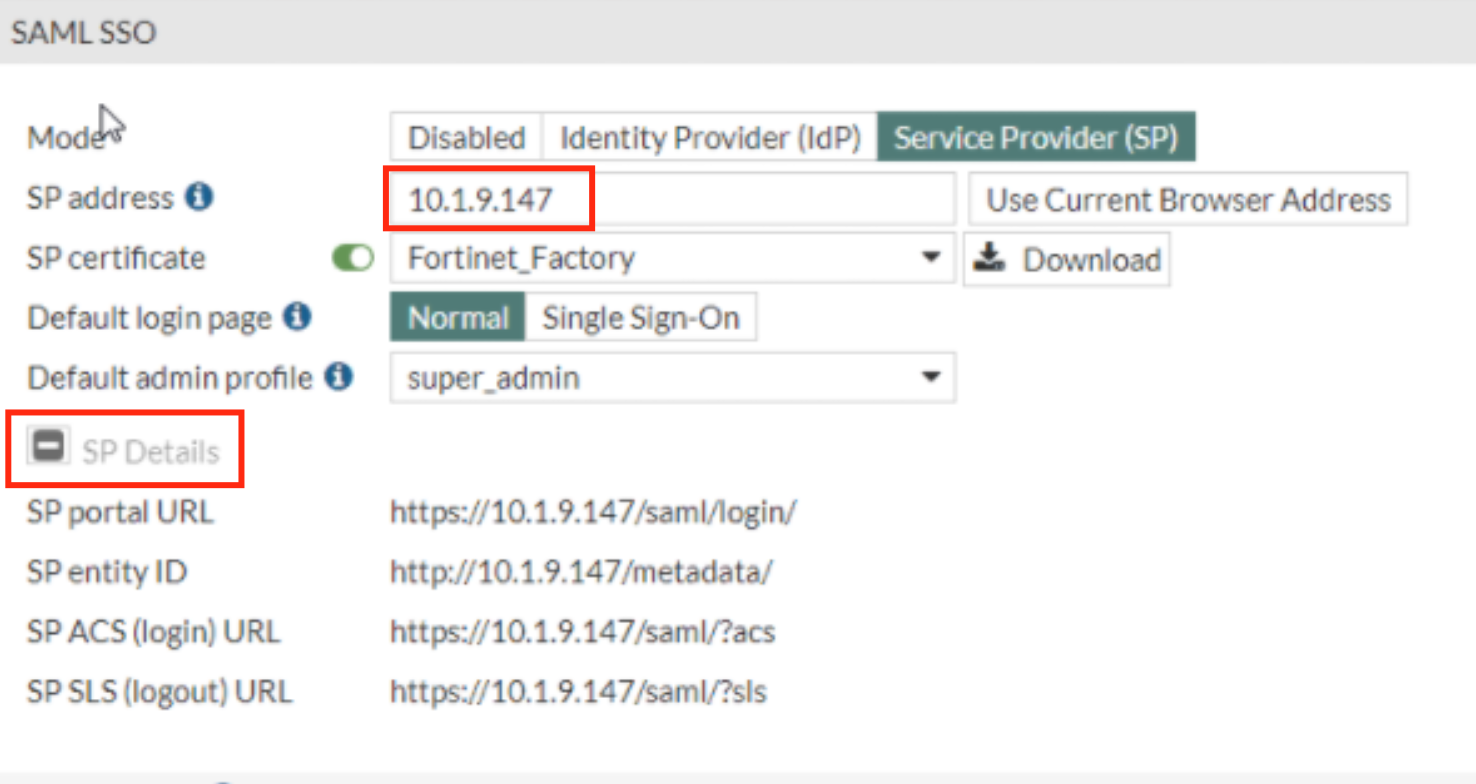 Image Added Image Added
|
|
|