To configure SAML single sign-on:Configure SAML Role Permission
| Section |
|---|
|
| Column |
|---|
The “Administer Configuration SAML” role permission is required to use SAML to access Secret Server. To grant a user this permission from an administrator account: Go to Admin > Roles. The Roles page appears. Click the Create New button. The Role Edit page appears: Type the name, such as SAML, in the Role Name text box. Click to select the Enabled check box. Click Administer Configuration SAML in the right side Permissions Unassigned list box. Click the < button to move the permission to the other side. Click the Save button. Select Settings in the navigation pane. Select SSO under USERS in the Control Panel page. Select SAMLv2 from the dropdown box in the Single Sign-On page |
| Column |
|---|
|
| Panel |
|---|
| borderColor | #9EBEE5 |
|---|
| bgColor | #f0f0f0 |
|---|
| borderWidth | 1px |
|---|
|  Image Removed Image Removed
|
|
|
...
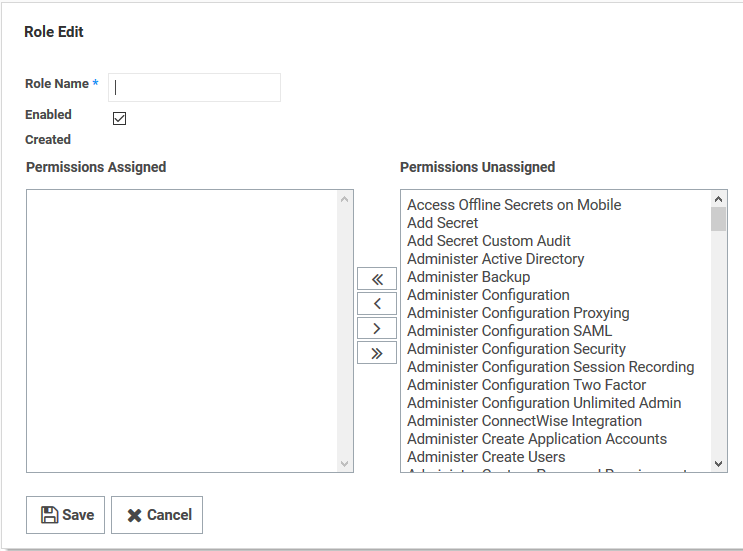 Image Added Image Added
|
|
|
| Section |
|---|
|
| Column |
|---|
Click the Assign Roles link of the newly created role. The View Role Assignment page appears Click the Role dropdown list to select the role you just created. Click the Edit button. |
| Column |
|---|
|
| Panel |
|---|
| borderColor | #9EBEE5 |
|---|
| bgColor | #f0f0f0 |
|---|
| borderWidth | 1px |
|---|
| 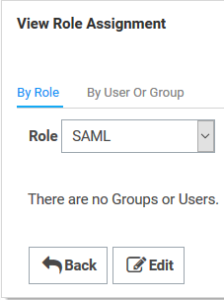 Image Added Image Added
|
|
|
| Section |
|---|
|
| Column |
|---|
On the Role Assignment page move the desired users to the Assigned list using the same method as before Click the Save Changes button. The Entity ID/ Issuer ID will match the Entity ID you specified in the DualShield Service Provider. There are two parts for specifying the Sign-In and Log-Out Page URLs The first part is that you will use the SingleSignOnService and SingleLogoutService URLs you copied from the DualShield SSO Server Metadata (see previous section) respectively. The second part is that you will append these URLs with some extra information. e.g. Sign-in page URL | Code Block |
|---|
https://dualshield.yourdomain.com:8074/sso/Login/kvps/DASApplicationName/Ctera |
Log-out page URL | Code Block |
|---|
https://dualshield.yourdomain.com/sso/logout?DASApplicationName=Ctera |
| Column |
|---|
|
| Panel |
|---|
| borderColor | #9EBEE5 |
|---|
| bgColor | #f0f0f0 |
|---|
| borderWidth | 1px |
|---|
|  Image Removed Image Removed
| 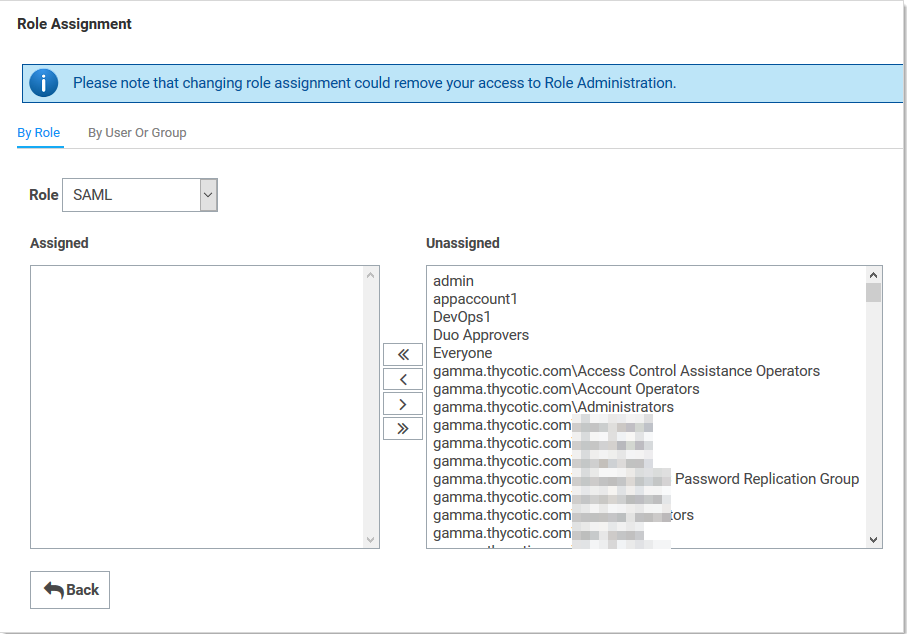 Image Added Image Added |
|
|
Configure SAML SSO:Upload the Idp Certificate file
| Section |
|---|
|
| Column |
|---|
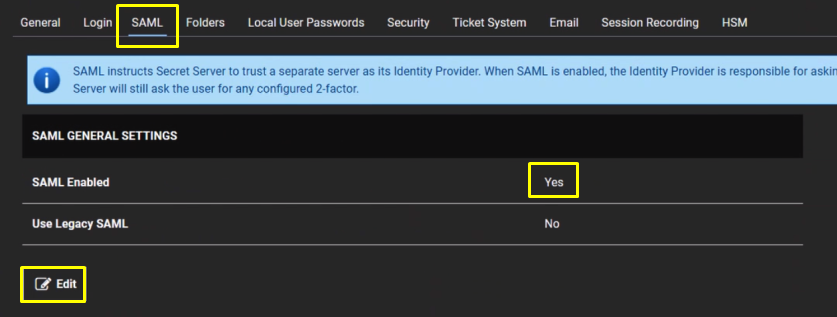
Navigate to Admin > Configuration. Click the SAML tab Click the Edit button in the SAML General Settings section. Click to select the SAML Enabled check box. Click the Save button. In order to do this, you need to convert the 'crt' file that was downloaded in the previous section to a 'cer' file. To begin, Open the crt file and install the Certificate to your personal folder in Certificate manager |
|
| Section |
|---|
|
| Column |
|---|
Click the Edit button in the SAML Service Providers section. Type a name for your service provider, in the Name text box. Click the Select Certificate link. The Upload Certificate popup appears: Click the Upload Certificate button to upload your commercial SSL certificate (Usually in pfx format) Type Password Click OK. Click on Download Service Provider Metadata. Once installed the Certificate needs to be exported Export it as a Base-64 encoded X.509 (.CER) |
| Column |
|---|
|
| Panel |
|---|
| borderColor | #9EBEE5 |
|---|
| bgColor | #f0f0f0 |
|---|
| borderWidth | 1px |
|---|
|  Image Removed Image Removed  Image Removed Image Removed
|
|
|
You will also need to download the IdP Certificate
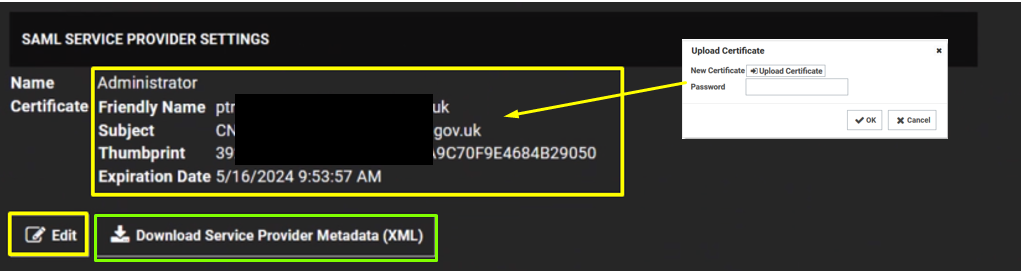 Image Added Image Added
|
|
|
| Section |
|---|
|
| Column |
|---|
Under Identity Providers click on Create New Service Provider Click Import IDP from XML Metadata and select the IdP metadata.xml file you saved previously. (refer to Obtain the IDP Metadata File section)Upload the exported CER file. |
| Column |
|---|
|
| Panel |
|---|
| borderColor | #9EBEE5 |
|---|
| bgColor | #f0f0f0 |
|---|
| borderWidth | 1px |
|---|
|  Image Removed Image Removed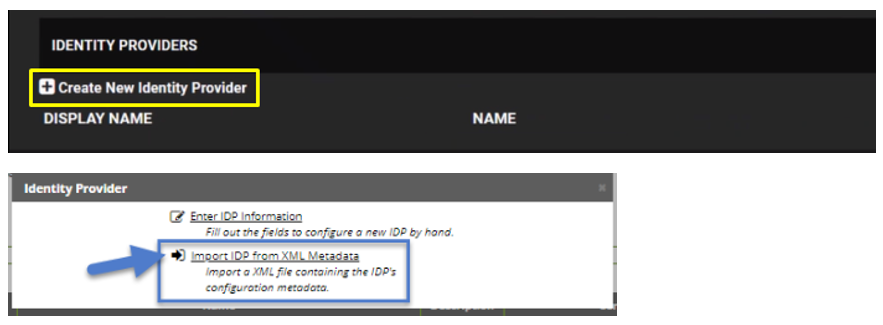 Image Added Image Added
|
|
|