Here we assume you have already set the appropriate Fabric Connector configurations. This guide will only explain how to configure the SAML SP and IDP settings.
| Section |
|---|
|
| Column |
|---|
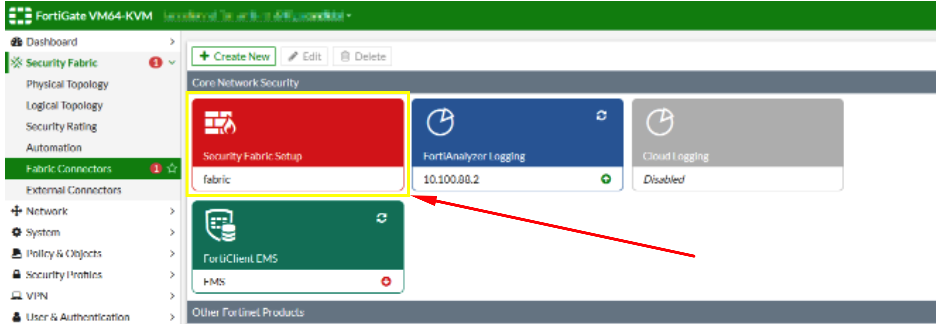
Log in to the root FortiGate.
Go to Security Fabric > Fabric Connectors and double-click the Security Fabric Setup card.
|
| Column |
|---|
|
| Panel |
|---|
| borderColor | #9EBEE5 |
|---|
| bgColor | #f0f0f0 |
|---|
| borderWidth | 1px |
|---|
| 
|
|
|
...
| Section |
|---|
|
| Column |
|---|
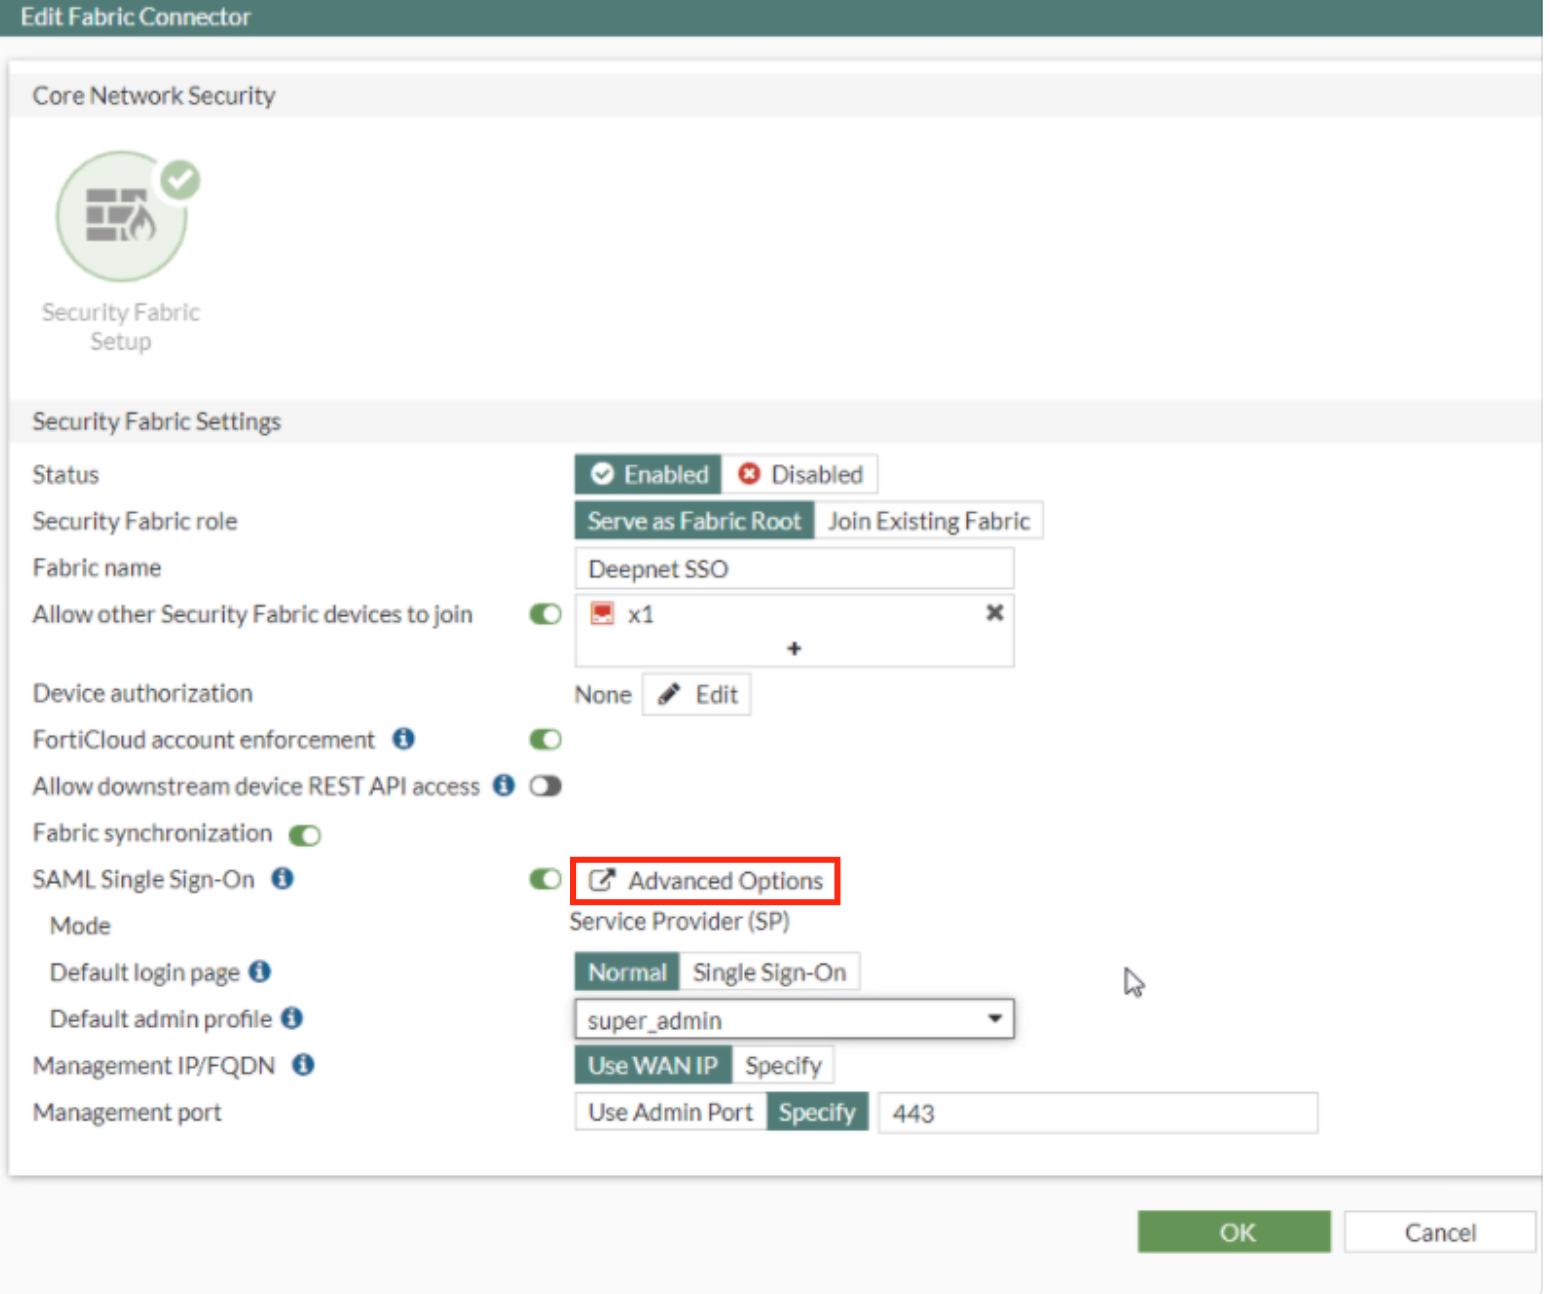
In the Fabric Connector Edit screen go down to where it says SAL SAML Single Sign-On and click Advance Options
|
| Column |
|---|
|
| Panel |
|---|
| borderColor | #9EBEE5 |
|---|
| bgColor | #f0f0f0 |
|---|
| borderWidth | 1px |
|---|
| 
|
|
|
...
| Section |
|---|
|
| Column |
|---|
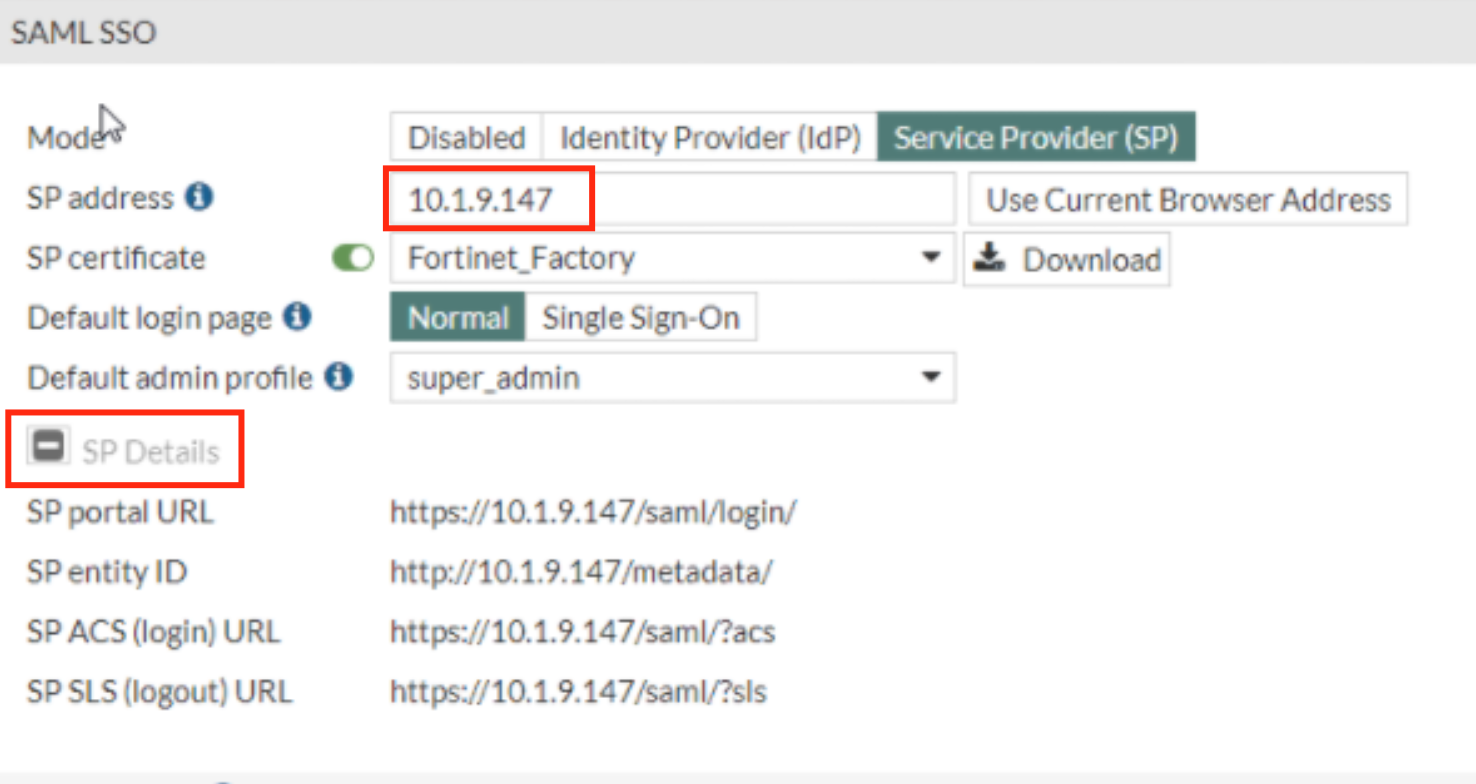
In the SAML SSO Window Specify the SP address. This is essentially the URL or the IP address of the Fortinet UI you wish to log onto.
Expand SP details |
| Column |
|---|
|
| Panel |
|---|
| borderColor | #9EBEE5 |
|---|
| bgColor | #f0f0f0 |
|---|
| borderWidth | 1px |
|---|
| 
|
|
|
Log back in. to the DualShield Admin Console
...
| Column |
|---|
Go to SSO>Service Providers |
...
| Panel |
|---|
| borderColor | #9EBEE5 |
|---|
| bgColor | #f0f0f0 |
|---|
| borderWidth | 1px |
|---|
|
 Image Removed Image Removed
|
Click on  Image Removed on the top right.
...
| Column |
|---|
Fill in the details as per screenshot on right and make sure you select SAML 2.0(Without Metadata) as Type. |
...
| Panel |
|---|
| borderColor | #9EBEE5 |
|---|
| bgColor | #f0f0f0 |
|---|
| borderWidth | 1px |
|---|
|
 Image Removed Image Removed
|
...
...
Copy and Paste the Entity ID, ACS and Logout URL from the SP details on the Fortinet UI (see above)
...
| Panel |
|---|
| borderColor | #9EBEE5 |
|---|
| bgColor | #f0f0f0 |
|---|
| borderWidth | 1px |
|---|
|
 Image Removed Image Removed
|
...
| Column |
|---|
The completed Service Provider dialogue box will look like this: |
...
| Panel |
|---|
| borderColor | #9EBEE5 |
|---|
| bgColor | #f0f0f0 |
|---|
| borderWidth | 1px |
|---|
|
 Image Removed Image Removed
|
...
| Column |
|---|
Click on Attributes at the top |
...
| Panel |
|---|
| borderColor | #9EBEE5 |
|---|
| bgColor | #f0f0f0 |
|---|
| borderWidth | 1px |
|---|
|
 Image Removed Image Removed
|
...
...
Click Create
Use the following Values:
...
| Panel |
|---|
| borderColor | #9EBEE5 |
|---|
| bgColor | #f0f0f0 |
|---|
| borderWidth | 1px |
|---|
|
 Image Removed Image Removed
|
Click Save
Click Save again
| Section |
|---|
|
|
| Section |
|---|
|
| Column |
|---|
Click on Display Metadata at the bottom |
| Column |
|---|
|
| Panel |
|---|
| borderColor | #9EBEE5 |
|---|
| bgColor | #f0f0f0 |
|---|
| borderWidth | 1px |
|---|
|
 Image Removed Image Removed
|
| Section |
|---|
|
| Column |
|---|
Search through the metadata for the Entity ID, Single Sign-On URL and Single Logout URL |
| Column |
|---|
| | Go toSSO>SSO Servers | | Column |
|---|
| | Panel |
|---|
| borderColor | #9EBEE5 |
|---|
| bgColor | #f0f0f0 |
|---|
| borderWidth | 1px |
|---|
|  Image Removed Image Removed
|
|
| Section |
|---|
|
| Column |
|---|
Select the drop down menu corresponding to the SSO server you will be using and click on View |
| Column |
|---|
|
| Panel |
|---|
| borderColor | #9EBEE5 |
|---|
| bgColor | #f0f0f0 |
|---|
| borderWidth | 1px |
|---|
|
 Image Removed Image Removed
|
Click Save again
| Panel |
|---|
| borderColor | #9EBEE5 |
|---|
| bgColor | #f0f0f0 |
|---|
| borderWidth | 1px |
|---|
|  Image Removed Image Removed
 Image Removed Image Removed
|
|
|