To use Registry Editor to turn on Windows automatic logon, follow these steps:
1. Run "Regedit" as administrator
...
2. Navigate to the following registry key:
HKEY_LOCAL_MACHINE\SOFTWARE\Microsoft\Windows NT\CurrentVersion\Winlogon
...

3. There are
...
4 registry values in the Winlogon key
...
that need editing or creating
...
- AutoAdminLogon
- DefaultUserName,
- DefaultPassword
- DefaultDomain
The AutoAdminLogon value
...
should already be present, but the others may or may not be depending on your system. If they are not there, add each one as needed.
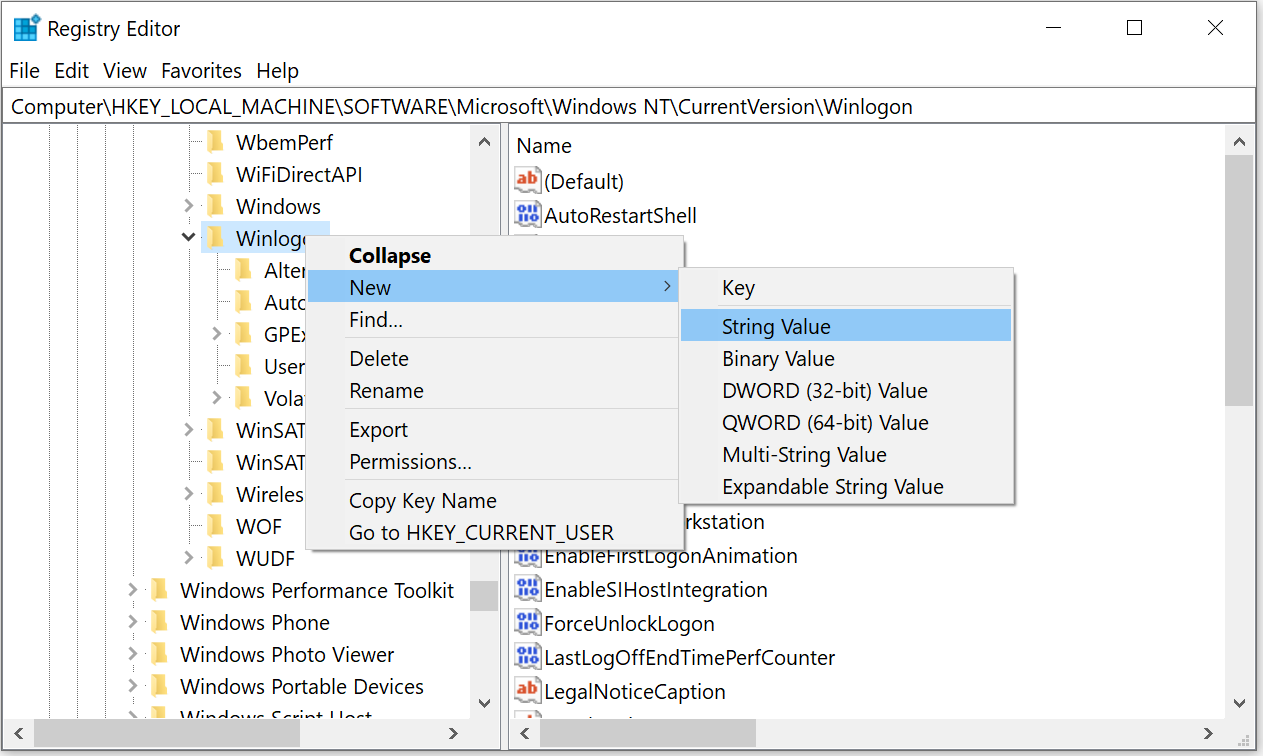
Right click on Winlogon key > New > String Value and name
...
it DefaultUserName
Right click on Winlogon key > New > String Value and name
...
it DefaultPassword
(Optional) Right click on Winlogon key > New > String Value and name
...
it DefaultDomain
...
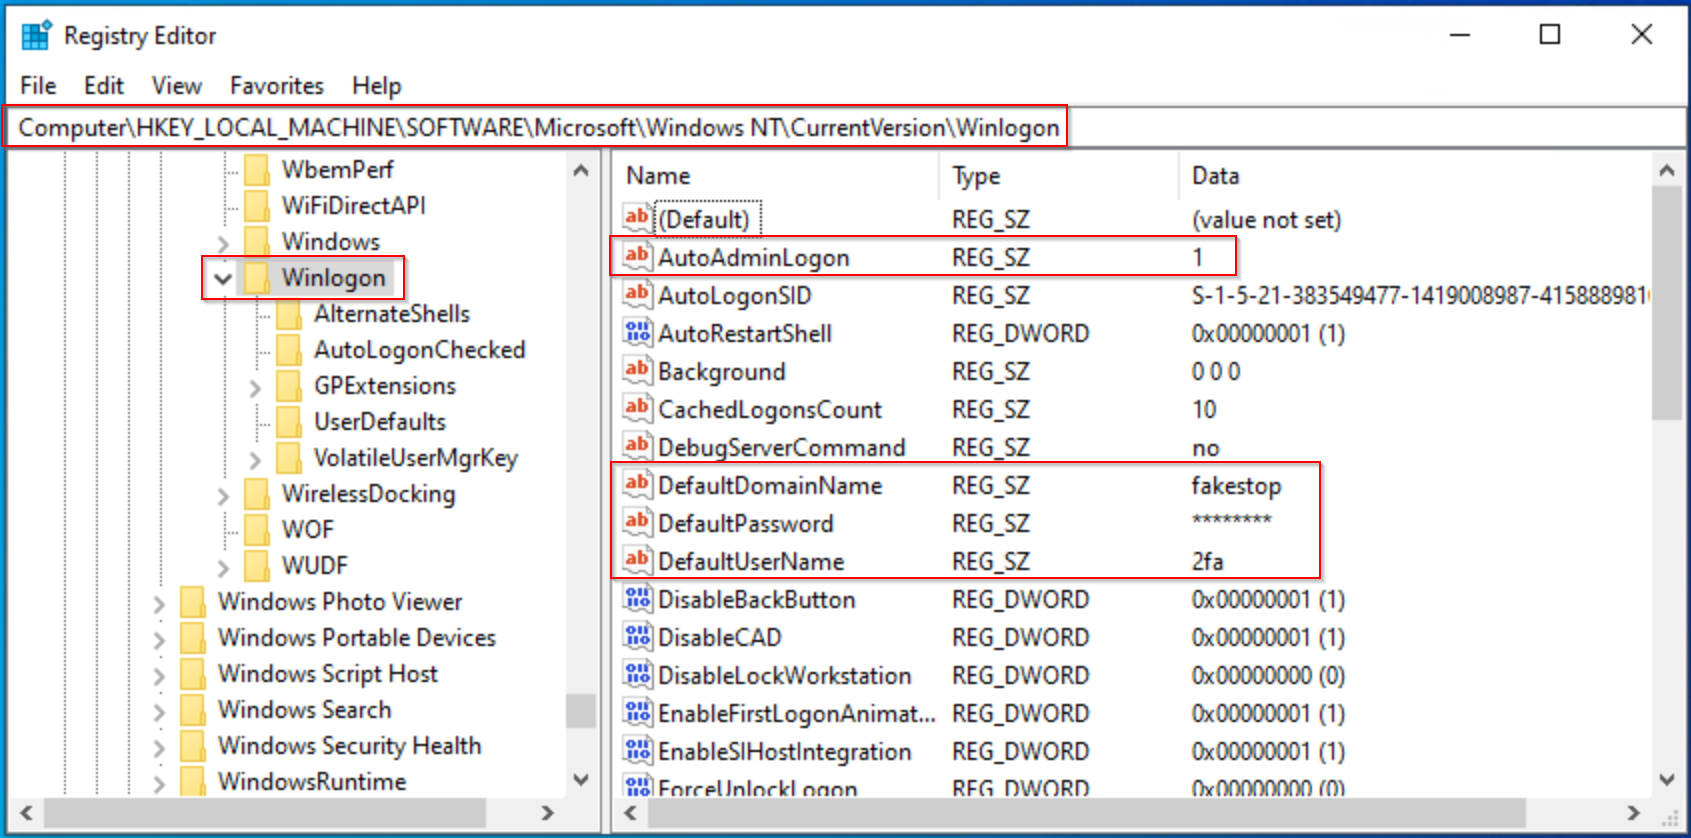
4. Once the required
...
four values are present, double click on each one in turn and edit its Value data to match the user you want to set up as auto logon.
AutoAdminLogon – Enable or disable auto logon, enter 1 to enable, 0 to disable.
DefaultUserName – The name of the user to auto logon with.
DefaultPassword – The password of the above user.
DefaultDomain – (Optional) The domain to log onto, ignore if you’re not part of a domain.
...
AutoAdminLogon – Enable or disable auto logon, enter 1 to enable, 0 to disable.
...
5. Once you have completed entering the values, close the registry editor and restart to see if the changes have been successful. If they are, the specified user won’t be asked to log on.