Here we assume you have already set the appropriate Fabric Connector configurations. This guide will only explain how to configure the SAML SP and IDP settings.
| Section |
|---|
|
| Column |
|---|
Log in to the root FortiGate.
Go to Security Fabric > Fabric Connectors and double-click the Security Fabric Setup card.
|
| Column |
|---|
|
| Panel |
|---|
| borderColor | #9EBEE5 |
|---|
| bgColor | #f0f0f0 |
|---|
| borderWidth | 1px |
|---|
| 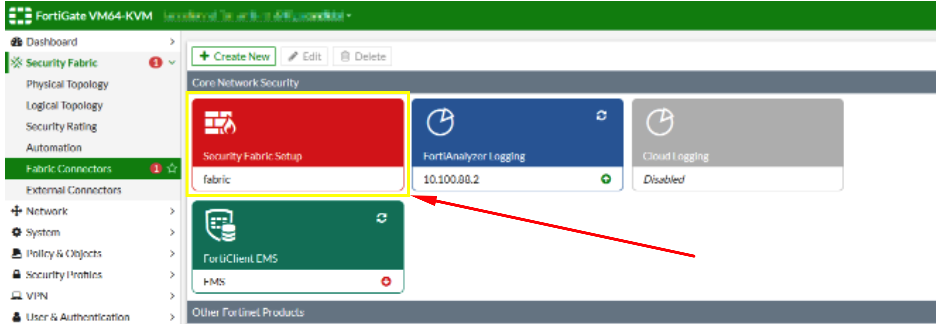 Image Added Image Added
|
|
|
| Section |
|---|
|
| Column |
|---|
In the Fabric Connector Edit screen go down to where it says SAML Single Sign-On and click Advance Options
|
| Column |
|---|
|
| Panel |
|---|
| borderColor | #9EBEE5 |
|---|
| bgColor | #f0f0f0 |
|---|
| borderWidth | 1px |
|---|
| 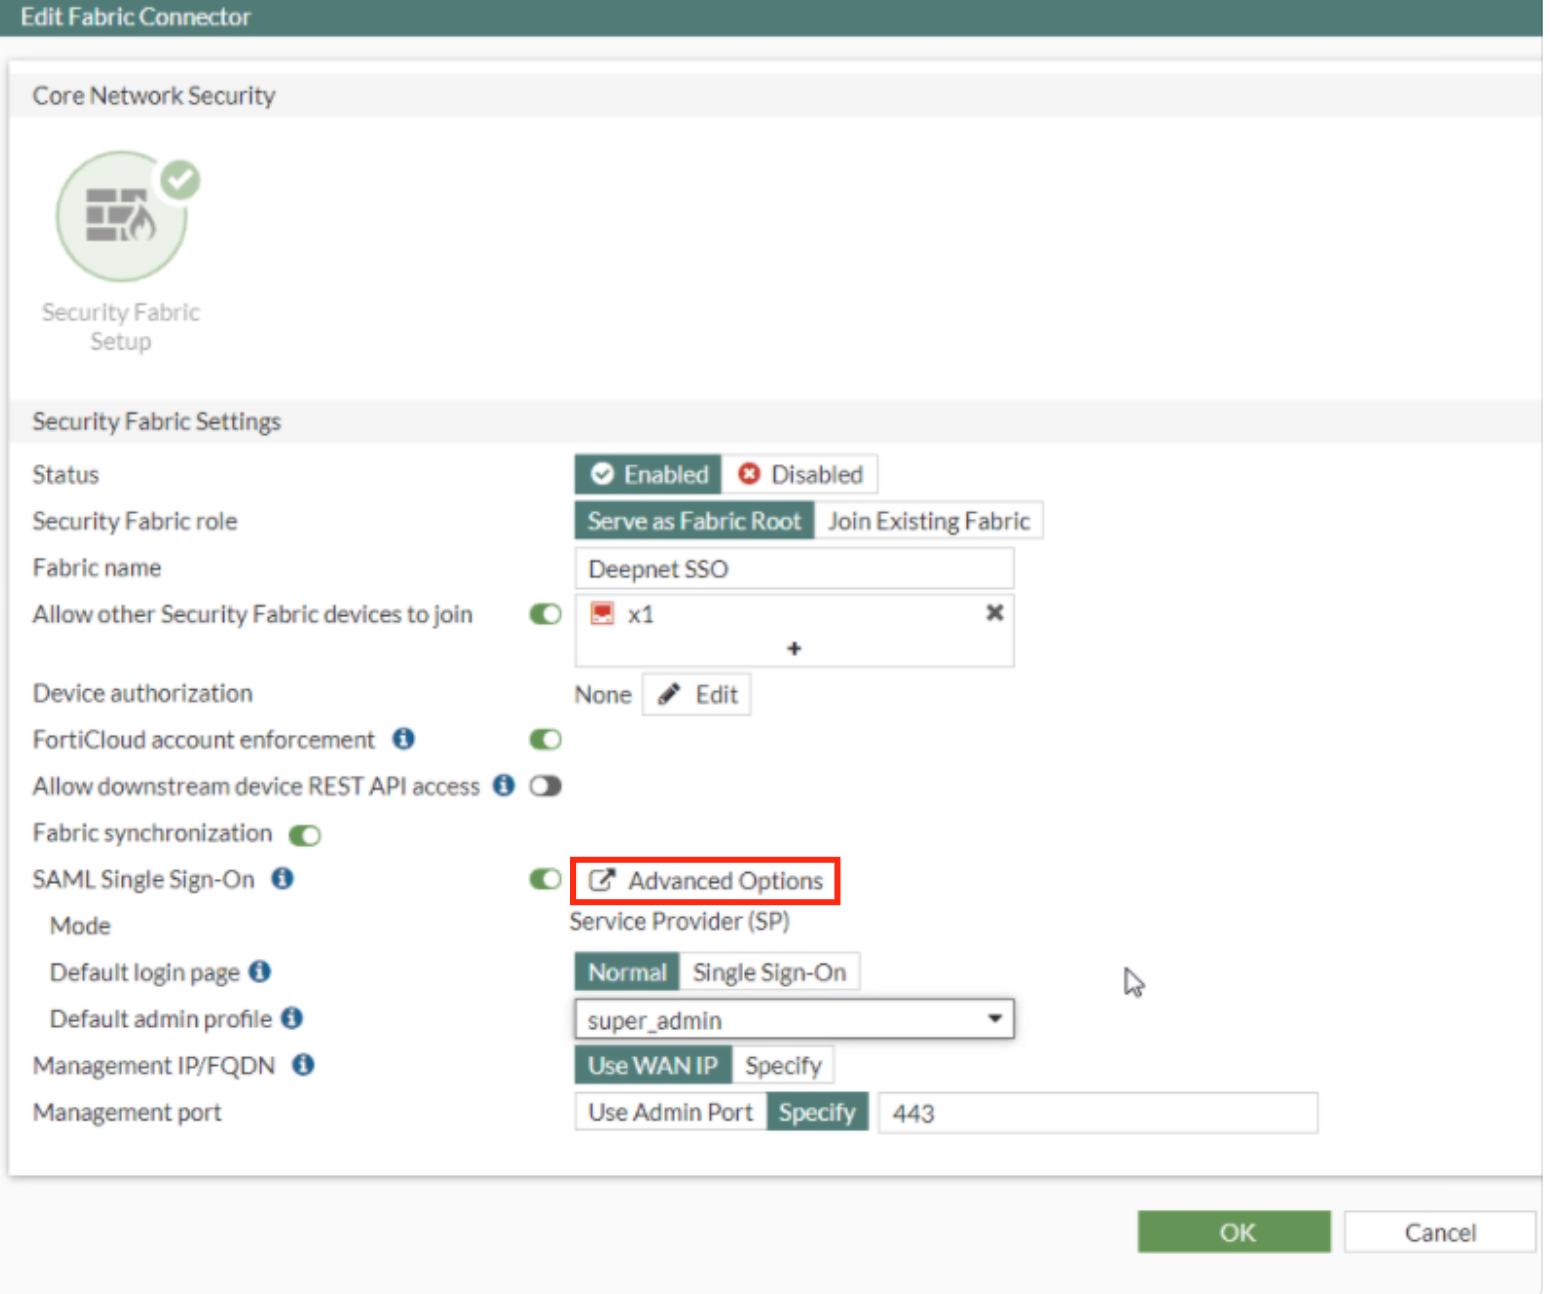 Image Added Image Added
|
|
|
| Section |
|---|
|
| Column |
|---|
In the SAML SSO Window Specify the SP address. This is essentially the URL or the IP address of the Fortinet UI you wish to log onto.
Expand SP details |
| Column |
|---|
|
| Panel |
|---|
| borderColor | #9EBEE5 |
|---|
| bgColor | #f0f0f0 |
|---|
| borderWidth | 1px |
|---|
| 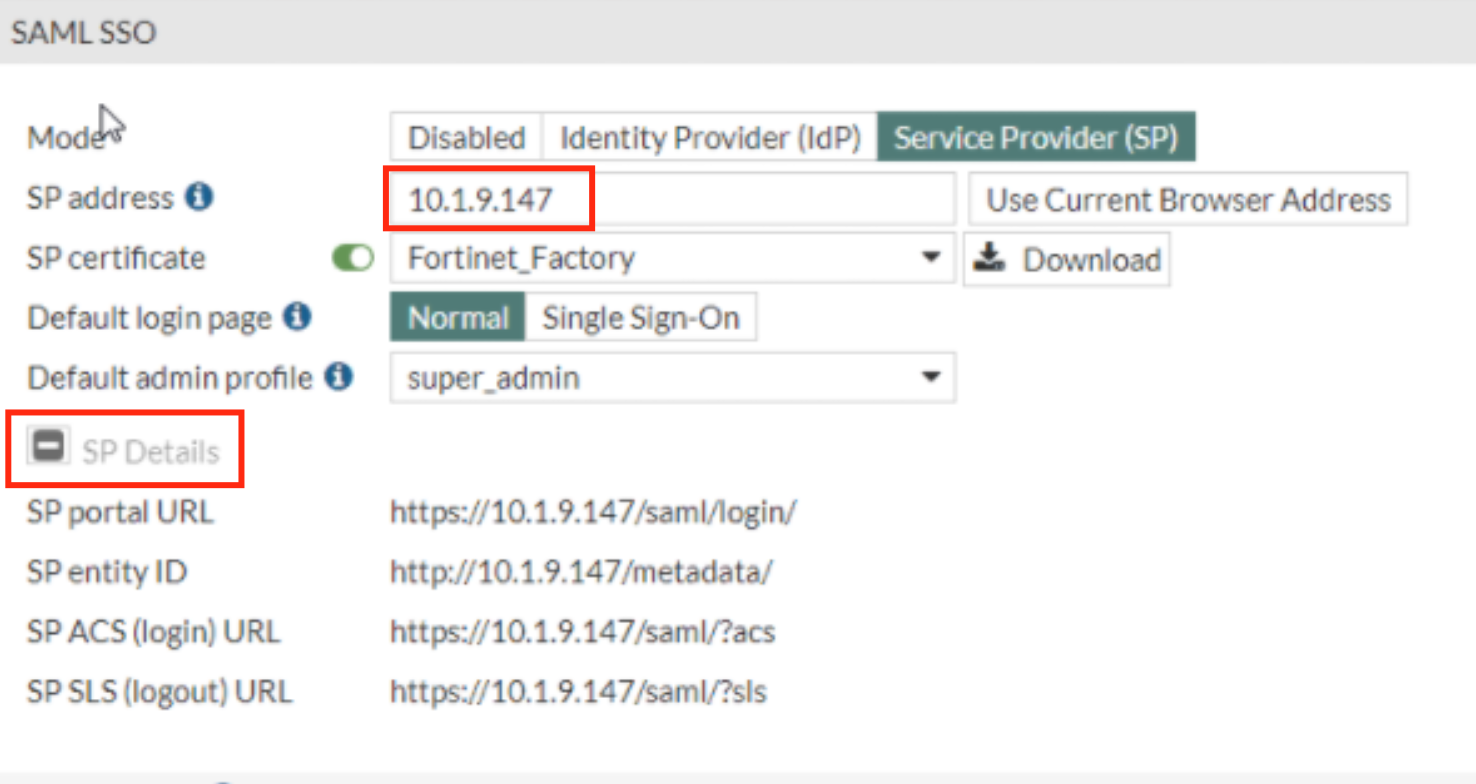 Image Added Image Added
|
|
|