Hardware devices already have a serial number and seed from the manufacturer, so they're brought in together as a batch — via a CSV file, not a one-at-a-time dialog.
1. Open the CSV import tool
Hardware devices arrive with real serial numbers and seeds already assigned by the manufacturer, so they aren't created one at a time — they're imported. On the Hardware Tokens tab, click Import / Bulk Assign with CSV, then Load CSV to begin. Every row's outcome (import, assign, reassign, unassign, or error) is classified automatically against what's already in inventory — nothing is written until you confirm.
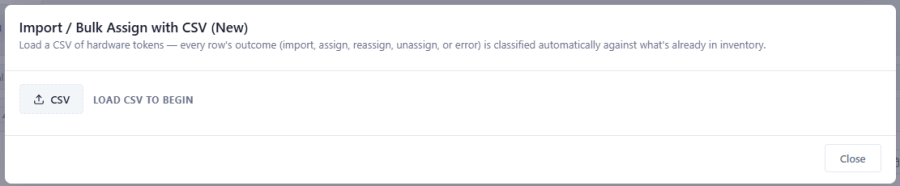
The CSV import tool, before a file is loaded
2. Load the CSV file
Choose the file your manufacturer or IT provider supplied, or paste its contents directly. Each row needs at minimum a serial number and seed — an assigned user is optional per row.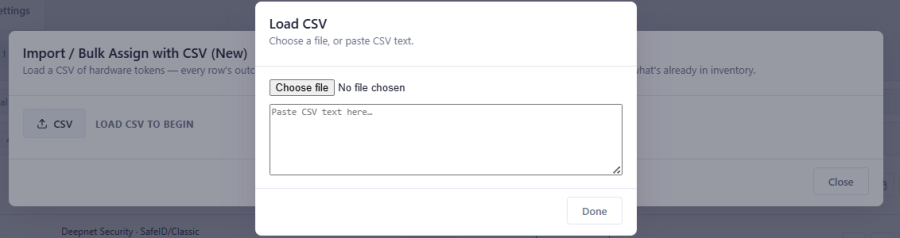
Choose a file, or paste CSV text
3. Review the import preview
Before anything is written, every row is classified against what's already imported — New tokens to add, Existing tokens to reassign or unassign, and rows that already match and need no change. Totals for each are summarized at the top, broken down by exactly what's about to change.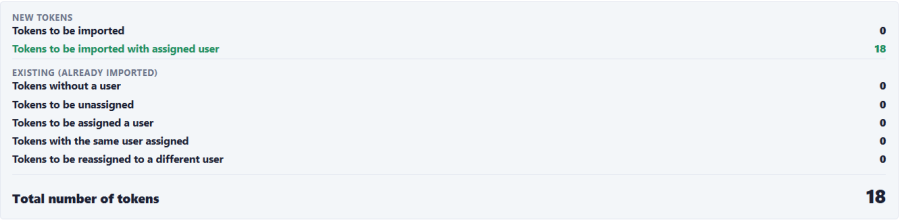
The stats breakdown — exactly what this CSV will change, before you commit to it
Each row's status comes from comparing two things: whether that serial number is already in inventory, and whether the CSV's assignment for it differs from what's currently set. Every combination shows up as its own status:
• Ready to Import and Assign — a brand-new serial, with a user in the CSV.
• Ready to Import — a brand-new serial, with no user in the CSV.
• Ready to assign — already in inventory, currently unassigned, and the CSV gives it a user.
• Already imported pending assignment — already in inventory, currently unassigned, and the CSV has no user for it either.
• Already imported and matches CSV assignment — already in inventory, and the CSV's user is exactly who it's already assigned to. Nothing to do.
• Ready to reassign token from … — already assigned to someone, and the CSV names a different user.
• This will unassign the user — already assigned to someone, and the CSV row now has no user for it.
• Excluded — not participating in Confirm — a row this import doesn't need to touch at all (for example, a duplicate serial already handled by an earlier row), grouped separately so it can't be mistaken for one of the actionable rows above.
3.1. Editing the preview
You can edit the token assignment, unassign, or exclude the token from the import entirely.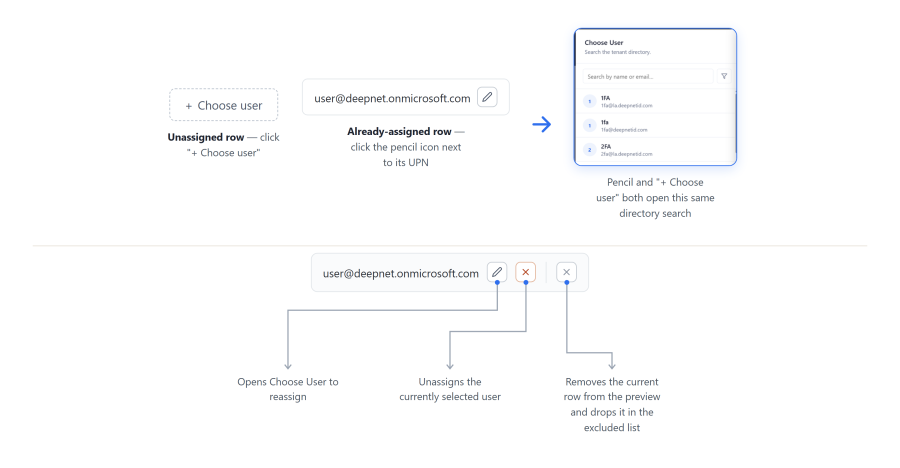
Assigning, reassigning, unassigning, or excluding a row — before you confirm
4. Confirm and apply the changes
Click Confirm. A final before/after summary shows exactly what's about to change for each affected serial number — review it, then click Submit to write it to the real token inventory.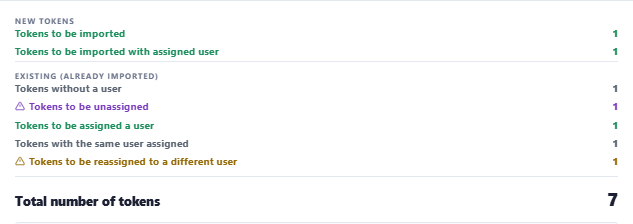
The last checkpoint before anything is actually written
5. Set expiration dates for the newly imported tokens
Once the import finishes, a Set expiration dates dialog lists every token that was just imported, each with its own date field. By default, each one of these tokens needs its own expiration date entered here.
Don't want to set them one by one right now? Tick "Never expires, will set expiration date later" to default the whole batch to never expiring — that's what unlocks Skip, closing the dialog without setting any dates. This only covers the tokens from this import, and it's never a dead end either way — the expiration date for any token can always be set or changed later with its own row's Edit Expiration action button.
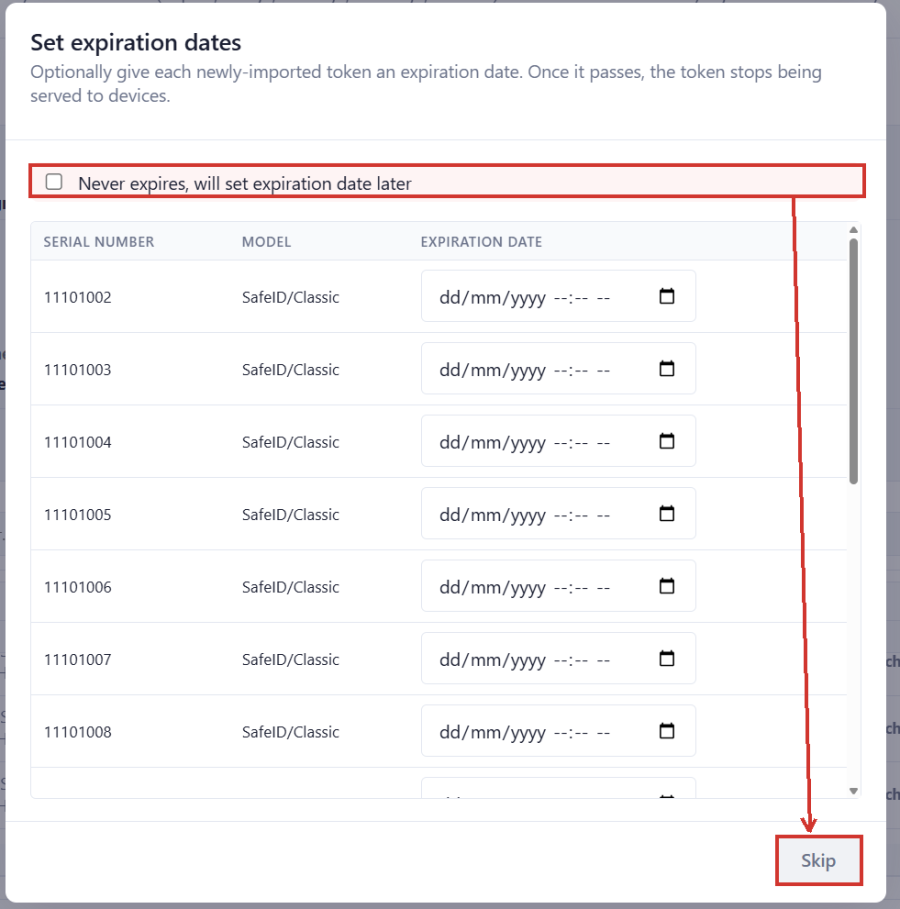
Checking "Never expires" is what enables Skip
Typed at least one date instead of checking the box? Save appears in place of Skip, so only the rows you actually filled in get an expiration date.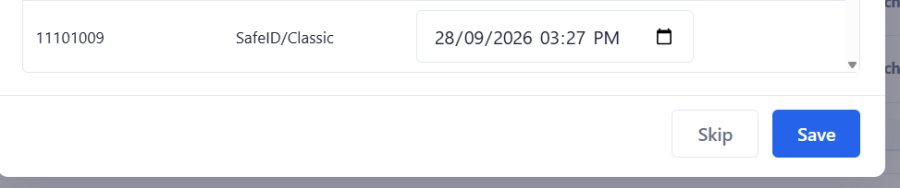
Once a date is filled in, "Save" replaces "Skip"
Page History
Overview
Content Tools