Configuring the Security Fabric with SAML:
| Section |
|---|
|
| Column |
|---|
Log in to the root FortiGate.
Go to Security Fabric > Fabric Connectors and double-click the Security Fabric Setup card.
|
| Column |
|---|
|
| Panel |
|---|
| borderColor | #9EBEE5 |
|---|
| bgColor | #f0f0f0 |
|---|
| borderWidth | 1px |
|---|
| 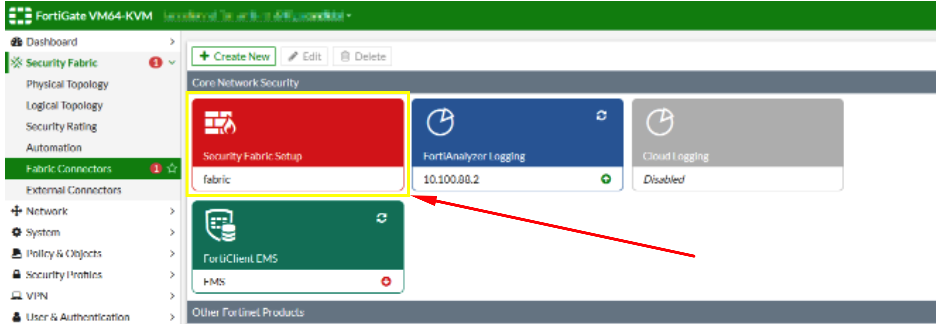 Image Added Image Added
|
|
|
Enter the details of the SAML identity provider:
| Section |
|---|
|
| Column |
|---|
The Entitity ID/ Issuer ID will match the Entity ID you specified in the DualShield Service Provider. There are two parts for specifying the Sign-In and Log-Out Page URLs The first part is that that you will use the SingleSignOnService and SingleLogoutService URLs you copied from the DualShield SSO Server Metadata (see previous section) respectively. The second part is that you will append these URLs with some extra information. e.g. Sign-in page URL | Code Block |
|---|
https://dualshield.yourdomain.com:8074/sso/Login/kvps/DASApplicationName/Ctera |
Log-out page URL | Code Block |
|---|
https://dualshield.yourdomain.com/sso/logout?DASApplicationName=Ctera |
|
| Column |
|---|
|
| Panel |
|---|
| borderColor | #9EBEE5 |
|---|
| bgColor | #f0f0f0 |
|---|
| borderWidth | 1px |
|---|
|  Image Added Image Added
|
|
|
Upload the Idp Certificate file
| Section |
|---|
|
| Column |
|---|
In order to do this, you need to convert the 'crt' file that was downloaded in the previous section to a 'cer' file. To begin, Open the crt file and install the Certificate to your personal folder in Certificate manager |
| Column |
|---|
|
| Panel |
|---|
| borderColor | #9EBEE5 |
|---|
| bgColor | #f0f0f0 |
|---|
| borderWidth | 1px |
|---|
|  Image Added Image Added  Image Added Image Added
|
|
|
| Section |
|---|
|
| Column |
|---|
Once installed the Certificate needs to be exported
Export it as a Base-64 encoded X.509 (.CER) |
| Column |
|---|
|
| Panel |
|---|
| borderColor | #9EBEE5 |
|---|
| bgColor | #f0f0f0 |
|---|
| borderWidth | 1px |
|---|
|  Image Added Image Added  Image Added Image Added
|
|
|
You will also need to download the IdP Certificate
| Section |
|---|
|
| Column |
|---|
Upload the exported CER file. |
| Column |
|---|
|
| Panel |
|---|
| borderColor | #9EBEE5 |
|---|
| bgColor | #f0f0f0 |
|---|
| borderWidth | 1px |
|---|
|  Image Added Image Added
|
|
|