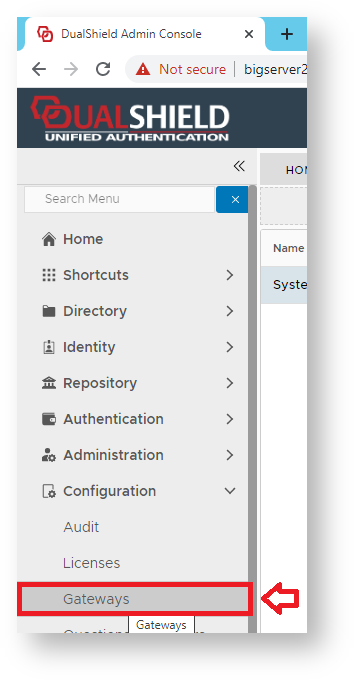
An Email gateway can be added to a selected domain by using the following procedure;
In the DualShield Admin Console, Navigate to "Configuration | Gateways", then click on the button "CREATE";
A new window will now open titled "Message Gateway – New";
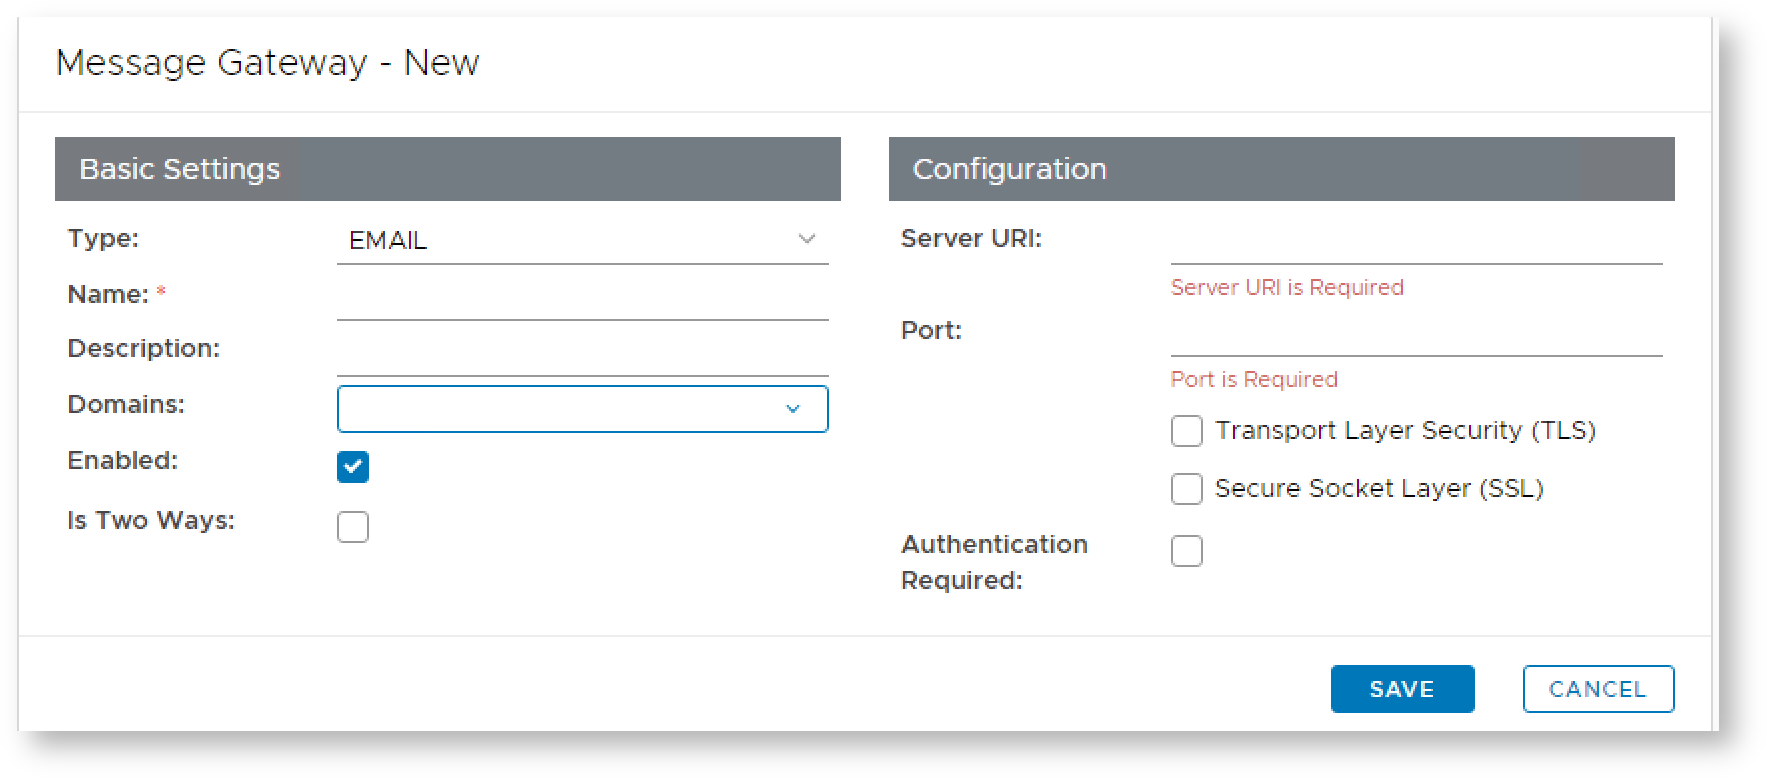
At the prompt "Type:", select "EMAIL", enter a suitable name and description for the email gateway, and select what domains will be able to use the message gateway;
Section 
Column width 70% Expand title Type Panel borderColor grey bgColor #F8F8F8 borderStyle dashed For email gateways select "EMAIL".
Expand title Name Panel borderColor grey bgColor #F8F8F8 borderStyle dashed Enter a suitable name for your email gateway (e.g. “Dualshield Email Gateway”).
Expand title Description Panel borderColor grey bgColor #F8F8F8 borderStyle dashed Provide a brief description of email provider (e.g. "Company Email Server").
Expand title Configuration Panel borderColor grey bgColor #F8F8F8 borderStyle dashed The Edit button (
 ) allows you to provide additional configuration details for the Email Gateway (for instructions see the next step below).
Expand title Domains Panel borderColor grey bgColor #F8F8F8 borderStyle dashed Select the Domains from which the user details can be obtained (e.g. "deepnetsupport.com").
Expand title Enabled Panel borderColor grey bgColor #F8F8F8 borderStyle dashed Select if the message gateway is enabled (or not).
The section headed "Configuration" can be used to configure the connection configuration details for the gateway you intend to connect to.
Section 
Column width 70% Expand title Server URL Panel borderColor grey bgColor #F8F8F8 borderStyle dashed Enter the address of your SMTP Server (in this example our mail server is at “mail.deepnetsecurity.com”),
Expand title Port Panel borderColor grey bgColor #F8F8F8 borderStyle dashed Unless your provider requires a different setting, leave the setting unchanged with the default value of 25,
Expand title Transport Layer Security (TLS) Panel borderColor grey bgColor #F8F8F8 borderStyle dashed Enter a TLS setting that matches the requirements of your SMTP mail server
Expand title Secure Socket Layer (SSL) Panel borderColor grey bgColor #F8F8F8 borderStyle dashed Enter a SSL setting that matches the requirements of your SMTP mail server
Expand title Username Panel borderColor grey bgColor #F8F8F8 borderStyle dashed If your mail server requires a user name, then enter it here.
Expand title Password Panel borderColor grey bgColor #F8F8F8 borderStyle dashed If your mail server requires a password, then enter it here.
The section headed "Test Gateway" can be used to check that the connection parameters are working prior to saving the template;.
Section Column width 30% 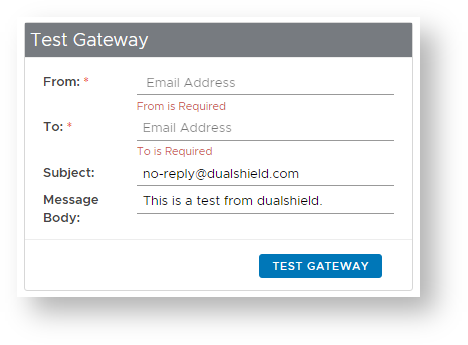
Column width 70% Expand title From Panel borderColor grey bgColor #F8F8F8 borderStyle dashed Enter a valid email address that specifies where the email was sent from,
Expand title To Panel borderColor grey bgColor #F8F8F8 borderStyle dashed Enter the address of the recipient of the test email,
Expand title Subject Panel borderColor grey bgColor #F8F8F8 borderStyle dashed The text entered here will be shown in the subject section of the email.
Expand title Message Body Panel borderColor grey bgColor #F8F8F8 borderStyle dashed This field contains the message that will appear in the body of the test message.
- After entering the test gateway fields (and after ensuring that the from address is a valid email address), you can test the functionality of the gateway by clicking on the "TEST GATEWAY" button (which will produce a message indicating if the email was sent correctly);
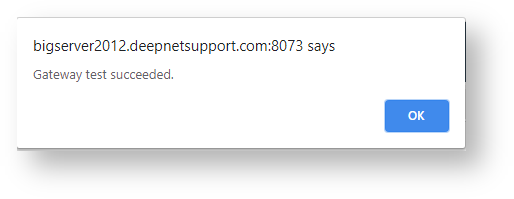
- Once the email gateway has been configured and tested you can save the newly created email gateway by clicking on "Save".