...
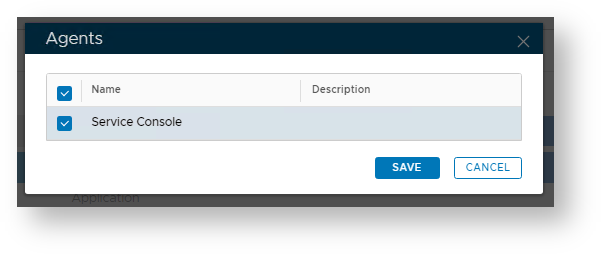
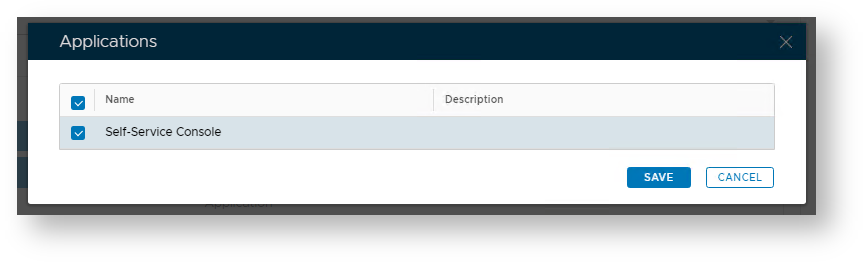
At the prompts "Name:" and "Description:" provide text that relates to the customisation you are about to perform, then at the prompt "Customisation Type:" select which portal is to be customisedSelf-Service Console, then at the prompts "Agents:" and "Applications" click on the search icons (see arrow in the picture above), then select the agent and application that matches your selected customisation type;and select Service Console.
You can now prepare the customisations using the section headed "Manage Content";
...
If we want to customise this section we need to uncheck the field "Keep this field empty", then in the text box we supply the content that will be displayed in this section of the web page.. The content can either be in plain text, or text in html form (for example we could add "<a href="https://your.domain.com:8076/drp" >password reset</a>" if we wanted to which will add a link to the password reset module, or just Plain text such as "Self Service Console" if only text was required in this section).
Once the customised content has been entered click "Save", and repeat this process for any other sections you need to customise.
...
Now complete the configuration is saved by click on the "Save" button.
...
Test
There is no need to restart any services prior to testing the web portals (however if the portal was open whilst the changes were being implemented then you will need to refresh the web page in order to view the changes). Provided the customisations were enabled and saved you can now see the effect of the customisations by simply opening the affected portal and examining the areas changed.
...