Run the SafeID Token Server installer (SafeIDServiceInstaller.exe) as an administrator
You will be presented with the box below
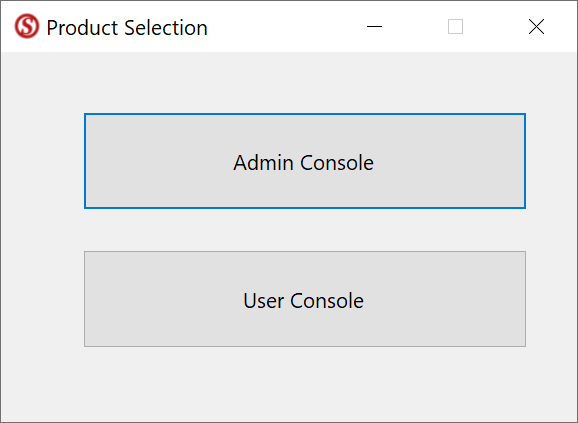
Select "Administration Console"
You will then be presented with a window like the one below
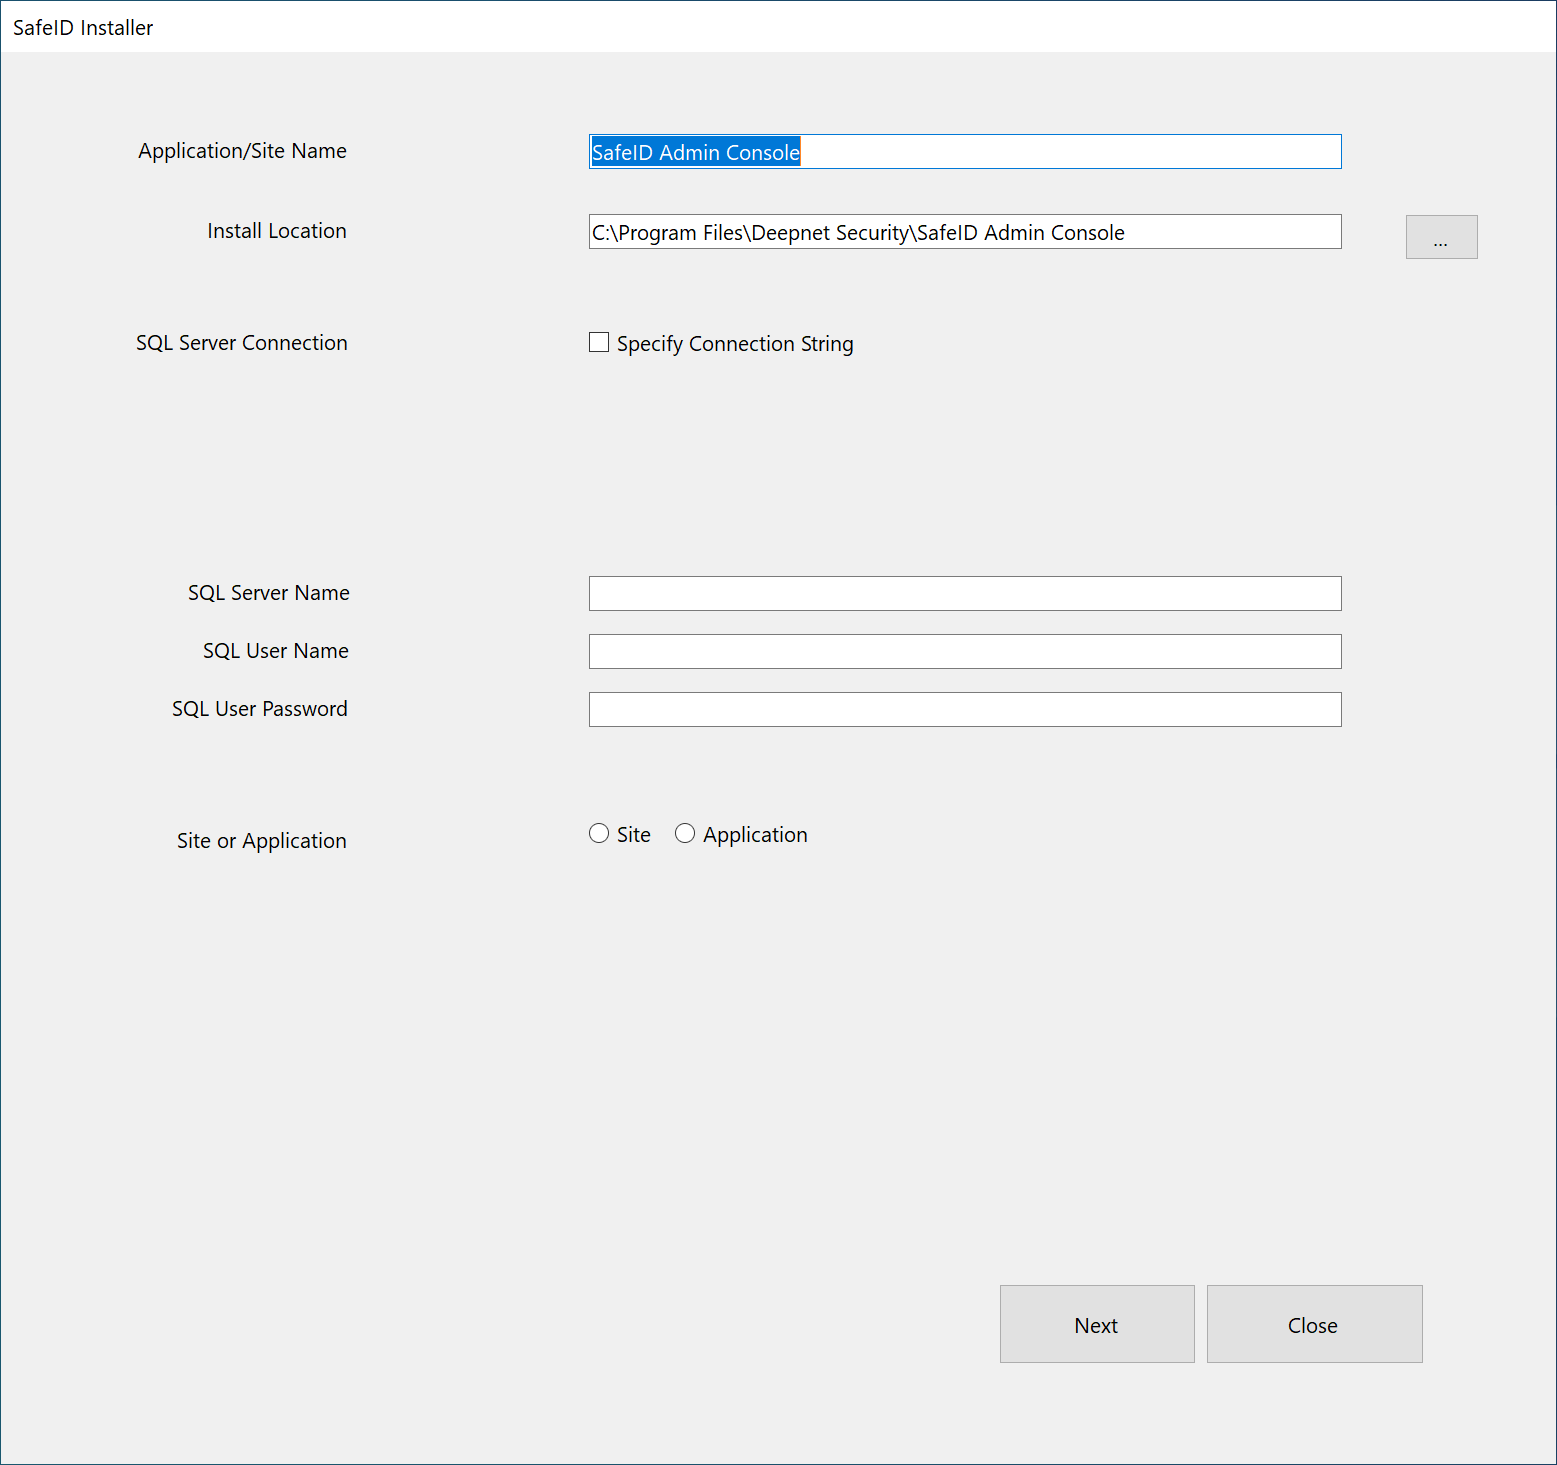
You can change the "Application/Site Name", and the "Installation Location", if you wish.
The software needs to connect to an MS-SQL server.
You can either specify the SQL connection string or enter the SQL connection properties.
To specify the SQL connection string, enable the option "Specify SQL Connection String"
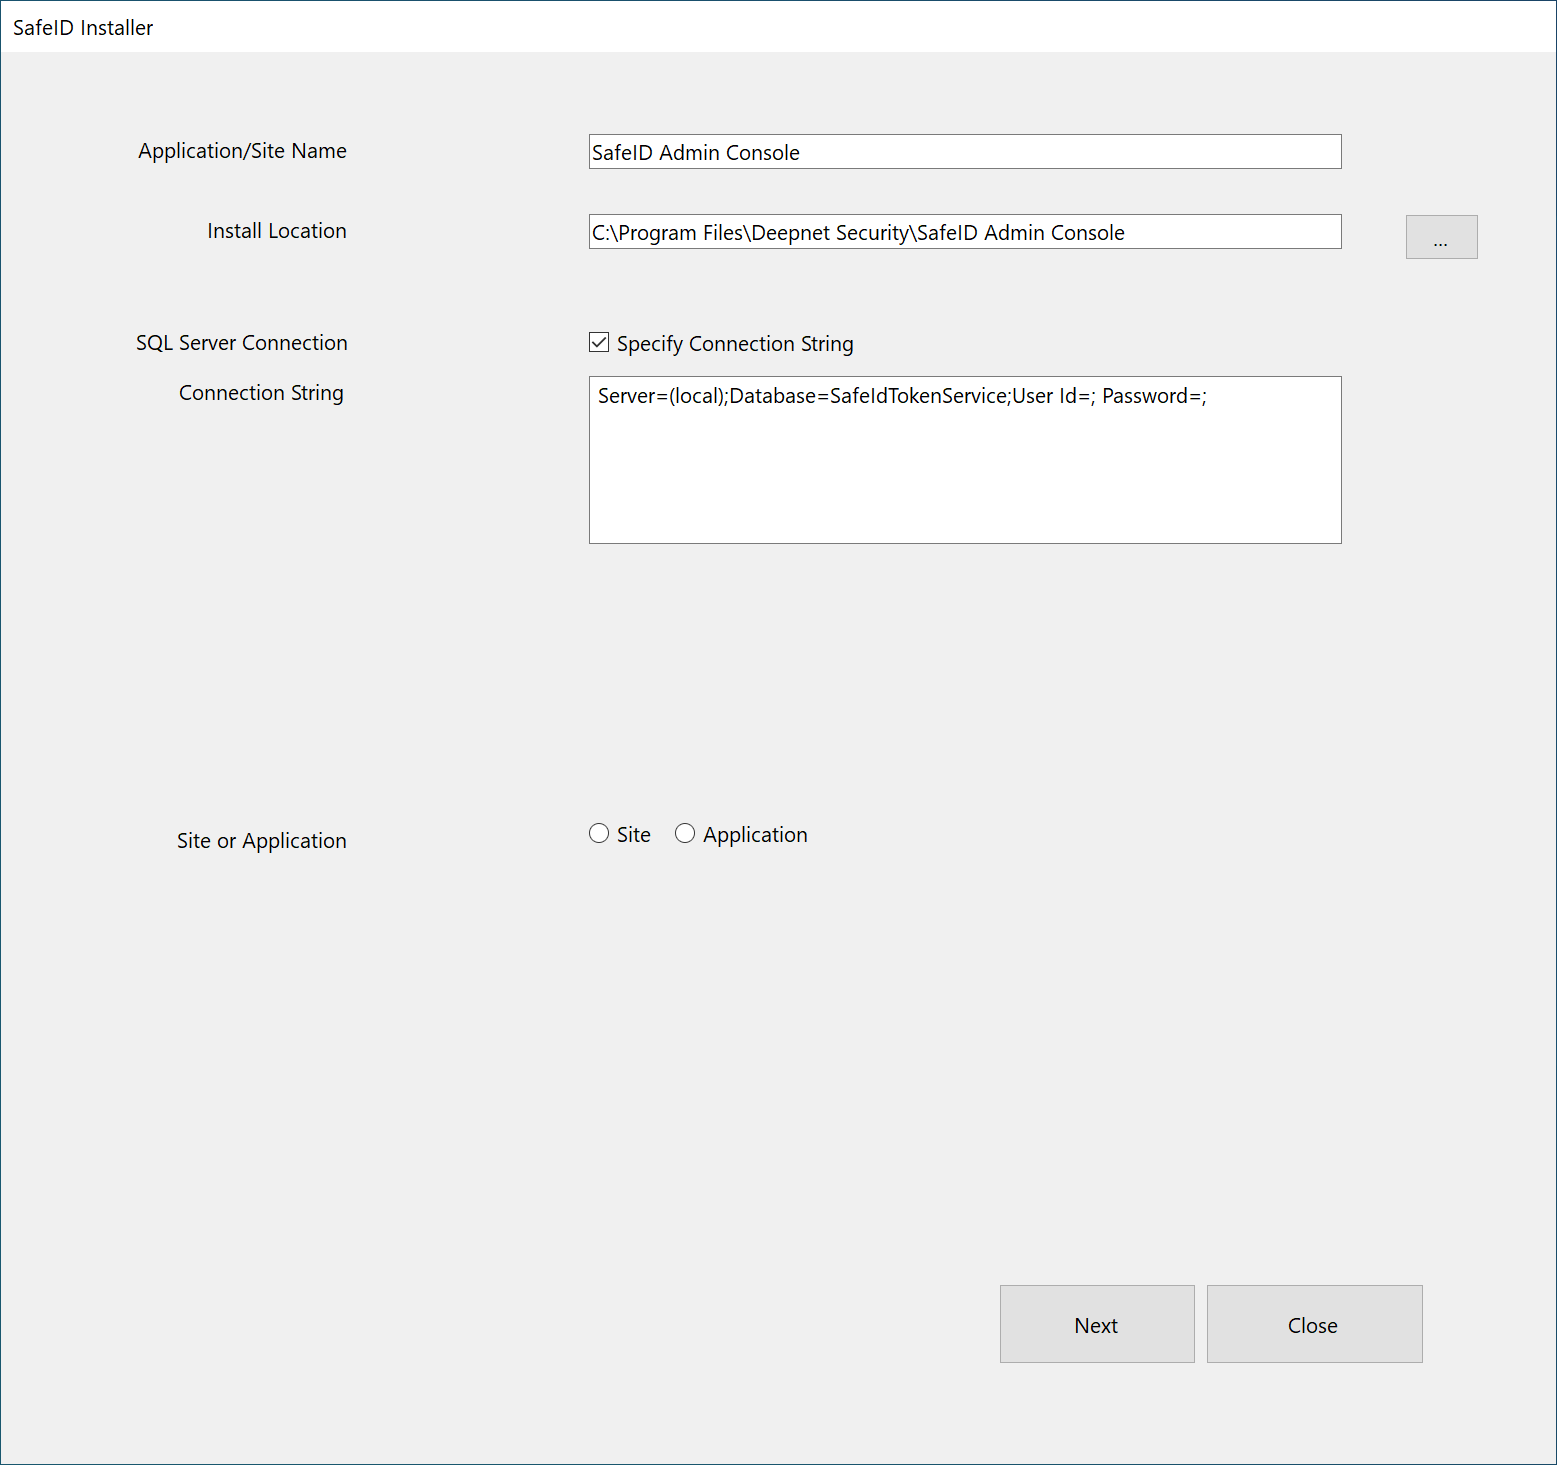
Modify the "SQL Server Connection String", e.g. "Server=localhost\SQLEXPRESS; Database=SafeIdTokenService;User Id=STS; Password=xxxxxxxx;"
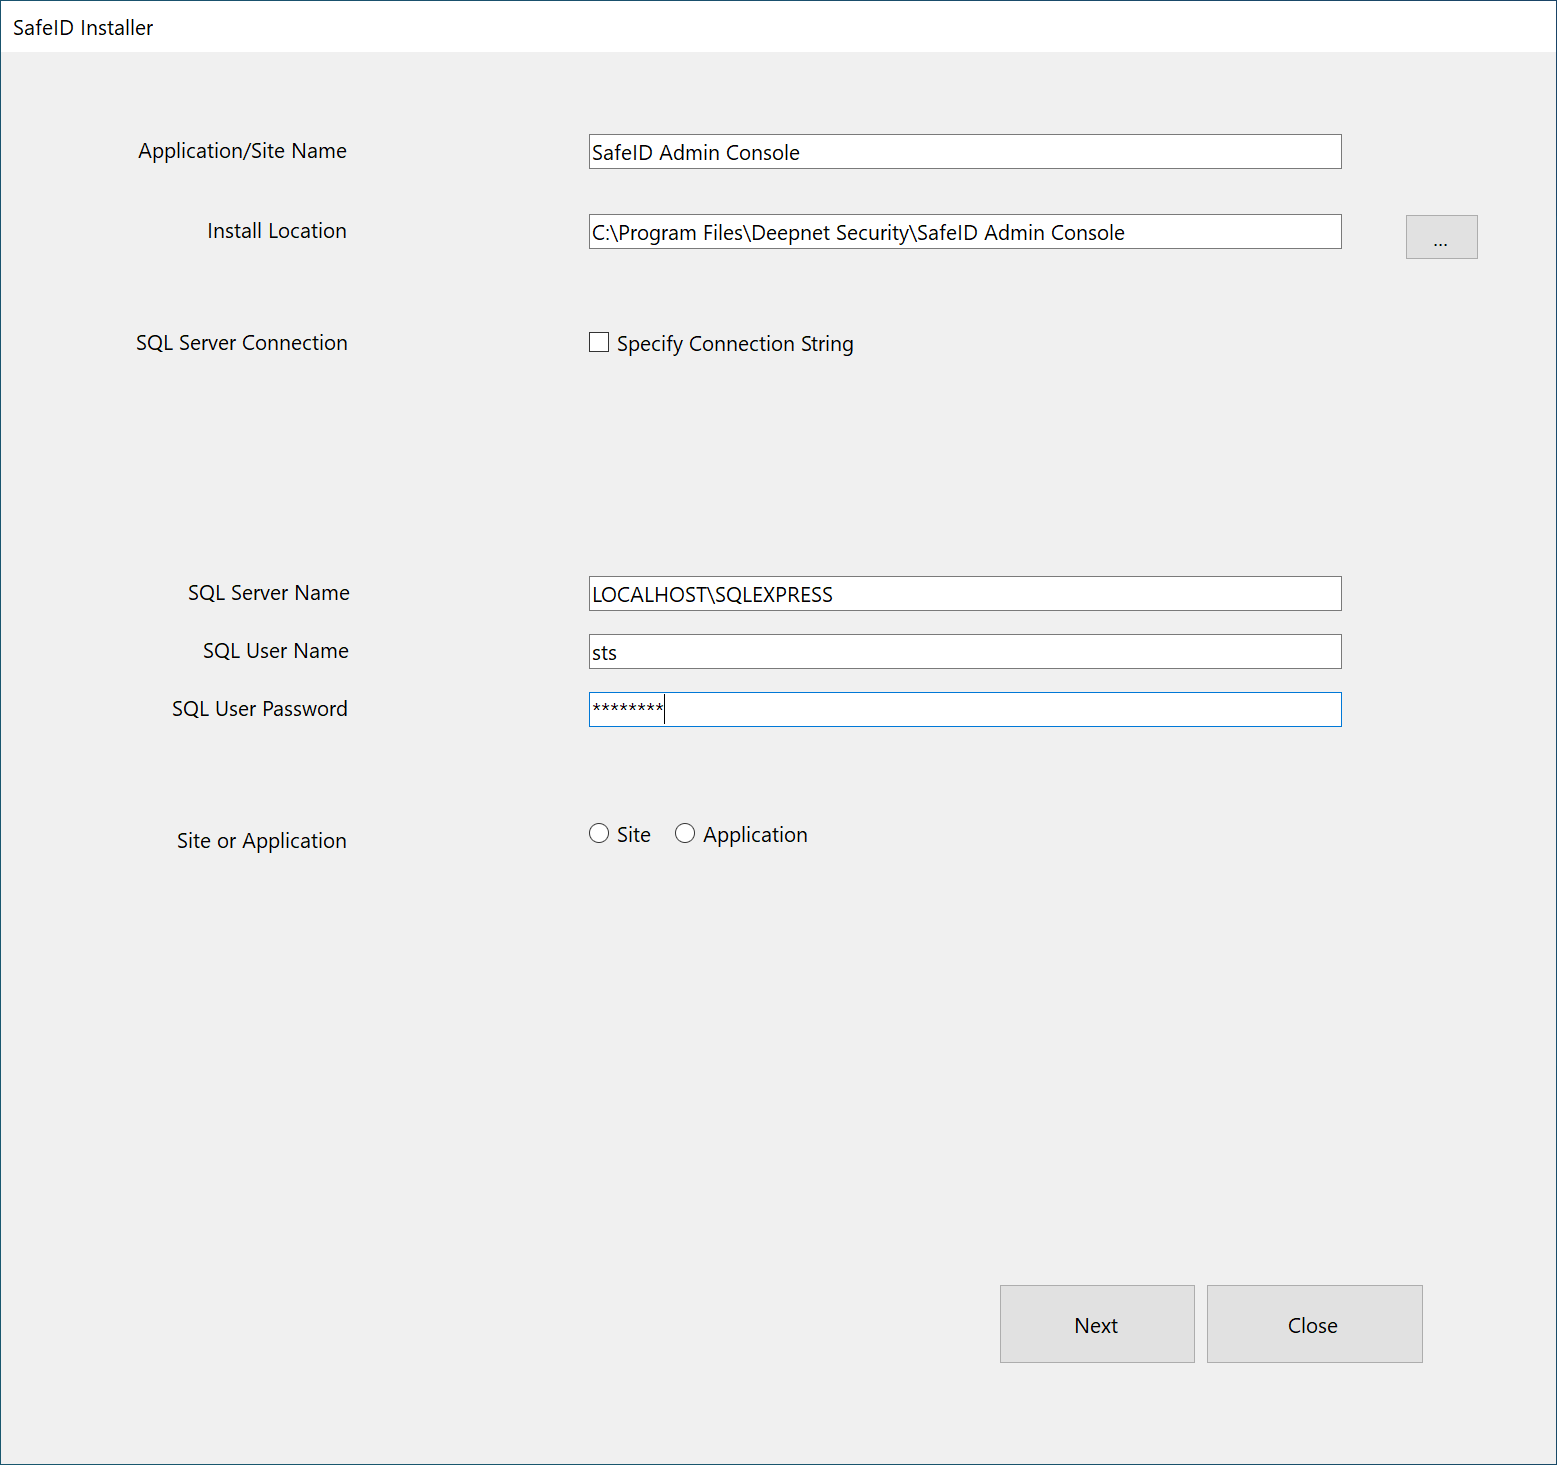
Select "Site" in "Site or Application" (This means that the SafeID Token service will be installed as a website in the local IIS web server)
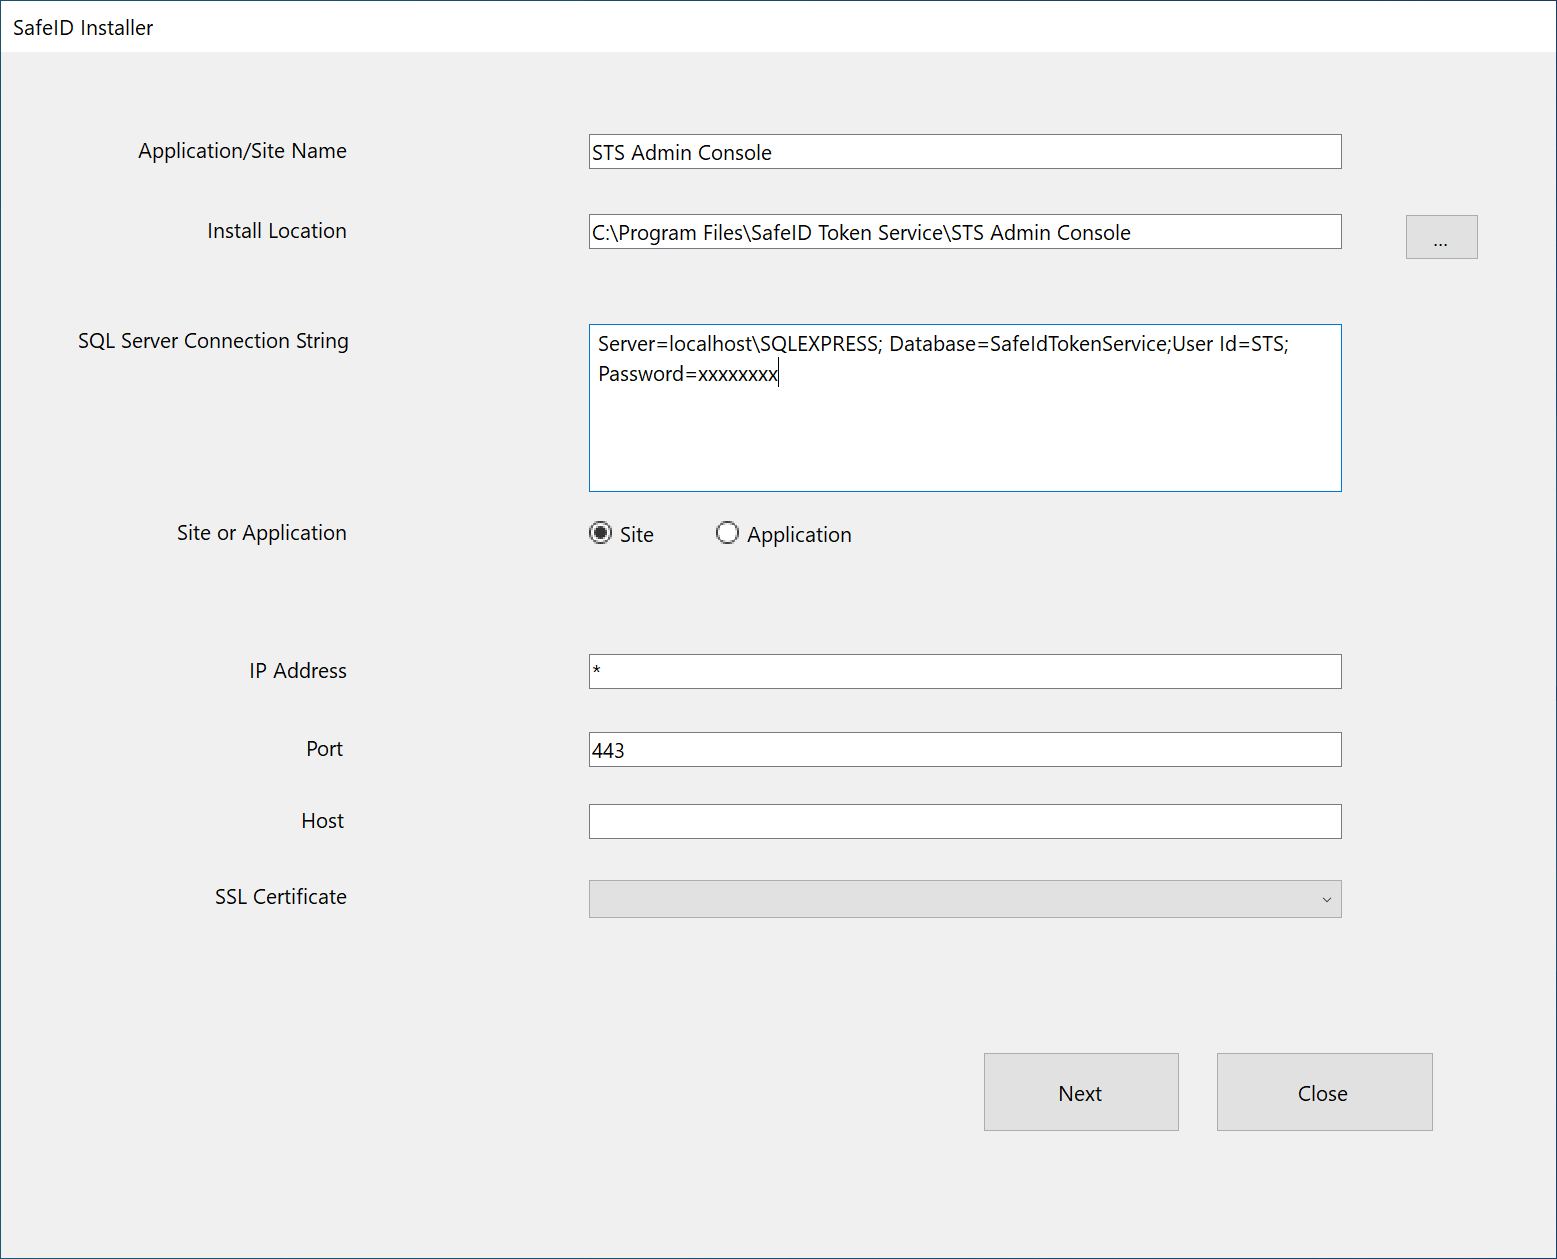
In "Host", enter the hostname of your SafeID Admin Console.
As the SafeID Admin Console will be accessed by your admin users only, you can either provide an FQDN (Fully Qualified Domain Name) as its hostname, or you can use the local machine name as its hostname.
In this example, we use the machine name as the hostname of the SafeID Admin Console, e.g. WIN-VRV2KFO3J2N
Select an SSL Certificate to be used for the SafeID Admin Console.
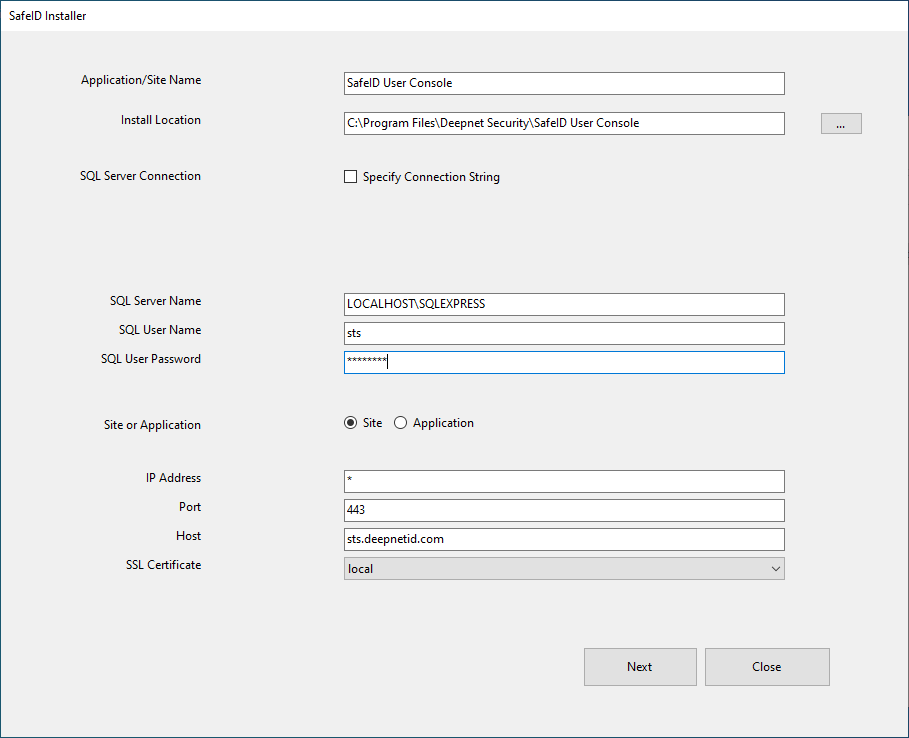
Click next.
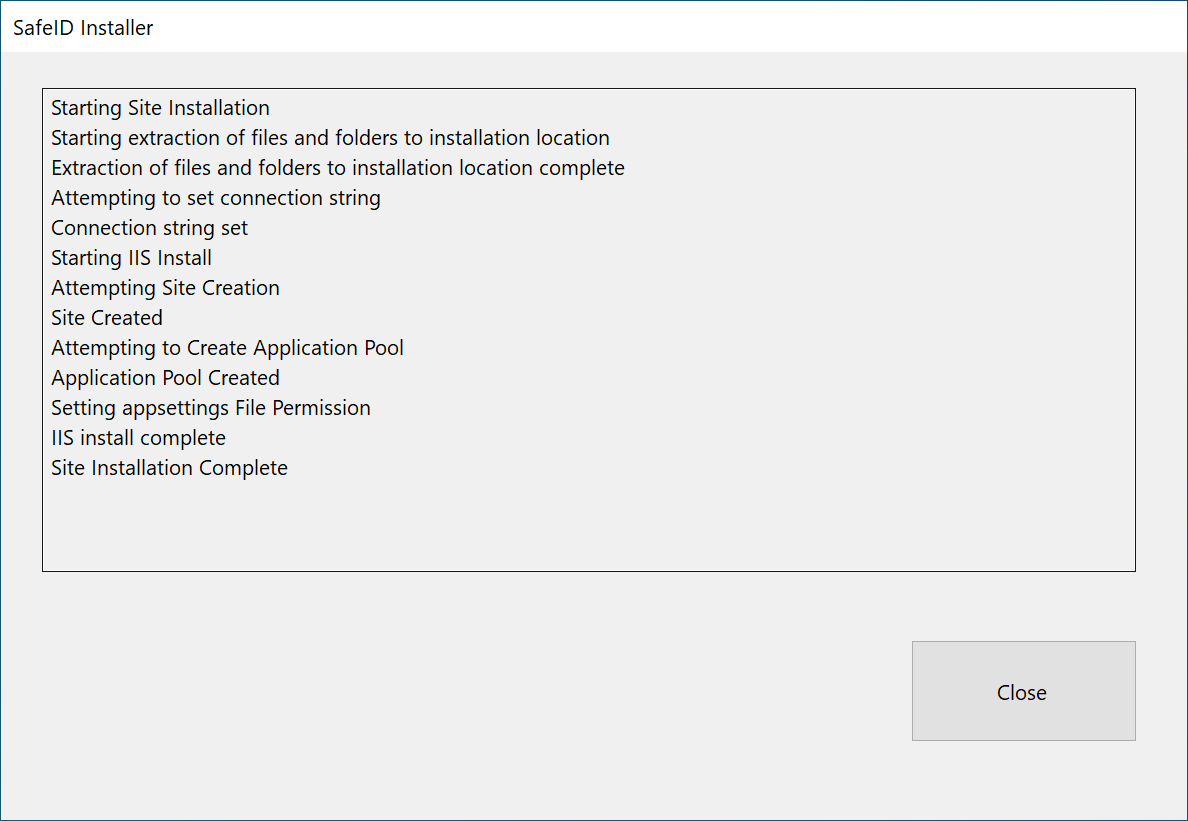
Once the installation has been completed, you will be taken to the setup page.
Set up Local Admin Account
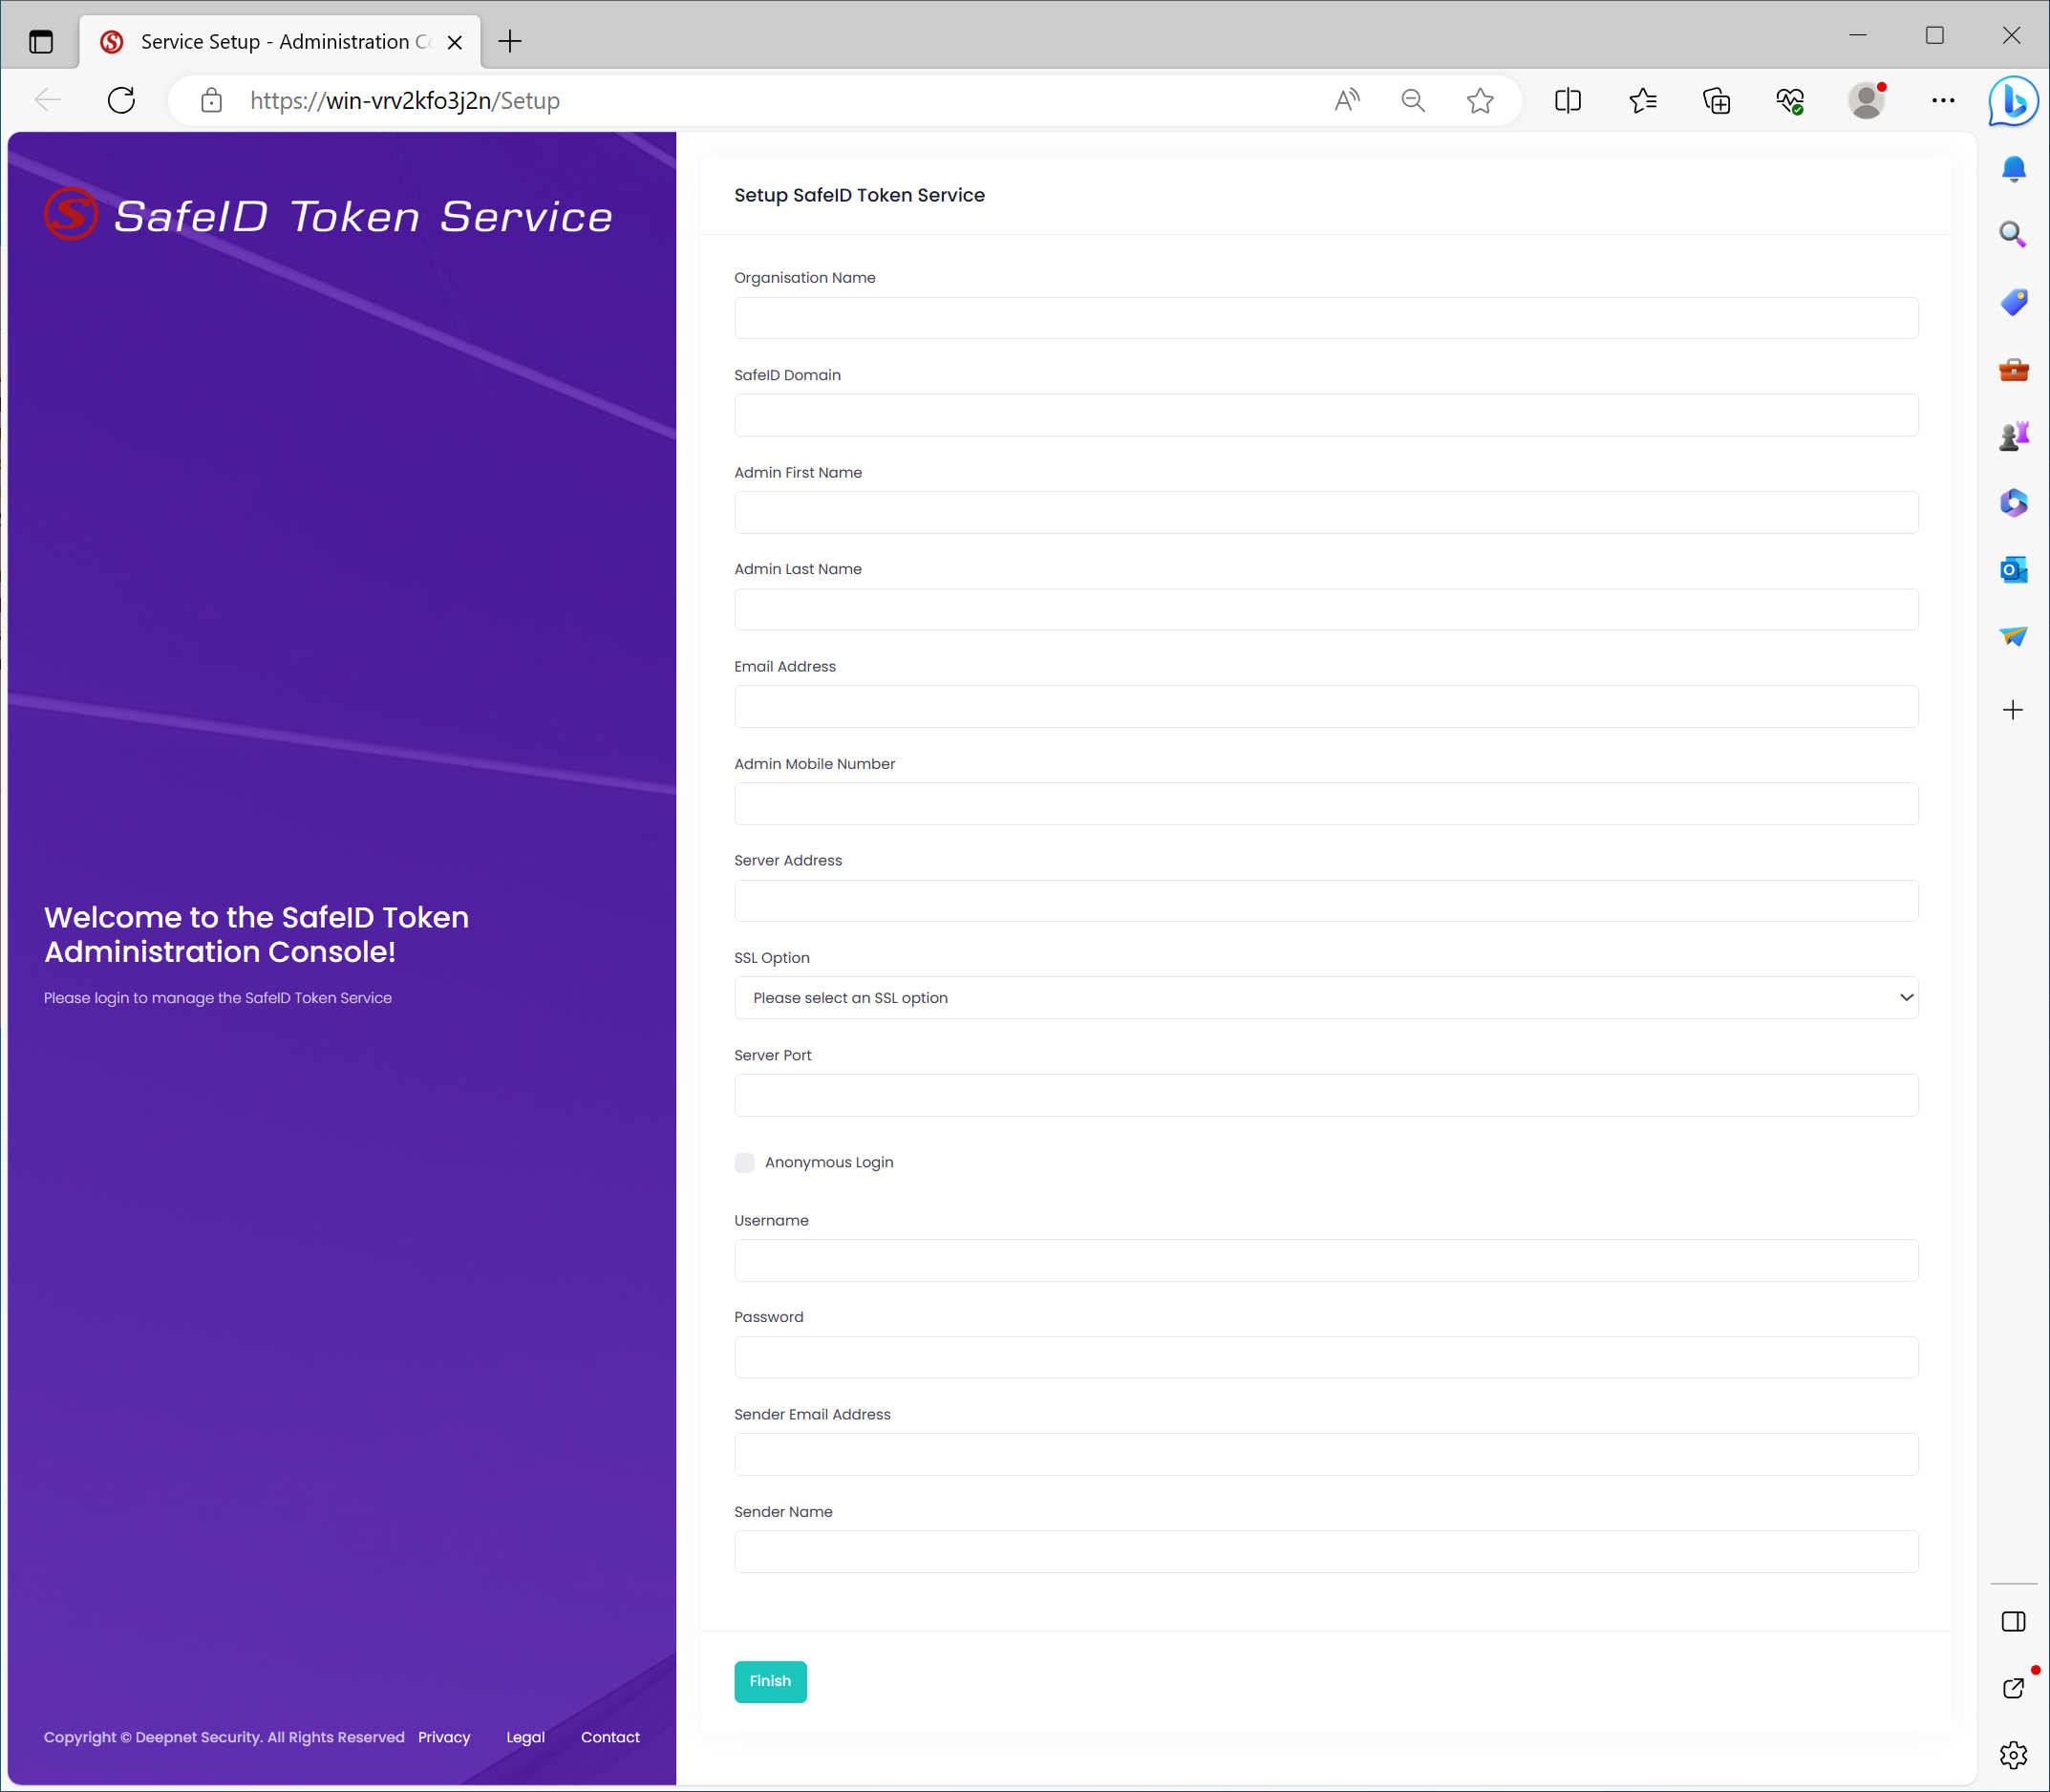
Please see the explanations of the fields below
- Organisation Name – The name of the organisation. This will be used in email sent by the service.
- SafeID Domain – This is a prefix for the local user login.
We need to create a default, local admin account that will be used to sign in to the server.
The following details will be used to create the default admin account
- First Name
- Last Name
- Email Address
- Mobile Number (Optional)
These details can be changed at a later point if required.
The SafeId Token Server also needs to be connected to your email server, so that it can send notification emails to the administrators.
Provide the details below of your email server:
- Server Address – SMTP email server address
- SSL option – SMTP SSL Option
- Server Port – SMTP Server Port
If the connection to your email server does not require authentication, then tick the option below:
- Anonymous login
Otherwise, you need to provide a service account to be used to send emails
- Username
- Password
Last, specify the name and email address of the sender
- Sender Email Address
- Sender Name
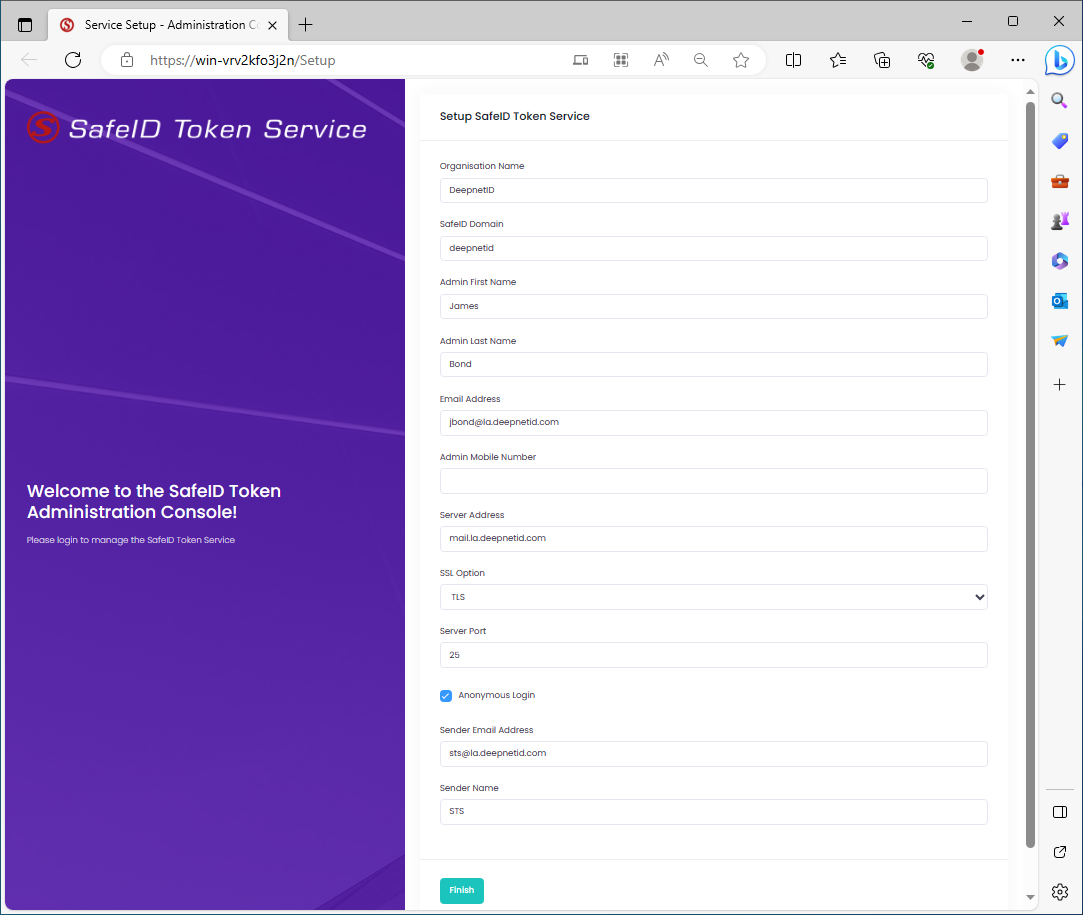
Click the "Finish" button to finish the setup.
Next, You will now be presented with the default local admin account name and link to allow you to set the password for the account.
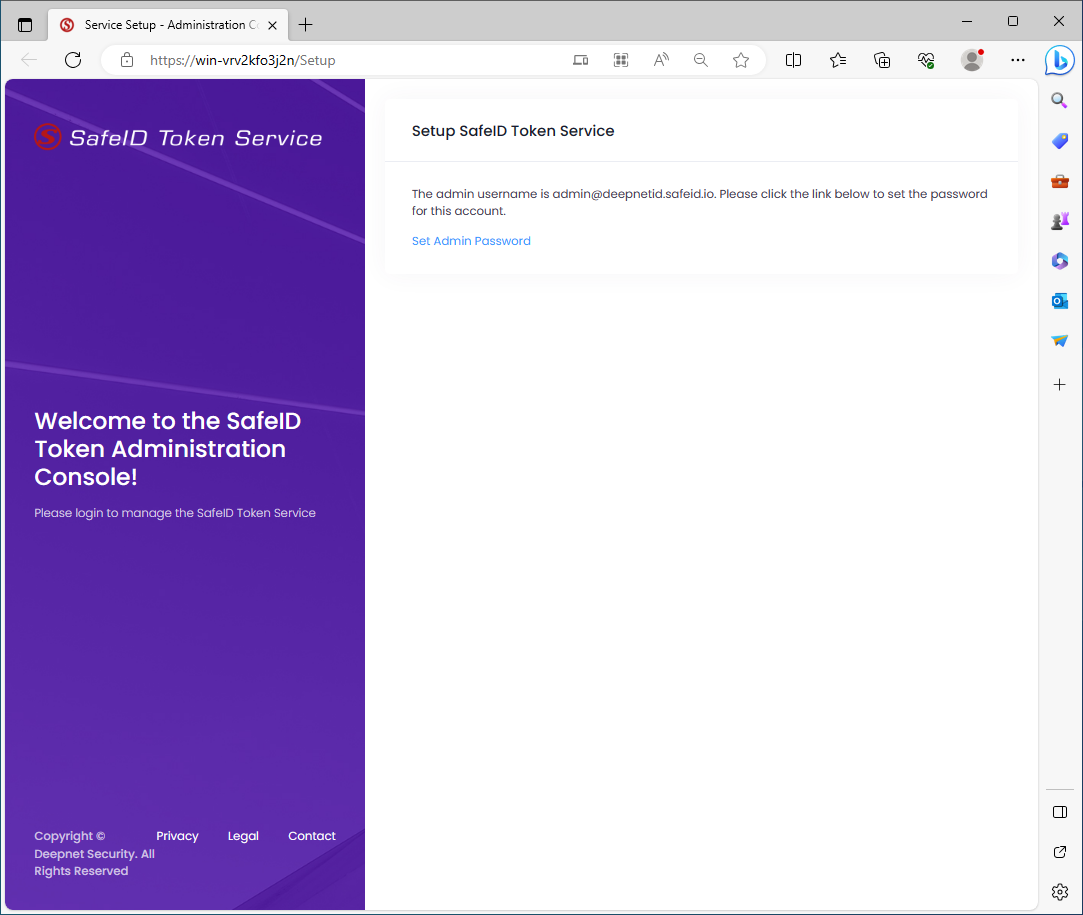
Click "Set Admin Password"
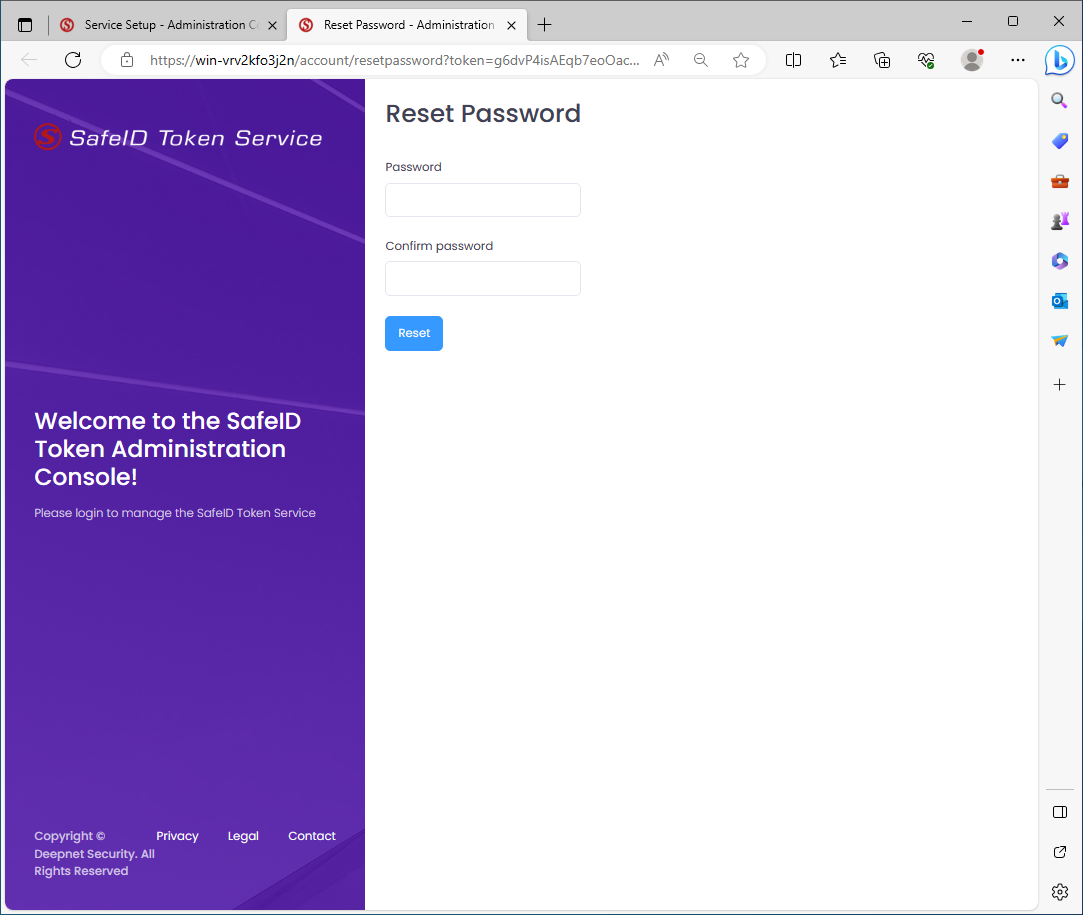
Enter a password for this admin user
Click the Reset button
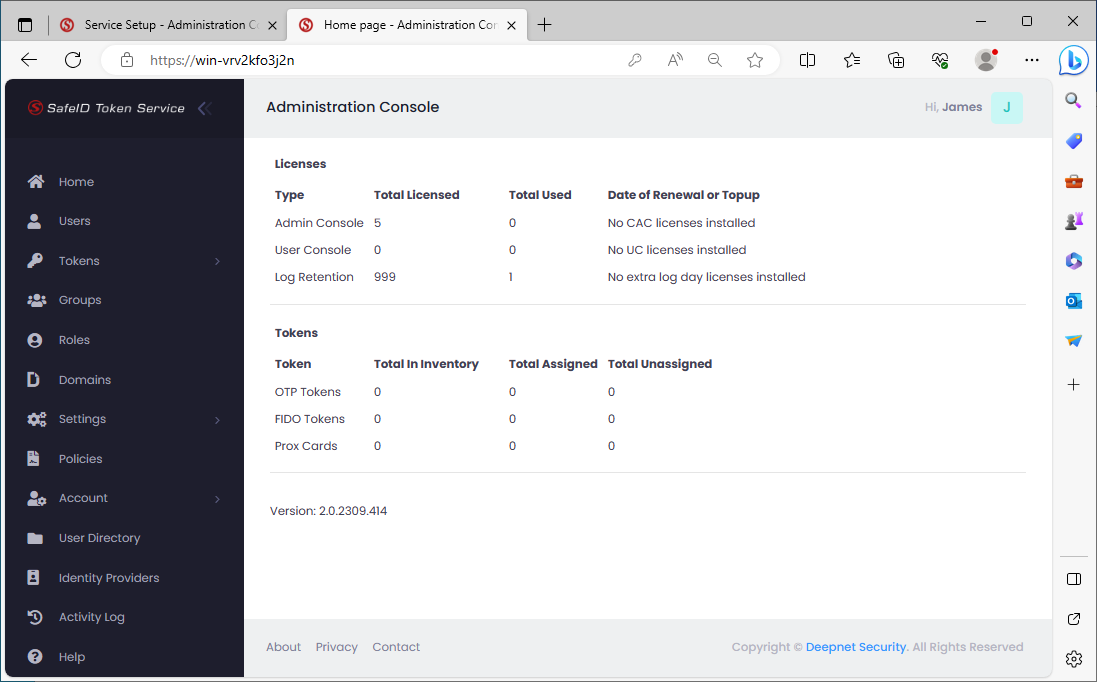
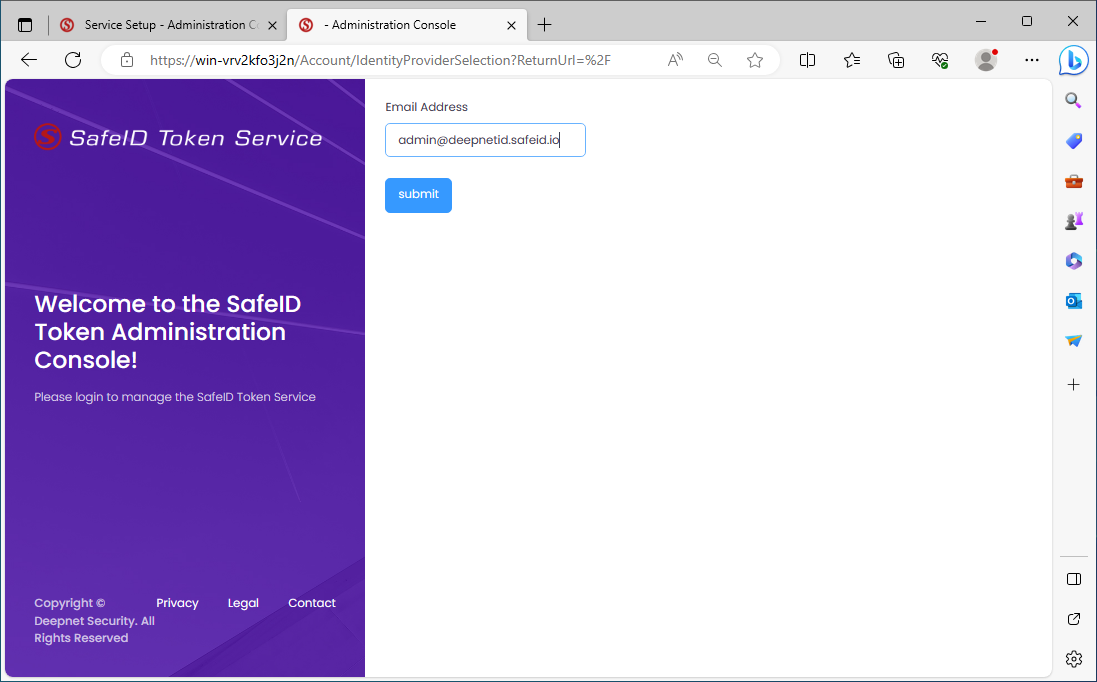
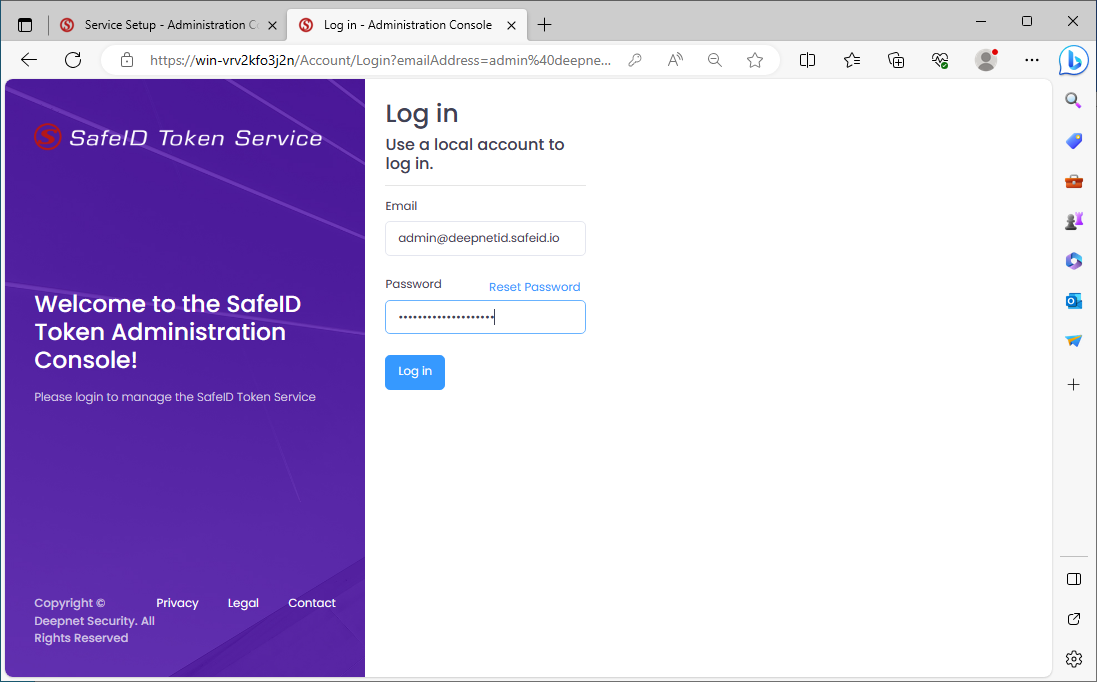
You will now sign in to the SafeID Admin Console
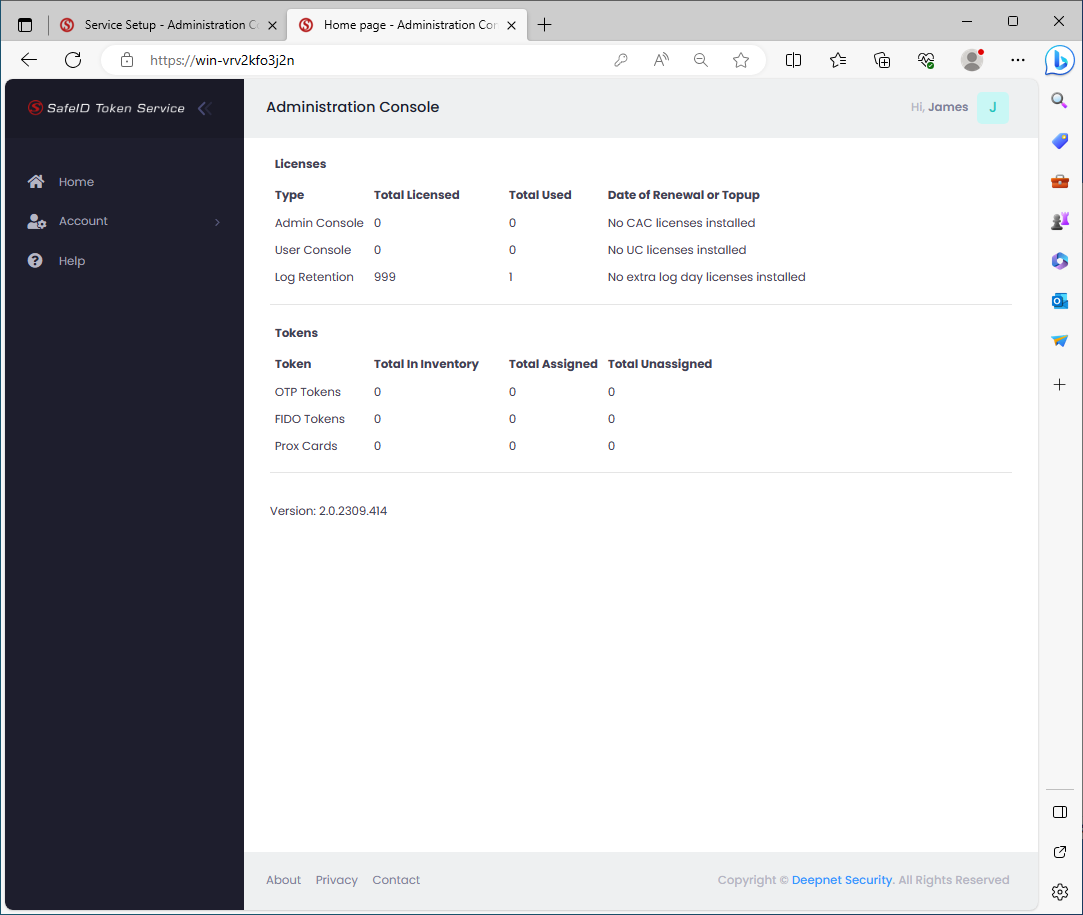
Your SafeID Token Server has been successfully set up.
Install License Key
Before you can carry out any task in the SafeID Admin Console, you need to install a license key.
Click "Account" in the control panel on the left, then select "Licenses"
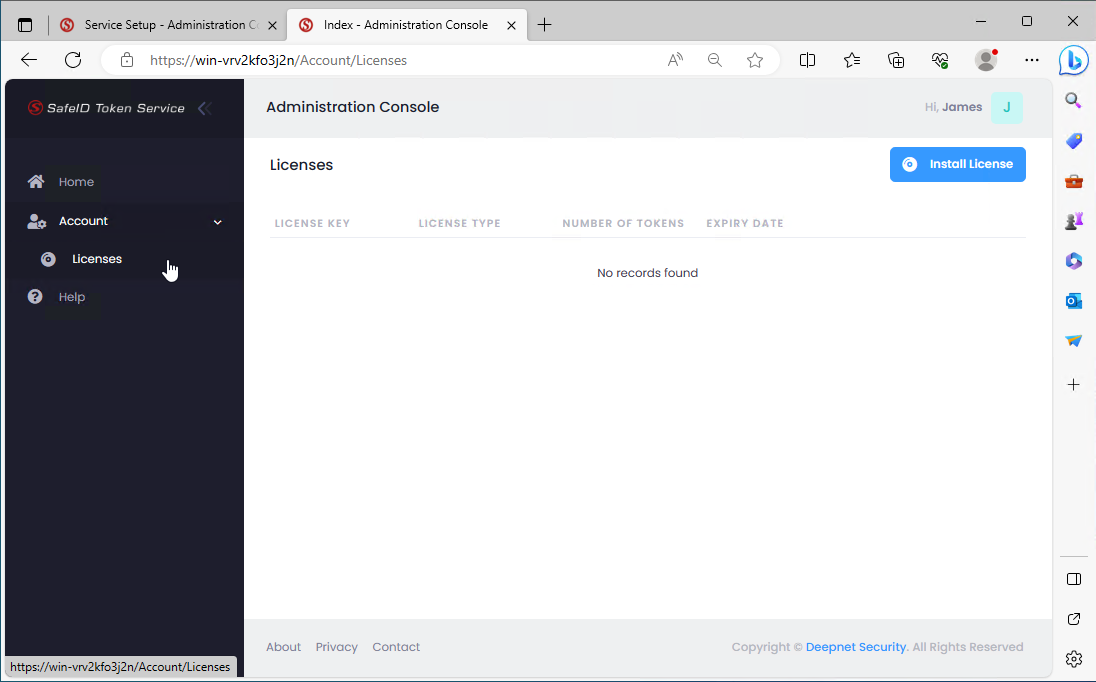
Click "Install License" in the content panel on the right

Select "Online (License Key)"
Enter your STS license key
Click "Install License"

First Sign in
Now, you can sign out, and sign in again
You will have access to all functions in the SafeId Admin Console