To enable a user account with two-factor authentication, the administrator has to carry out two steps:
- Configure a realm and set TOTP authentication as its secondary authentication
- Create a sign-in policy
Create a Realm
2- Setup similar to below, making sure the primary authentication is set to your AD Connection*:
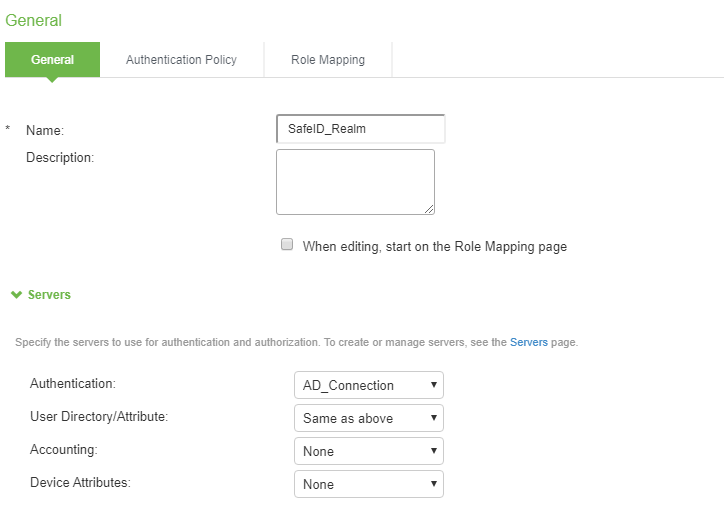
*If you have not yet set up a connection to you AD server, then please follow the how to guide by clicking on the following link
Appendix - Setup AD connection
3- Tick the option Enable additional authentication server ,
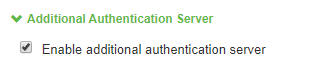
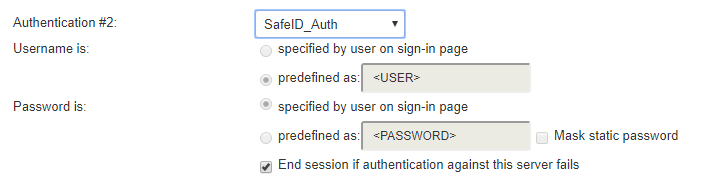
4- In Authenticaation #2, select SafeID_Auth server that you set up in the previous step.
5- Click on Save Changes. This will take you to the Role Mapping page.
6- Click the New Rule... button to create a new rule.
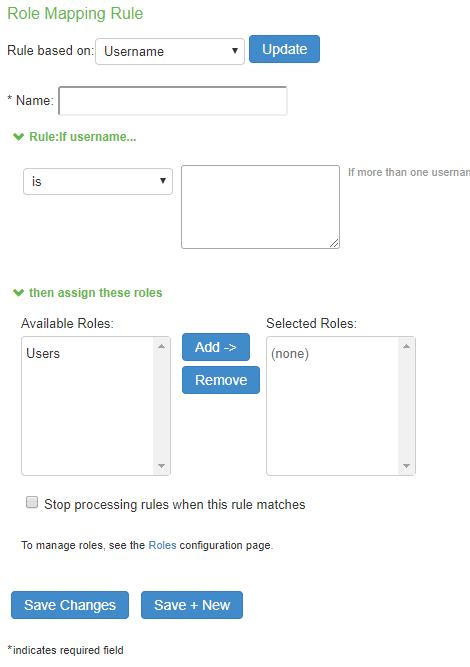
7- Complete the form as below
- Enter a name to describe this new rule, e.g. SafeID_Rule
- Enter * in the rule box
- Click "Add >>" button
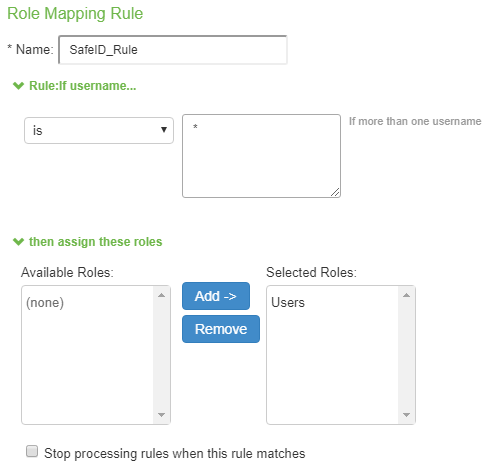
8- Click Save Changes, you should now get the same as this:

Create a Sign-in Policy
- Go to Authentication>Signing In>Sign-in Policies
- Click on New URL
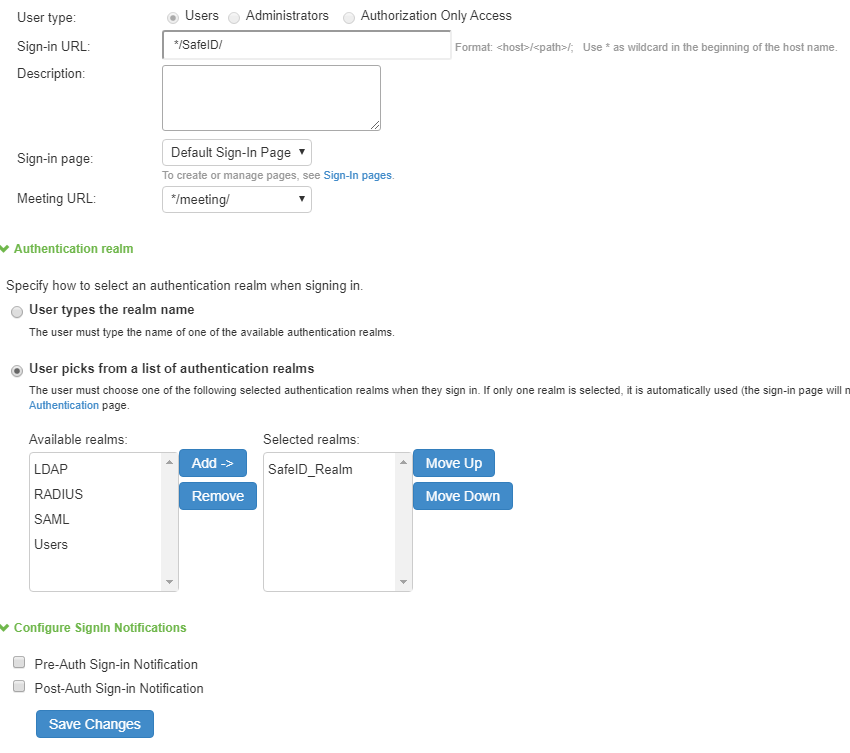
3. The Sign-in URL is what follows your pulse server hostname e.g. www.Pulsesecure.com/SafeID/. For this you can just specify a wildcard followed by the URL as above.
4. Select the User Realm you have created, e.g. "SafeID_Realm"
5. Click on Save Changes
![]()