Introduction
The purpose of the "Facesense Logon Statistics" report template is to allow the administrator to create reports that show statistics based on all user logon that used Facesense authentication.
The report can be found by navigating to "Administration | Reports", then scrolling down to the report "Facesense Logon Statistics";

Creating a report using the "Facesense Logon Statistics" template
To create a report based on FaceSense logon activity details you will need to use the context menu option "Create" for the report template "Facesense Logon Statistics" (highlighted template above).
- It is possible to filter which details are listed in the report by using the condition builder tool (the tool is accessed by clicking on the
 icon).
After the icon is pressed a new window titled "Condition Builder" will open;
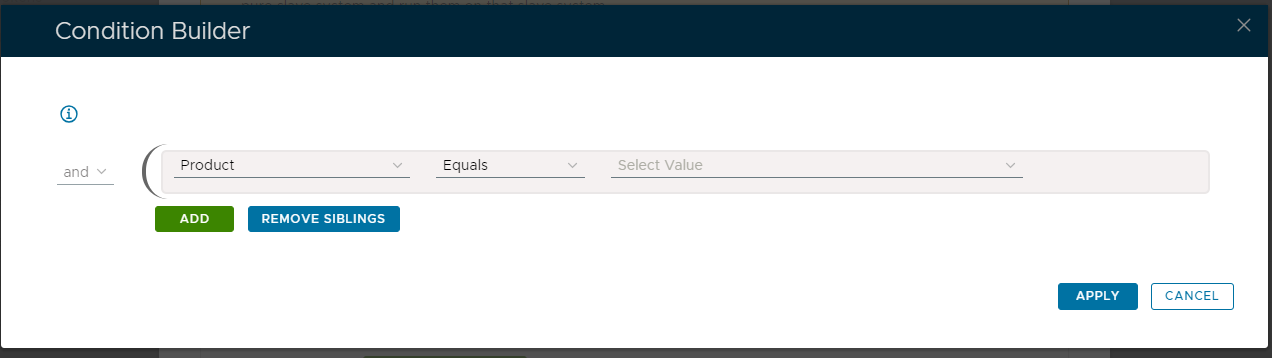
The report template would normally produce a report that provides details for all records that are produced by the query that the report is based on, but these records can be restricted by supplying optional conditions in the condition builder.
The condition builder allows us to specify additional conditions that further restrict what records are included in the report.
As an example, if we wanted to restrict the records added to our report for a specific product and domain we could add the following conditions;
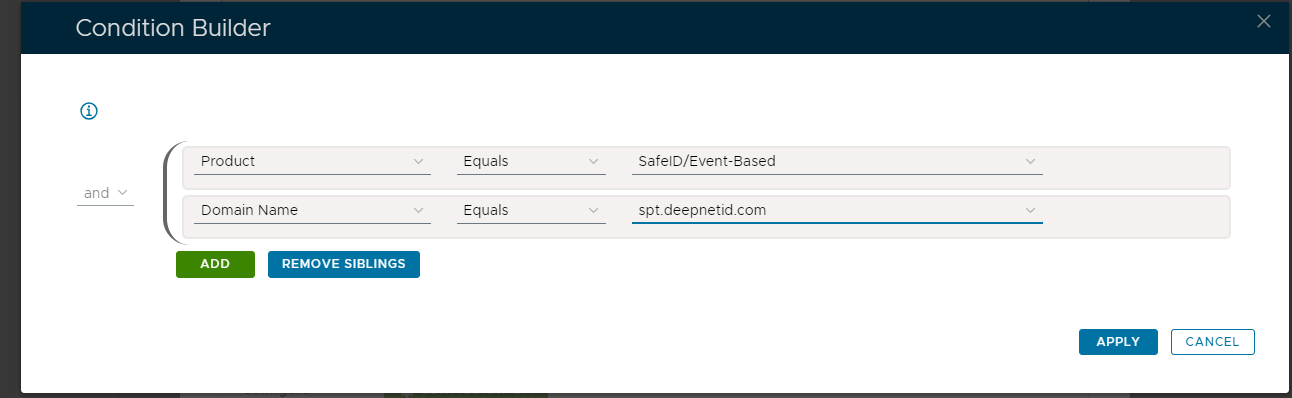
The above example was created with the "All Tokens" report template (searching for tokens in the specified domain of the product type "SafeID/Event-Based"), but each template will offer different options.
Conditions are added to this list using the
 button, and it is possible to use the logic operators ("and" and "or") to specify if all the conditions are required, or if some are optional.
When all the required conditions have been added we submit the conditions using the
 button, and once applied the condition builder will close, and the "Query Statement" parameter will be updated;
Using the "Condition Builder" tool to filter reported records
If no conditions are specified, then the report will list details all FaceSense login statistics, but additional conditions can be added that filter which records are included in the report.
Condition filters are added using the "Condition Builder" tool that is used to construct the Query Statement and is employed using the ![]() icon.
icon.
Filters may be applied based on any of the following fields;

- It is possible to filter which details are listed in the report by using the condition builder tool (the tool is accessed by clicking on the icon).
After the icon is pressed a new window titled "Condition Builder" will open;
The report template would normally produce a report that provides details for all records that are produced by the query that the report is based on, but these records can be restricted by supplying optional conditions in the condition builder.
The condition builder allows us to specify additional conditions that further restrict what records are included in the report.
As an example, if we wanted to restrict the records added to our report for a specific product and domain we could add the following conditions;
The above example was created with the "All Tokens" report template (searching for tokens in the specified domain of the product type "SafeID/Event-Based"), but each template will offer different options.
Conditions are added to this list using the
button, and it is possible to use the logic operators ("and" and "or") to specify if all the conditions are required, or if some are optional.When all the required conditions have been added we submit the conditions using the
button, and once applied the condition builder will close, and the "Query Statement" parameter will be updated;
Report Scheduling
Whilst the report can be run manually from the management console, it is possible you might want to schedule the report to run a specific times automatically.
This can be achieved by use the report scheduling option;
- Reports can be scheduled for automatic execution by selecting the "Schedule Enable" option then clicking on the
 icon;
icon;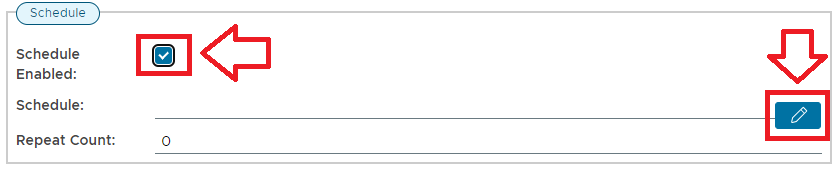
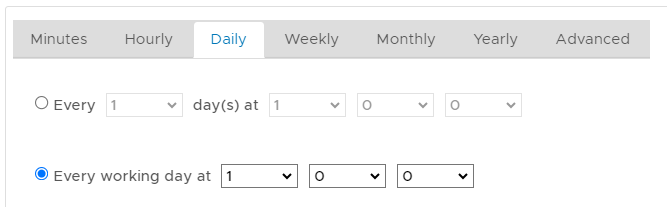
When the
is pressed a window will open titled "Schedule" that can be used to specify the when the report is scheduled to run; 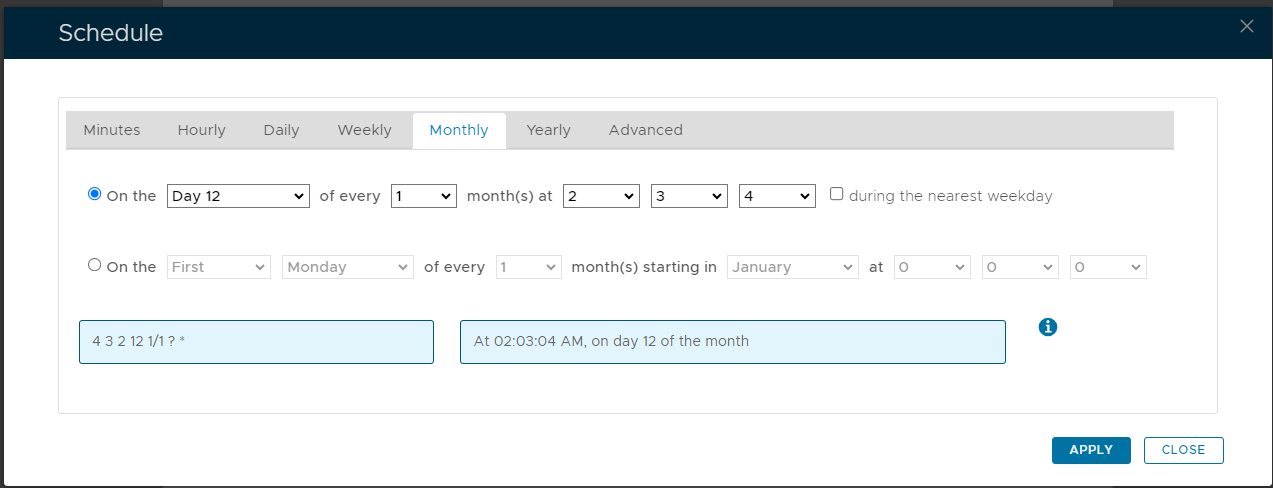
As an example, we can schedule the report to run at 1am every weekday using the following settings;
After clicking on
 the schedule details will be converted into text form and added against the report parameter "Schedule";
Configuring Report Output
The default layout and contents of the report can be customised using the  button.
The purpose of the configuration feature is to specify which of the available field are to be listed in the report columns.
In the following table the items listed as included are listed in the report columns, whilst the optional items are not included in the report;
Included | Optional |
|---|---|
| Domain | Agent |
| Login Name | Application |
| Error Code | Unit |
| Count | Event Code |
| Average Score | |
| Token Code | |
| Token Name |
- Although the reports will include default data in the report columns, it is possible to change this default configuration using the
 button (found at the end of the report template).
If this button is clicked a new window will open titled "Report - Output";
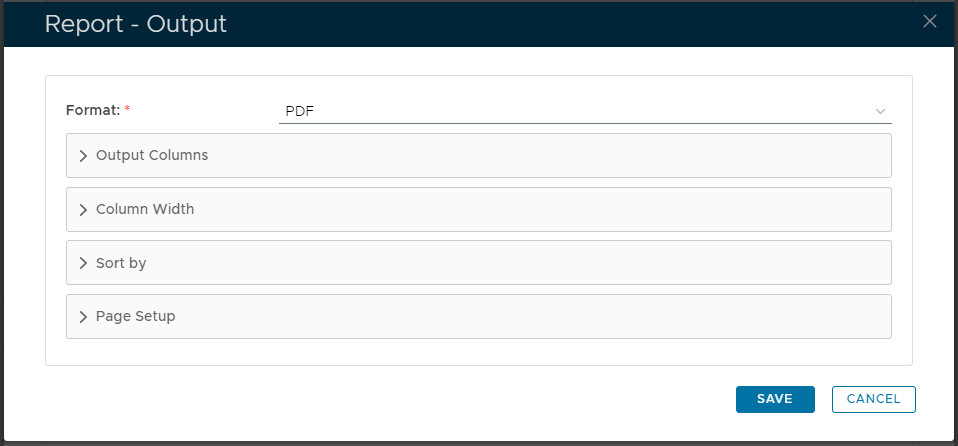
This option allows you to determine the format of the output for the report (defaults to PDF format).
This section allows us to select which field the report will be sorted by (and if the sorting is ascending or descending);

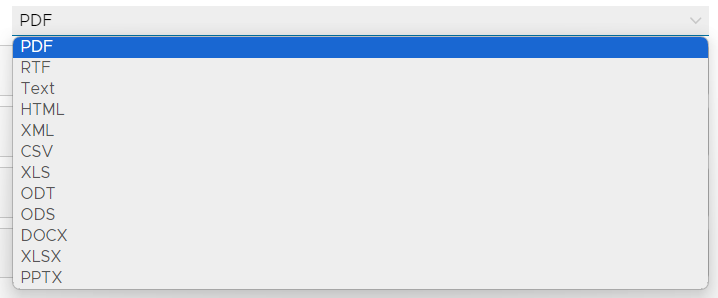
Report Format
Report configuration starts by providing the option to select report format from the following options;;
Format Description PDF PDF is a "Portable Document Format" format that is used when you need to save files that cannot be modified but still need to be easily shared and printed. RTF RTF is a "Rich Text Format" format commonly used in windows documents that adds some basic formatting a text document. Text Text format documents are suitable for simple text editors (such as notepad) that offer no special text formatting characters. HTML HTML format is a text format suitable for use within a web page. XML
XML format is a markup language designed to aid transport of data. CSV CSV format is a simple text file where the data is usually separated by commas. ODT ODT format is an Open Document Text format created by applications such as open office. ODS ODS format is an Open Document Spreadsheet format created by applications such as open office. XLS XLS format documents are used by Microsoft Excel worksheets. DOCX DOCX format documents are used by Microsoft Word. XLSX XLSX is a zipped version of an Microsoft Excel worksheet. PPTX RPTX files are usually imported into Spiceworks Reports. Output Columns
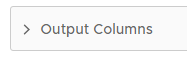
After specifying which of the available fields are to be included in the report (each field that is selected by a tick will add a column to the report, with each column being headed by the name of the field).
Column Width
This section can be used to determine the width (in characters) of for the data fields are selected to be included in the report..
Sort By
This section allows us to select which field the report will be sorted by (and if the sorting is ascending or descending)
Page Setup
You can use the page setup options to customise the title and subtitle of the report together with various layout attributes (page size, margins, creation date etc).
Running and Exporting the Report
The newly created report will now be listed in the "Reports" tab (listed under the name that you gave your report, and should be at the end of the list).
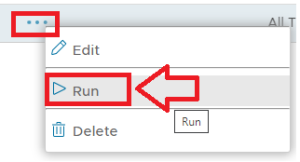
- To run your reports, first select the tab "Reports";
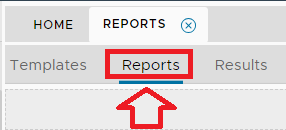
Then click on the context menu of the report you want to run, then select "Run";
The status of the running report can be inspected by selecting the "Results" tab;
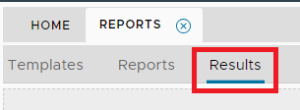
Initially the status will be set to "RUNNING" (as shown in the example above), but will eventually change to "COMPLETED (you can update the page status by clicking on the "
 " icon).
Once the report has completed you may export the results by left clicking on the context menu of your report then selecting "Export";
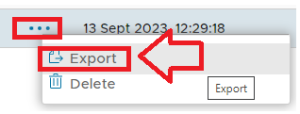
A new windows titled "Report - Output" will now open that allows you to specify the report format;
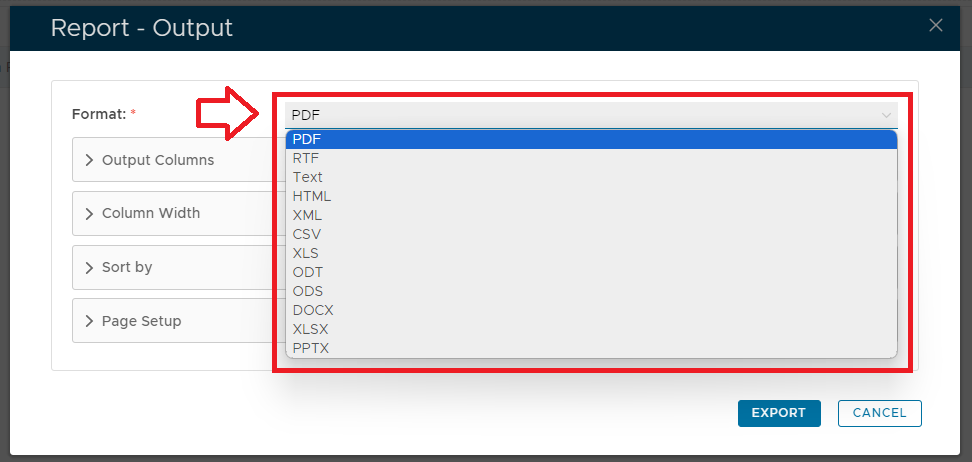
For this test we will leave the default "PDF" format selected and click on
 to produce our report.
The report will now be created in our download folder, and is ready for inspection.
Example Report
In the following example report we will create a report that will list all FaceSense statistics for users are members of the domain "spt.deepnetid.com".
We start by naming our report and providing a suitable description, then we click on the ![]() icon in order to build our query statement;.
icon in order to build our query statement;.

A new window now opens titled "Condition Builder";

For this report we want to search for all users within the domain "spt.deepnetid.com" so we add the following filter;

We don't need any additional conditions so we click  to build the condition, and the Query Statement parameter is updated;

After the report has been saved and run, we will find the FaceSense statistics for all users that are members of the specified domain.
