The authentication protocol used is EAP - PEAP/TLS. Therefore an SSL certificate will be needed in the RADIUS server settings.
You can either import an existing SSL certificate
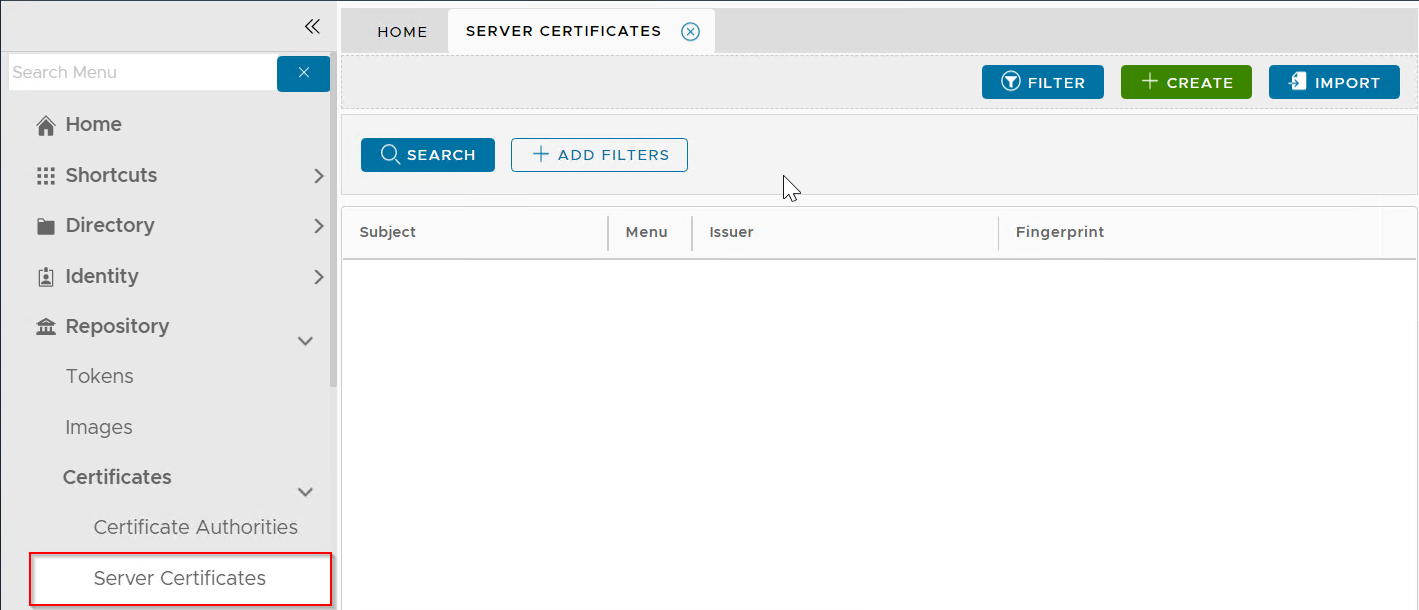
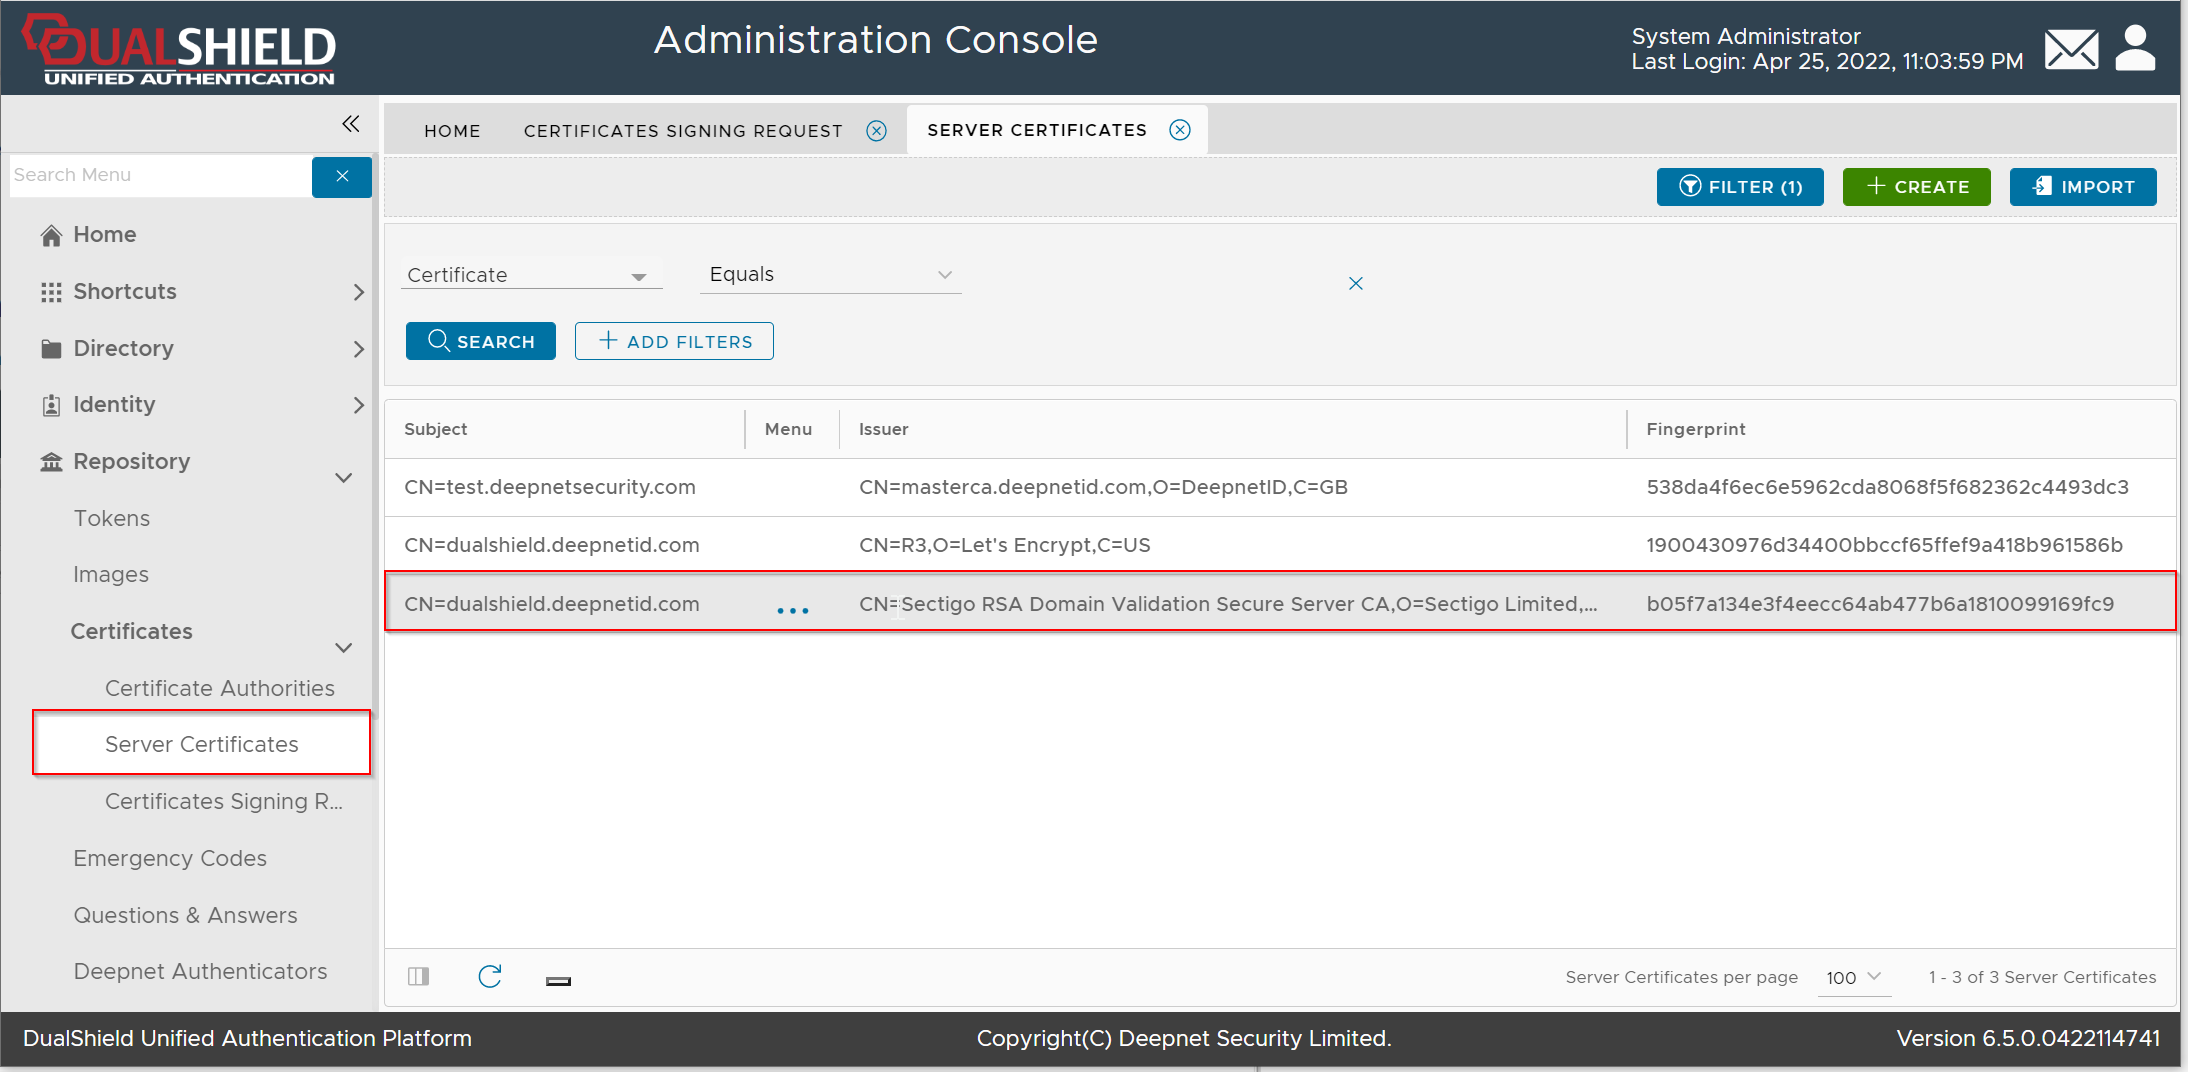
In the Admin Console, select "Repository | Certificates | Server Certificates"
Click the "Import" button
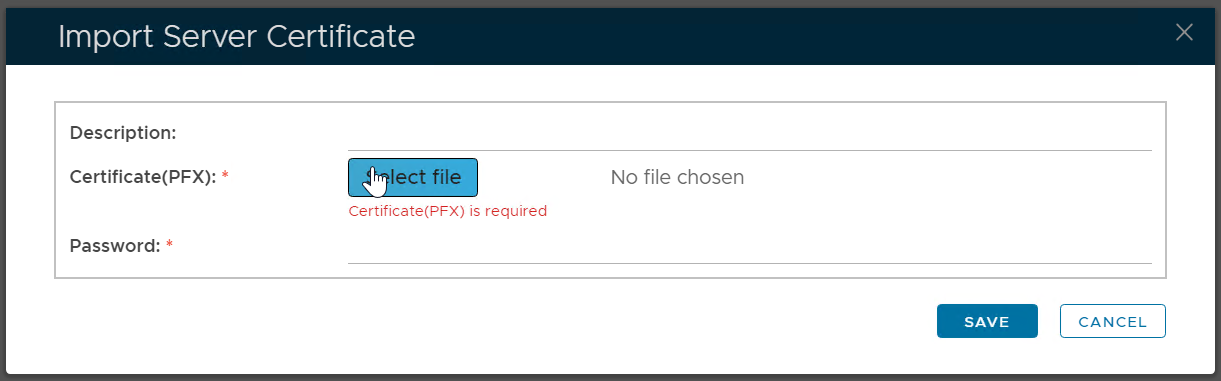
Enter a description
Select the certificate PFX file to be imported
Enter the password of the PFX file
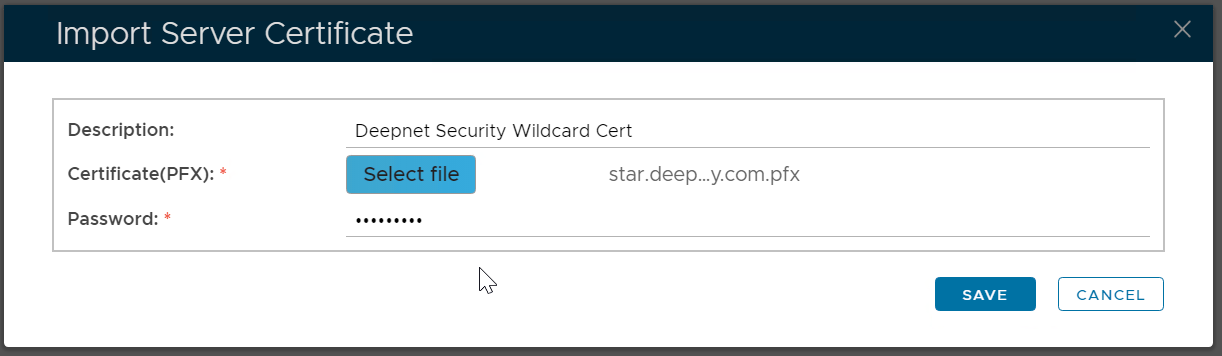
Click "Save"
Please note that this does not automatically update the web certificate of your DualShield consoles. If you wish to do that then...
Click on the ellipses corresponding to the newly imported Server Certificate and select Apply

Select the correct SSO Server from the drop down...

Hit Apply

Click Yes.
Navigate to "SSO | SSO Servers", click the context menu of "Single Sign-On Server"
Select "Replace Certificate" from the context menu

The "Replace Console Certificate" window will pop up:

There are 2 options in this window
- Select File
- Select Server Certificate
If you already have the certificate imported into the "server certificate" repository, then click the "Select Server Certificate" option

Select the correct certificate from the Server Certificate list and click "Save"
Otherwise, click the "Select File" option to import a new certificate:

select the certificate to be imported

Then, click the "Save" button
Or, you can apply for a new SSL certificate
Generate a Certificate Signing Request
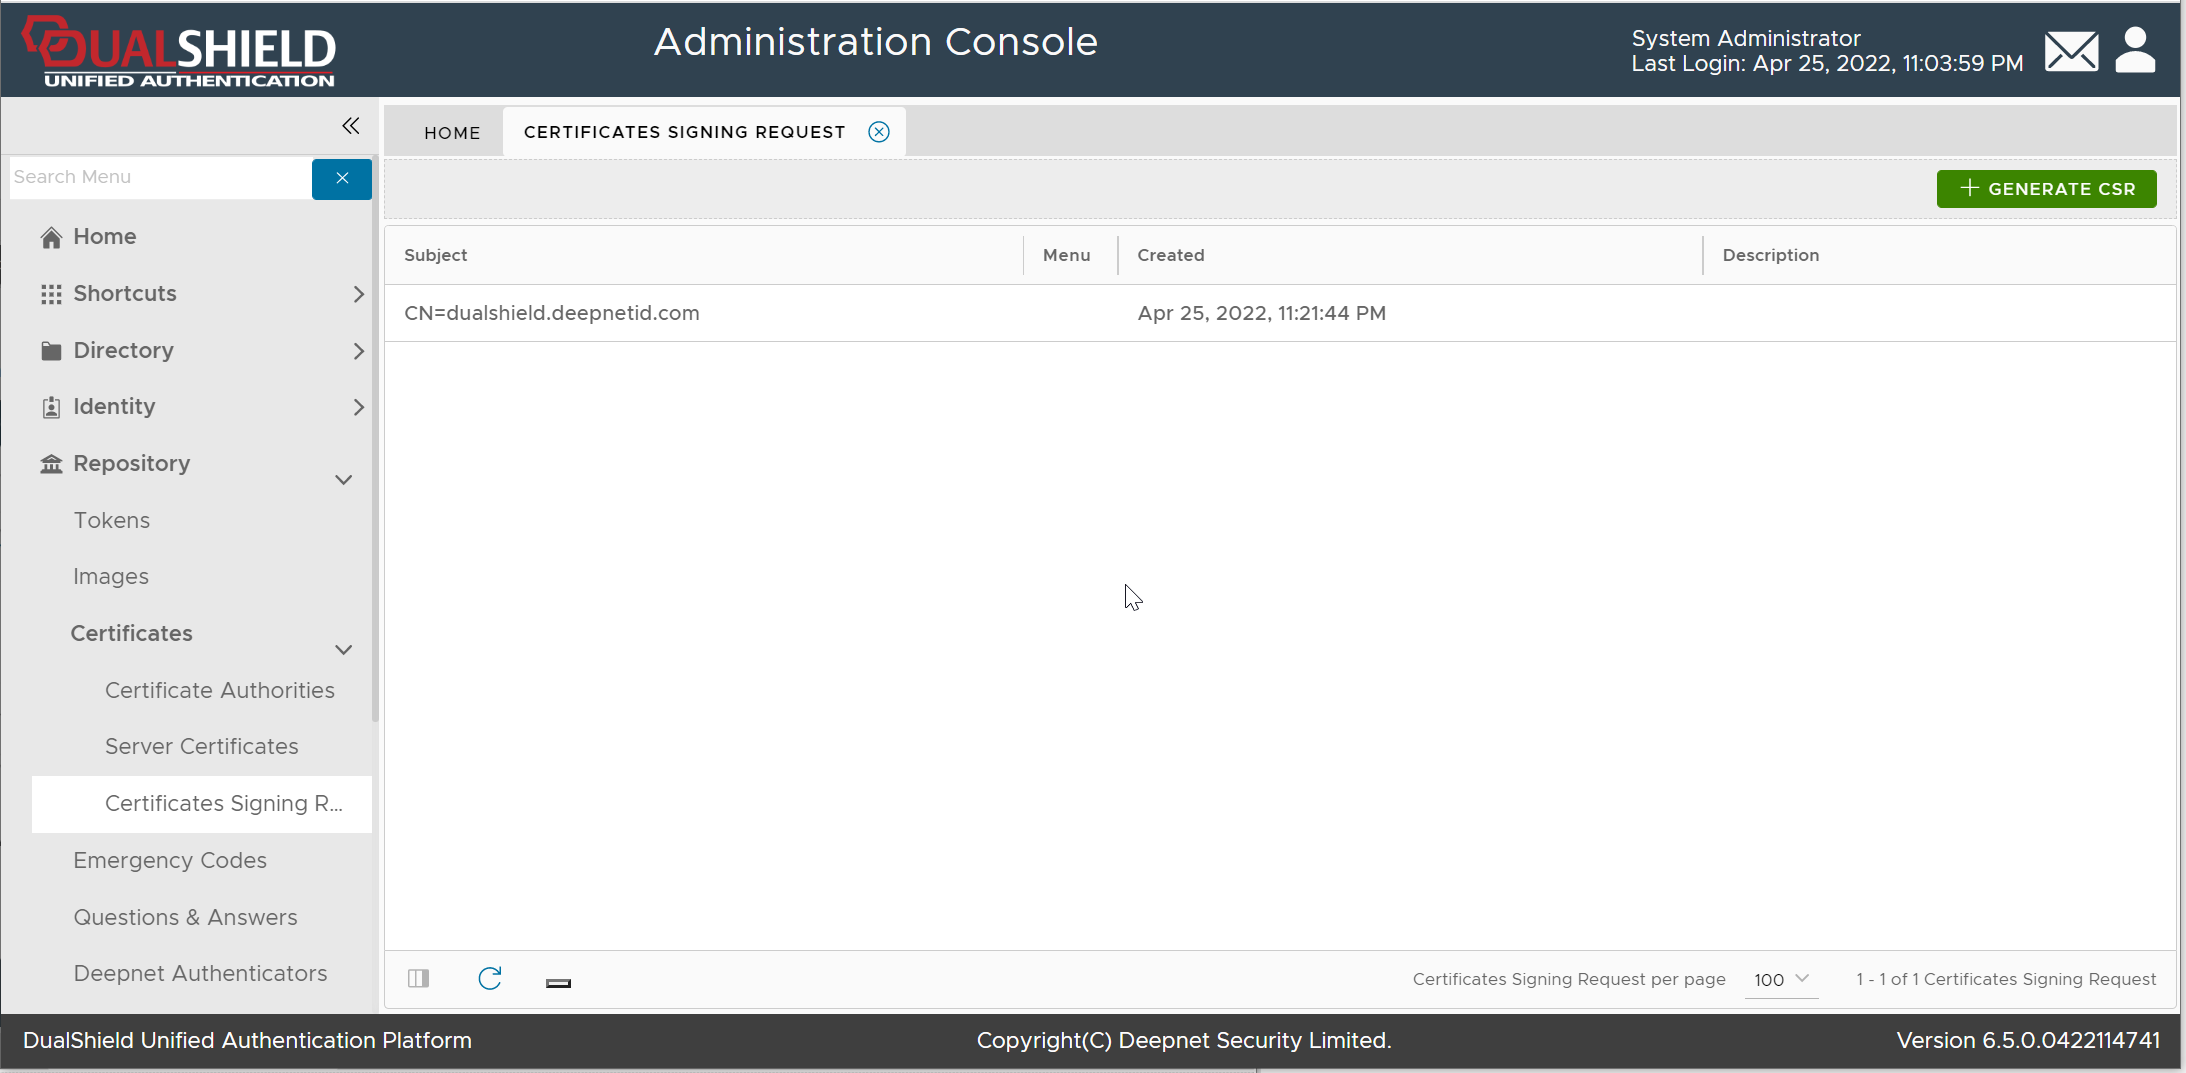
Navigate to Repository | Certificates | Certificate Signing Request"

Click the "Generate CSR" button

Fill in the CSR form, click Save
Submit the Certificate Signing Request
Now, you need to submit the Certificate Signing Request (CSR) to a Certificate Authority, e.g. GoDaddy, to be signed.
Click the context menu of the newly created Certificate Signing Request

Select "View" from the context menu
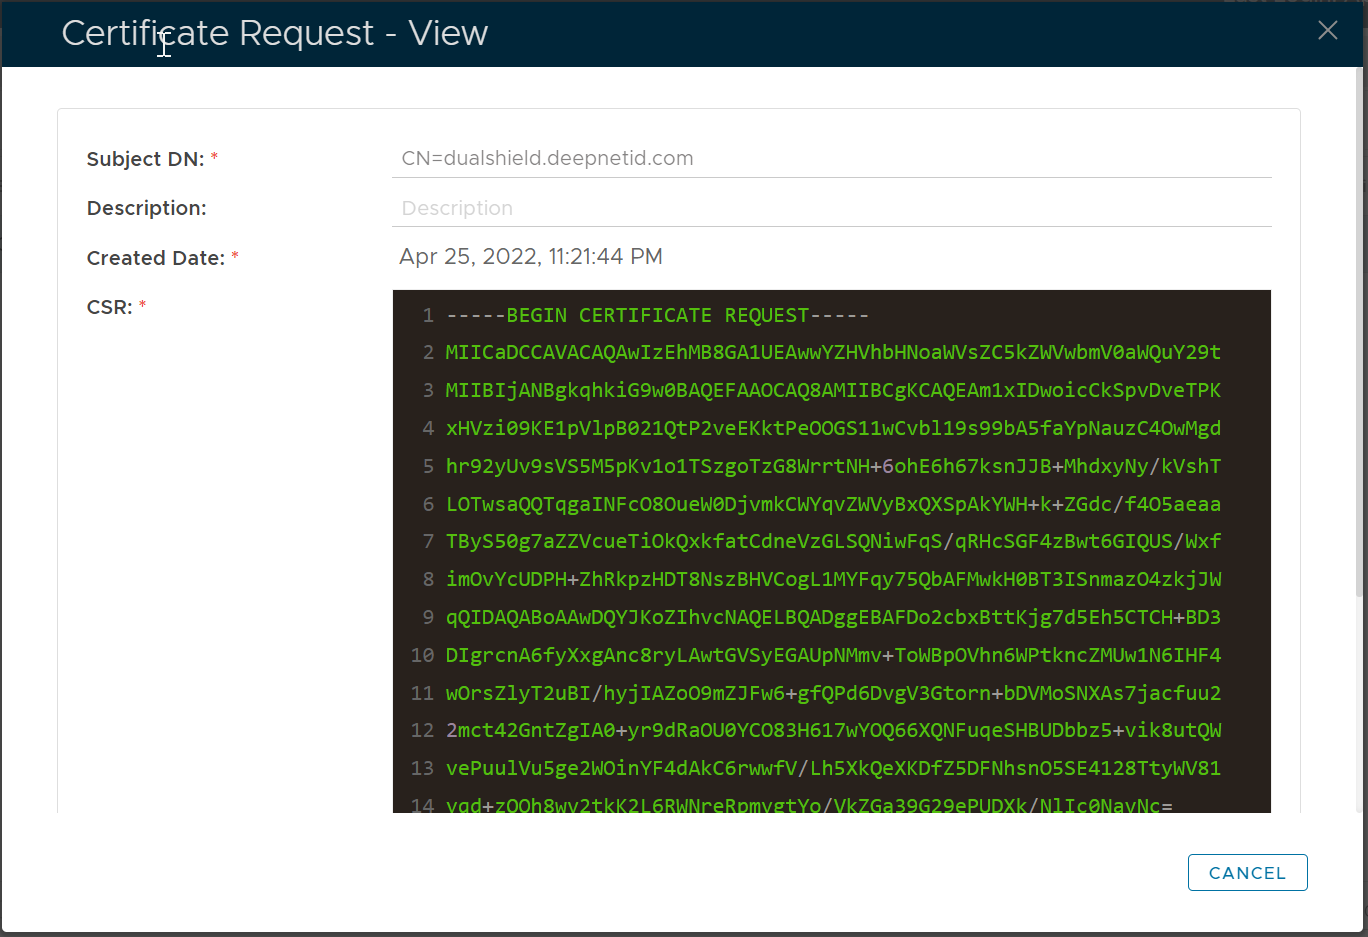
Copy the CSR text and submit it to your CA
Download the Certificate from CA
Once your CA has signed your CSR, it will issue you a certificate.
Download the SSL certificate. Commonly, the certificate is delivered in a CRT file, e.g. "dualshield.deepnetid.com.crt"
Also, a CA bundle file will be provided. The CA bundle file includes the certificate of the root CA and the intermediate CA, e.g. "dualshield.deepnetid.com.ca-bundle"

Complete the Certificate Signing Request
Finally, you need to complete the Certificate Signing Request using the certificate that you downloaded from the CA
Click the context menu of the Certificate Signing Request
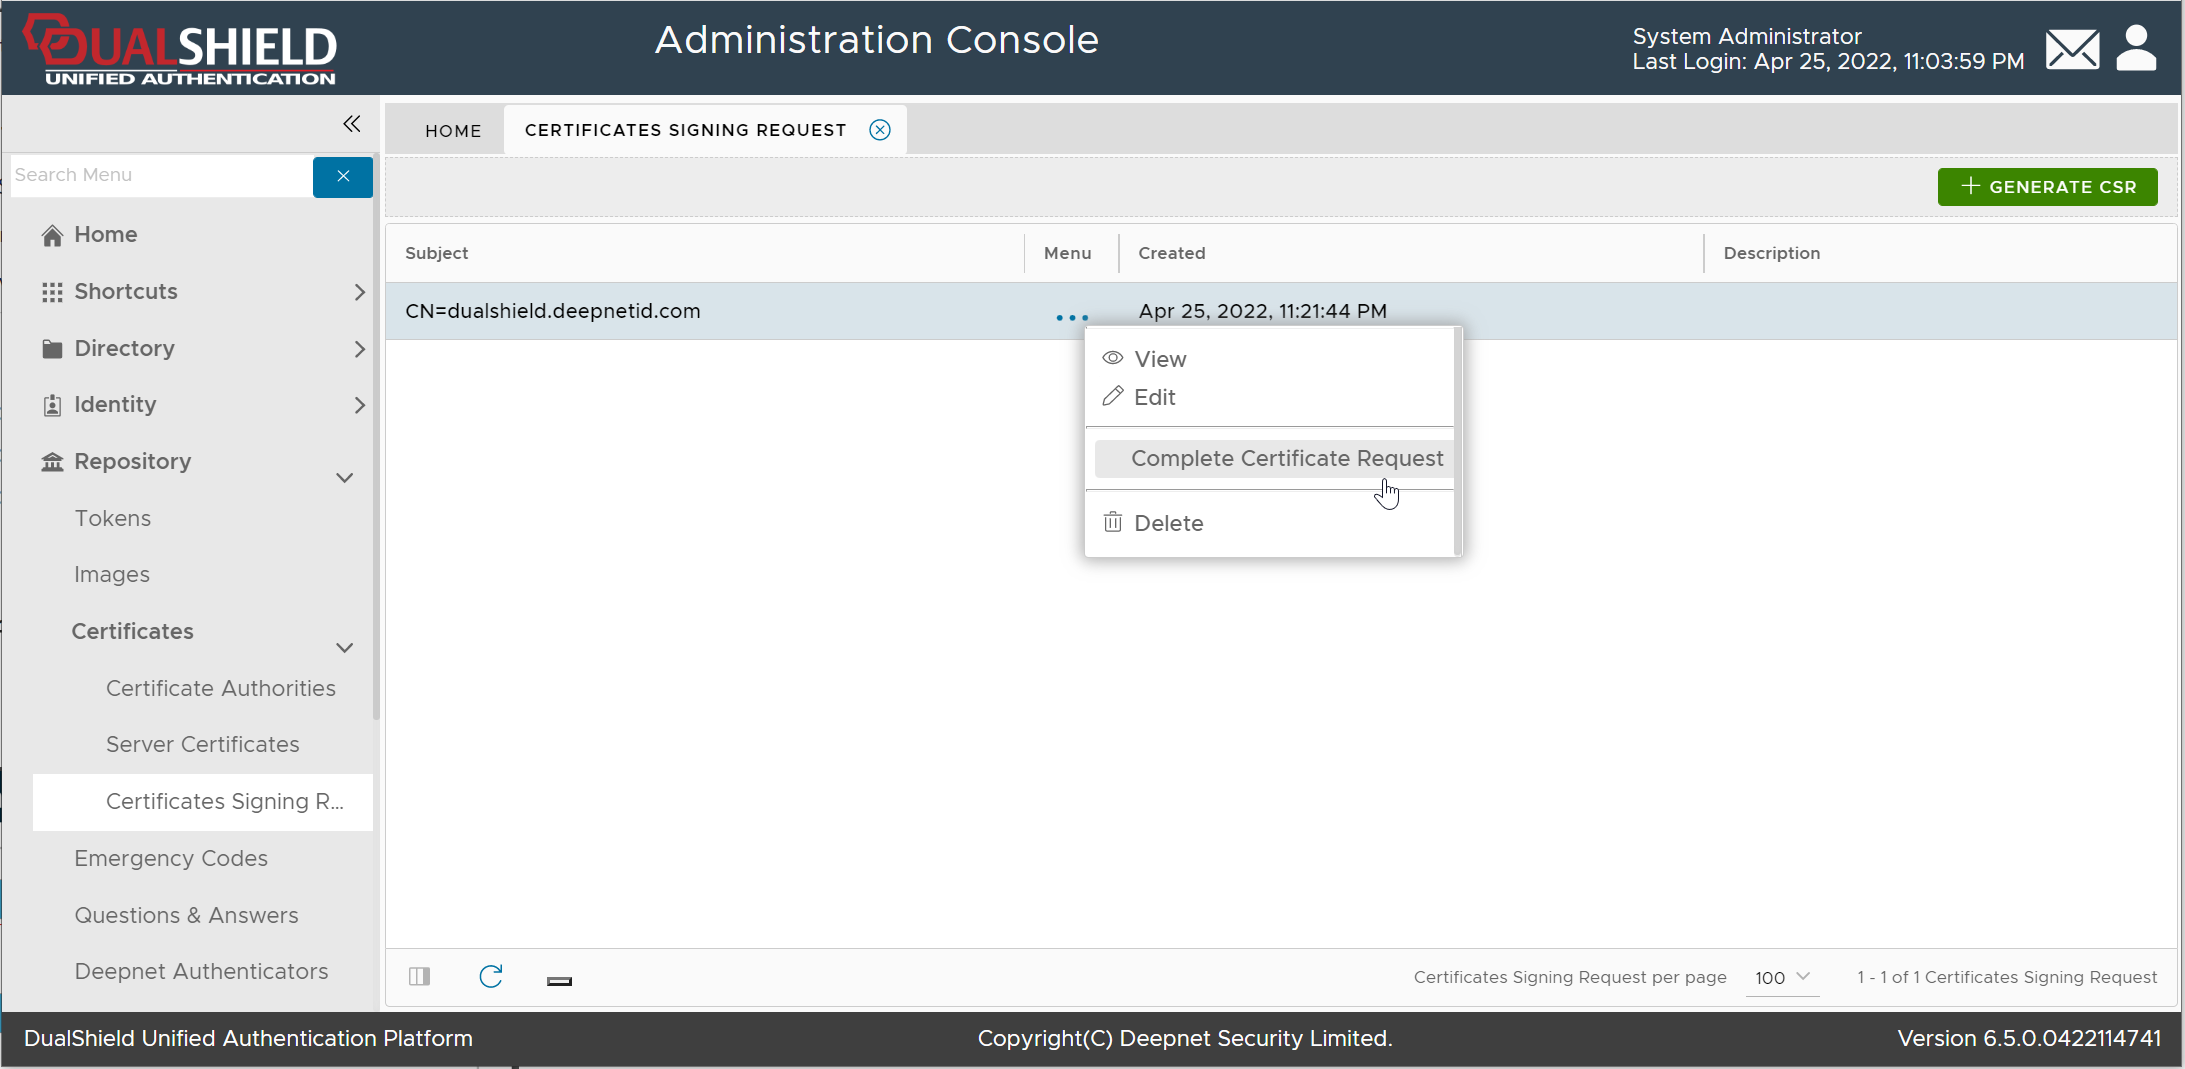
Select "Complete Certificate Request"
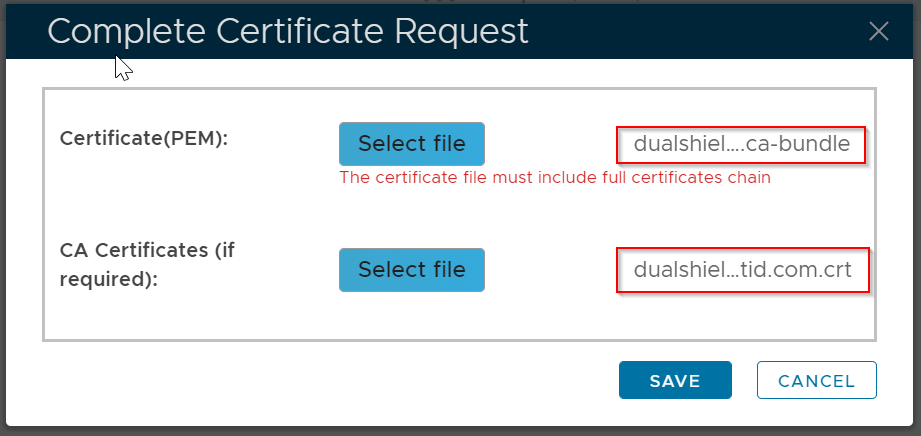
Select the CA Bundle file, and the certificate CRT file
Click Save
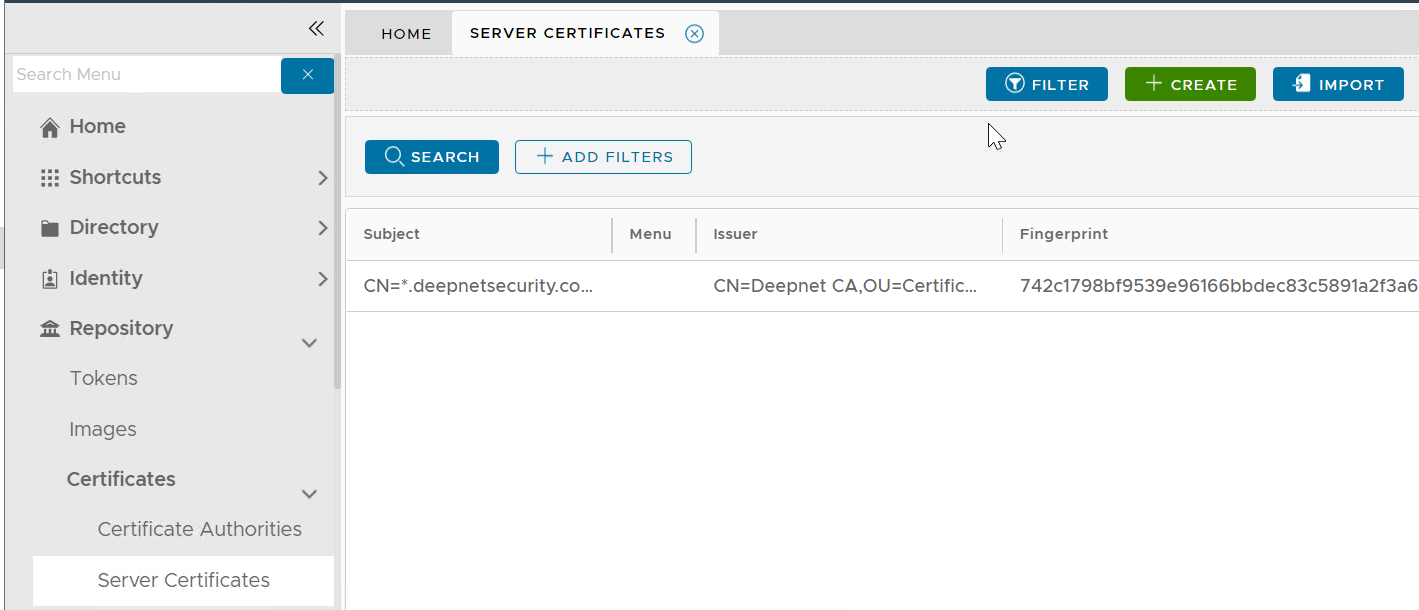
The certificate will be saved in the "Server Certificate" list
Please note that this does not automatically update the web certificate of your DualShield consoles. If you wish to do that then...
Click on the ellipses corresponding to the newly imported Server Certificate and select Apply

Select the correct SSO Server from the drop down...

Hit Apply

Click Yes.
Navigate to "SSO | SSO Servers", click the context menu of "Single Sign-On Server"
Select "Replace Certificate" from the context menu
The "Replace Console Certificate" window will pop up:
There are 2 options in this window
- Select File
- Select Server Certificate
If you already have the certificate imported into the "server certificate" repository, then click the "Select Server Certificate" option
Select the correct certificate from the Server Certificate list and click "Save"
Otherwise, click the "Select File" option to import a new certificate:
select the certificate to be imported
Then, click the "Save" button