Complete the following steps to set up a DualShield RADIUS server in a DualShield platform.
Enable Agent Registration
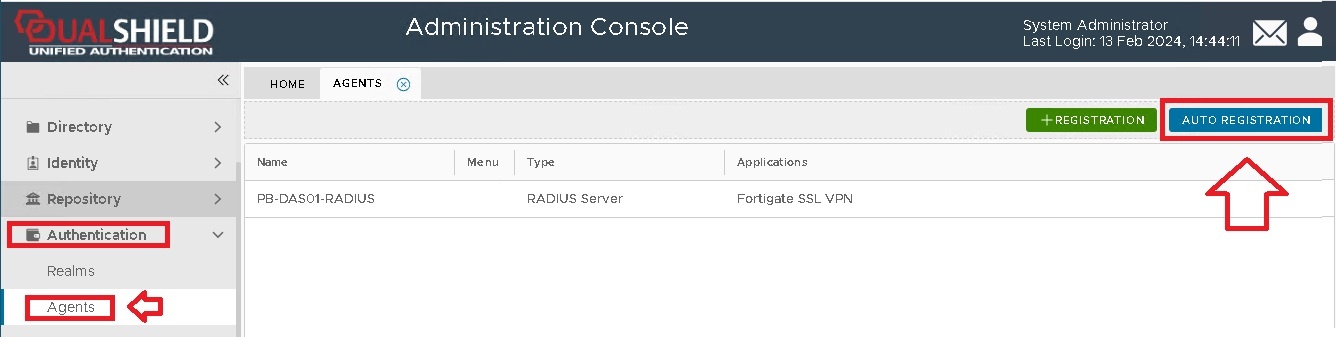
From the point of view of the DualShield authentication server, the DualShield RADIUS server is treated as an Authentication Agent. Therefore, in order to install a DualShield RADIUS server, we need to first enable the Agent Registration option.
For security purposes, the agent registration function is disabled by default. You need to enable the Agent Auto Registration function in your DualShield authentication server.
From the management console, navigate to "Authentication | Agents", then click 
A new window will now open titled "Auto Registration", ensure the "Enabled" option is selected, then click ;
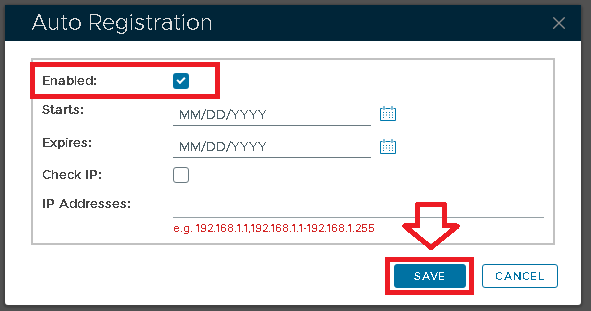
Tick the "Enabled" option first, then fill in the Starts and Expires date.
You may want to enable the "Check IP" option for extra security. If this option is enabled, then in the "IP Addresses" field you must enter the IP address of the machine where the authentication agent is being installed.
Click on the  button, and Auto-Registration will now take place during the installation of the RADIUS server.
Install RADIUS Server
Like the DualShield server itself, the DualShield RADIUS server is typically installed on a Windows server. However, if desired then the DualShield RADIUS server can also be installed on a Linux server.
- Step 1: Welcome
- Step 2: Licensing Agreements
- Step 3: Installation Path
- Step 4: Server Selection
- Step 5: Select Installation Packages
- Step 6: Server Configuration
- Step 7: Agent Registration
- Step 8: Configuration Summary
- Step 9: Installing
- Step 10: Perform External Processes
- Step 11: Installation Finished
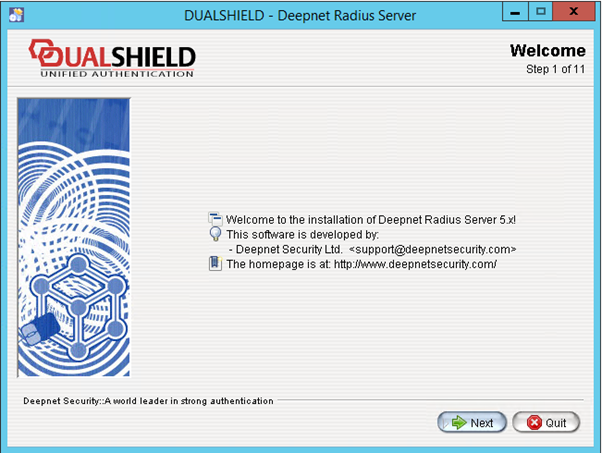
Step 1: Welcome
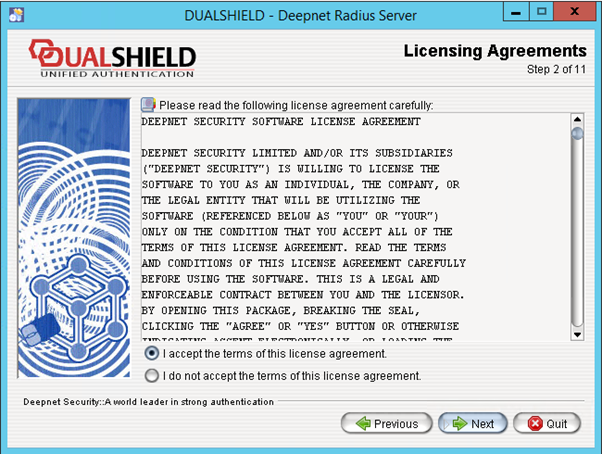
Step 2: Licensing Agreements
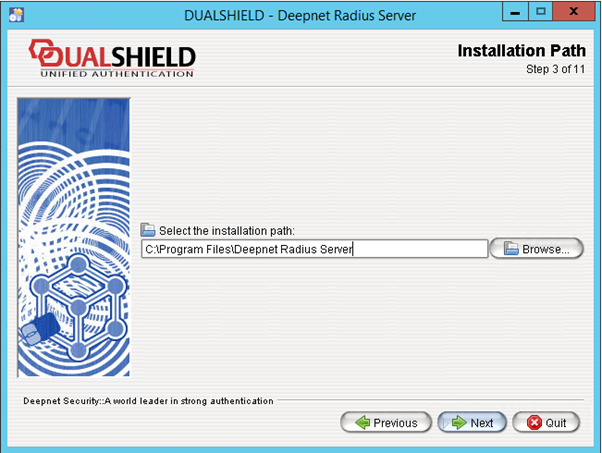
Step 3: Installation Path
Step 4: Server Selection

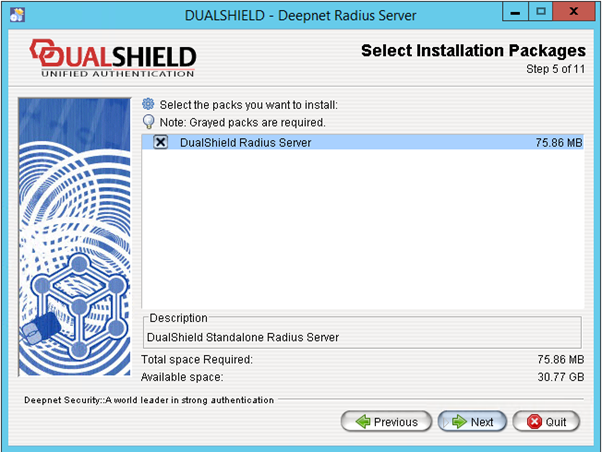
Step 5: Select Installation Packages
Step 6: Server Configuration
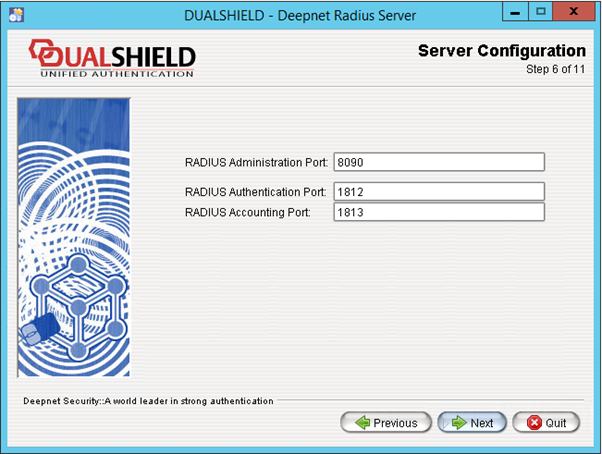
Administration Port:
The Administration port is the port accessed by the DualShield Authentication Server for the purpose of managing the DualShield Radius Server.
Authentication Port:
The Authentication Port is the standard Radius authentication port.
Accounting Port:
The Accounting Port is the standard Radius accounting port.
Step 7: Agent Registration
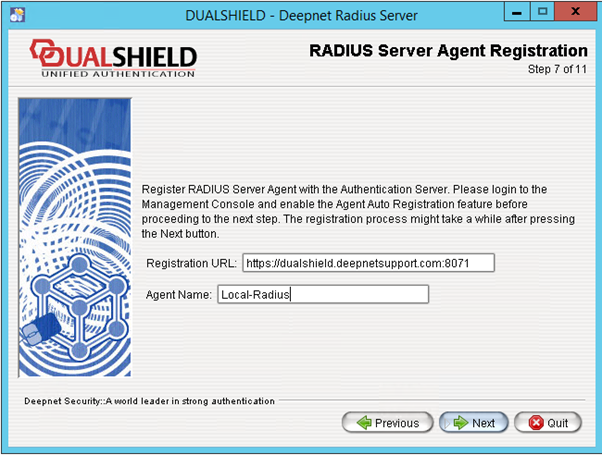
Change the Registration URL to the URL of your DualShield server.
Please note that the protocol of the connection to the DualShield server must be set to HTTPS. The default port of DualShield server is 8071.
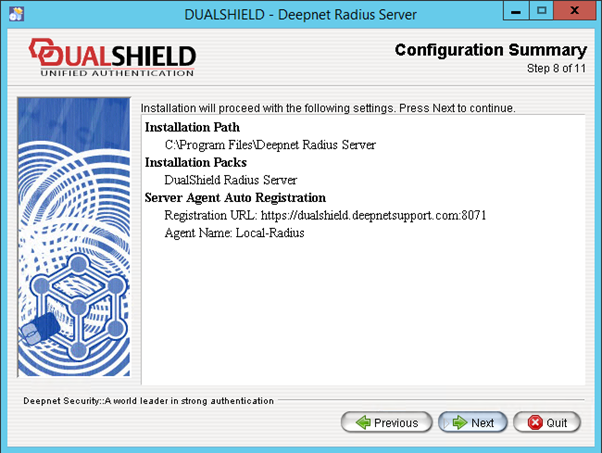
Step 8: Configuration Summary
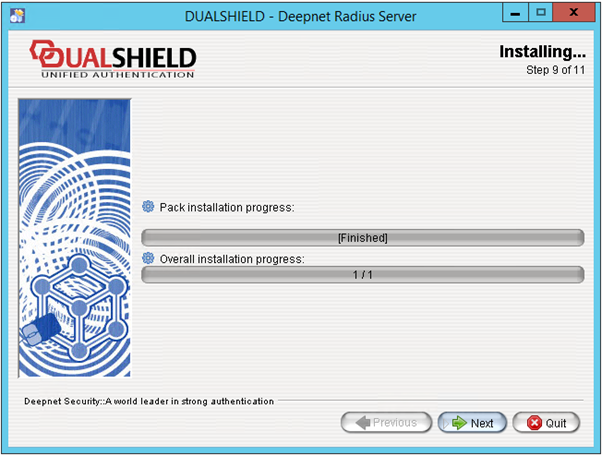
Step 9: Installing
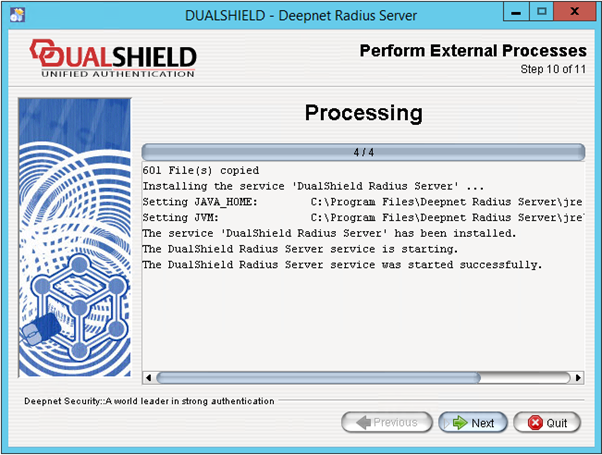
Step 10: Perform External Processes
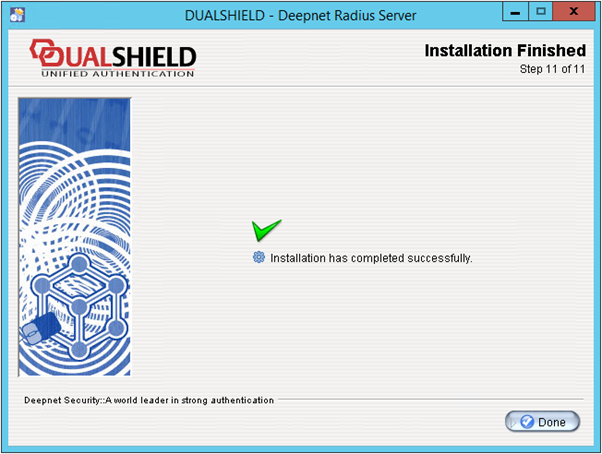
Step 11: Installation Finished
Change the IP Address

If this is the only RADIUS server that you will have in your DualShield platform, then it is OK to use the local loopback IP address.
However, if you will have more than one RADIUS servers in your DualShield platform, then you must change the IP address of the RADIUS server to the network IP address.
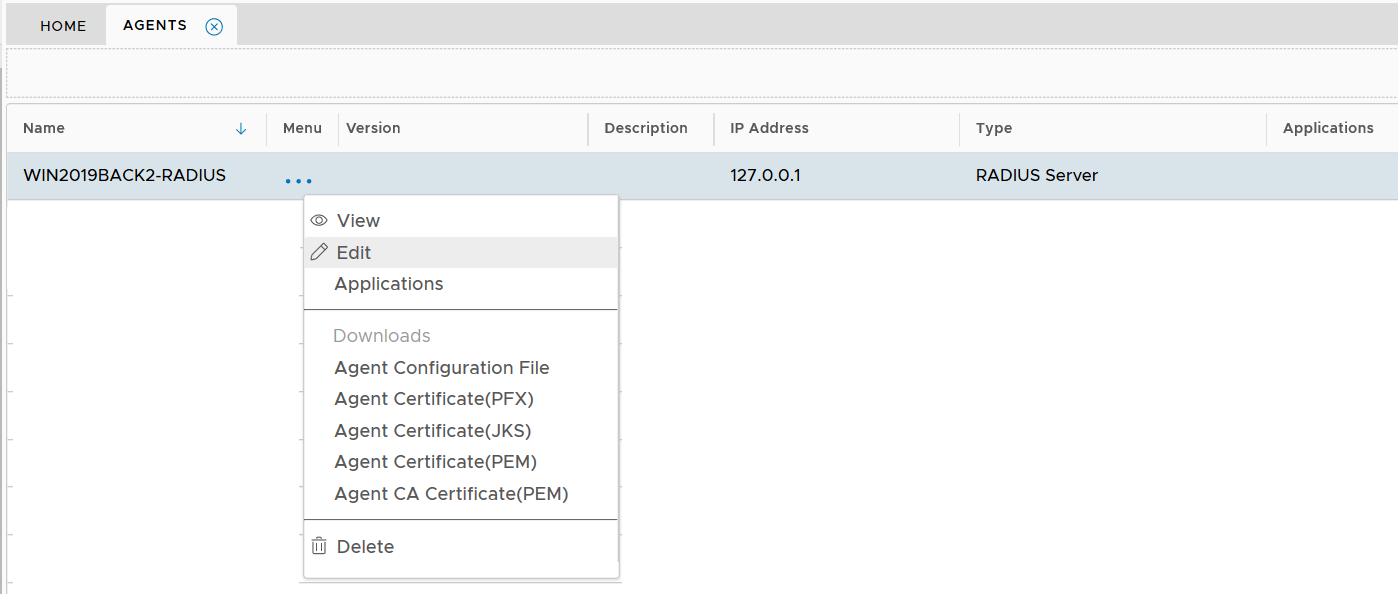
Select "Edit" from the context menu
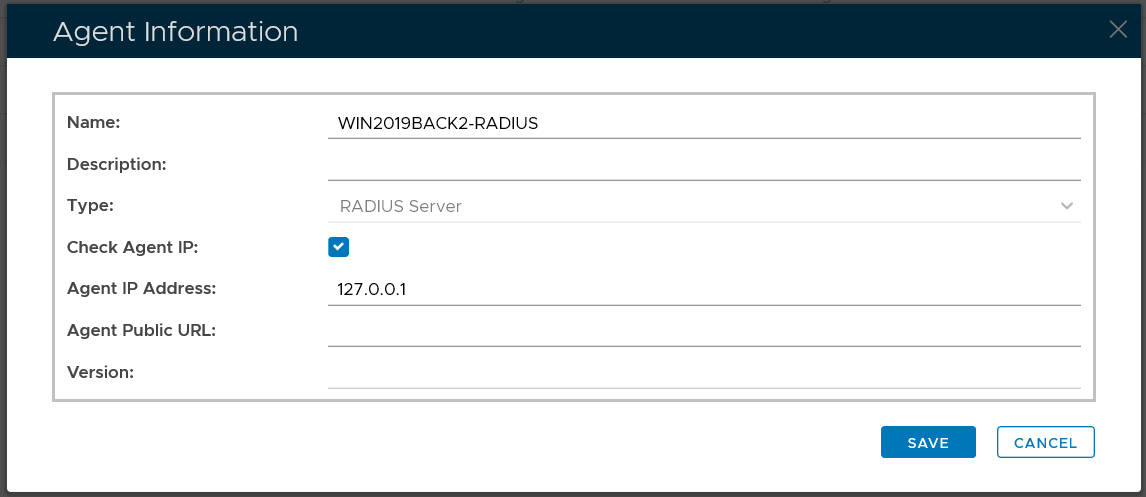
Change the "Agent IP Address"
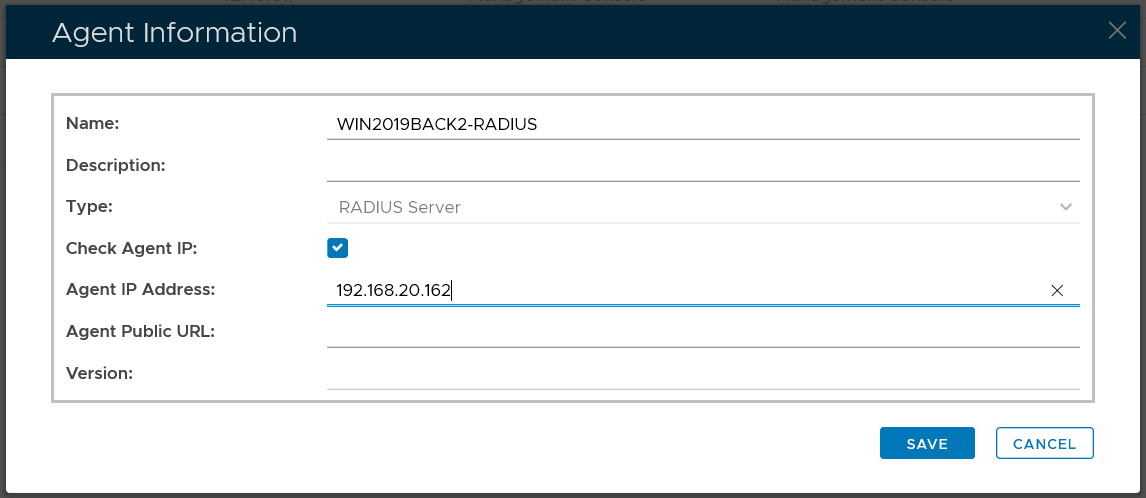
Click "Save"

Quick Test
Find the RADIUS server, open the context menu of the RADIUS server
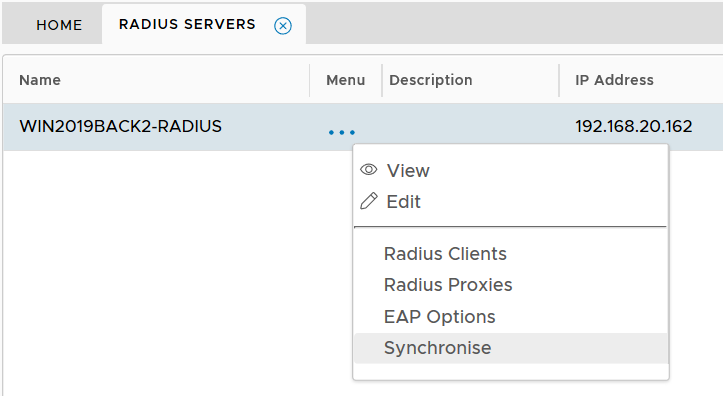
select "Synchronise"
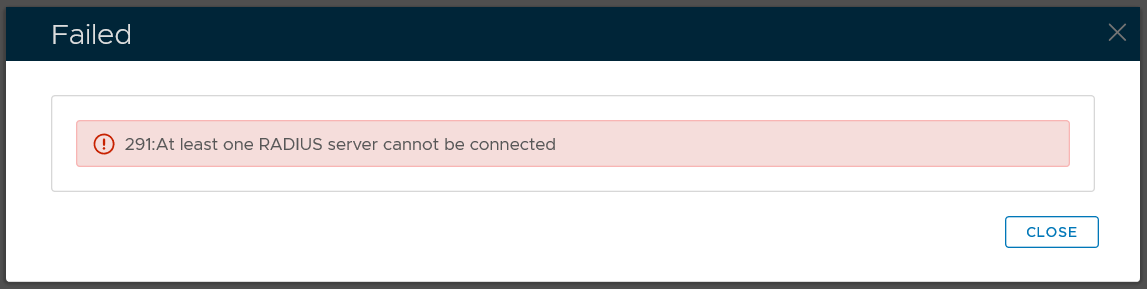
If there is no error message displayed on the screen, then it means that the connection between the RADIUS server and the authentication server is OK and the RADIUS server is operating. Otherwise, you will get the error message below: