Navigate to the user directory by clicking "Users" in the control panel, then select the user directory from the drop list in the content view

Find the user, e.g. "James Bond"

Click the actions menu icon to the right of the user account
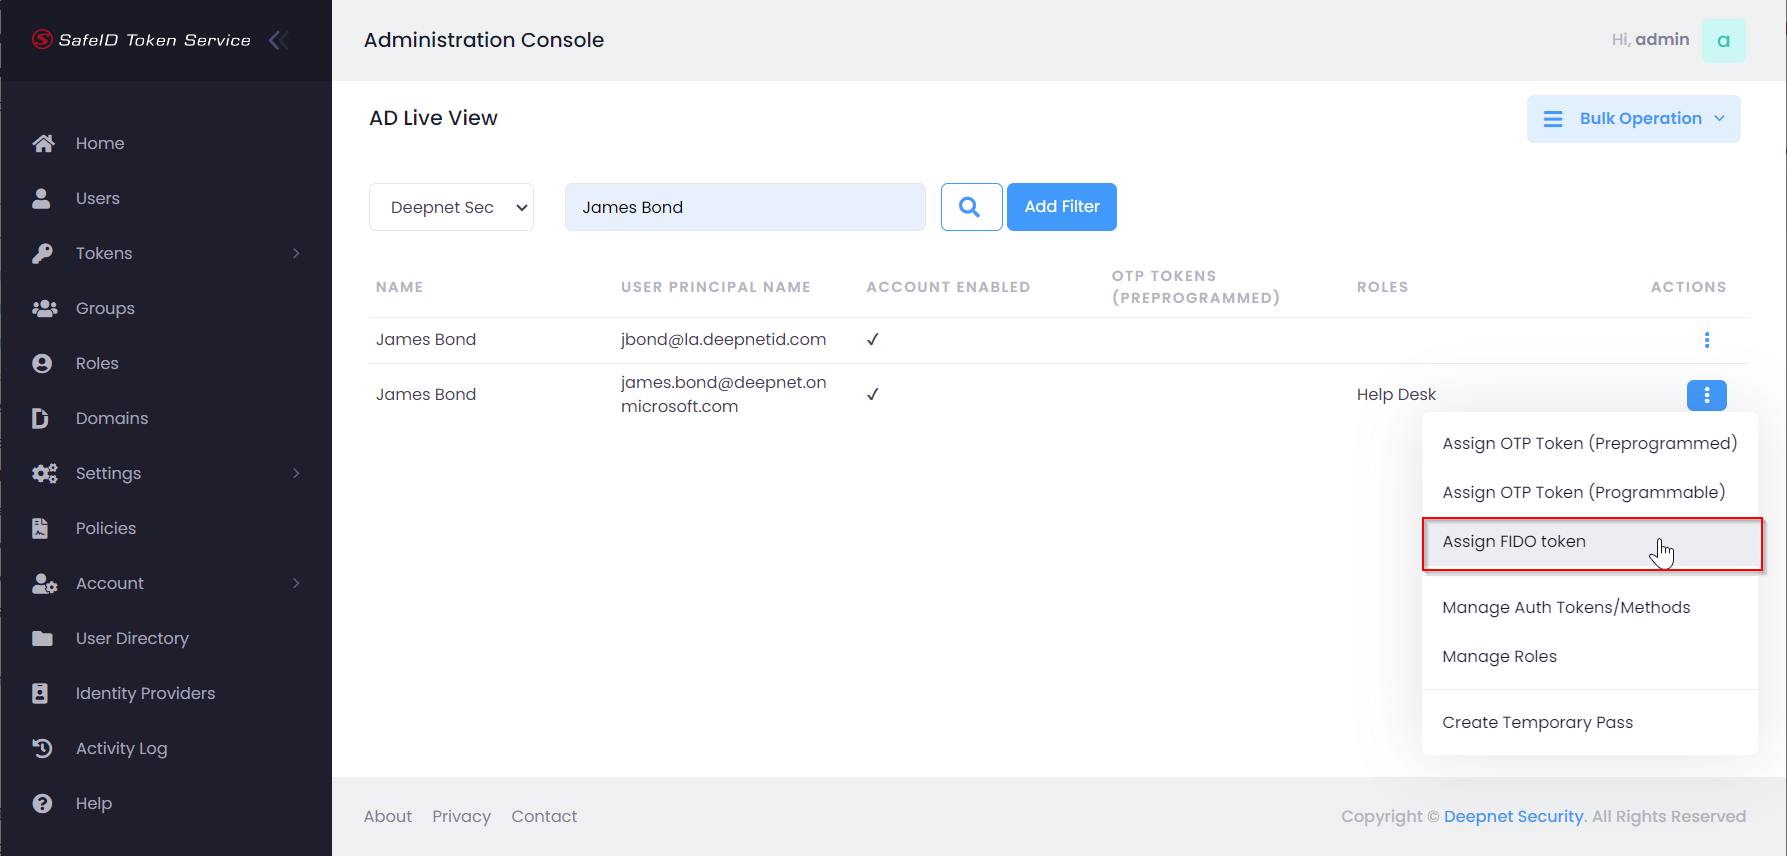
Select "Assign FIDO token" from the actions menu
If this is the first time you are trying to assign a FIDO key to a user, then you will get the prompt below
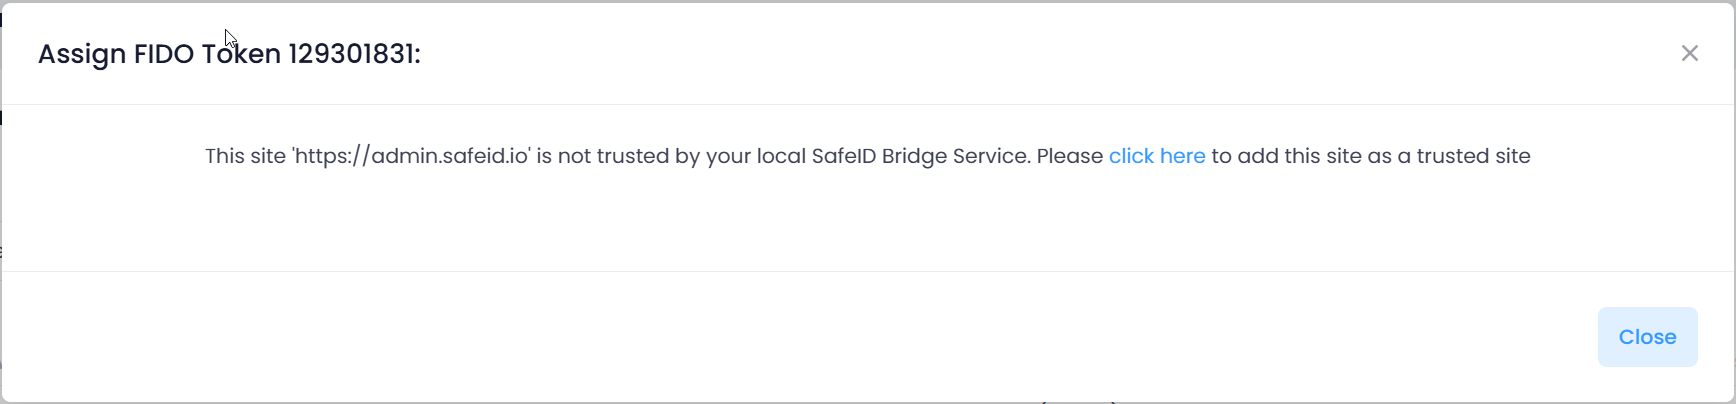
Click "click here" and follow the instructions below to add the SafeID admin console as a trusted site to your local SafeID Bridge Service
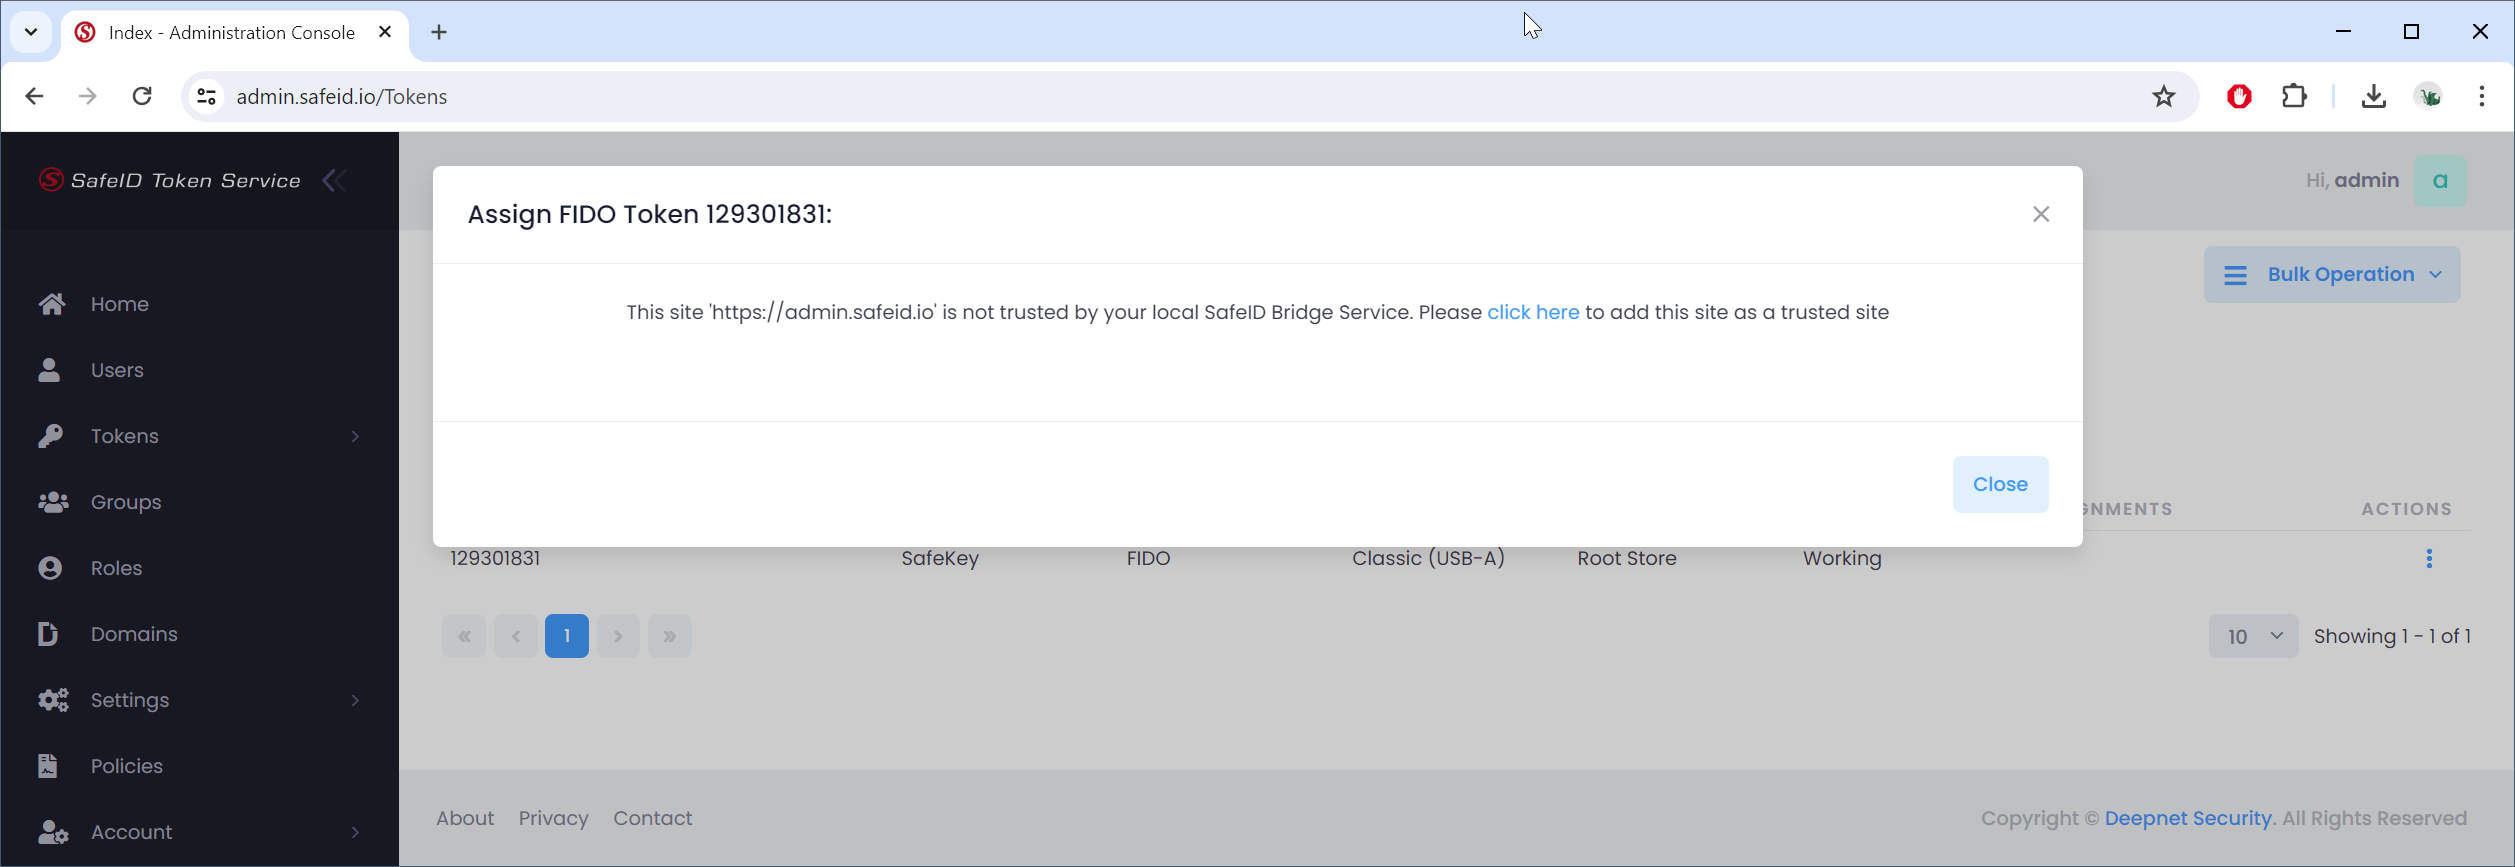
Click "click here" to continue
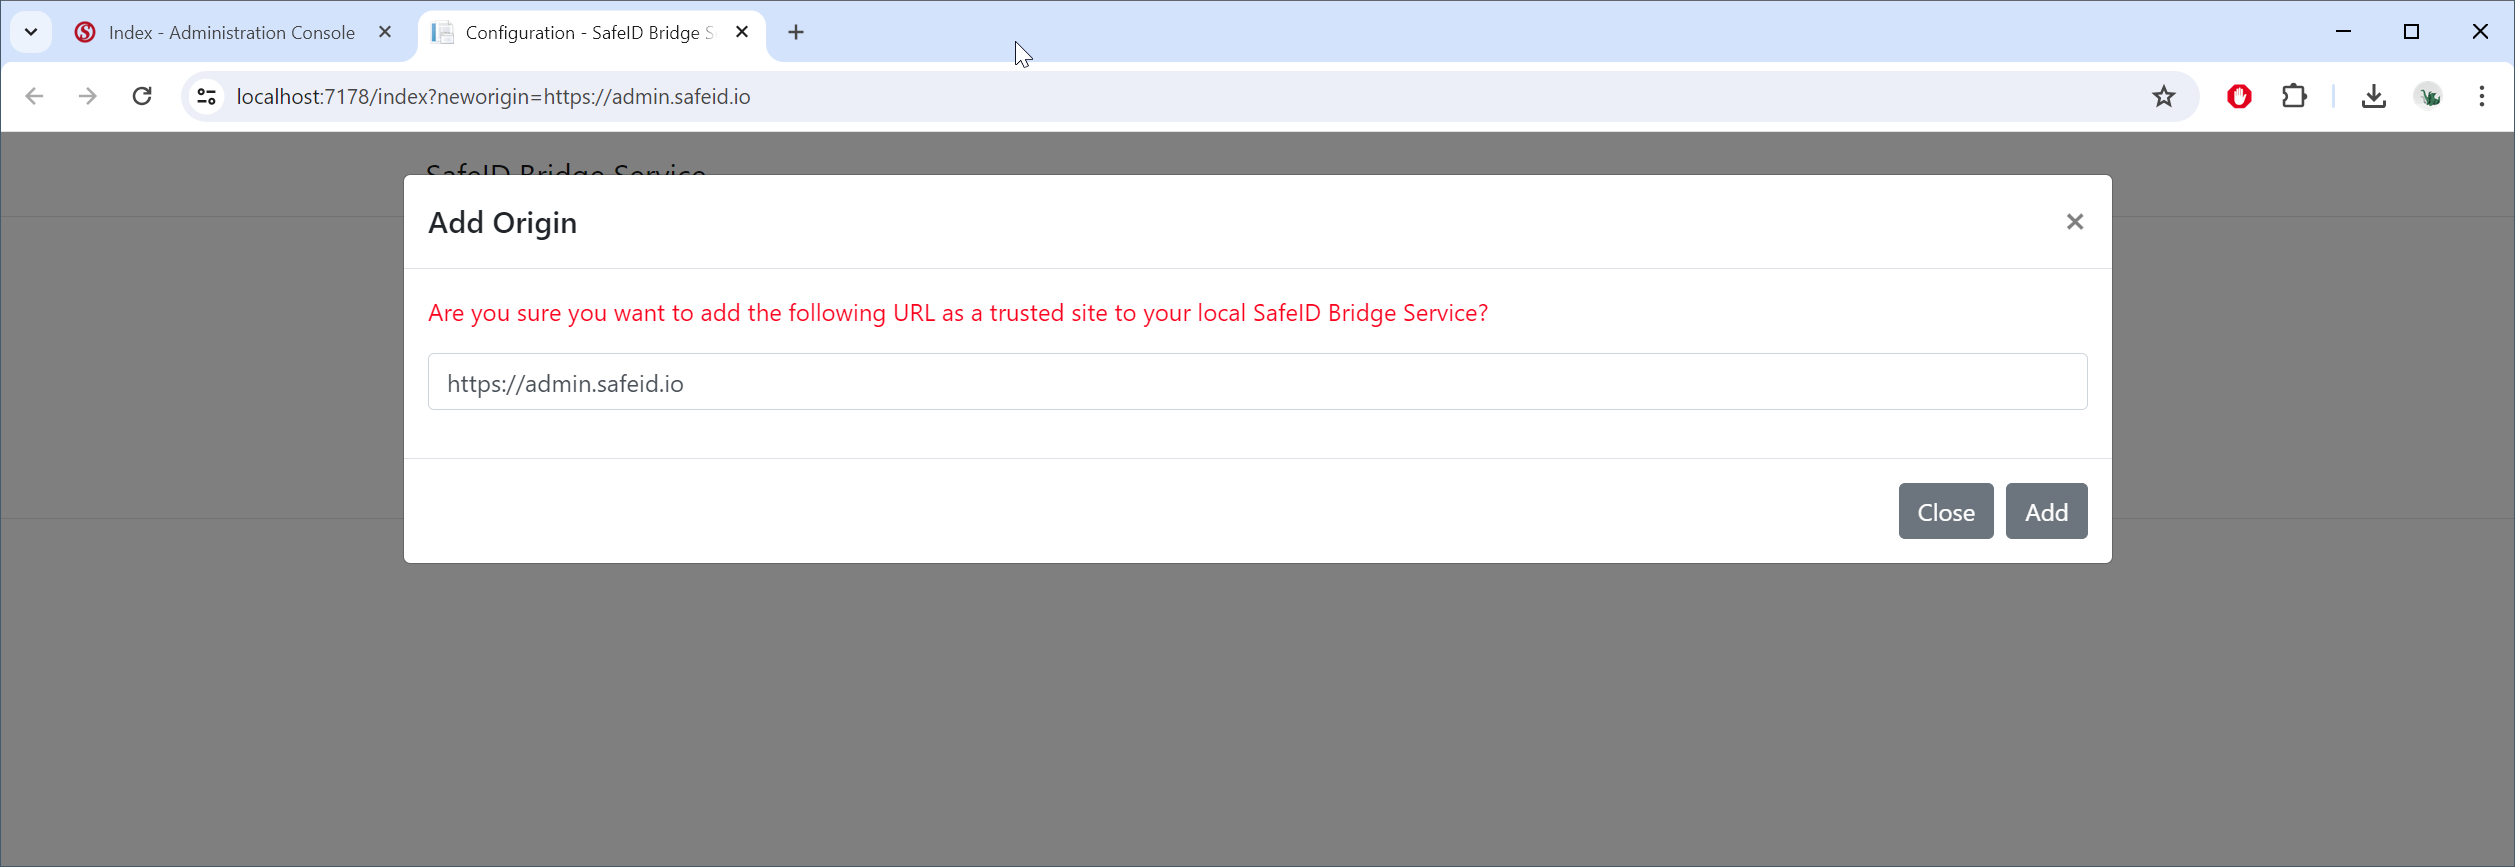
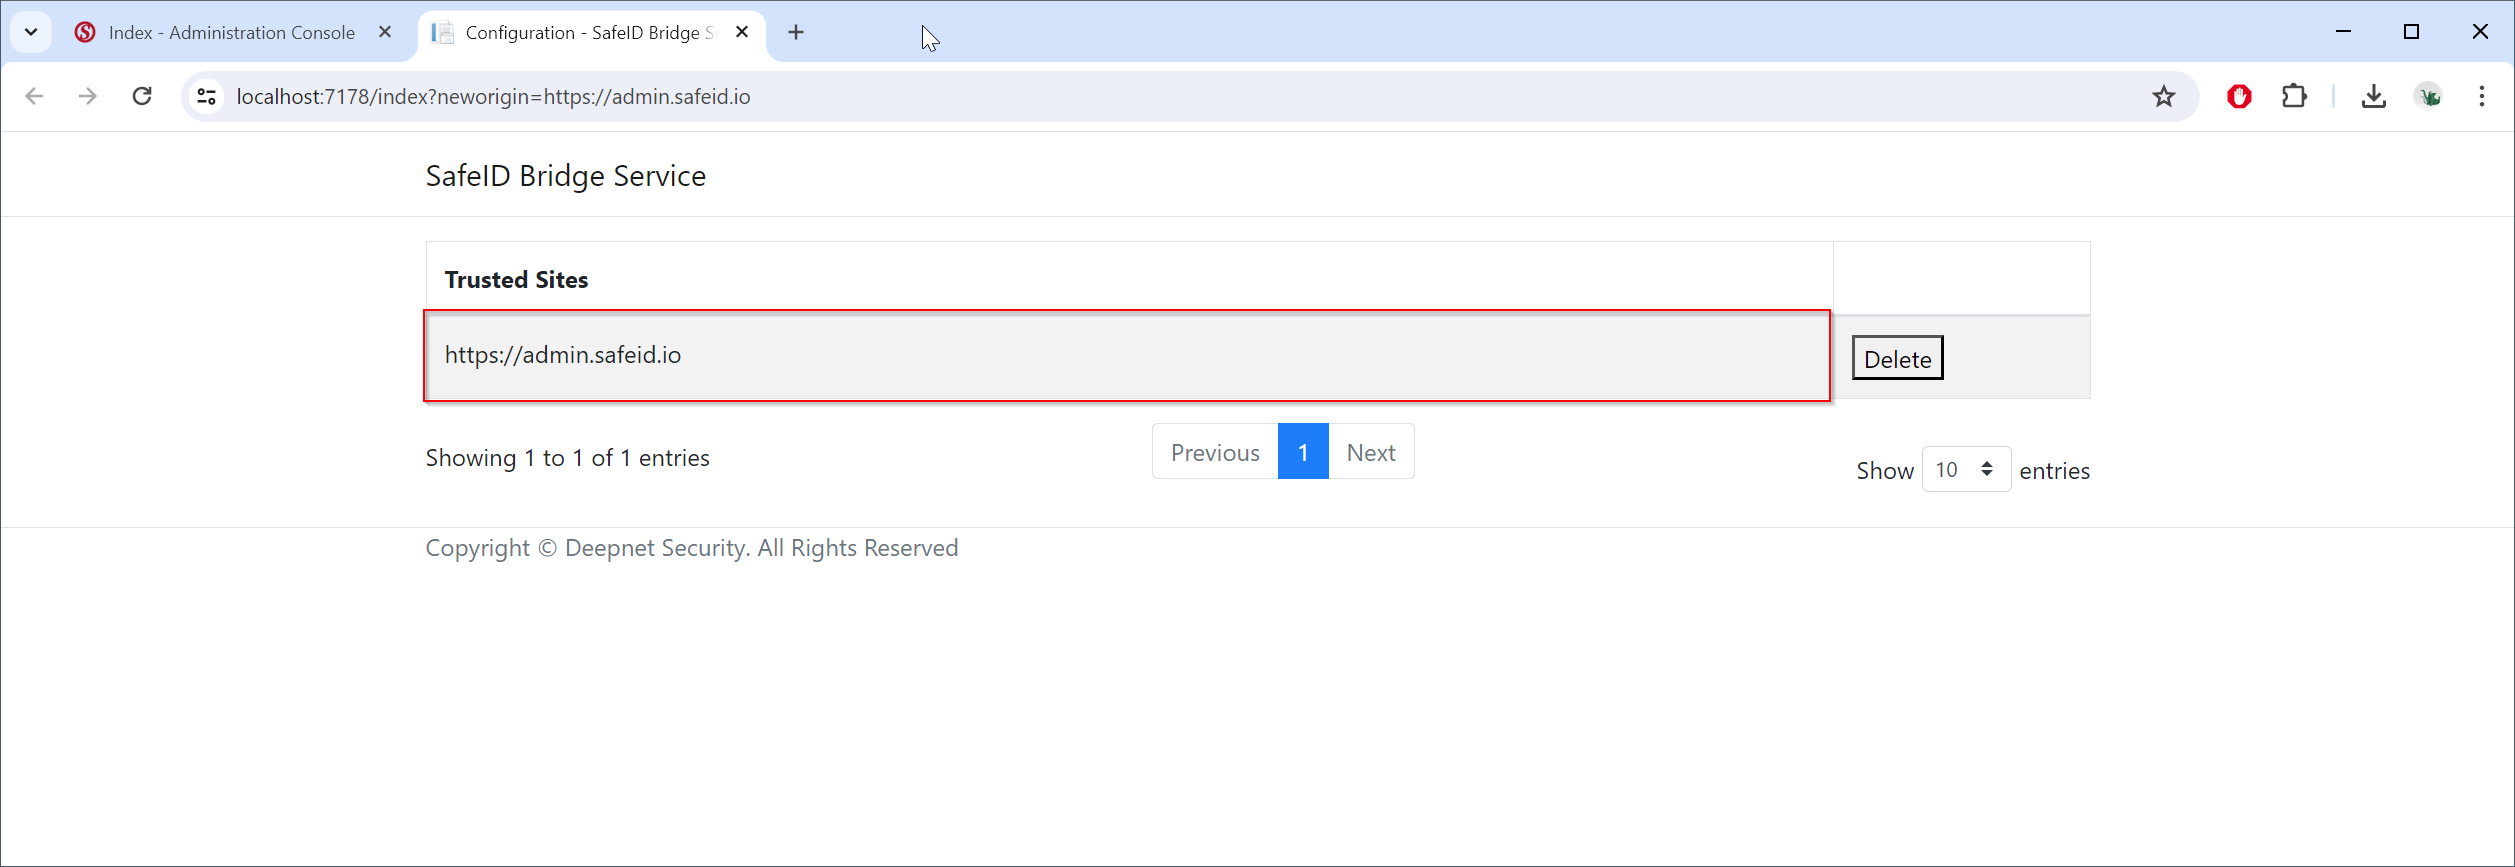
Click "Add" to add the SafeID admin console as a trusted site to your local SafeID Bridge Service
Once you have added the SafeID admin console as a trusted site to your local SafeID Bridge Service, click the "Close" button to dismiss the prompt. Then, click "Assign FIDO token" in the token's action menu again.
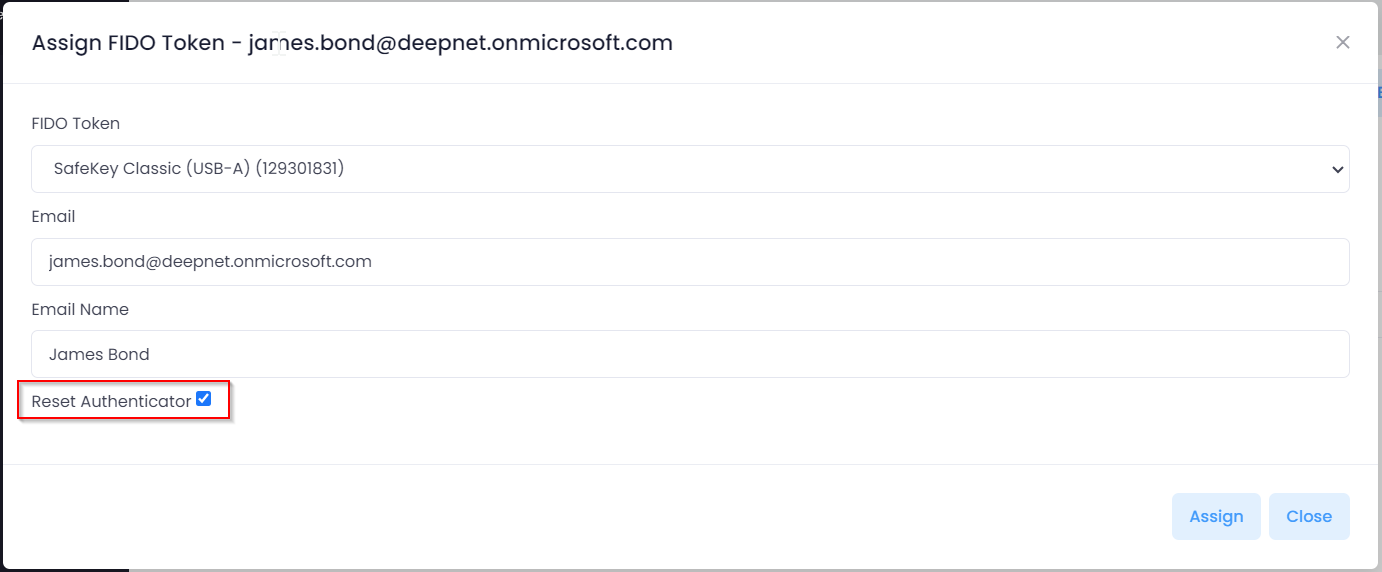
Enable the option "Reset Authenticator"
Then, click "Assign"

Plug in the FIDO key (If it is already plugged in, you need to unplug it and re-plug it in)
Touch the FIDO key when its LED light flashes
Now, you will see the prompt below:

Touch the FIDO key again when its LED light flashes
Finally, you will see the prompt below:
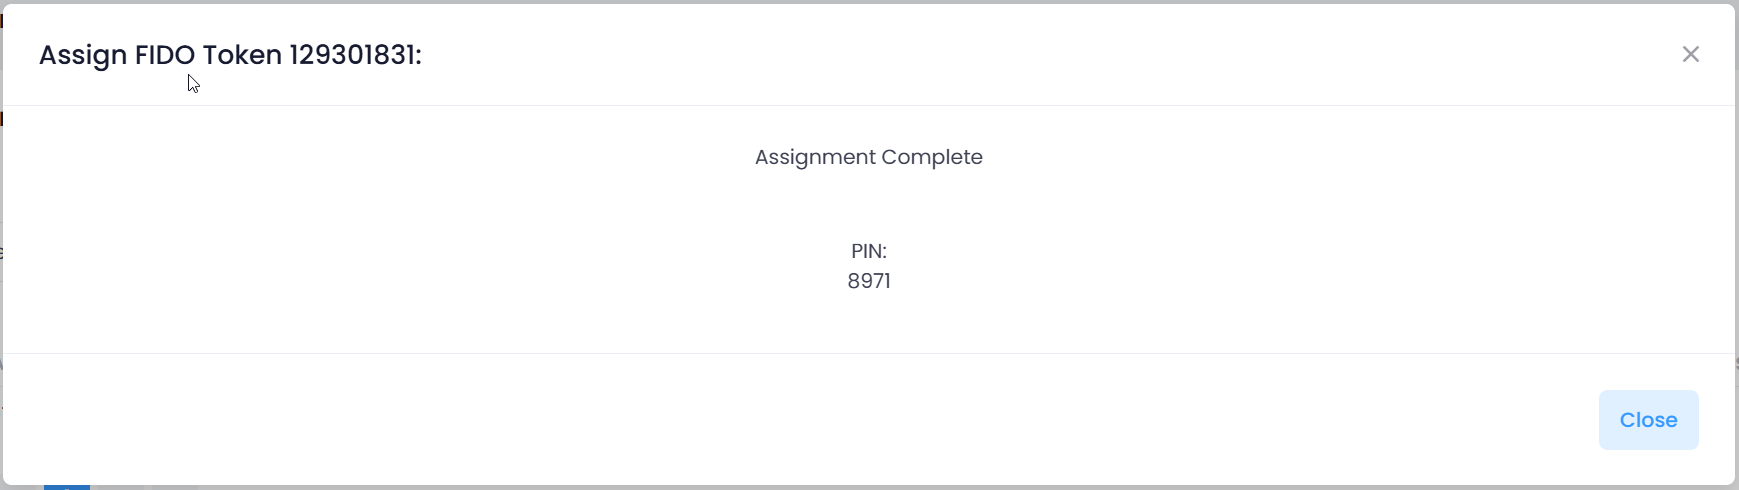
Please take note of the PIN and send it to the user.
Now, the user will be able to use this FIDO key to sign in to their account straight away without having to do anything extra.